Published
•
Updated
How to embed and style Gravity Forms in Beaver Builder
Two ways to embed Gravity Forms in Beaver Builder: via shortcode or the official module. Includes tips for styling forms directly inside the Beaver Builder editor without code.
If you use Beaver Builder on your WordPress site, you may be wondering how to embed Gravity Forms on new pages or posts.
In this post, we’ll show you how to embed your Gravity Forms on pages or posts using Beaver Builder. We’ll also show you how to style your forms from inside the Beaver Builder editor!
What is Beaver Builder?
Beaver Builder is a popular WordPress page builder that lets you create complex layouts using a drag and drop editor. With Beaver Builder, page creation happens on the front end, making the design process fast and intuitive. There are currently over 1 million WordPress sites using Beaver Builder!

Now let’s take a look at how to add Gravity Forms to a page using the Beaver Builder page builder plugin.
Adding Gravity Forms to a page with Beaver Builder using a shortcode
So you created a Gravity Form and now you want to embed it on a page using Beaver Builder? That’s easy to accomplish using the Gravity Forms embed shortcode. Below we’ll show you how to find the shortcode and how to add it to a page using Beaver Builder.
Pro tipThe Gravity Forms embed shortcode allows you to add any kind of form to a page using Beaver Builder, including multi-page forms!
Copy the Gravity Forms embed shortcode
The Gravity Forms embed shortcode allows you to embed Gravity Forms anywhere on your site, including pages, posts, and sidebar widgets!
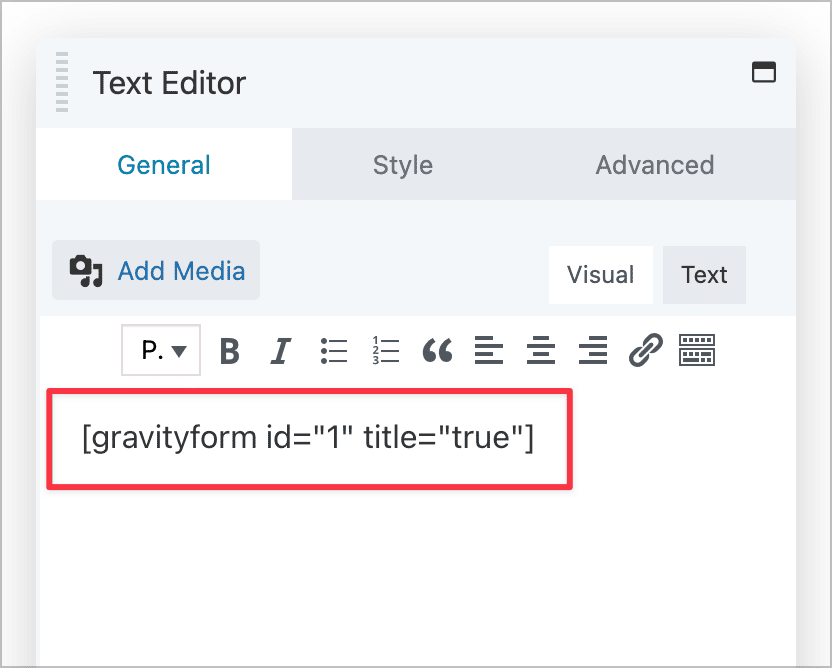
Shortcodes in WordPress are text strings enclosed in square brackets that allow you to display dynamic content without any code! Here’s what the embed shortcode for Gravity Forms looks like:
[gravityform id=“8”]The “id” is a necessary parameter that tells the shortcode which form to embed (all Gravity Forms have a unique ID associated with them).
To find the embed shortcode for your form, first edit the form to open the Gravity Forms visual builder. Next, click on the button at the top right labeled “</> Embed”.
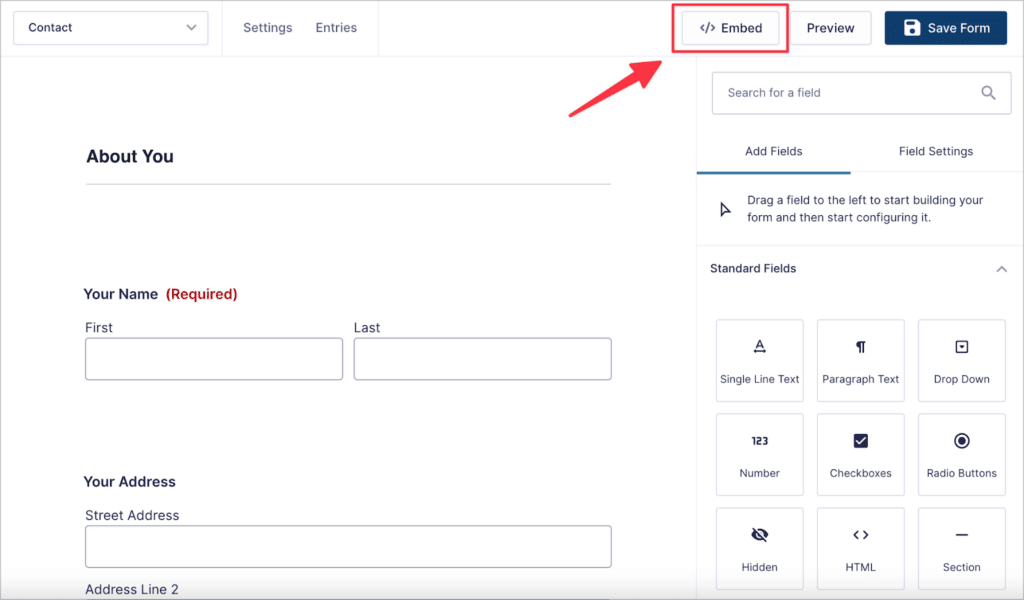
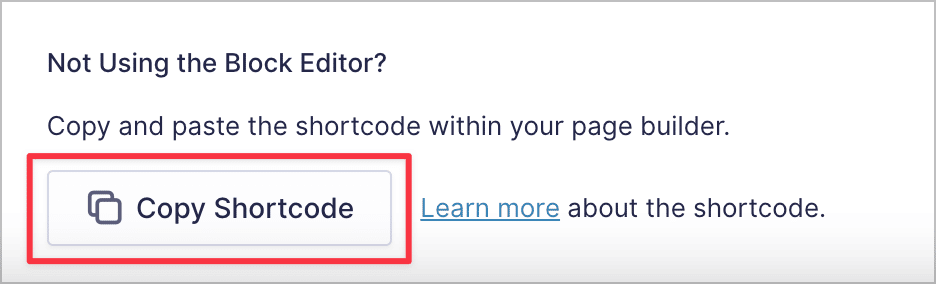
A new fly-out menu will now appear. Scroll down to the bottom and click “Copy Shortcode” to copy the embed shortcode to your clipboard.
Now that you have the embed shortcode for your form, the next step is to add the shortcode to a new page using Beaver Builder!
Create a new page using Beaver Builder (or edit an existing page)
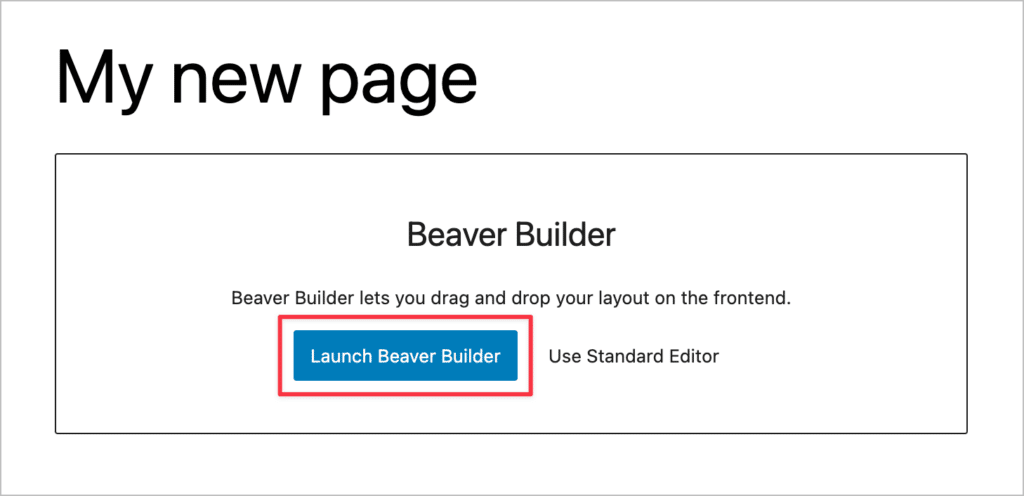
To create a new page, hover over “Pages” and click “Add New”. You now have the option to create your page using either the standard editor or Beaver Builder. Select “Launch Beaver Builder”. (If you already have a page on your website built using Beaver Builder, simply edit that page).
Now click on the “+” icon at the top right to open the module selector. Ensure you’re on the “Modules” tab and drag and drop a “Text Editor” module onto your page.
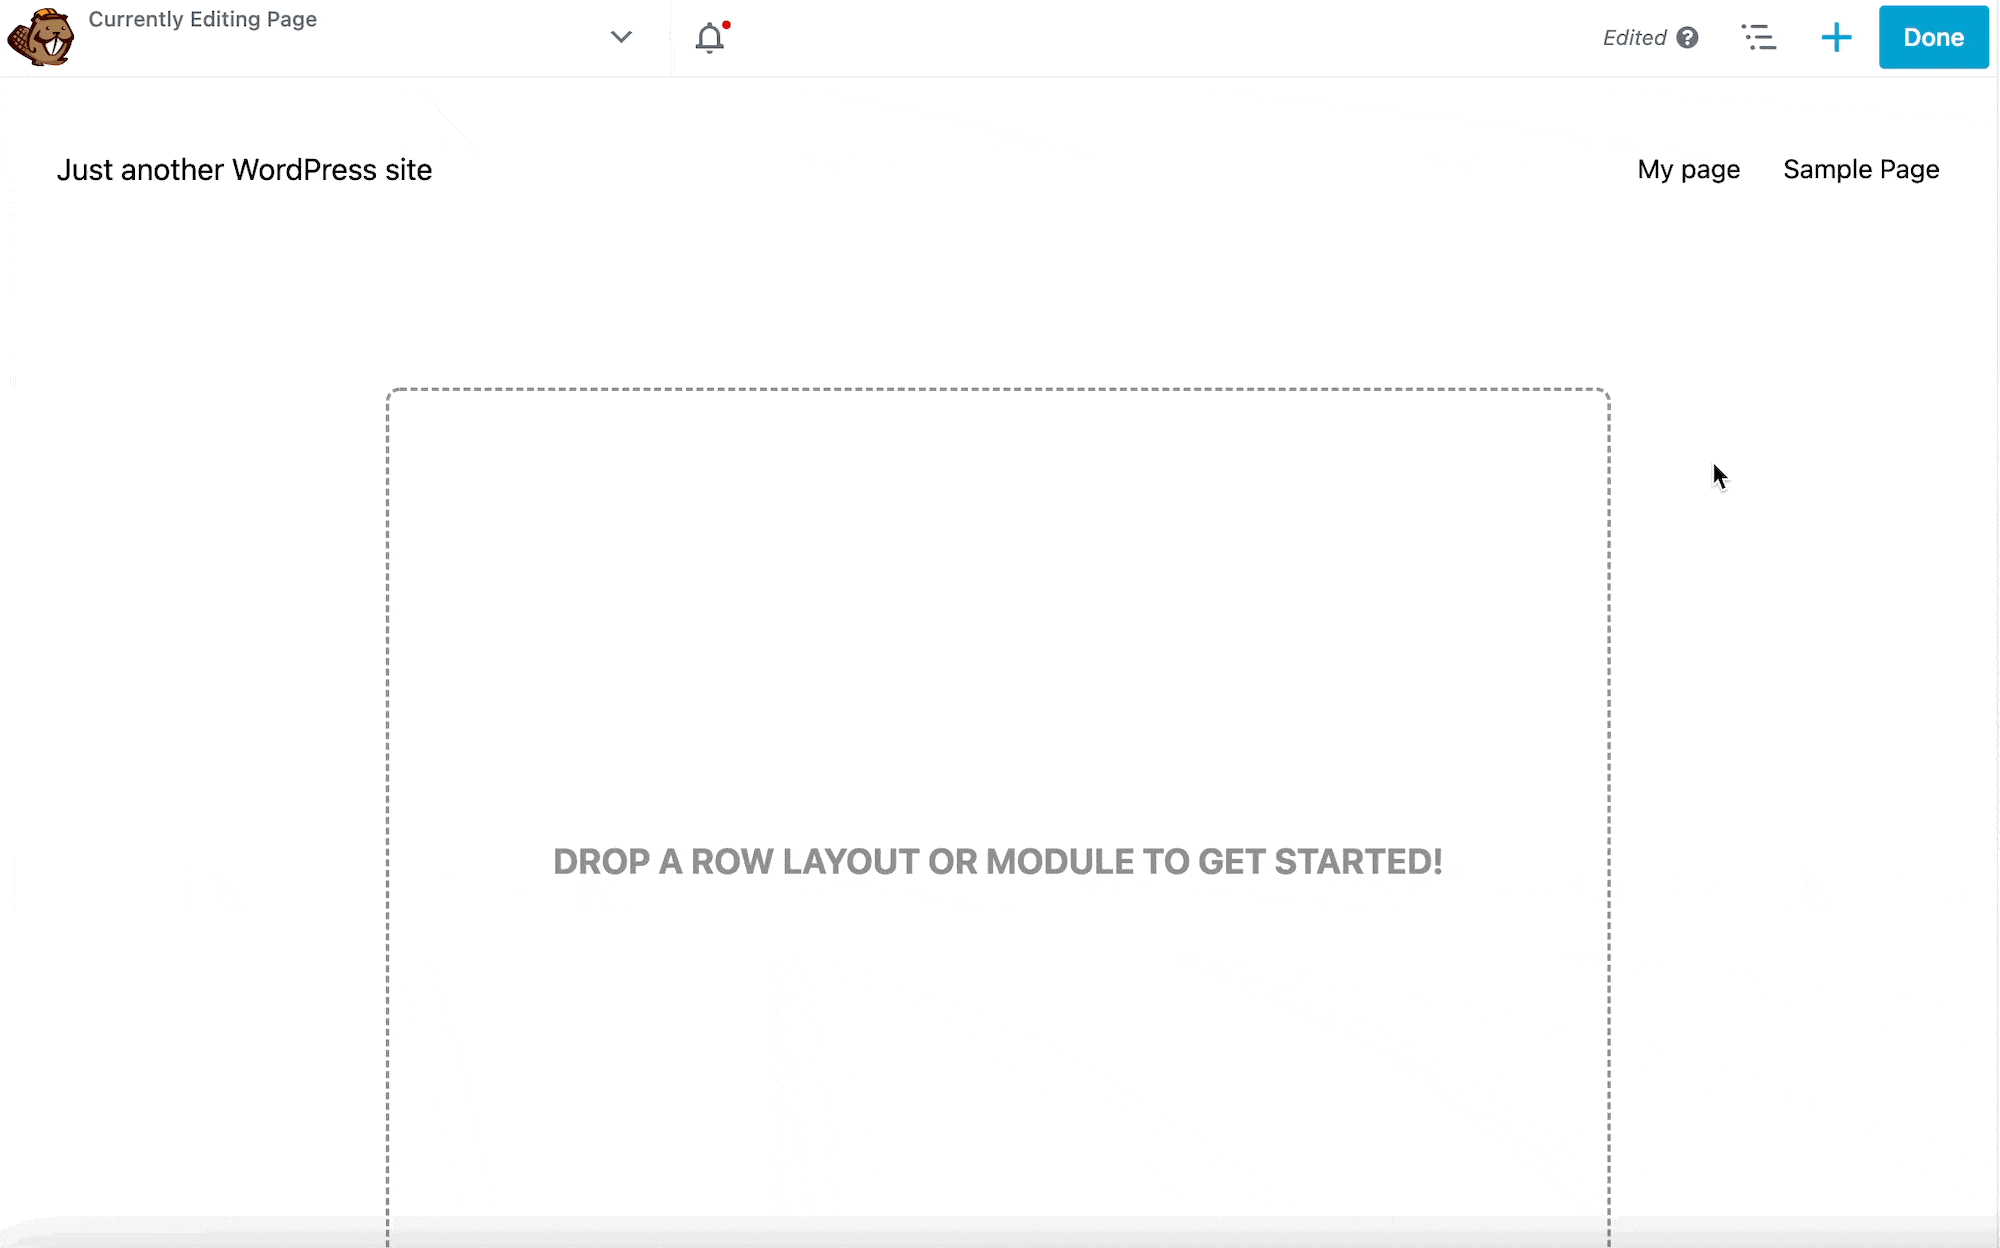
After adding the Text Editor module to your page, you’ll be able to add content inside the module in the form of text, HTML or shortcodes! Go ahead and paste your form shortcode into the text module and click “Save”.
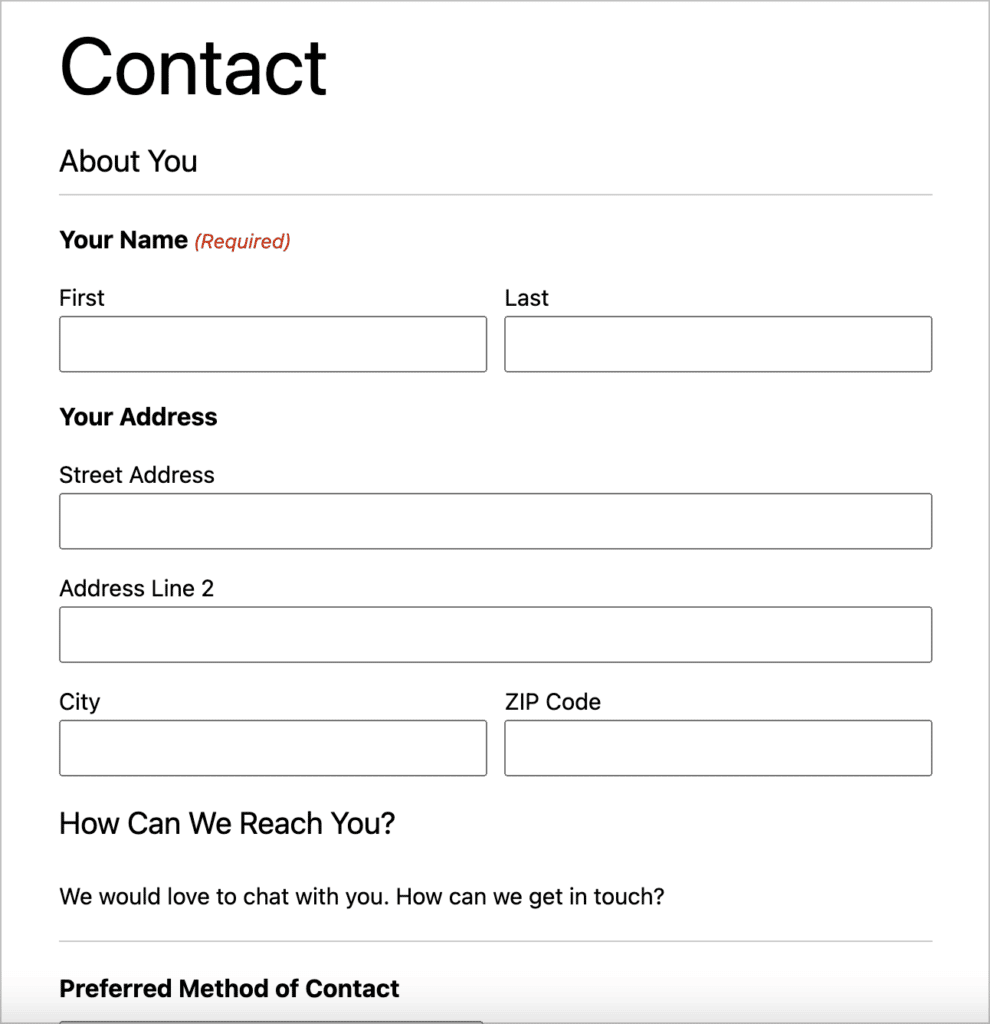
After you’ve added your shortcode, click “Done” at the top right and publish or update the page. You should now see your form embedded in the page!
That’s it! Now let’s look at how to embed a Gravity Form in Beaver Builder using a widget.
Adding Gravity Forms to a page with Beaver Builder using a widget
While the shortcode is the best method for embedding Gravity Forms in a page, you can also use the Gravity Forms WordPress widget.
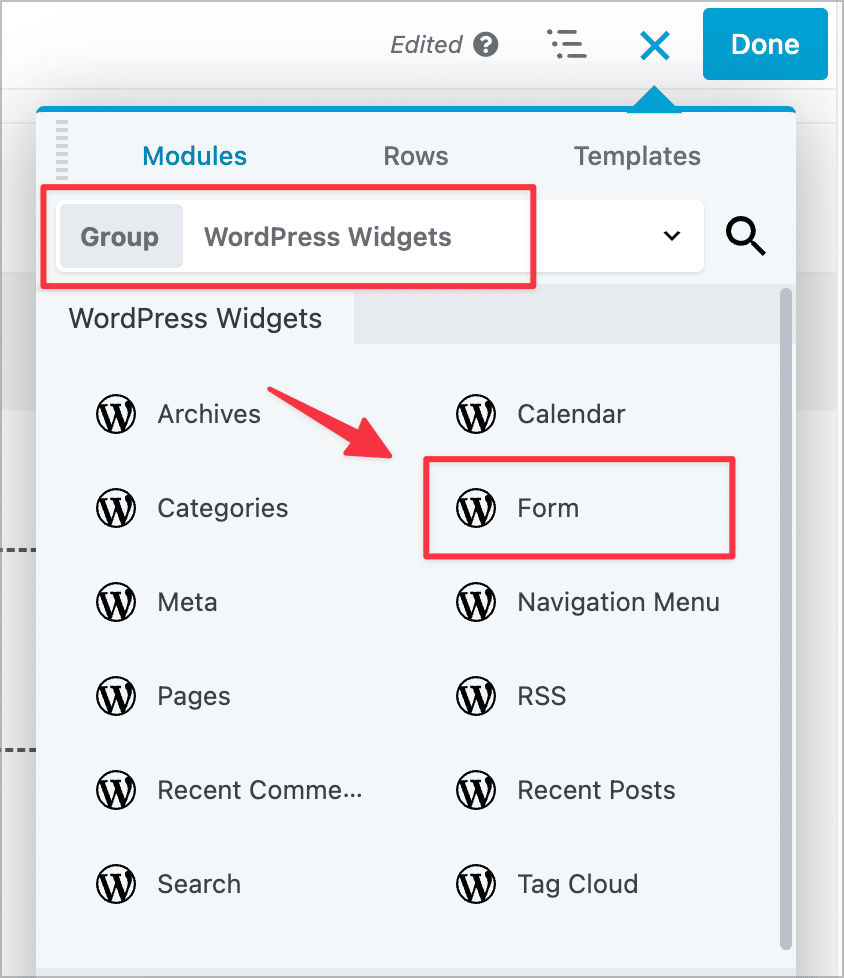
To do this, edit your page with Beaver Builder, and click on the “+” icon to open the module selector. Next, click on the drop-down at the top and select “WordPress Widgets”.
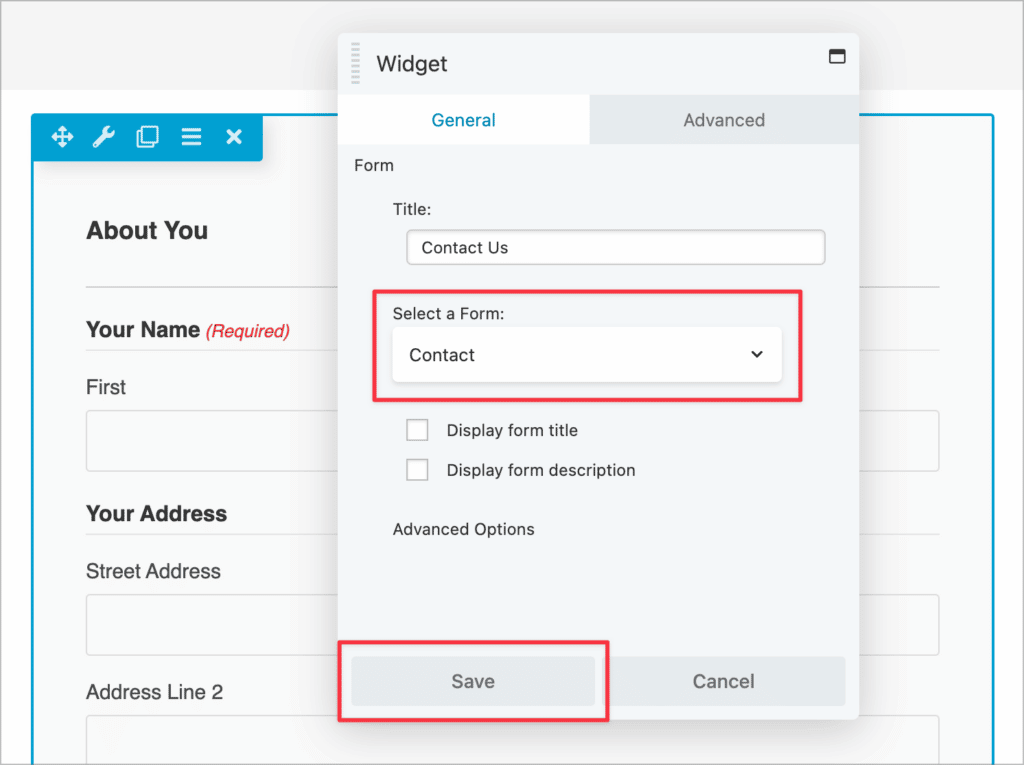
You will now see all of the available WordPress widgets that you can add to your page. Select the “Form” widget and drag and drop it onto your page.
After adding the widget to your page, you’ll need to select the form you want to embed from the “Select a Form” dropdown menu. When you’re done, click “Save”. You should now see a preview of your form inside the Beaver Builder editor.
That’s it! Now that you know how to embed a Gravity Form in a post or page using Beaver Builder, let’s look at how to style those forms.
Styling Gravity Forms in Beaver Builder
If you’re looking for a way to style your Gravity Forms from inside Beaver Builder, check out the Ultimate Addons for Beaver Builder plugin. The plugin adds a range of new modules to Beaver Builder, allowing you to do more with your page designs.
While there is a Lite version of the plugin available for free on WordPress.org, the Gravity Forms Styler module is only available in the paid version of the plugin.
The Gravity Forms Styler module allows you to take full control of your forms and style them to suit your website.
Bonus: Displaying Gravity Forms submission data in Beaver Builder
After embedding your form and gathering user submissions, you may need a way to display your Gravity Forms submission data on the front end. This is easy to accomplish using GravityView!
GravityView is an add-on for Gravity Forms that allows you to build web applications on top of Gravity Forms using a drag and drop builder! Using GravityView, you can:
- Build directories and member profiles
- Create a job board
- Create member management systems
- And much more!
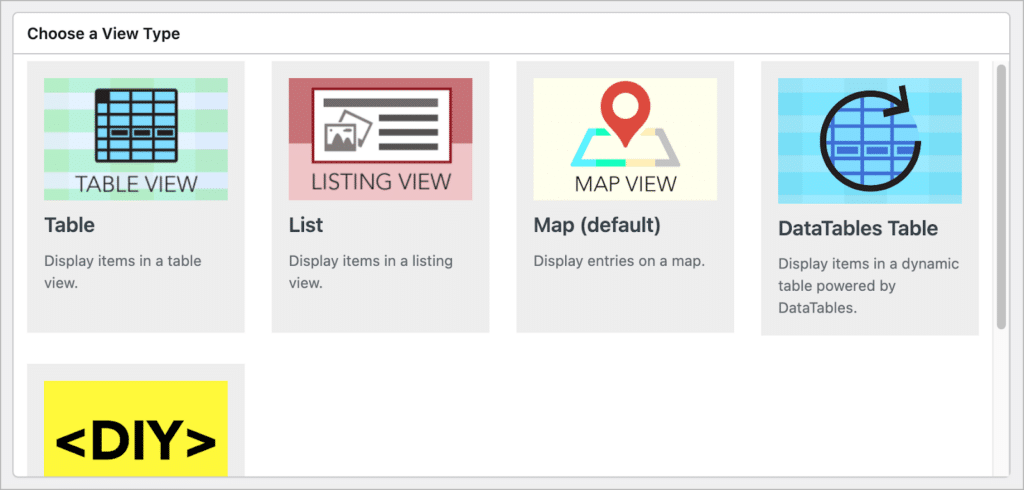
After installing GravityView, you can connect your form to a “View”, enabling you to display form submissions using different layouts. You can display data in a table, a list, on a map, in a DataTable, or create a custom layout using the DIY builder.
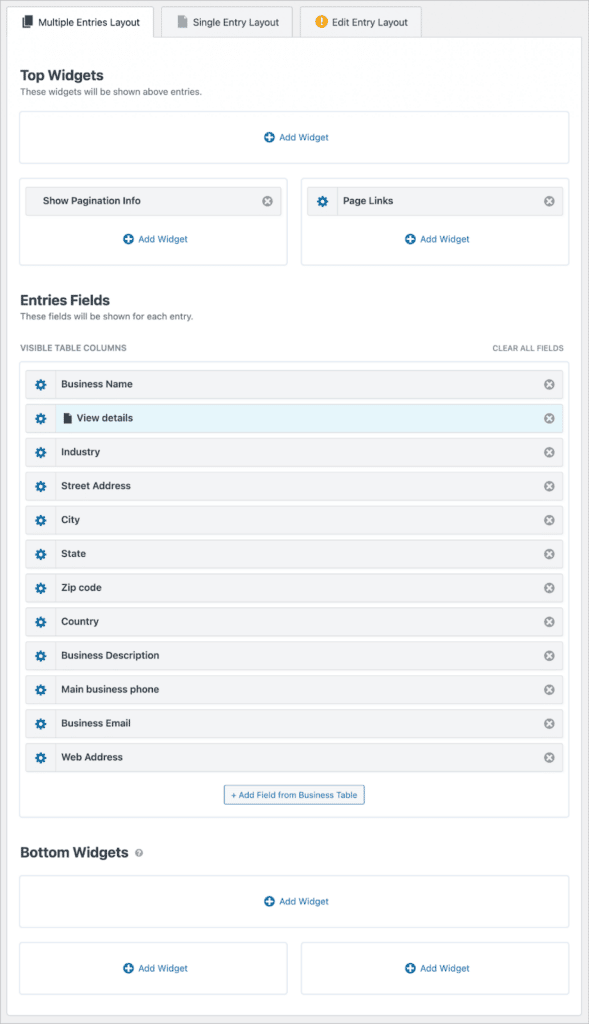
After selecting a layout, you can start building your application using GravityView’s drag and drop builder.
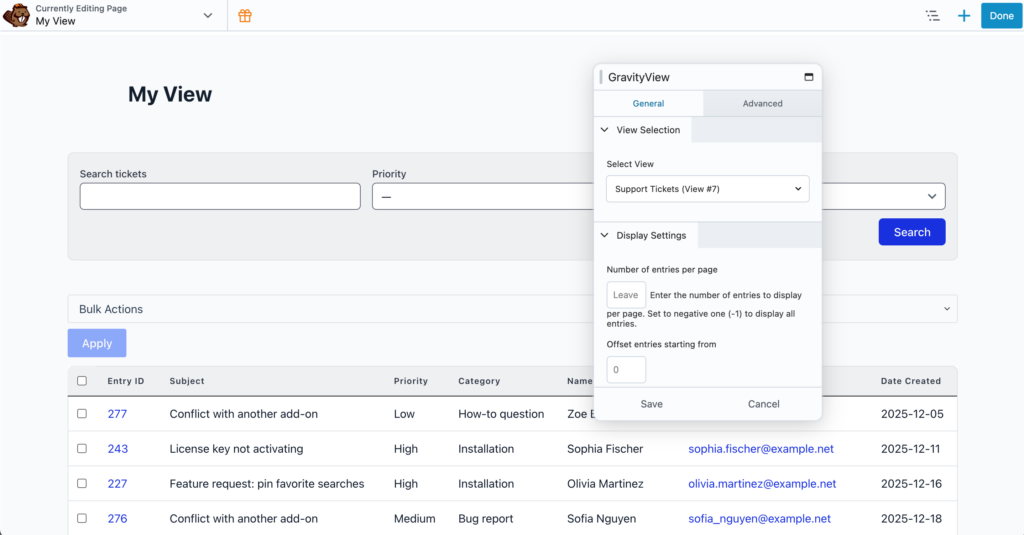
When you’re done, embed your View in Beaver Builder using the native GravityView module (added in GravityView 3.0). Drag the GravityView module onto your layout, then choose your View in the module settings. No shortcode required.
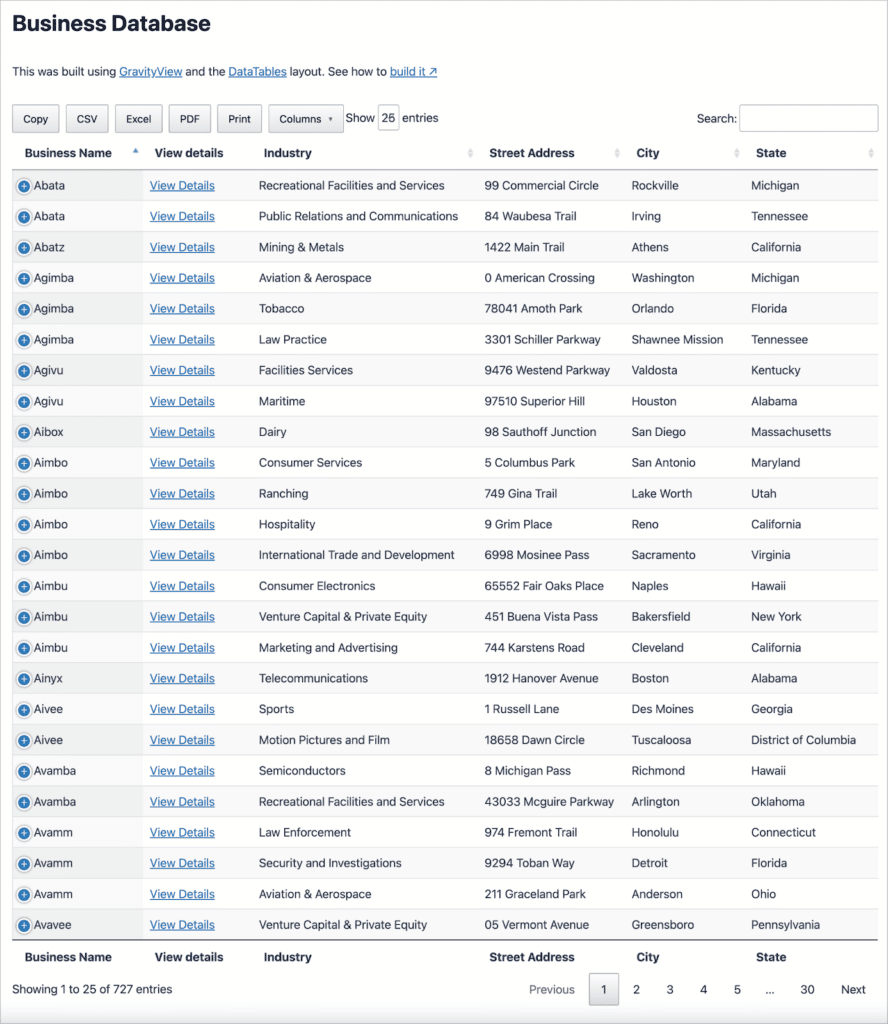
That’s it! Here’s an example of a View that displays business listings collected using Gravity Forms.
That’s it! Now you know how to display Gravity Forms submission data on pages or posts using Beaver Builder. You can learn more about GravityView on our website.
Embed and style your Gravity Forms in Beaver Builder
Beaver Builder is a popular page builder for WordPress, allowing you to create page designs using a drag and drop interface. Beaver Builder is one of the most popular plugins for WordPress users, and so is Gravity Forms!
In this post, we showed you how to embed your Gravity Forms on pages or posts using Beaver Builder. We also showed you how to embed submissions on the front end using the GravityView plugin. To learn more about Gravity Forms, read our ultimate guide!

Helpful tips right in your inbox.
Subscribe to get the latest articles, information on releases and helpful Gravity Forms tips!
More articles

How to build a WordPress CRM without code (a contact database you own)
Build a simple WordPress CRM with GravityView. Turn the Gravity Forms entries you already collect into a no-code contact database you own, with no monthly fees.

Launch Log: Distance sorting for radius searches, DataTables search improvements, and import reliability fixes
The latest GravityKit releases add distance sorting to map searches, bring built-in search to DataTables, and fix GravityCharts and GravityImport edge cases.

WordPress page builder market share 2026: Elementor leads at 32.67%
Elementor reaches 32.7% of WordPress sites. WordPress Block Editor 20.6%, wpBakery 8.5%, Divi 5.7%. Latest HTTP Archive crawl, share-of-WordPress basis throughout.