WordPress is a versatile platform that allows website owners to create dynamic and engaging content with ease. One popular way to display data on a WordPress website is through the use of tables.
In this blog article, we will compare two popular WordPress table plugins—GravityView and TablePress—to help you decide which one is the best fit for your needs.
We will evaluate their features, ease of use, customization options, and pricing, to provide you with a comprehensive overview of each plugin’s strengths and weaknesses. So, whether you’re a blogger, business owner, or website developer, read on to find out which plugin will work best for you.
💡 Test GravityView yourself: See our live demo applications and get your own free trial site preloaded with all GravityKit add-ons!
Why create tables on WordPress?
Creating tables on WordPress can be a useful way to present information in a structured and organized format. Whether you need to display pricing plans, product specifications, or any other type of data, tables can make your content easier to interpret and understand.
Additionally, tables can be a great tool for improving the user experience on your website, as they can help visitors quickly find the information they are looking for! In fact, most websites make use of tables for pricing info, product comparisons, and more.
There are various WordPress plugins that make it easy to create tables without any coding knowledge.
What is TablePress?
TablePress is a free WordPress plugin that allows users to create and manage tables on their website without requiring any coding knowledge.
With TablePress, users can create tables that display data in an organized and visually appealing way, making it easy for their website visitors to read and understand. The plugin includes a range of features that allow users to customize their tables, such as adding filters, sorting options, and pagination.
Additionally, TablePress allows users to import and export tables in a variety of formats.
Major differences between GravityView and TablePress
First, it’s important to understand the major differences between GravityView and TablePress. While TablePress is a simple plugin that allows you to create tables of data for displaying on your website, GravityView is a full-fledged web application builder that extends Gravity Forms.
GravityView includes numerous features, not just the ability to create tables. GravityView also requires Gravity Forms to work! TablePress is a standalone plugin, but includes less functionality than GravityView. To see what’s possible using GravityView, check out our live demos.
Now, let’s compare each plugin in terms of its features and functionality.
Creating tables (ease of use)
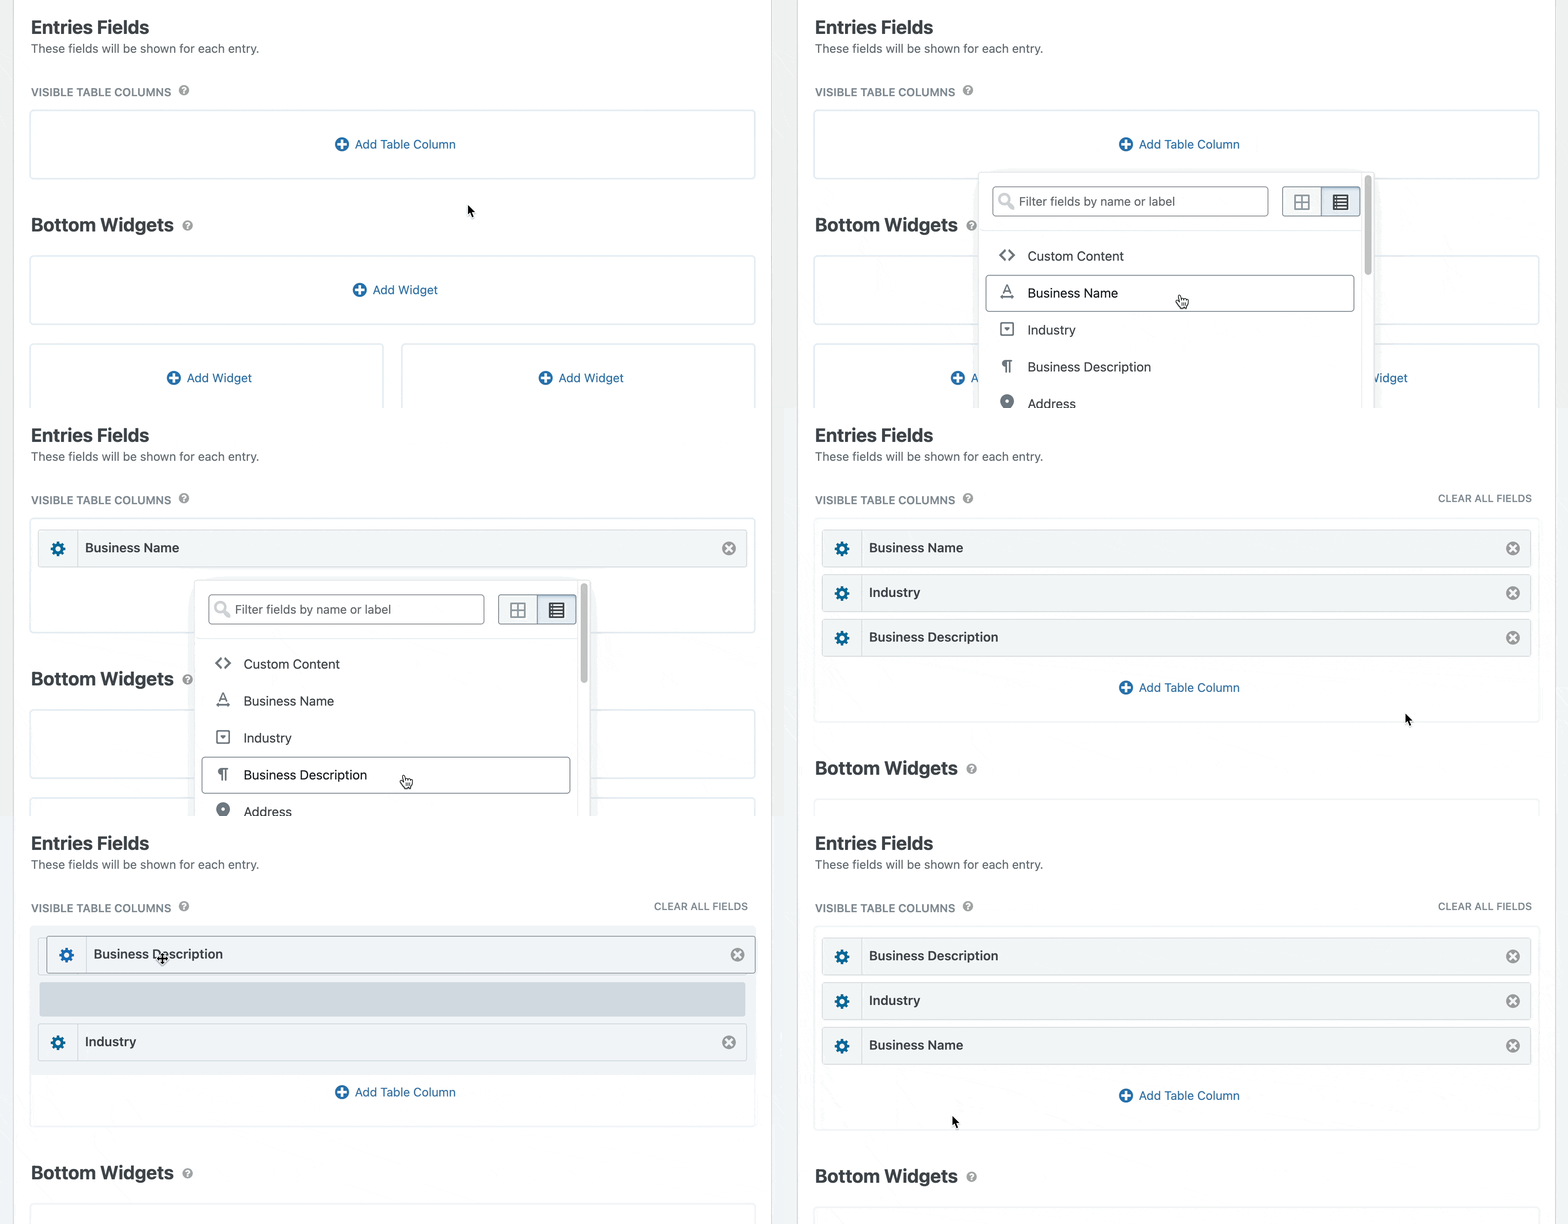
Both plugins make it easy to create tables of data. In GravityView, you create tables by adding fields using a drag and drop builder.
GravityView tables receive their data from Gravity Forms, so each column in your table will be a form field and each row in your table will be a separate form entry.
After adding fields using the drag-and-drop builder, you can preview your table on the front end. Here’s an example:

GravityView includes several other advanced features, but we’ll cover these below under “Layouts”.
💡 Pro tip: See how GravityView allows you to build front-end database applications.
TablePress allows you to create tables using an Excel-like editor in the WordPress Admin backend. All you need to do is click into a cell and add the data you want inside. You can insert links, images, and rich text (using the advanced editor).

Now let’s look at the different layout options each plugin supports.
Layouts
GravityView supports a range of layout options, including a regular table layout and a “DataTables” layout. The DataTables layout includes more features and functionality, such as field filter for data drill downs, export buttons, column control and more!
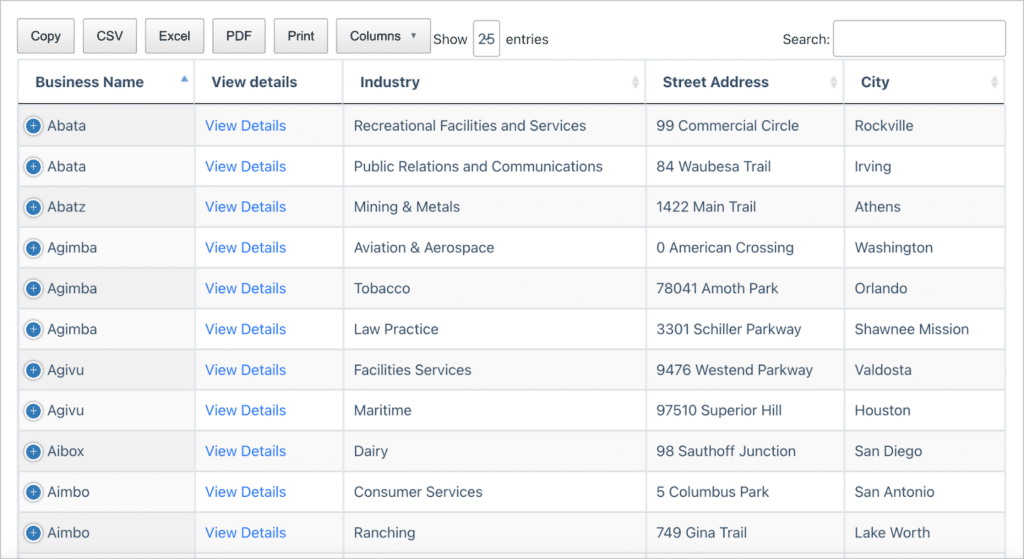
The DataTables layout is well-suited to any kind of data—from dense, numerical data to directory information. DataTables are responsive and they also support fixed headers and columns.
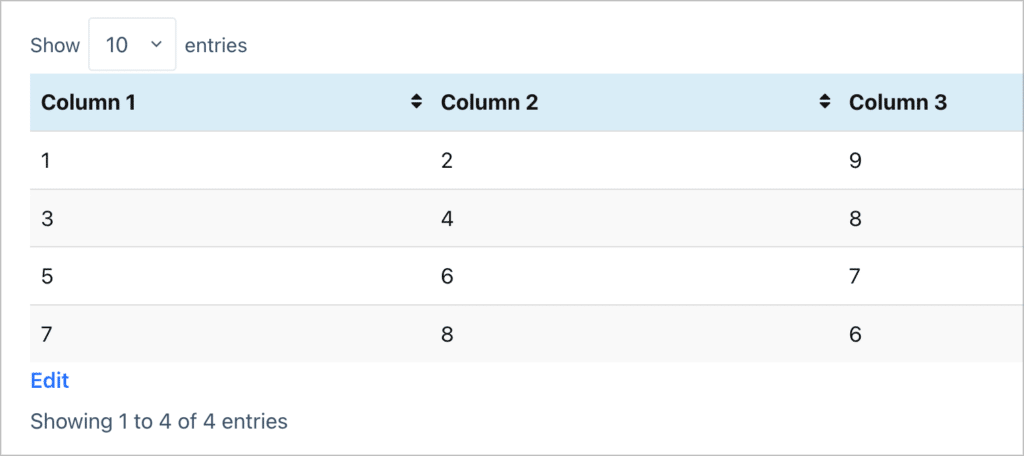
TablePress doesn’t support different “layouts”, but they do offer a range of features for customizing your tables. This includes fixed headers/columns, column filter drop down, buttons and more.
Now let’s take a look at the filtering and sorting capabilities of each plugin.
Filtering and sorting
Being able to filter and sort data in your tables is a crucial functionality to have. Both plugins offer unique features supporting this functionality.
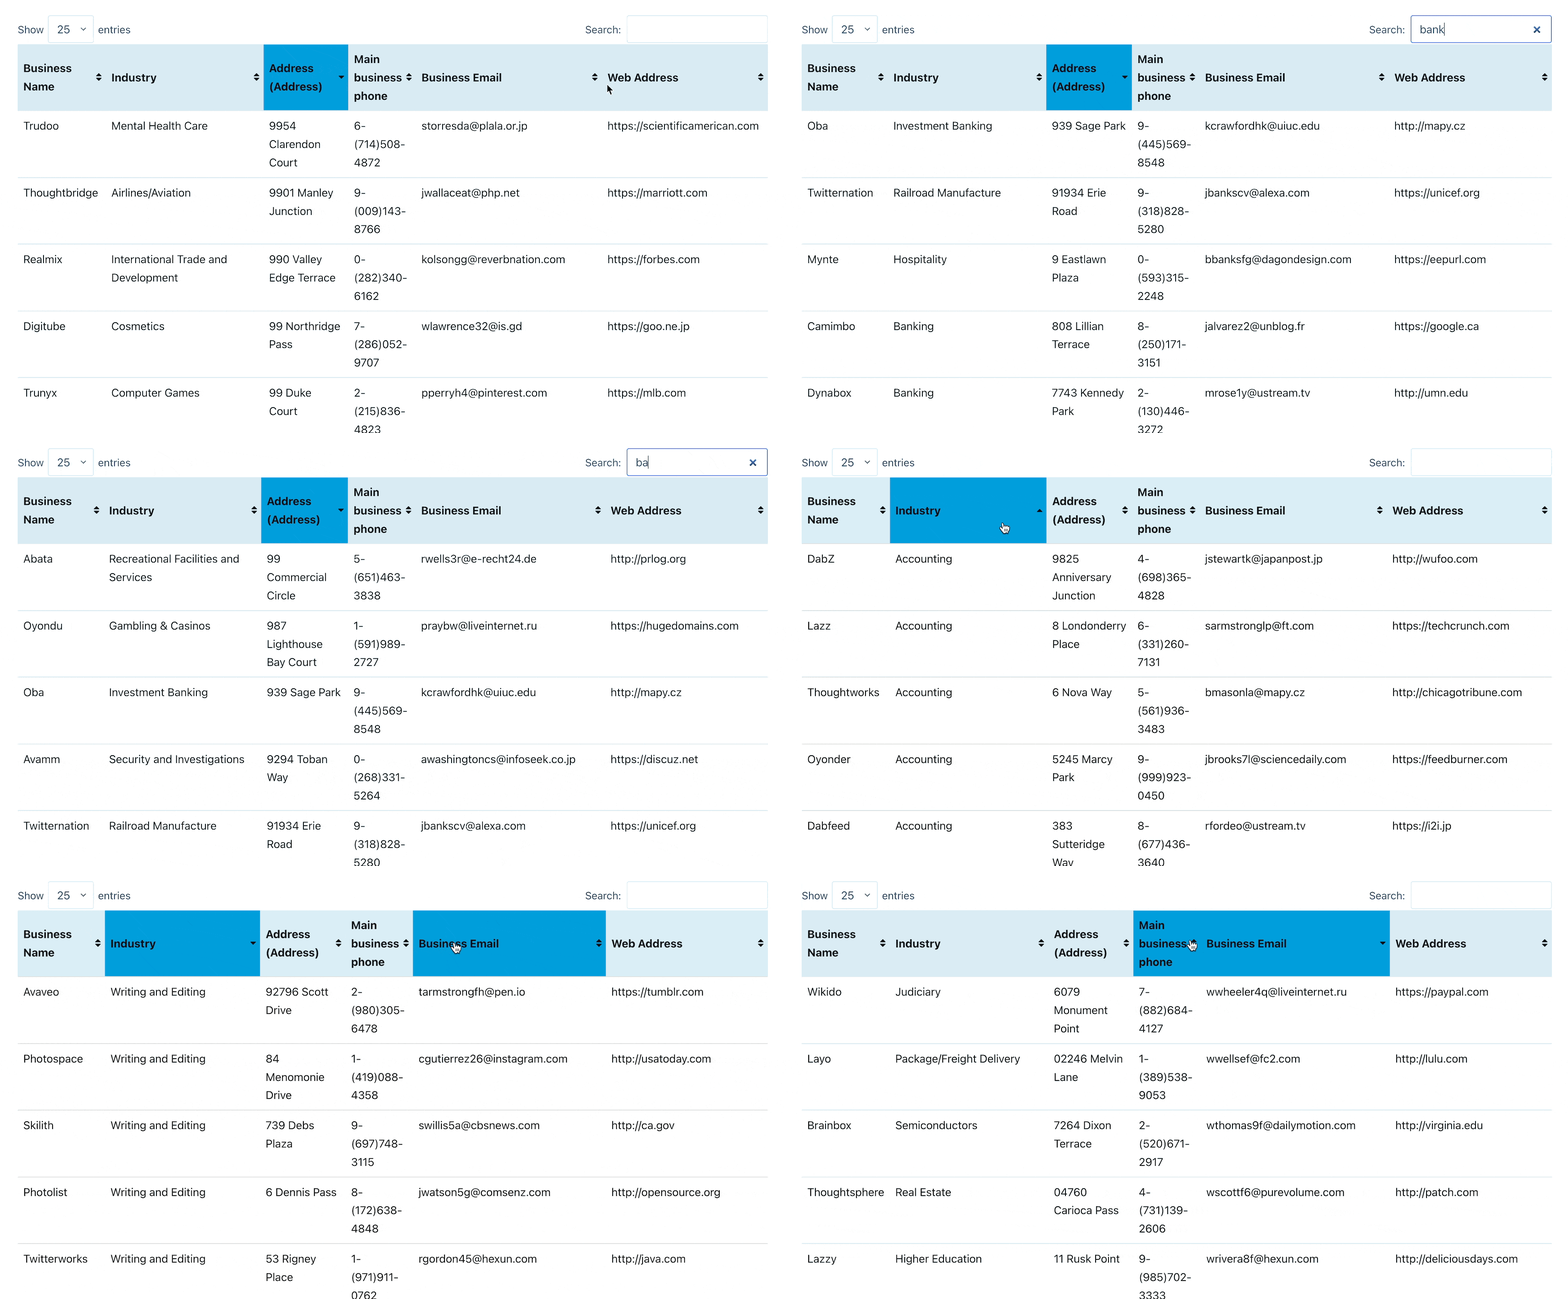
GravityView provides a range of options for searching, sorting, and filtering your table data. Before you publish your table, you can add a custom search bar, modify the default sort settings, or add conditional logic filters using the GravityView Advanced Filtering extension!

TablePress also includes basic sorting and filtering options. This includes searching by keyword and reordering columns. However, the more advanced sorting and filtering functionality (such as column filter dropdowns and individual column filtering) is only available in their paid plans.
Now let’s take a look at how each plugin handles custom content.
Custom and dynamic content
GravityView allows you to add custom content to your tables. This includes shortcodes, HTML and Gravity Forms merge tags, which allow you to reference user-submitted field values.
To add custom content, all you need to do is add a “Custom Content” field to your View. The Custom Content field includes a text editor where you can add any content you want, including images, HTML, embeds, shortcodes, merge tags, and more.

GravityView also support several powerful shortcodes, such as , which allows you to show/hide content based on conditional logic.
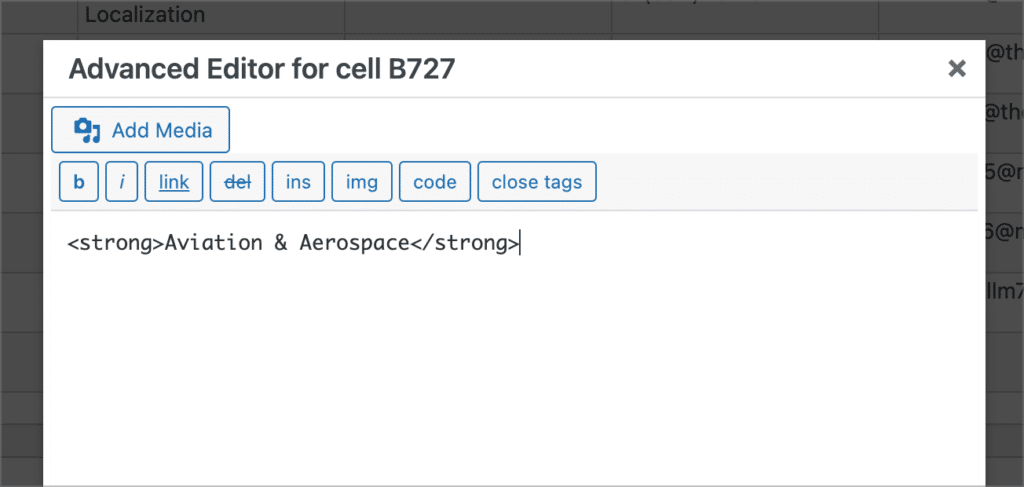
TablePress includes an “Advanced Editor” that allows you to style content in a cell, or add images and other media. However, the TablePress advanced editor is more limited than GravityView’s Custom Content field. For example, shortcodes are not supported and neither are certain HTML tags.
Now that we’ve covered custom and dynamic content, let’s take a look at how each plugin handles importing and exporting data.
Importing and exporting data
Gravity Forms does not include the ability to import data, which means you can’t import data to GravityView, either. However, GravityKit does offer a separate plugin called GravityImport that allows you to import data to Gravity Forms from a CSV file.
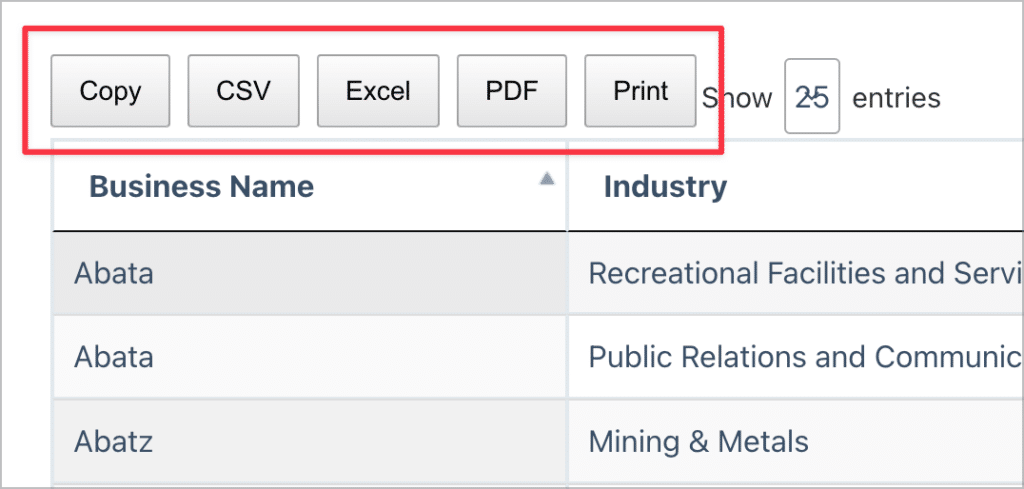
When it comes to exporting data, GravityView makes this easy. To export data from a table View, all you need to do is add /csv or /tsv to the end of the View URL. Alternatively you can use the DataTables layout which includes buttons for exporting data to CSV, Excel and PDF with one click.
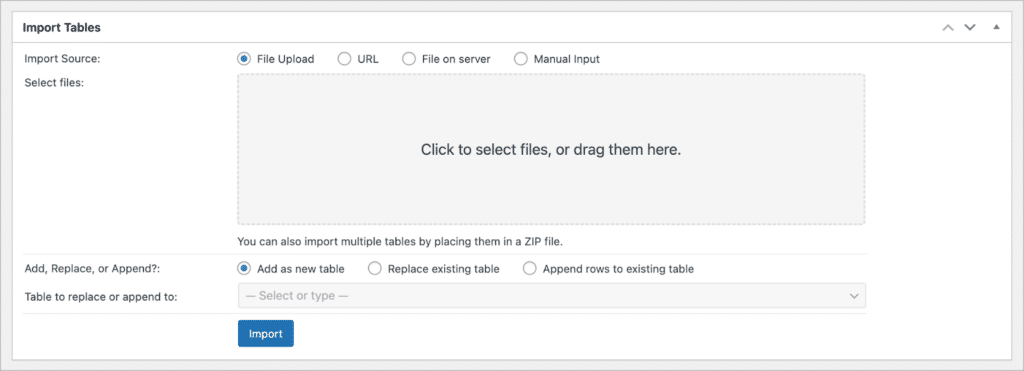
TablePress includes an inbuilt import feature, allowing you to import data from a spreadsheet file, or URL.
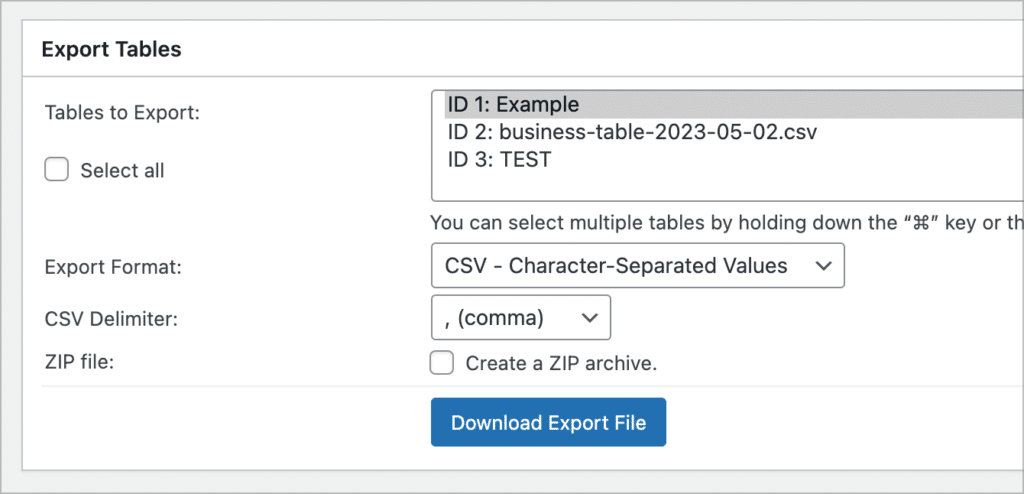
Exporting data is equally simple in TablePress. You can export tables to CSV, HTML or JSON formats.
Now let’s look at each plugin’s pricing structure.
Pricing
Let’s look at GravityView’s pricing tiers first:
- GravityView ($99/year): This option includes the GravityView plugin and two basic layouts (Table and List).
- GravityView Pro ($249/year): This option includes the GravityView plugin, as well as all premium Layouts and Extensions.
- GravityKit All Access ($499/year): The All Access package includes GravityView, extensions, the Maps layout, and all other GravityKit add-ons!
The basic version of TablePress is free on WordPress.org, with paid options available that include more features.
- Free: Includes basic TablePress features.
- Pro ($79/year): Includes more features and functionality.
- Max ($189): Includes advanced features such as REST API access.
That’s it!
💡 Pro tip: Interested in how GravityView stacks up against Ninja Forms Views? Read our full comparison here.
Build tables on WordPress using GravityView
In this blog article, we compared two popular WordPress table plugins—GravityView and TablePress—to help you decide which one is the best fit for your website. While TablePress makes it easy to create simple tables, GravityView is the clear favorite for existing users of Gravity Forms.
GravityView allows you to display Gravity Forms entries on the front en using different layouts, including a basic table or DataTables layout. GravityView includes a drag-and-drop builder, support for custom content, export capabilities and much more!
If you found this comparison helpful, read our comparison of GravityView and Ninja Tables next.

Helpful tips right in your inbox.
Subscribe to our weekly newsletter for tips, special offers, and more!
Helpful tips right in your inbox.
Subscribe to our weekly newsletter for tips, special offers, and more!
