Published
•
Updated
GravityView vs Ninja Tables: In-depth comparison
GravityView vs Ninja Tables: an in-depth comparison of two WordPress data display plugins. Find out which best fits your table layout and front-end data needs.
Are you torn between GravityView and Ninja Tables for presenting data in a table on your WordPress website? Choosing the right plugin can significantly impact the visual appeal and functionality of your data presentation.
- GravityView is a no-code application builder for Gravity Forms, created by GravityKit—a Certified Gravity Forms Developer.
- Ninja Tables is a WordPress plugin that lets you create, customize, and display responsive data tables without code.
In this comprehensive comparison, we’ll delve into the strengths and features of both GravityView and Ninja Tables to help you make an informed decision. Whether you need a robust solution for displaying form entries or want to create interactive tables, read on to discover which plugin is the best fit for your table-displaying needs.
Let’s dive in!
TL;DR
GravityView and Ninja Tables are two different WordPress plugins with both unique and overlapping features.
GravityView allows you to display and organize data captured through Gravity Forms, offering customizable layouts to showcase form entries on the front end. Additionally, GravityView benefits from integrations with other GravityKit add-ons, as well as the wider Gravity Forms ecosystem.
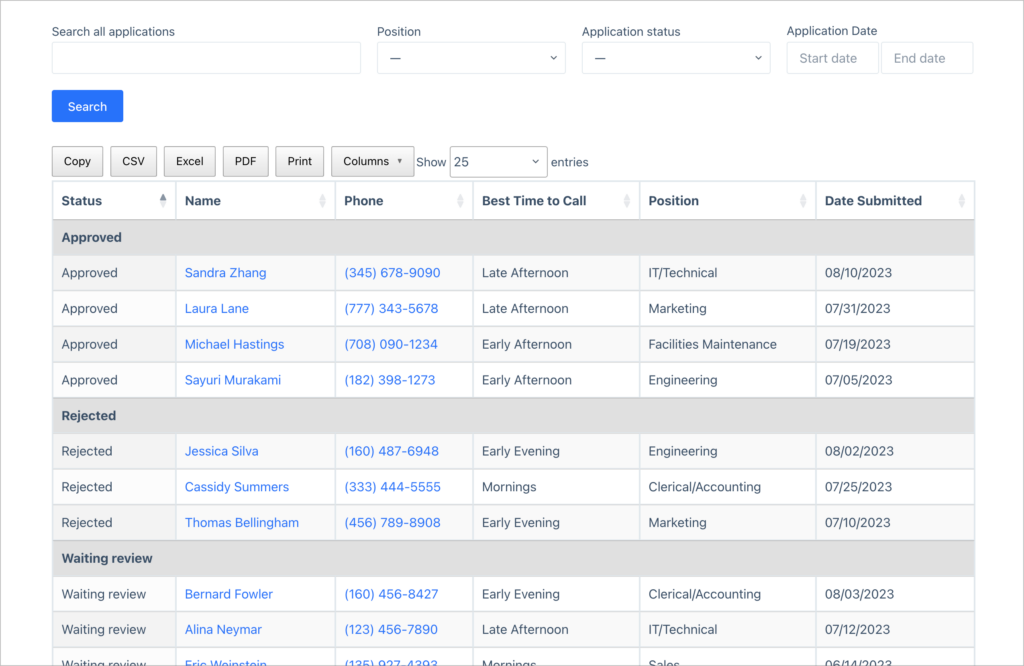
On the other hand, Ninja Tables is a plugin tailored for creating responsive and interactive tables on WordPress sites, enabling users to present data in a structured manner with sorting, filtering, and pagination features.
While GravityView focuses on transforming form submissions into visually appealing directories and other front-end applications, Ninja Tables is focused purely on data presentation with versatile and user-friendly tables.
Layouts
The GravityView core plugin comes with 3 layouts: Layout Builder (create custom layouts with rows and columns), Table and List. GravityView Pro includes a further 3 layouts—DataTables, Maps and DIY.
Ninja Tables does not support different layout types, as the plugin is focused around displaying data in tabular format. However, there is some flexibility when building tables, allowing users to create pricing tables, feature comparisons, product tables, and more.
Summary
| Feature | GravityView | Ninja Tables |
| Display data in a table | ✅ | ✅ |
| Display data in a list | ✅ | ❌ |
| Display data in a DataTable | ✅ | ❌ |
| Display data on a map | ✅ | ❌ |
| Create custom layouts with rows and columns | ✅ | ❌ |
Ease of use (user interface)
When creating a new View in GravityView, the first step involves selecting a data source and View Type. The data source represents the form containing the desired entries for display, and the View Type determines the layout.
Once you’ve chosen a data source and View Type, you can start building your View using GravityView’s user-friendly drag-and-drop builder. In this builder, you can easily add fields (data to display) and widgets (tools for navigating the View, like search bars or maps).
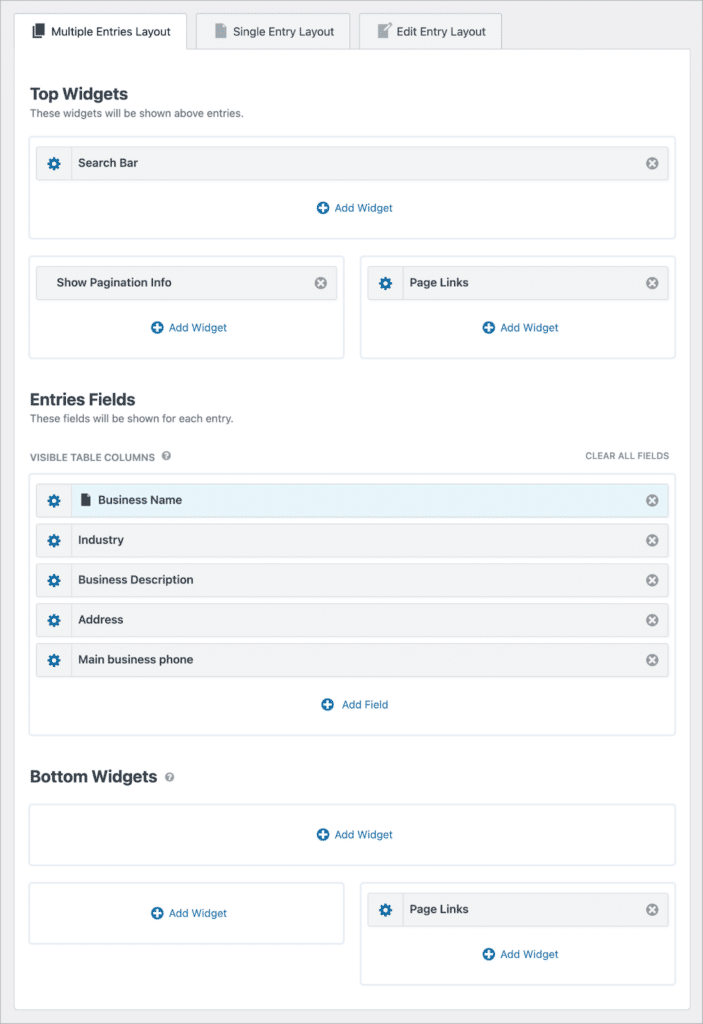
To add a field, click the “Add Field” button and choose the desired field.
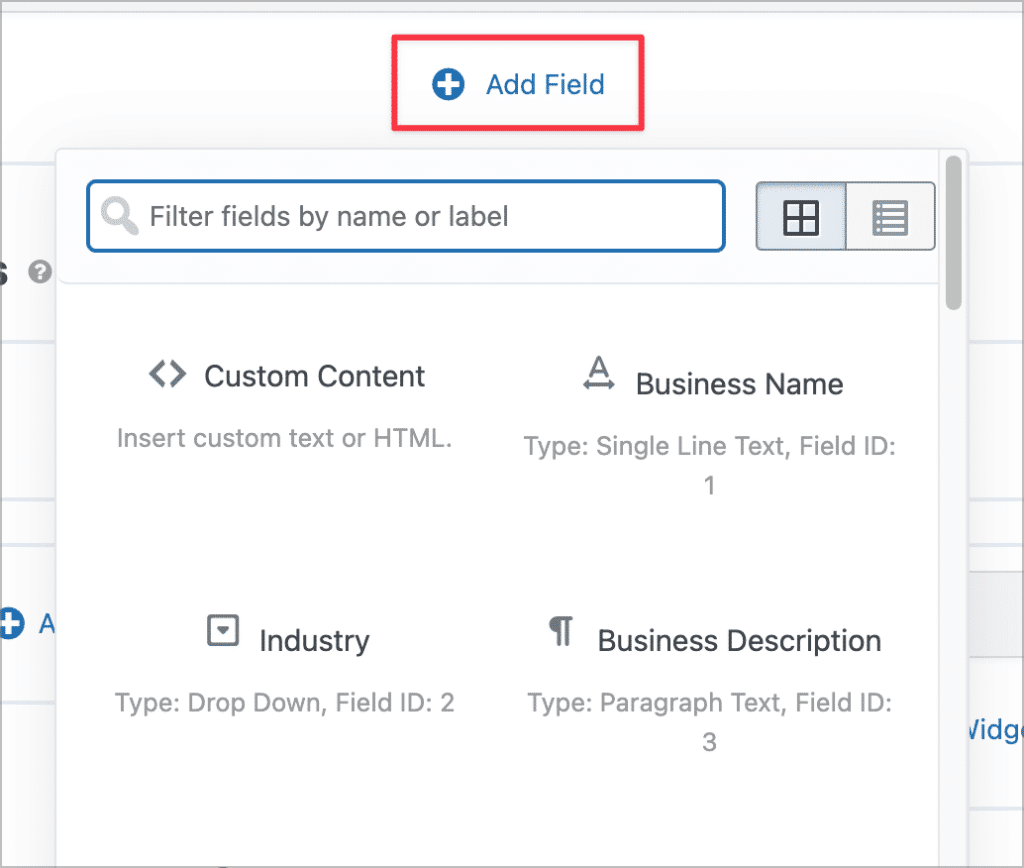
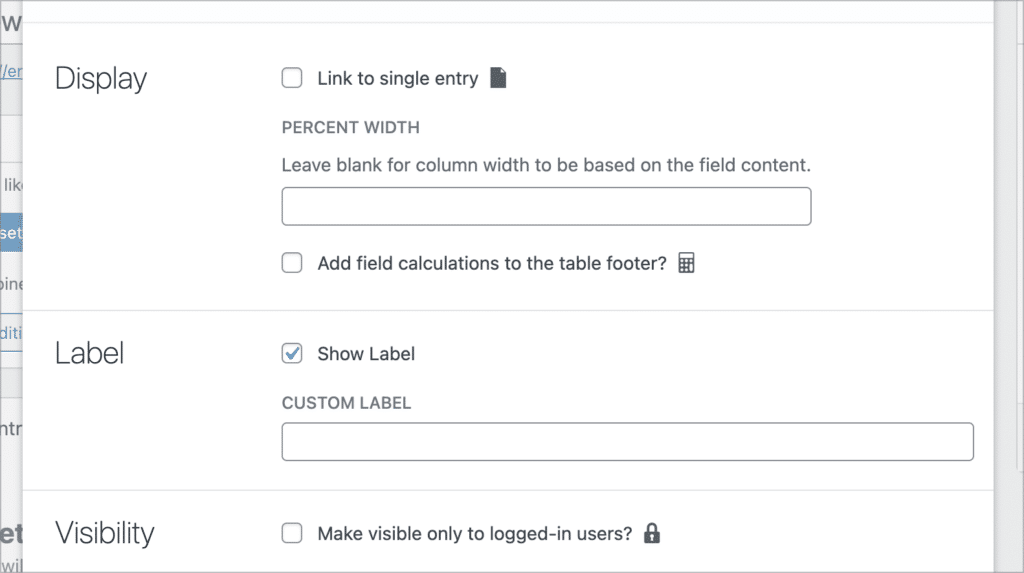
By clicking the gear icon, you can access the field settings to modify the label, visibility, and more.
You can rearrange the position of fields and widgets simply by clicking and dragging them. At the top of the View editor, you’ll find three tabs: Multiple Entries, Single Entry, and Edit Entry. These tabs allow you to edit different aspects of your View.
The Multiple Entries layout displays each entry sequentially, while the Single Entry page provides additional information about a specific entry. Lastly, the Edit Entry page allows logged-in users to update their entries directly from the front end.
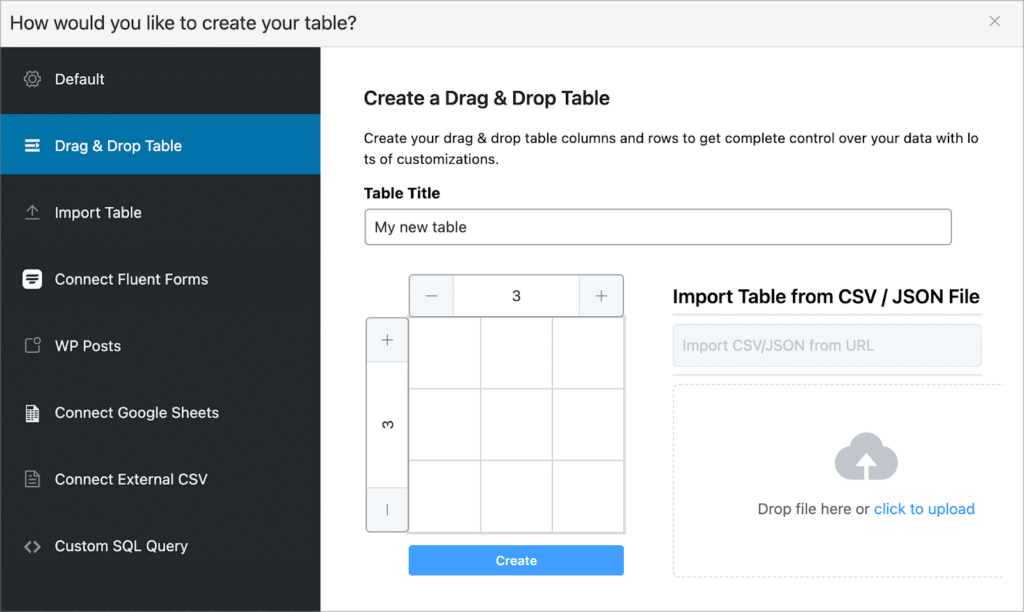
Now let’s talk about Ninja Tables. When creating a new table with Ninja Tables, you’ll have the option to use the drag-and-drop builder, or the default builder. You can also import tables from a CSV or JSON file.
The drag and drop builder allows you to drag different “elements” into your table, such as text, buttons, or HTML.
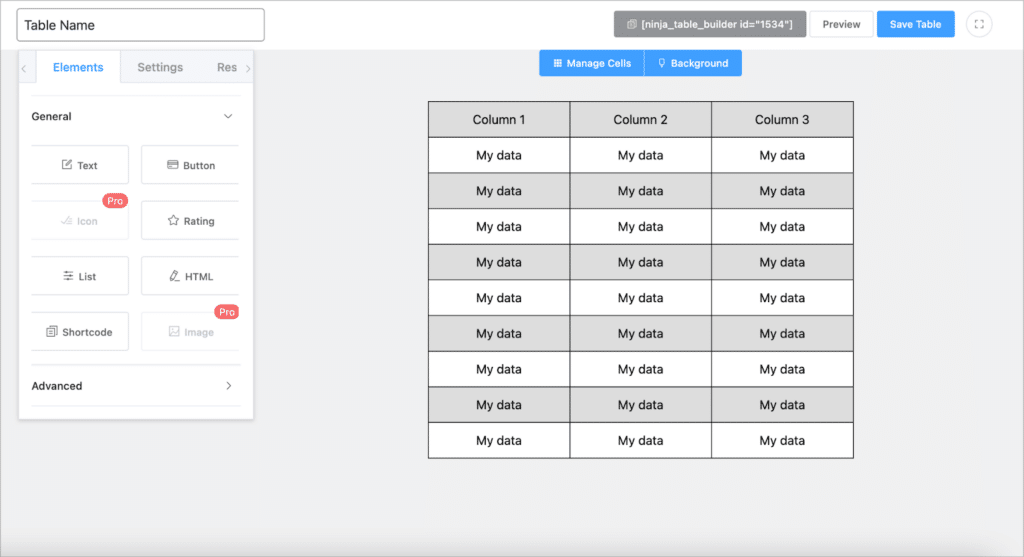
It’s worth noting that several of the General and Advanced elements are only available in the Pro plugin.
Summary
| Feature | GravityView | Ninja Tables |
| Drag and drop builder | ✅ | ✅ |
| Import data from CSV | Requires GravityImport | ✅ |
| Supports widgets | ✅ | ❌ |
Custom content
Having the ability to customize your data and tailor layouts to specific requirements is crucial for site builders and designers. GravityView stands out in this respect, offering a robust Custom Content field that allows you to incorporate shortcodes, HTML, dynamic merge tags, and other elements into their tables.
Furthermore, the Custom Content field supports video and audio player embedding, providing added flexibility when it comes to presenting your content.
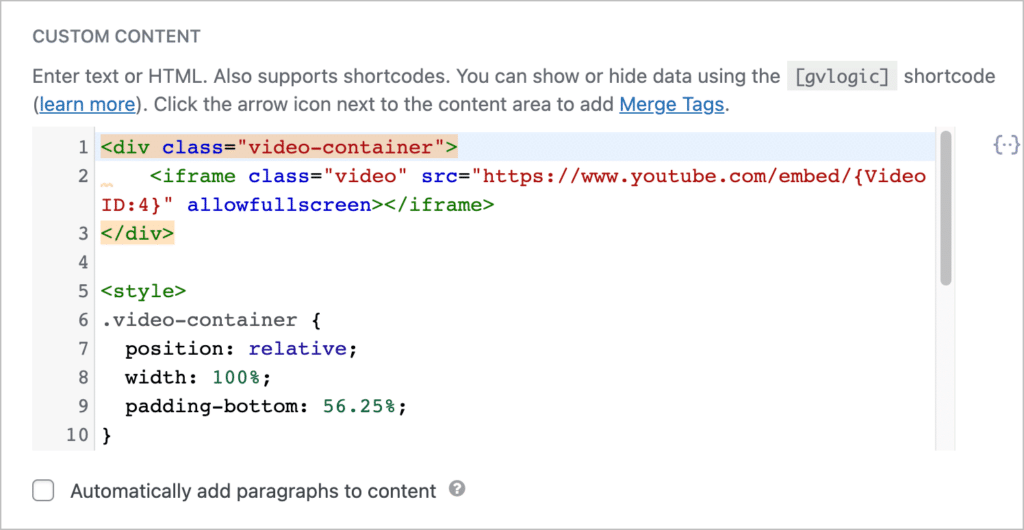
The GravityView settings also includes a code editor for including custom CSS and JS snippets.
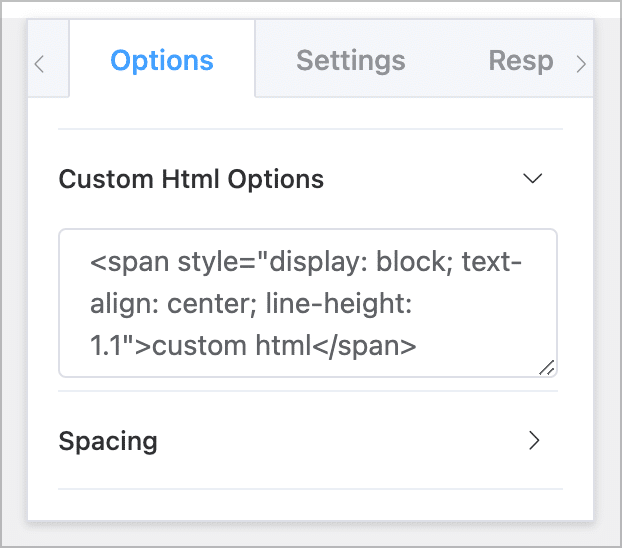
Ninja Tables includes limited support for custom content. However, there is a basic HTML element that can be added to table cells allowing you to write your own, custom HTML code.
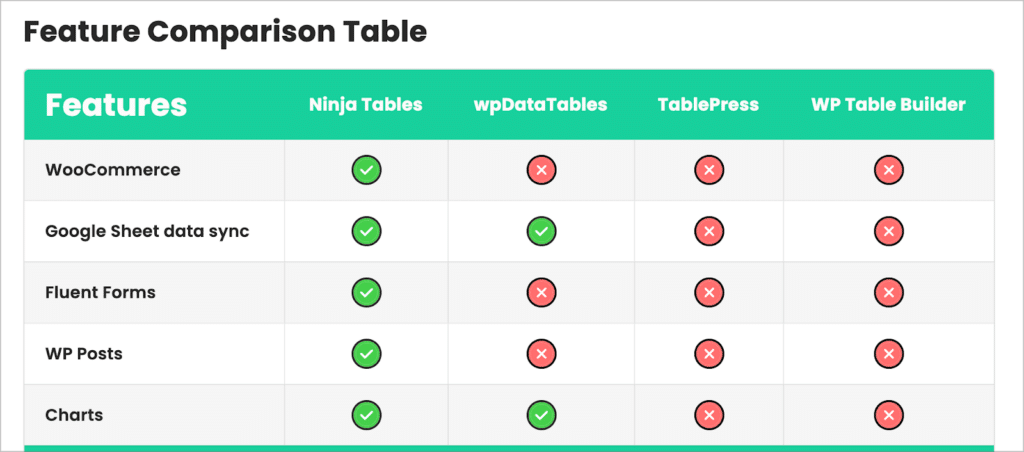
Ninja Tables also allows you to pull in data from external sources like Google Sheets, WordPress posts and Fluent Form Entries.
Summary
| Feature | GravityView | Ninja Tables |
| Insert custom HTML | ✅ | ✅ |
| Use merge tags for dynamic content | ✅ | ❌ |
| Google Sheets as data source | ❌ | ✅ |
| WP posts as data source | ❌ | ✅ |
| Fluent Forms as data source | ❌ | ✅ |
| Gravity Forms as data source | ✅ | ❌ |
Sorting and filtering
The GravityView core plugin offers basic sorting features accessible in the View settings at the bottom of the View editor. Users can sort entries by field and apply date filters.

GravityView Pro includes the Advanced Filtering Extension, providing more precise control over displayed entries. This extension enables filtering by specific field values and restricting entries to those created by the logged-in user.
Additionally, GravityView includes a customizable search bar widget and field filtering for individual columns.

Ninja Tables has a custom filter feature in its Pro version. This enables you to add filters to tables so you can sort and filter data on the front-end. You can also select a UI type (Dropdown, Radio Buttons, Date picker, etc).
Summary
| Feature | GravityView | Ninja Tables |
| Customizable filters | ✅ | ✅ |
| Conditional logic | ✅ | ❌ |
Editing data from the front end
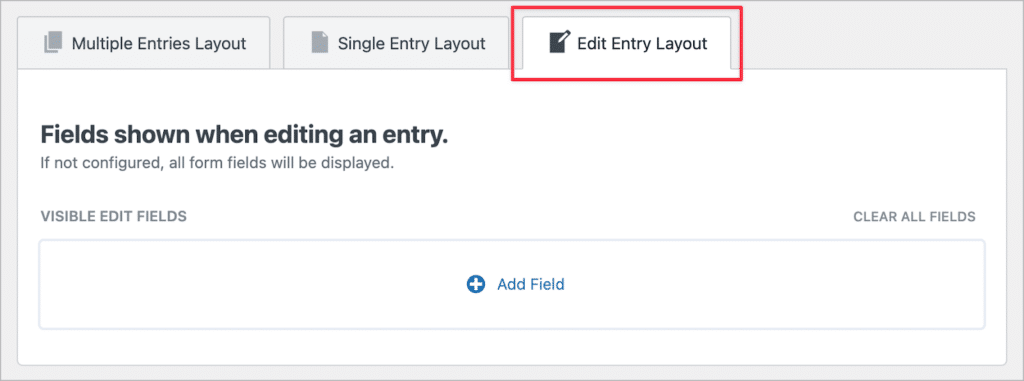
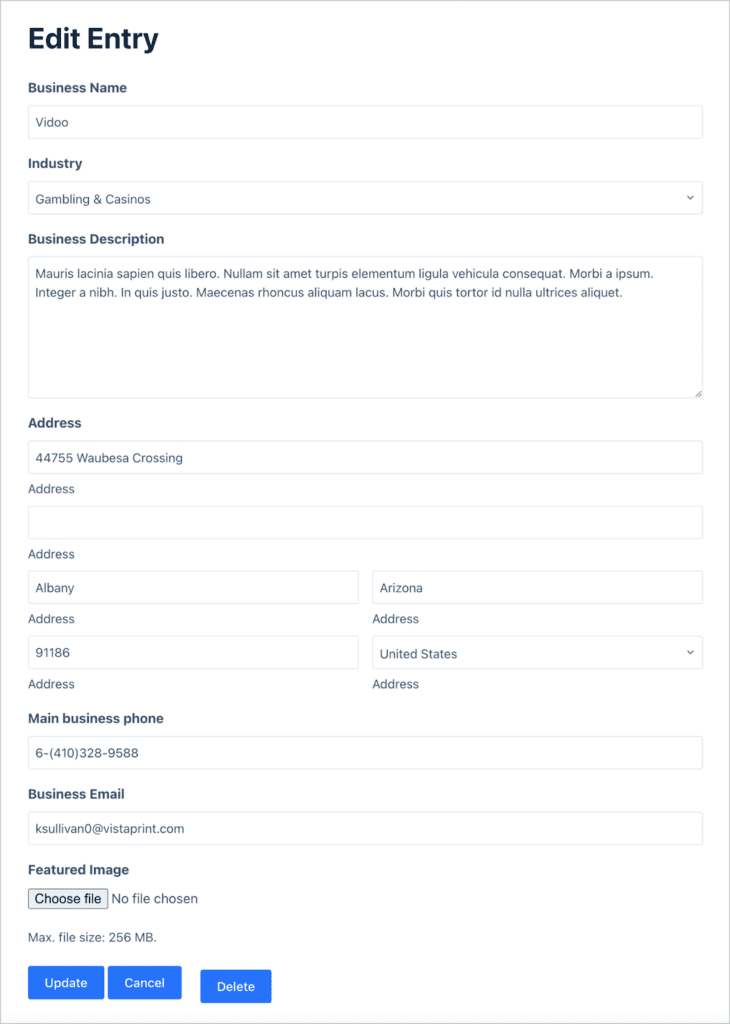
Front-end entry editing is a built-in feature in GravityView, allowing logged-in users to edit entries that they create. Within the GravityView drag-and-drop editor there is a dedicated “Edit Entry” layout where you can configure the editing interface and specify which fields are editable.
Enabling GravityView’s User Edit option grants logged-in users the ability to edit their own entries, making this feature particularly useful for user profiles and directory listings.
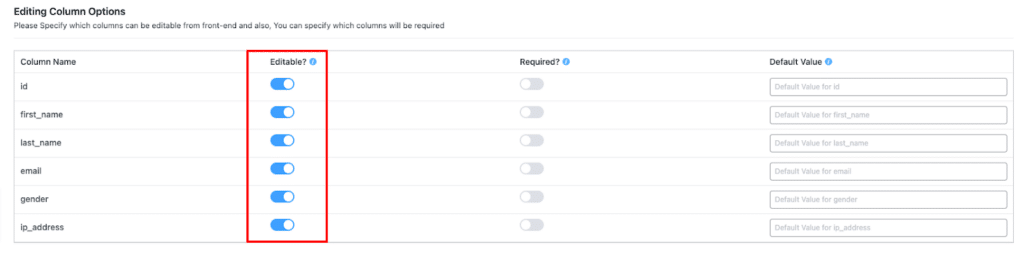
Ninja Tables also allows for front end editing. However, this feature is only available in the Pro version. Additionally, front-end editing is restricted to WordPress user data, which you can pull into your front-end tables.
Ninja Tables also allows you to restrict editing to a user’s own entries and select the columns that you want to make editable.
Summary
| Feature | GravityView | Ninja Tables |
| Users can edit user meta | ❌ | ✅ |
| Users can edit submitted form entries | ✅ | ❌ |
| Control which fields are editable | ✅ | ✅ |
Exporting data
GravityView includes an in-built export feature that allows you to export data directly from your front-end table Views. All you need to do is add either /csv or /tsv to the end of the View URL.
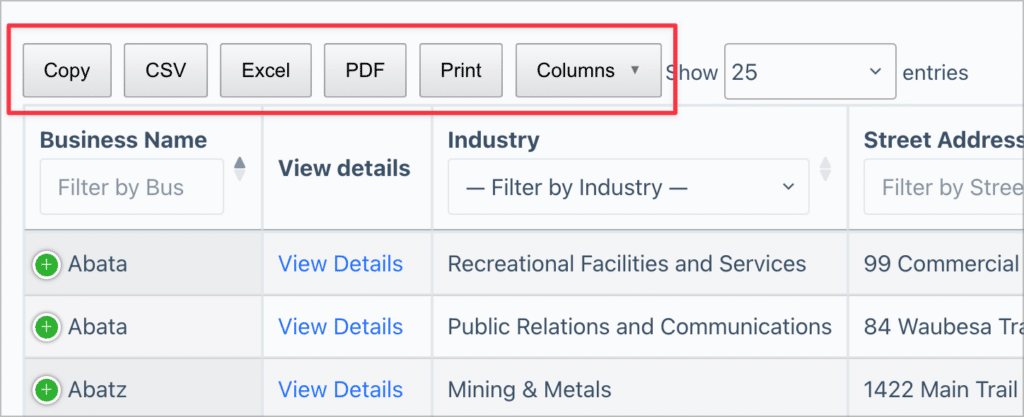
The GravityView DataTables layout includes additional export features, allowing you to export data to a variety of formats, including Excel, and PDF.
Ninja Tables also has an export feature. However, this only allows you to export data from the table configuration screen in the backend. You cannot export data from the front end.
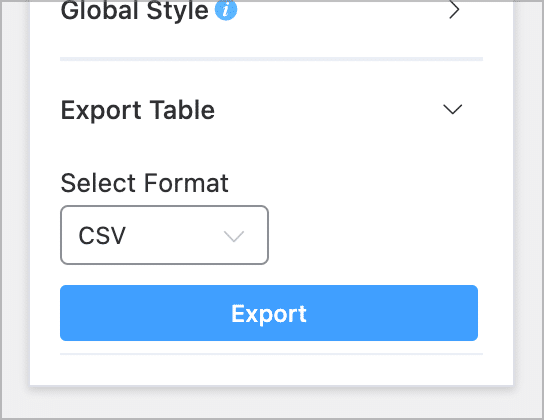
Ninja Tables allows you to export table data to either CSV or JSON format. Okay, now let’s look at the different integrations and extensions supported by each plugin.
Summary
| Feature | GravityView | Ninja Tables |
| Export data from the front end | ✅ | ❌ |
| Export data to CSV | ✅ | ✅ |
| Create customized PDF reports | Requires GravityExport | ❌ |
Integrations and extensions
GravityKit provides 7 premium extensions that expand the core capabilities of GravityView. Here’s a brief overview of each:
- Multiple Forms: Display entries from multiple forms within a single View.
- Ratings & Reviews: Enable users to rate and comment on entries (particularly useful for directories or review websites).
- A-Z Filters: Introduces a new widget for filtering entries alphabetically.
- Featured Entries: Mark specific entries as “Featured” to ensure they appear at the top of the View.
- Social Sharing & SEO: Add social sharing buttons to entries and improve the View’s SEO performance.
- Advanced Filtering: Utilize conditional logic filters to control which entries are displayed in the View.
- Integration with GravityKit’s Other Add-ons: Other add-ons from GravityKit seamlessly integrate with GravityView, providing a comprehensive range of enhancements. You can explore the complete collection of add-ons offered by GravityKit to further enhance your GravityView experience!
Ninja Tables also has several extensions built into its Pro version:
- Custom filter: Allow users to search in the table for specific data.
- Conditional formatting: Apply conditions to the table column to highlight cells with colors.
- Fluent Forms integration: Display Fluent Forms form entries in your tables.
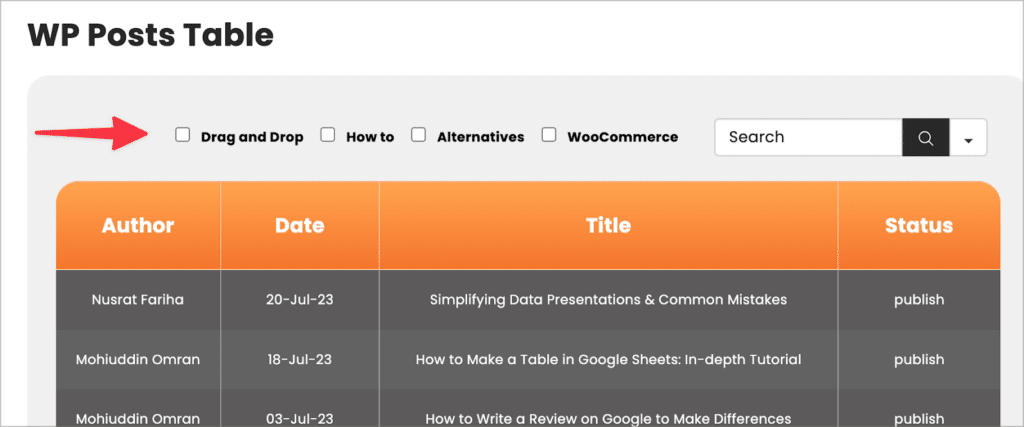
- WP Post tables: Fetch WordPress posts/pages and display them in tables.
- Charts: Create charts and graphs from your table data.
- WooCommerce product tables: Display WooCommerce products in a table.
- Google Sheets synced tables: Sync tables with Google Sheets.
Now let’s take a look at the demos and free trials available for each plugin.
Demos and free trials
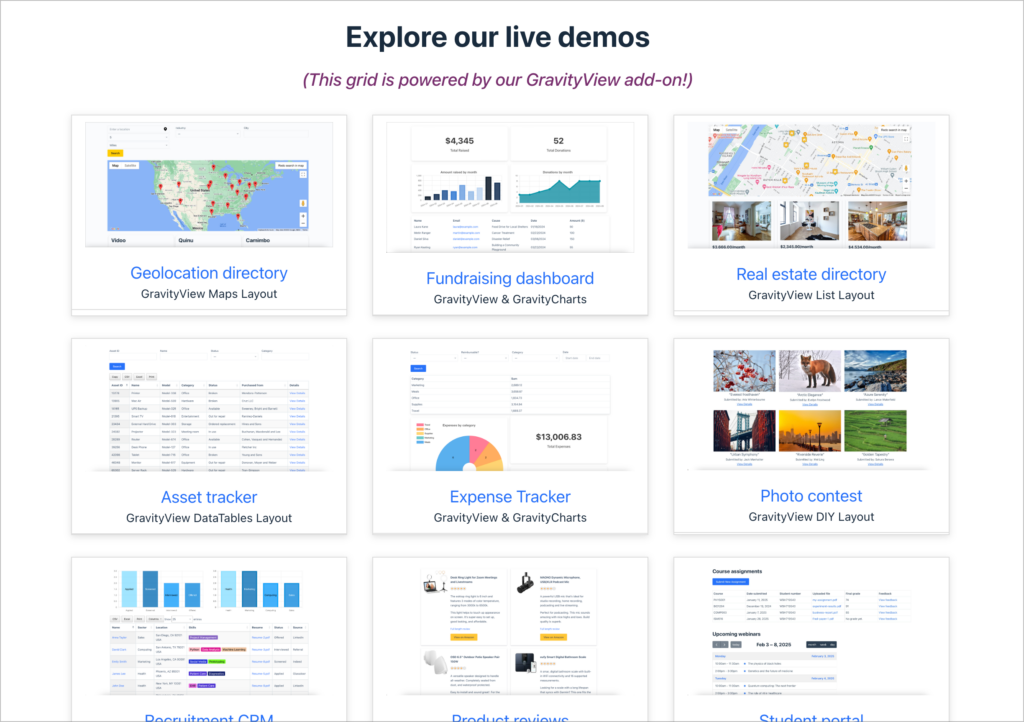
GravityKit offers a demo showcase featuring various example applications that demonstrate the capabilities of GravityView and other GravityKit add-ons.
By signing up for a free demo playground, you can personally experience GravityView for 30 days, enabling you to explore its features and functionalities before making a decision to buy!
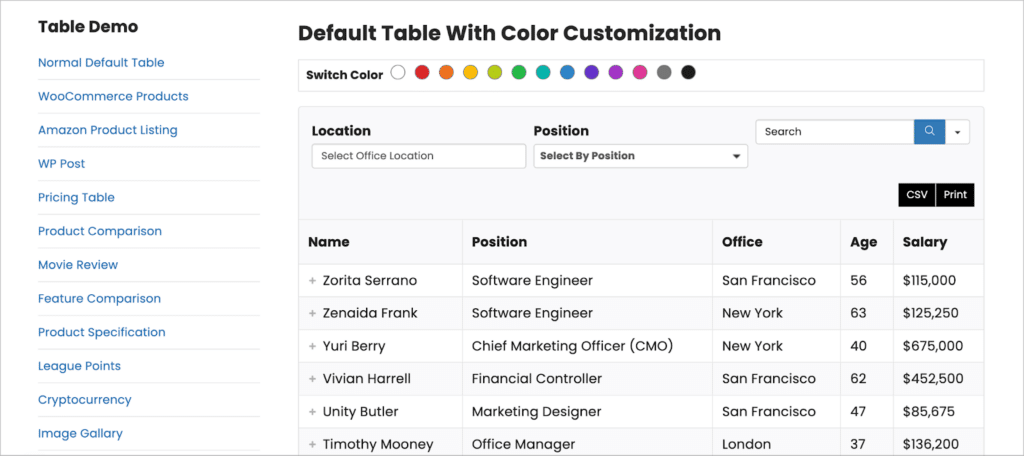
Ninja Tables aso has a demo site where they showcase a range of live demo tables for you to preview and interact with. While they do not offer a free trial, they do have a free version of the plugin (with limited features) available from the WordPress plugin directory.
Pricing
Let’s compare each plugin in terms of its pricing structure. GravityKit has a straightforward pricing model with three tiers:
- GravityView ($129): This plan includes the GravityView core plugin with the List and Tables layouts.
- GravityView Pro ($199): In this bundle, you’ll receive GravityView along with all Extensions and Layouts.
- All Access Pass ($399): The All Access Pass includes everything in GravityView Pro plus every other add-on available.
Ninja Tables pricing is as follows:
- Free: There is a free version of the plugin (with limited features) available for download on the WordPress plugin directory
- Single Site ($79): For use on a single site
- Agency License ($129): For use on 20 sites
- Unlimited License ($299): For use on an unlimited number of sites
GravityView vs Ninja Tables: Which is best for displaying tables?
In conclusion, while both GravityView and Ninja Tables offer valuable solutions for displaying data in tables, GravityView stands out as the superior choice for anyone working with Gravity Forms. Its seamless integration, specialized focus on Gravity Forms entries, and powerful extensions make it an excellent option.
However, it’s worth noting that Ninja Tables also provides a good solution for creating responsive and interactive tables on WordPress websites, offering versatility for various data presentation needs.
Ultimately, the decision depends on your specific requirements and preferences, but GravityView’s tailored features for Gravity Forms users make it a compelling and comprehensive choice! If you enjoyed this post, read our comparison of GravityView and Ninja Forms Views next.

Helpful tips right in your inbox.
Subscribe to get the latest articles, information on releases and helpful Gravity Forms tips!
More articles

Launch Log: GravityView 3.0, plus upgrades to Block MCP and GravityKit MCP
GravityView 3.0 lands with the new Vantage theme, frontend bulk actions, and AI-assisted View creation. This launch log also covers updates to GravityKit MCP, Block MCP, and Dashboard Views.

Announcing GravityView 3.0: a fresh new look, AI View creation, and native page builder support
GravityView 3.0 is here: restyle Views with the new Vantage theme, build them with AI, embed them in any page builder, and run bulk actions on the front end.

Launch Log: GravitySearch arrives, plus AI spam review and GravityView fixes
This week, releases are anchored by a brand-new product! GravitySearch joins the GravityKit suite with cross-form entry search for Gravity Forms. Alongside it, Gravity Forms Zero Spam picks up an AI-powered review step, and GravityView sees fixes for Enhanced Security, Edit Entry, and Entry…