Published
•
Updated
How to build a Craigslist clone on WordPress with no code
Build a Craigslist-style classifieds site on WordPress using Gravity Forms and GravityView. No coding required. Create listings, browse by category, and contact sellers from the front end.

WordPress has long been revered as a go-to platform for building websites, but its true power lies in the ability to customize and extend its functionality!
If you’ve ever wanted to build your own version of Craigslist, you’ll be thrilled to know that you can recreate a similar online classifieds platform using the powerful duo of Gravity Forms and GravityView.
In this article, we’ll walk you through a practical and detailed guide on how to construct your very own WordPress Craigslist clone. Whether you’re looking to create a localized marketplace or facilitate nationwide classifieds, this step-by-step tutorial is for you.
Are you ready to embrace the potential of WordPress, and discover how to craft an engaging and user-friendly classifieds site that rivals the industry giants? Let’s get started!
💡 Check out our live demo applications and get your own free trial site preloaded with all GravityKit add-ons!
Download the free classified ad form template now!
Import the template into Gravity Forms and customize as necessary.
Sneak peek
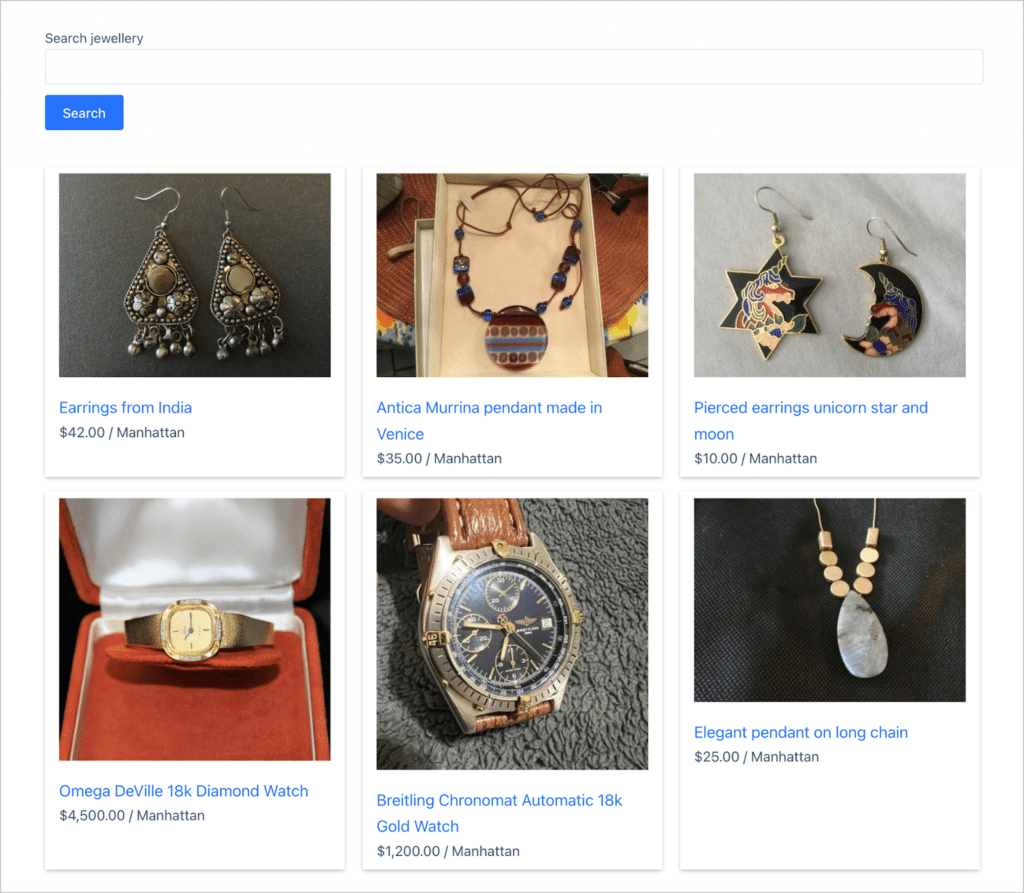
Here’s a quick look at our finished Craigslist clone for the “Jewelry” category:

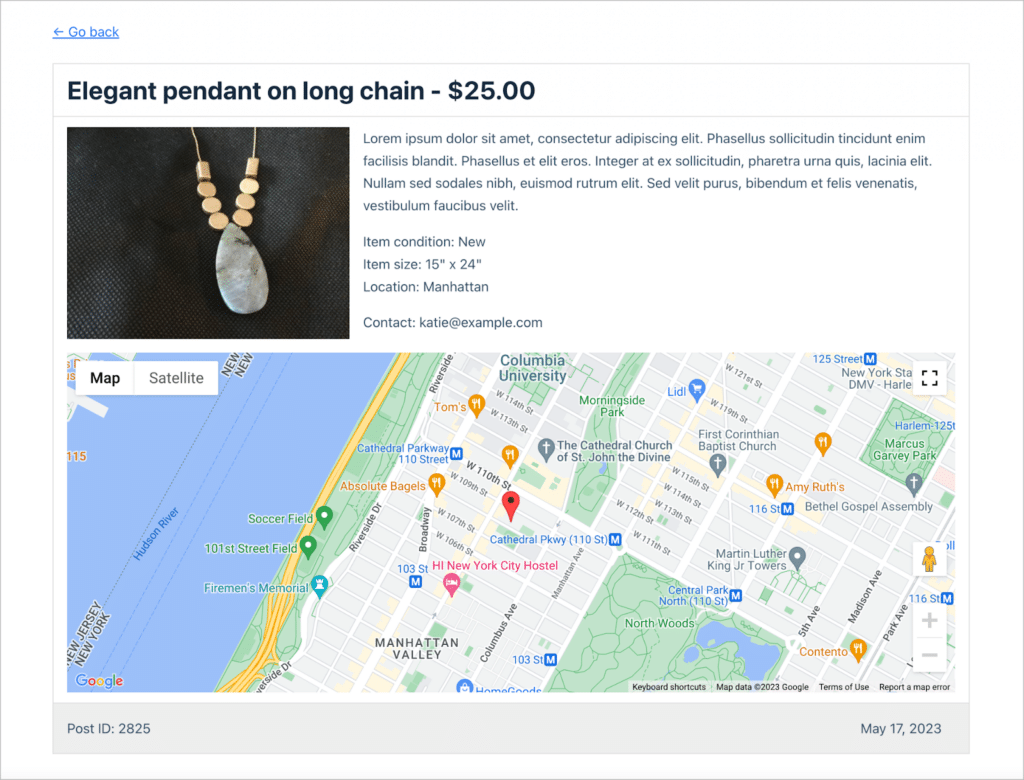
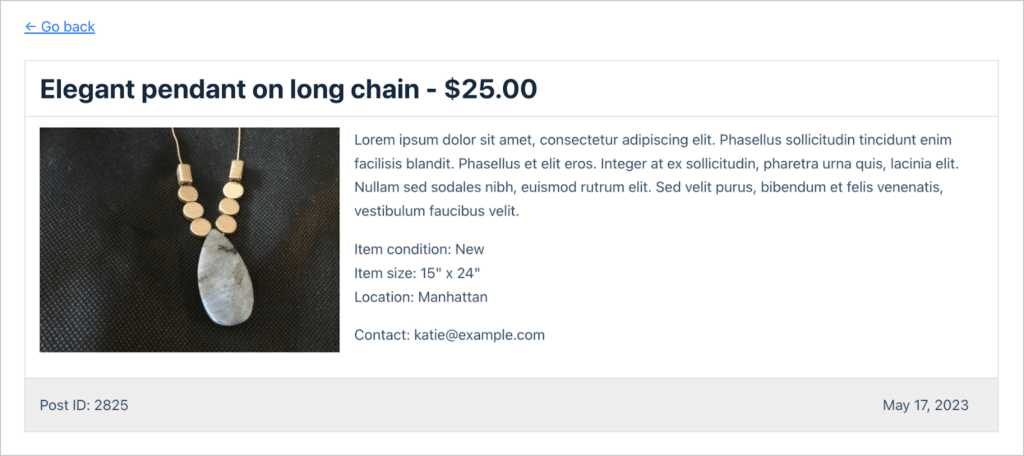
When a user clicks to view more information about a posting, this is what they will see:

Thanks to GravityView’s advanced functionality, we can customize the layout of individual postings by adding a map and other data. Here’s an example:
What you’ll need
Here are the plugins you’ll need to build a Craigslist clone on WordPress:
- Gravity Forms
- GravityView
- GravityView Maps extension (optional)
What is Craigslist?
Craigslist is a renowned online marketplace that revolutionized the way people connect and engage in local communities. Founded in 1995 by Craig Newmark, Craigslist started as an email distribution list in San Francisco before evolving into a classified ads website covering a broad range of categories.
Craigslist now operates in more than 70 countries and over 700 cities worldwide!
What sets Craigslist apart is its simplicity and accessibility, allowing users to post and browse listings with ease, often free of charge. With its wide reach and grassroots approach, Craigslist has become a go-to resource for individuals, businesses, and organizations looking to sell items, find housing, and engage with their local communities.
Today, Craigslist remains a household name, facilitating connections and fostering a sense of community in countless cities and regions worldwide.
Why build a Craigslist clone on WordPress
Creating a Craigslist clone on WordPress presents a multitude of benefits that make it an appealing endeavor for individuals and businesses alike.
Firstly, WordPress offers a user-friendly interface and a vast ecosystem of themes and plugins, making it highly adaptable and customizable to suit your specific needs.
By leveraging the power of Gravity Forms and GravityView, you can seamlessly integrate advanced form functionalities and robust data display options, empowering you to create a classifieds platform that is tailored to your requirements.
Additionally, WordPress classifieds website development gives you complete control over your platform’s design, features, and monetization options! Furthermore, WordPress provides a solid foundation for scalability, allowing you to accommodate growing user bases and expand your classifieds website as your community flourishes.
By building a Craigslist clone on WordPress, you can tap into the proven success of a well-established platform while retaining the flexibility and autonomy to shape your online marketplace according to your vision.
Main features of Craigslist
Let’s take a look at some of the features of Craigslist so we can replicate them later on:
- Classified ads: The core feature of Craigslist is its classified advertisements. Users can post listings across a wide range of categories, including housing, jobs, services, for sale, community events, and more.
- Localized search: Craigslist emphasizes local communities, allowing users to browse and search for listings specific to their geographic area.
- Free and paid listings: Craigslist offers free posting options for most categories, enabling individuals and businesses to advertise without incurring any costs. However, certain categories, such as job postings or specific services, may require a fee.
Now that we know the features we need, we can start building our classifieds website on WordPress, step by step.
Building a WordPress Craigslist clone, step by step
Here are the steps we’re going to follow to create an online marketplace on WordPress:
- First, we’ll create a submission form, allowing users to post a new ad in the classifieds directory.
- Next, we’ll build a View with a search bar allowing us to display classifieds ads on the front end.
- Finally, we’ll configure the edit entry layout, allowing posters to update their listings from the front end.
Let’s get started.
Creating the ad submission form
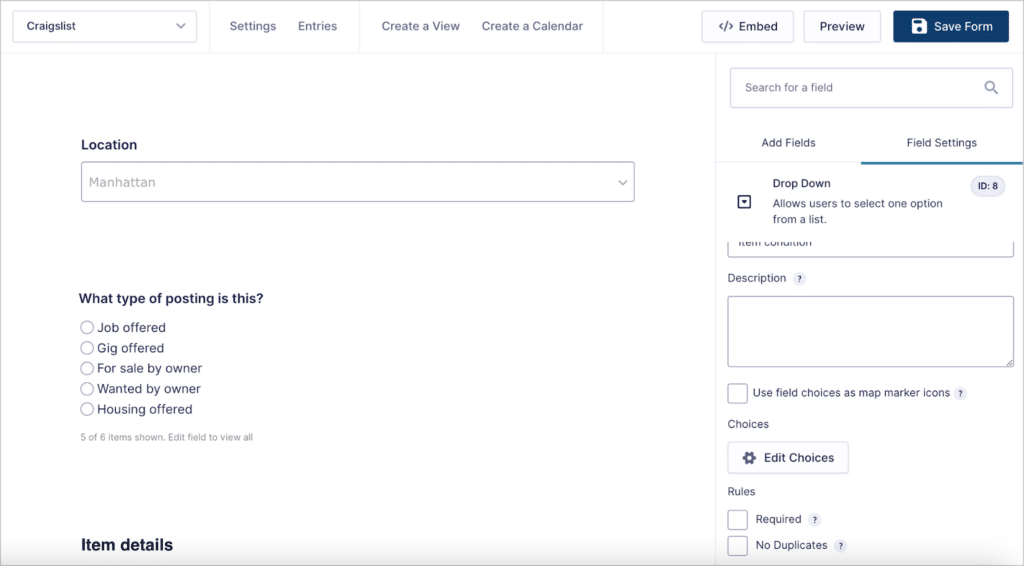
To create a new form, we’ll hover over “Forms” and click “New Form”. Now we can start adding fields to our form using the Gravity Forms visual editor.
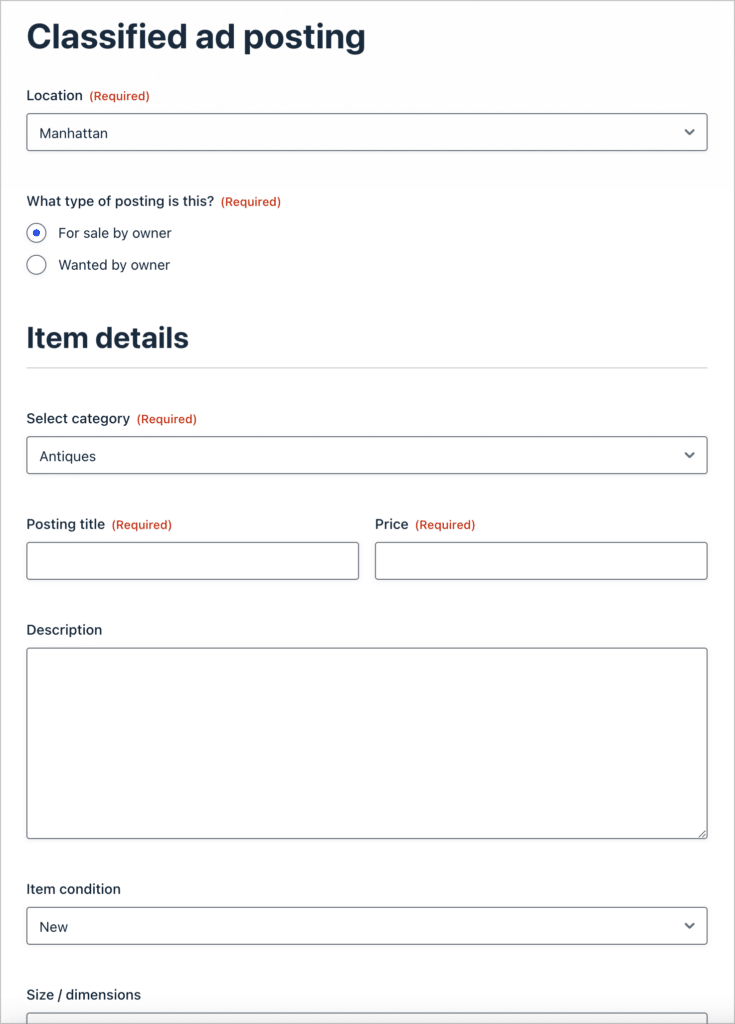
Here are the initial fields we’re going to add to the form:
- Location (Drop Down field)
- Type of posting (Radio Buttons field)
Once a user selects a posting type, the remaining fields will appear. We can accomplish this using conditional logic! For example, let’s say the user is posting an item for sale. In that case, the following form fields will appear:
- Category (Drop Down field)
- Posting title (Single Line Text field)
- Price (Number field)
- Description (Paragraph Text field)
- Item condition (Drop Down field)
- Size / dimensions (Single Line Text field)
- Email (Email field)
- Phone (Phone field)
Gravity Forms is a powerful form builder that supports a wide range of field choices and advanced functionality like conditional logic. Thanks to these powerful features, you can easily customize your listing form. We’ll keep things simple by only adding the above fields.
Here’s what our form looks like on the front end:
Save time by downloading our free classified ad form template now!
After configuring our listing form, the next step is to embed it on a page or post.
Building the classifieds View using GravityView
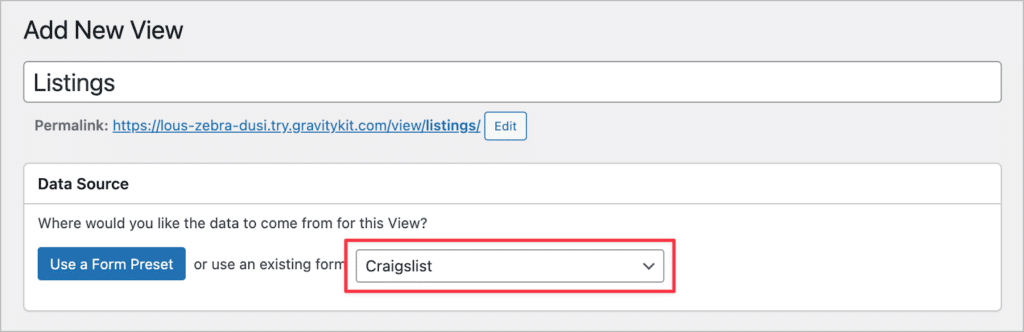
Now that we’ve configured the listing form, we can build a View to display classified ads on the front end. After installing GravityView, we’ll create a new View by hovering over “GravityKit” and clicking “New View”.
After giving our View a name, we’ll need to select a data source. This tells GravityView where to get data from for displaying on the front end. We’ll go ahead and choose the listing form we created in the previous step.
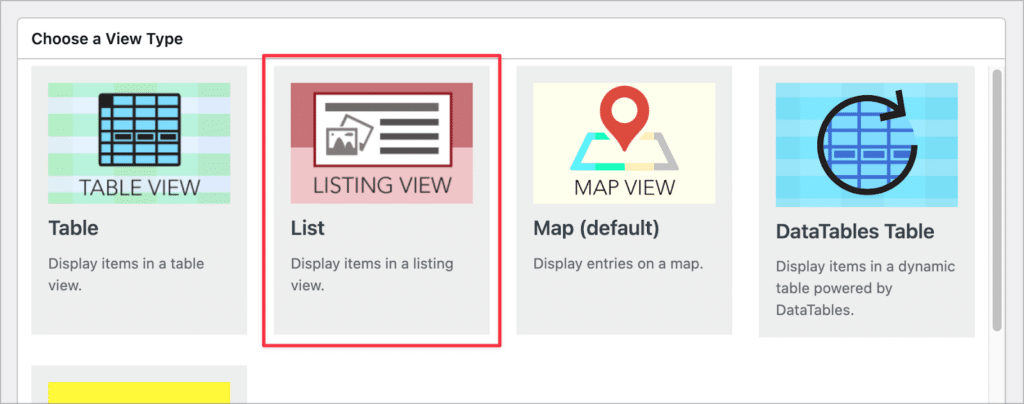
After selecting a data source, we need to choose a View Type. This refers to the layout we’re going to use to display the data. GravityView supports a range of layout options. For our Craigslist clone, we’ll go ahead and select the “List” type.
After selecting a View Type, we can start configuring our Craigslist clone by adding fields and widgets to the View editor. Let’s start by configuring the Multiple Entries layout—this is the main listing page where users can view all postings.
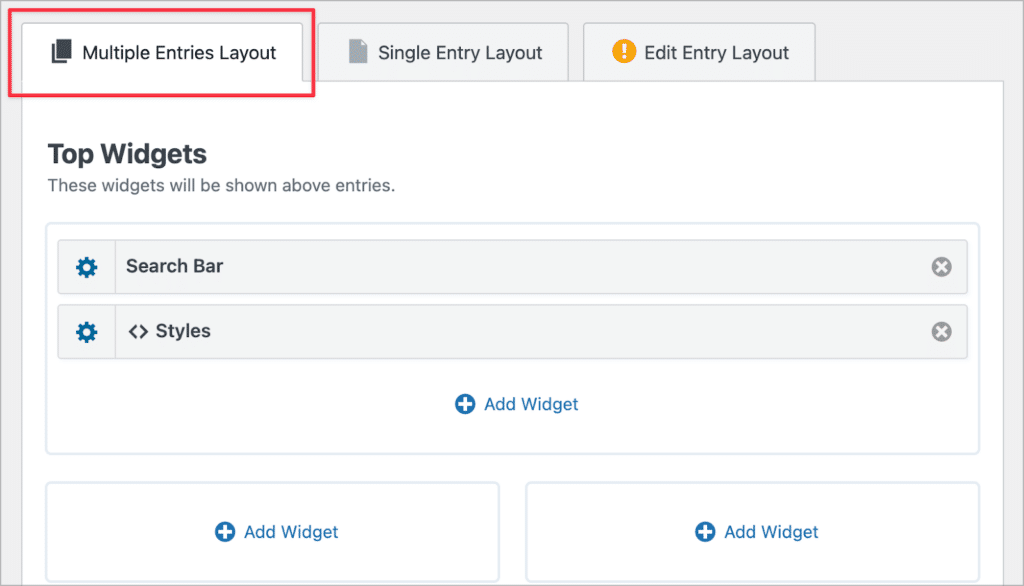
Configuring the Multiple Entries layout
We’ll start by adding fields to the “Entries Fields” section. Here we’re just going to add the “Image”, “Posting title”, “Price” and “Location” fields. We can add fields by clicking “Add Field” and selecting the field we want from the list.
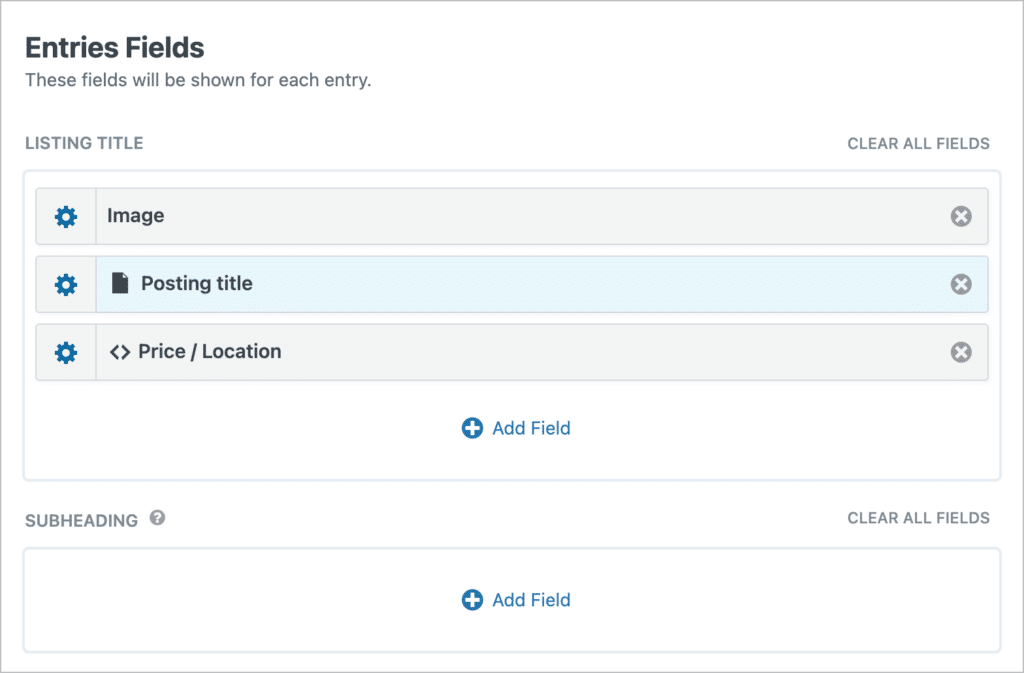
After adding the “Image” and “Posting title” fields, we’re also going to add a “Custom Content” field. Inside the Custom Content text editor, we’ll add the “Price” and “Location” fields by pasting the field merge tags inside.
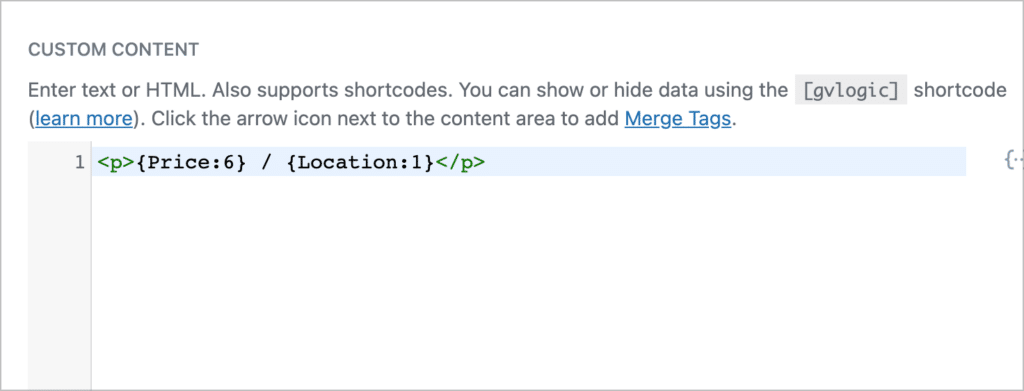
The Custom Content field gives us finer control over the layout as it allows us to add our own HTML structure!
After adding our fields, we need to add some widgets. First, we’ll add a search bar, allowing users to search for postings by keyword (just like on the Craigslist site). Next, we’ll add a “Custom Content” widget. This is where we’re going to paste some CSS styles to turn our list view into a grid view.
Here’s the code we used to turn the list View into a grid View:
Here’s what the multiple entries page looks like on the front end:
Our WordPress Craigslist clone is looking great so far. Now we can turn our attention to the single entry layout!
Configuring the Single Entry layout
The single entry page is the page that users see when they click to view more information about a specific posting. To configure this layout, we’ll click on the “Single Entry Layout” tab at the top.
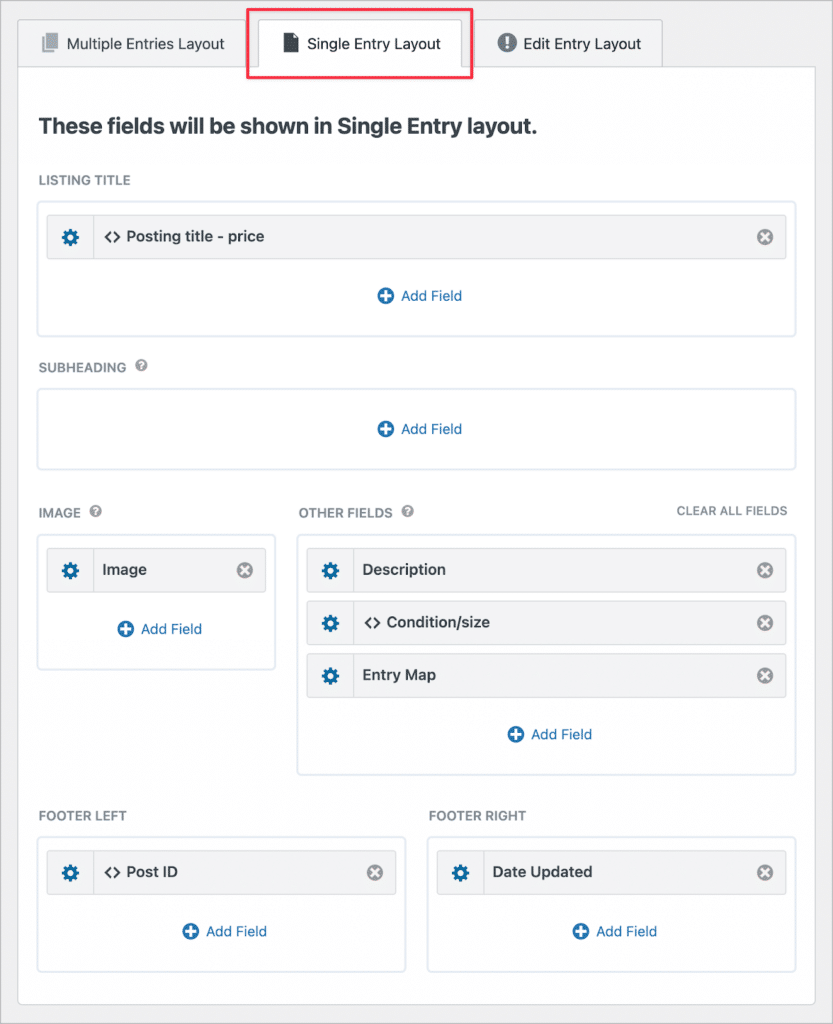
Here we’re going to add the remaining listing fields, like the description, condition and size of the item, and seller contact email. Here’s what the single entry page looks like on the front end:
If you want posters to be able to edit their listings from the front end, you’ll also need to configure the Edit Entry layout. Let’s do that now!
Configuring the Edit Entry layout (optional)
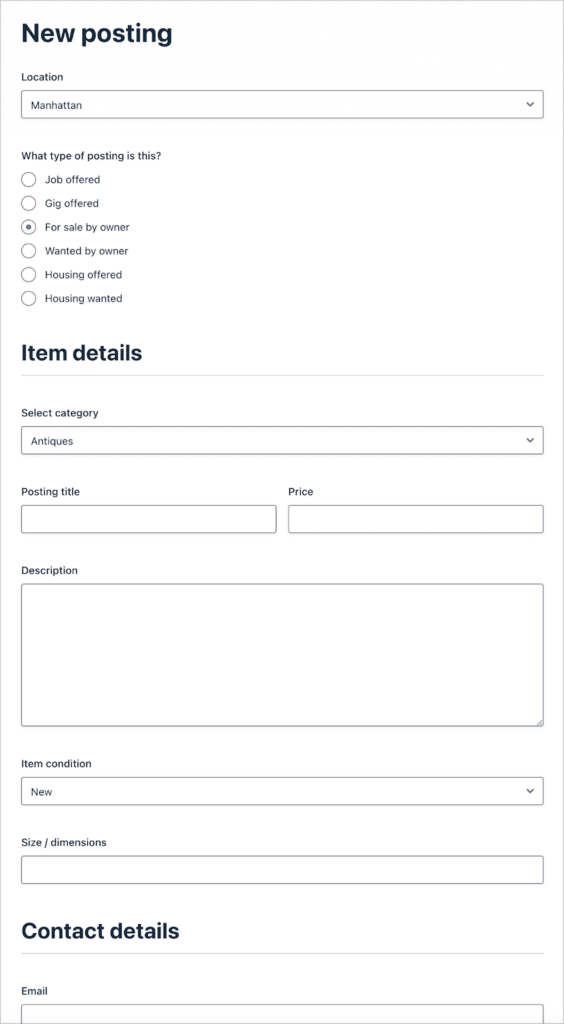
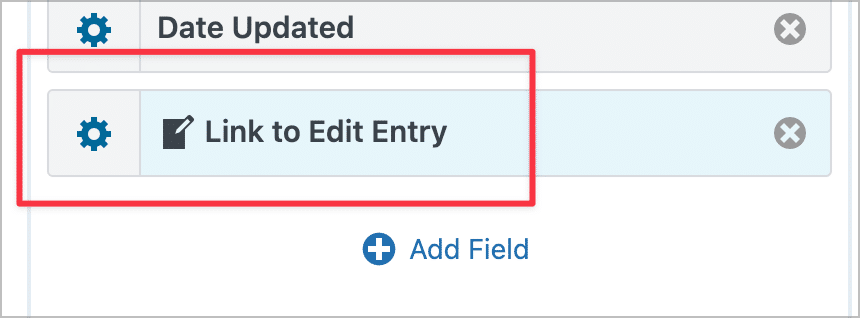
The GravityView edit entry layout allows users to edit their postings from the front end. First, we’ll need to add a link to the Edit Entry page from either the Multiple or Single entry pages.
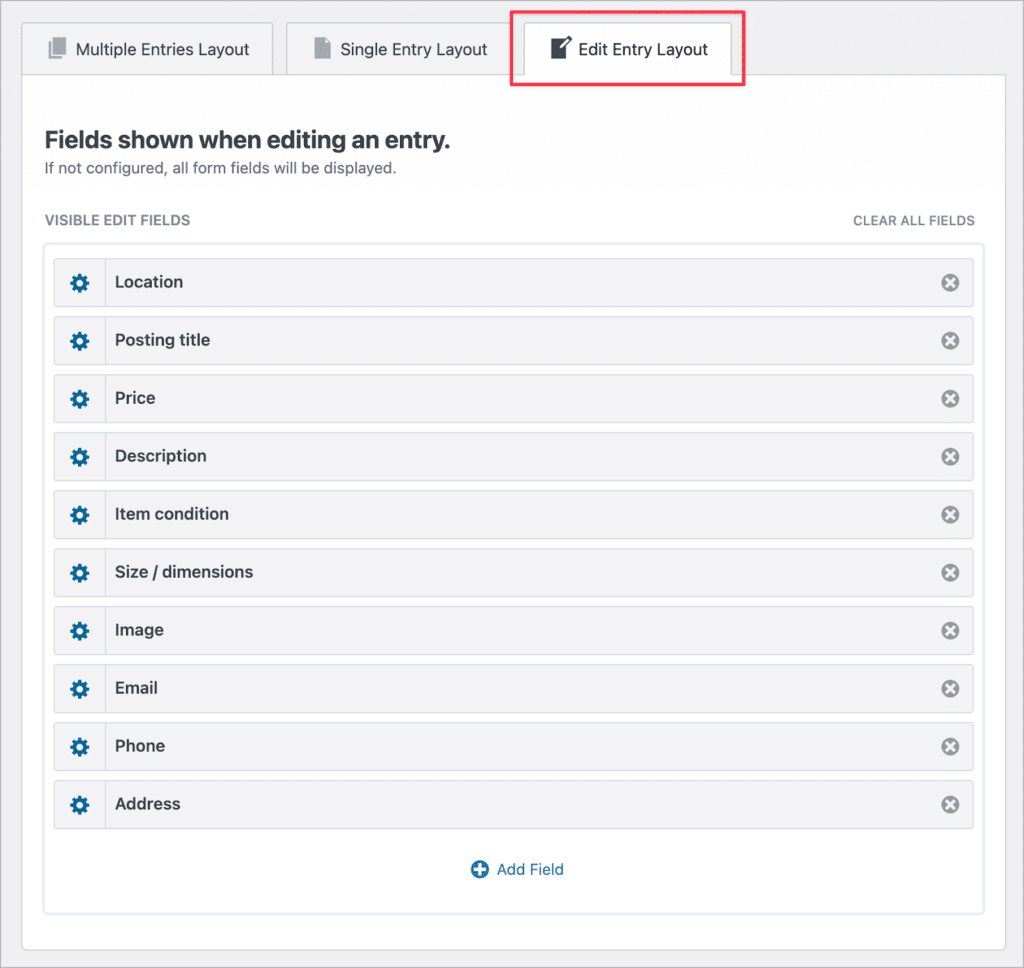
Next, we’ll click on the “Edit Entry Layout” tab at the top of the View editor. Here we need to add the fields we want to make editable from the front end.
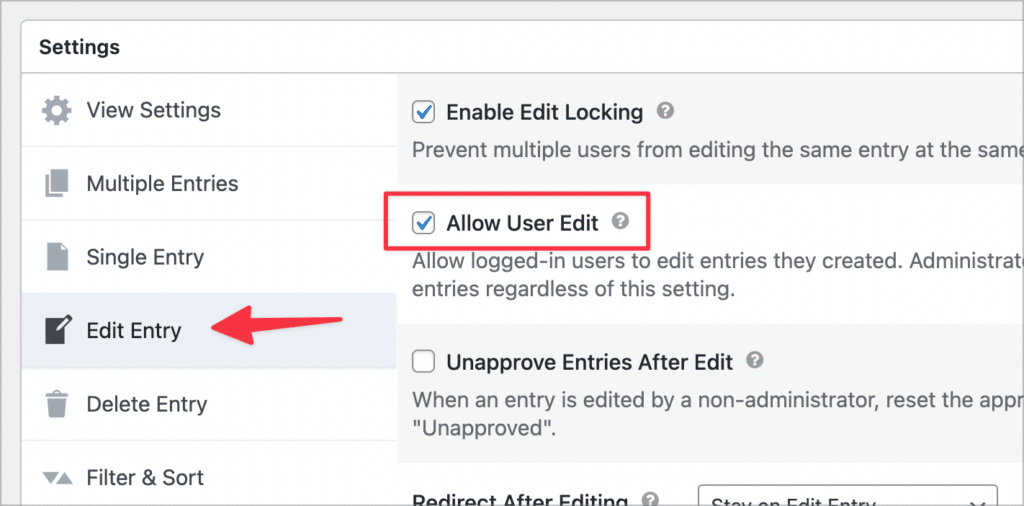
Finally, we’ll need to enable the “User Edit” option in the Edit Entry settings. This will allow logged-in users to edit listings that they create.
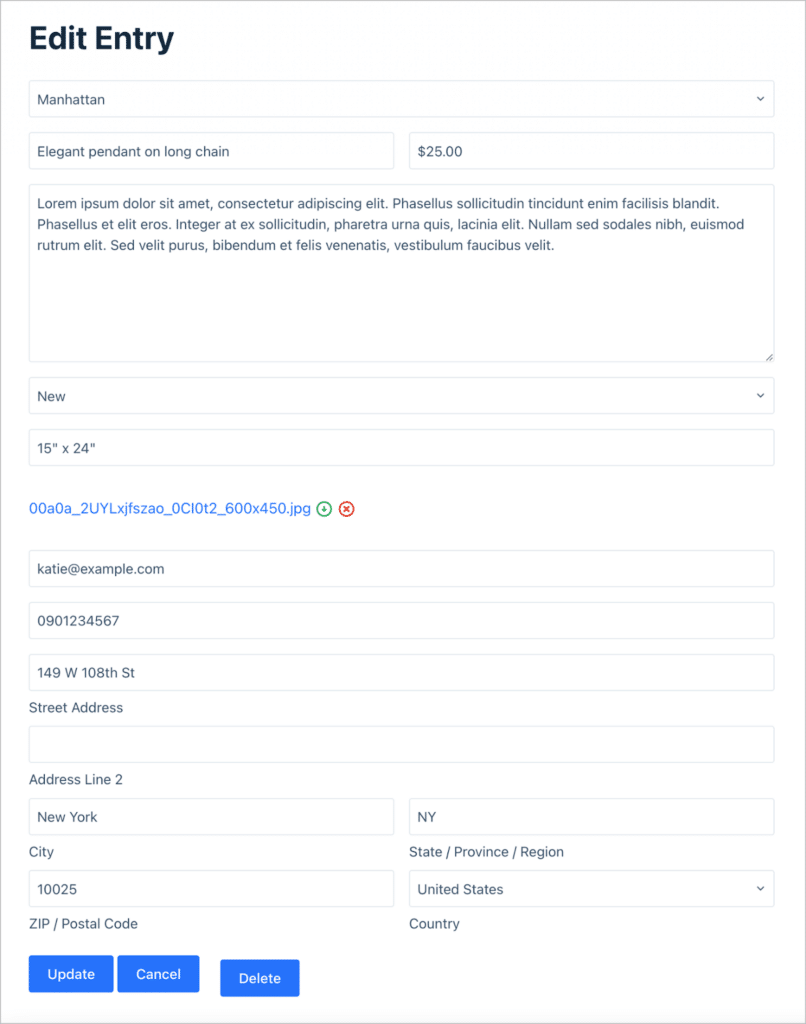
Now, user’s will be able to update their postings from the front end! Here’s what the Edit Entry page looks like:
That’s it! We’ve successfully built a Craigslist clone on WordPress! We kept things simple for this example, but there’s plenty more we could do using GravityView’s powerful functionality.
Bonus: Adding more functionality with extensions
Let’s take a look at a few of the extensions available for GravityView and how we could use them to enhance our Craigslist clone:
- Featured Entries: The GravityView “Featured Entries” extension allows you to mark certain listings as “Featured” so that they show up at the top of the directory.
- Social Sharing & SEO: With this extension, you can add social sharing buttons to user listings, making it easier for users to share and engage with postings.
- A-Z Filters: This extension enables you to add additional filtering options to your directory.
💡 Pro tip: To see more examples of apps you can build using GravityView, check out our How to Build It page.
Adding support for paid listings
To add support for paid listings, you can use one of the Gravity Forms payment add-ons, such as 2Checkout, Stripe, or PayPal.
Start building your Craigslist clone on WordPress
Congratulations! You’ve reached the end of our comprehensive guide on building your very own Craigslist clone on WordPress using the powerful combination of Gravity Forms and GravityView.
As you can see, when using Gravity Forms and GravityView, there’s no need for a WordPress Craigslist plugin or theme! If you found this post interesting, check out GravityView today to learn more, or read our guide on how to build a Yelp clone!

Helpful tips right in your inbox.
Subscribe to get the latest articles, information on releases and helpful Gravity Forms tips!
More articles

Launch Log: GravityView 3.0, plus upgrades to Block MCP and GravityKit MCP
GravityView 3.0 lands with the new Vantage theme, frontend bulk actions, and AI-assisted View creation. This launch log also covers updates to GravityKit MCP, Block MCP, and Dashboard Views.

Announcing GravityView 3.0: a fresh new look, AI View creation, and native page builder support
GravityView 3.0 is here: restyle Views with the new Vantage theme, build them with AI, embed them in any page builder, and run bulk actions on the front end.

Launch Log: GravitySearch arrives, plus AI spam review and GravityView fixes
This week, releases are anchored by a brand-new product! GravitySearch joins the GravityKit suite with cross-form entry search for Gravity Forms. Alongside it, Gravity Forms Zero Spam picks up an AI-powered review step, and GravityView sees fixes for Enhanced Security, Edit Entry, and Entry…