Published
•
Updated
How to build a Yelp clone on WordPress with no code
Build a Yelp-style business directory on WordPress using Gravity Forms and GravityView. Let users submit listings, leave reviews, and search by location without writing any code.

In today’s digital age, online directories have become an essential part of our daily lives. One of the most popular directories out there is Yelp, a platform that helps users find local businesses and services based on their location, ratings, and reviews.
Building a directory website like Yelp from scratch can be a daunting task, especially if you don’t have any coding experience. However, with plugins like Gravity Forms and GravityView, it’s possible for anyone to create a Yelp-like directory website with ease!
In this post, we’ll focus on using Gravity Forms and GravityView to build a WordPress Yelp directory. Let’s get started!
💡 Check out our live demo applications and get your own free trial site preloaded with all GravityKit add-ons!
Download the free business listing template now!
Import the template into Gravity Forms and customize as necessary.
Sneak peek
Here’s a preview of the Yelp clone we’re going to build in this tutorial:
When you click to view more information about a specific business, you can also view the reviews for that business:
What you’ll need
Here are the plugins and extensions you’ll need to build a Yelp clone:
What is Yelp?
Yelp is a popular online directory and review platform that allows users to search and discover local businesses such as restaurants, bars, shops, and service providers. Founded in 2004, Yelp has grown to become the go-to source for consumers seeking information and reviews on businesses in their local area!
With over 200 million reviews and counting, Yelp has become a trusted platform for both businesses and consumers alike. In addition to reviews, Yelp also provides other useful information such as business hours, contact information, photos, and more.
Whether you’re looking for a new place to eat, a reliable plumber, or a trendy clothing store, Yelp is a valuable resource for finding and connecting with businesses in your community.
Why build a Yelp clone on WordPress
There are several reasons why you may want to build a Yelp clone using WordPress. For starters, Yelp is a popular website that receives millions of visitors each month, so creating a similar directory site can be a profitable venture.
Additionally, Yelp has a lot of features that make it an attractive platform for business owners to showcase their products and services.
By building a Yelp clone using WordPress, you can create a local business directory site that offers similar features and functionality as Yelp, but with your own unique branding and customization options.
WordPress is an ideal platform for building directory websites because it offers a wide range of plugins and themes that can help you create a powerful and functional site without needing to write any code.
Overall, building a Yelp clone using WordPress can be a rewarding project that can benefit your local community or potentially lead to a successful online business.
Main features of Yelp
Yelp allows users to search for businesses by location, category, or keyword, read reviews and ratings from other users, and leave their own reviews and ratings.
Some of Yelp’s main features include a robust review and rating system, business information such as address and hours of operation, photos and videos of businesses, and the ability to filter search results based on a variety of criteria.
In this tutorial, we’re going to emulate this functionality using Gravity Forms and GravityView.
Steps for building a Yelp clone using Gravity Forms and GravityView
Gravity Forms is a powerful plugin for capturing and managing data. GravityView is an add-on for Gravity Forms that allows you to display your form data on the front end and build dynamic web applications!
Here are the steps we will follow to build a Yelp clone using Gravity Forms and GravityView:
- First, we’ll create a directory submission form so we can add listings to our directory.
- Next, we’ll build the directory layout using GravityView
- Finally, we’ll add a map, as well as a way for users to leave ratings and reviews
Okay, let’s begin!
Creating the submission form
The first thing we need to do is create a directory submission form that will allow us to add business listings to the directory.
To create a new form in Gravity Forms, we’ll hover over “Forms” and click “New Form”. Now we can start building our form using the Gravity Forms drag-and-drop editor.
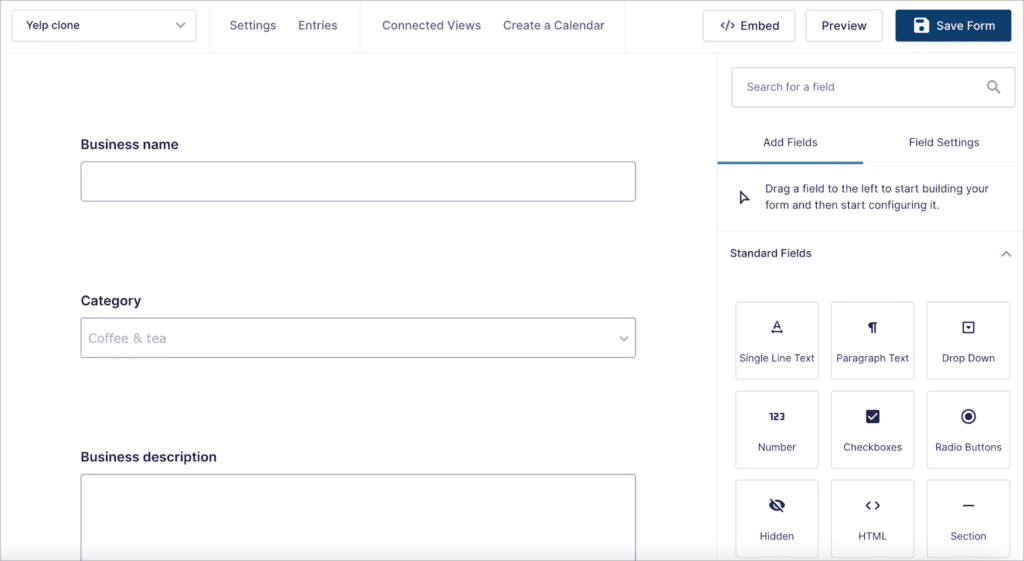
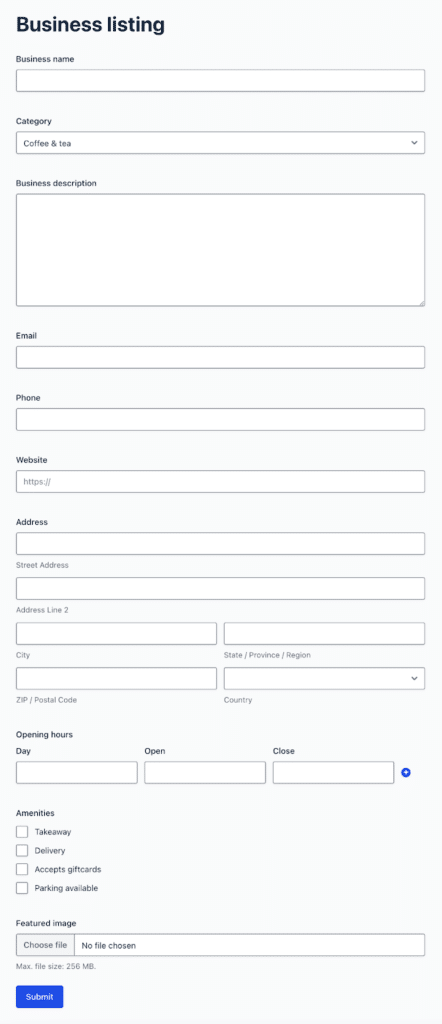
Gravity Forms supports a wide range of field types, conditional logic, and other powerful features. This allows you to build a form for capturing any kind of data you need to. For this example, we’ll add the following fields to our form:
- Business name (Single Line Text field)
- Category (Drop Down field)
- Business description (Paragraph Text field)
- Email (Email field)
- Phone (Phone field)
- Web address (Website field)
- Address (Address field)
- Opening hours (List field)
- Amenities (Checkbox field)
- Featured image (File Upload field)
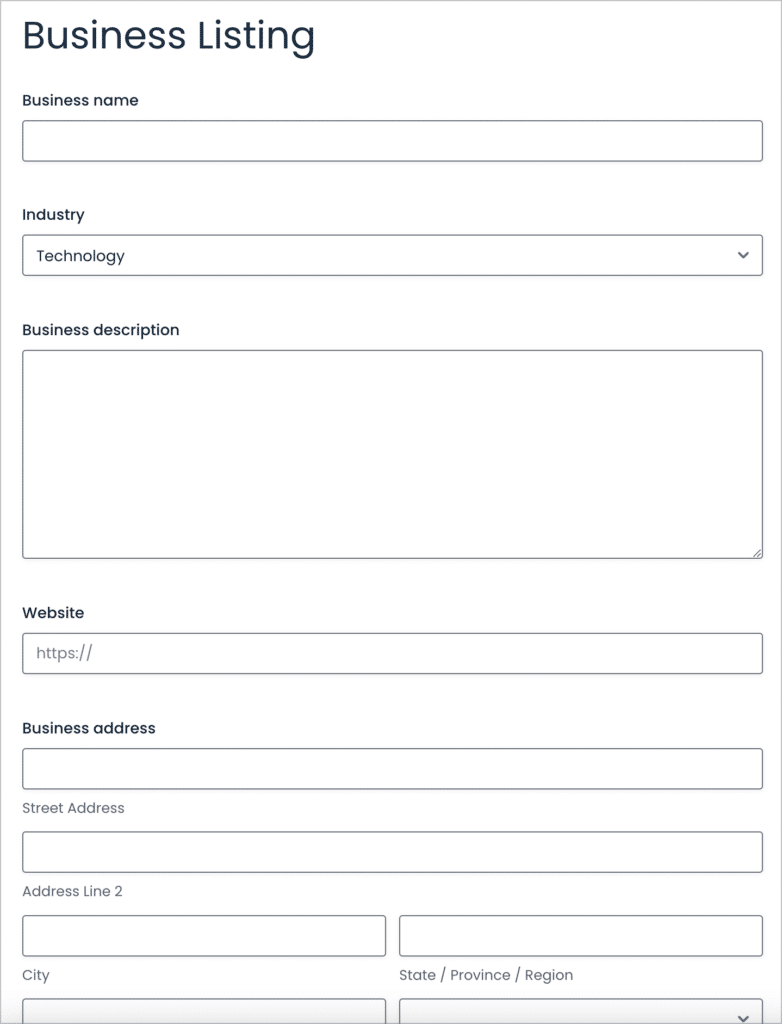
Here’s what our business listing form looks like on the front end:
Save time by downloading our business listing template and customizing as necessary!
After creating our form, we can embed it on a page or post. The next step is to use GravityView and create a View for displaying business listings on the front end.
Building the directory View
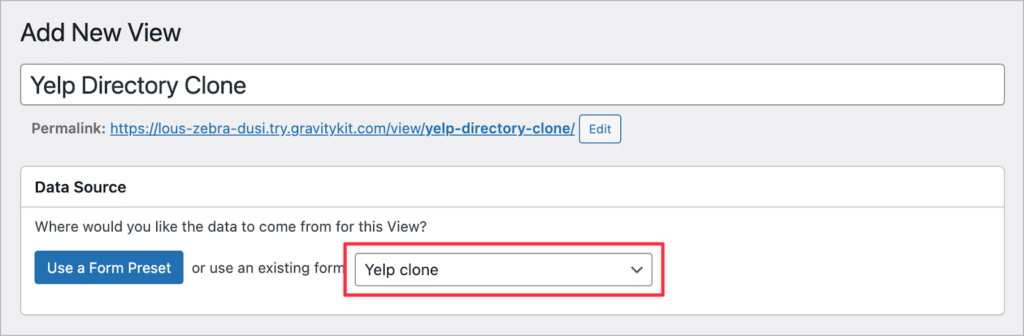
After installing GravityView, we’ll hover over “GravityKit” and click “New View”. After giving our View a name, we’ll need to select a data source. The data source for the View should be the form we created in the previous step.
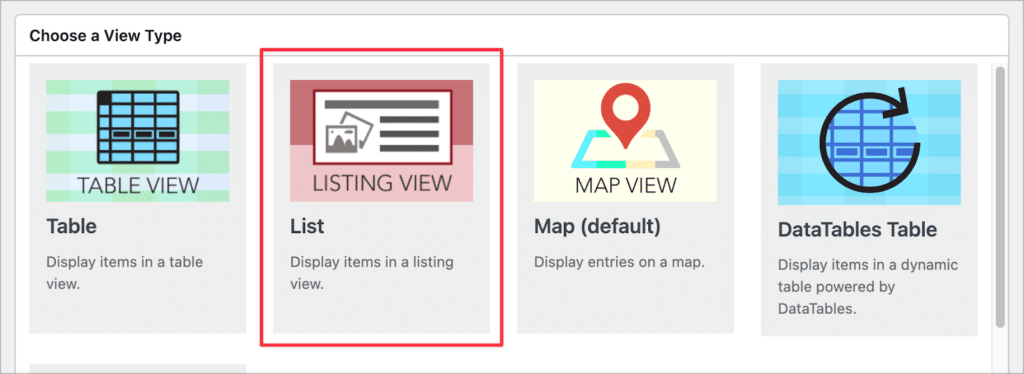
After choosing a data source, we’ll need to select a View Type. Different View Types allow us to display entries in different layouts. For our Yelp clone, we’ll select the “List” type.
After selecting a View Type, we can start constructing our View by adding fields and widgets. Fields allow us to display user-submitted values from our form, and widgets add extra functionality such as search capabilities, maps and more.
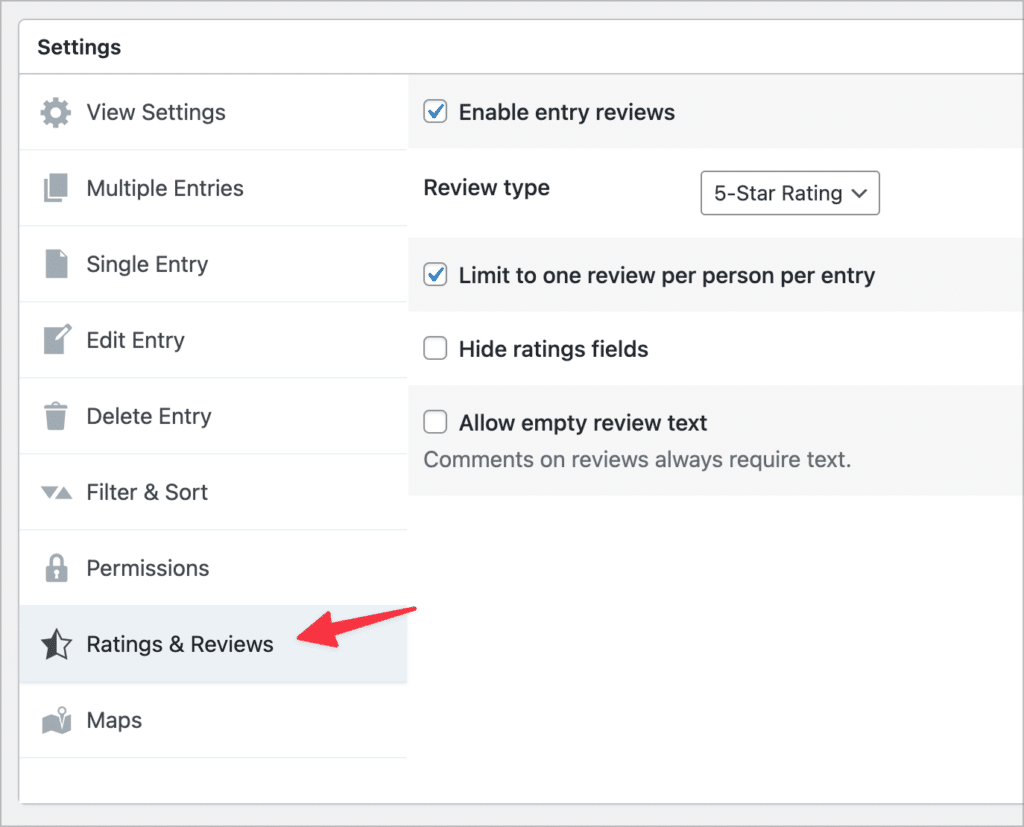
We’ll start by configuring the Multiple Entries Layout—this is the main directory page where each of our listings will show up. We’ll start by enabling entry reviews. This will allow users to write and view reviews for businesses in the directory.
To enable reviews, we’ll scroll down to the View Settings, click on the “Ratings & Reviews” tab and check the box that says “Enable entry reviews”. For this to work, you’ll need to have installed the GravityView Ratings & Reviews extension.
Now we can start adding fields to the Multiple Entries Layout. This is the main directory page where businesses will be displayed one after the other. We’ll start by adding fields to the “Entries Fields” section.
Here let’s add the “Business name”, “Stars rating”, “Featured image”, “Business description”, and “Amenities”. Next, we’ll add a “Search Bar” widget, and a “Multiple Entries Map” widget to the “Top Widgets” area.
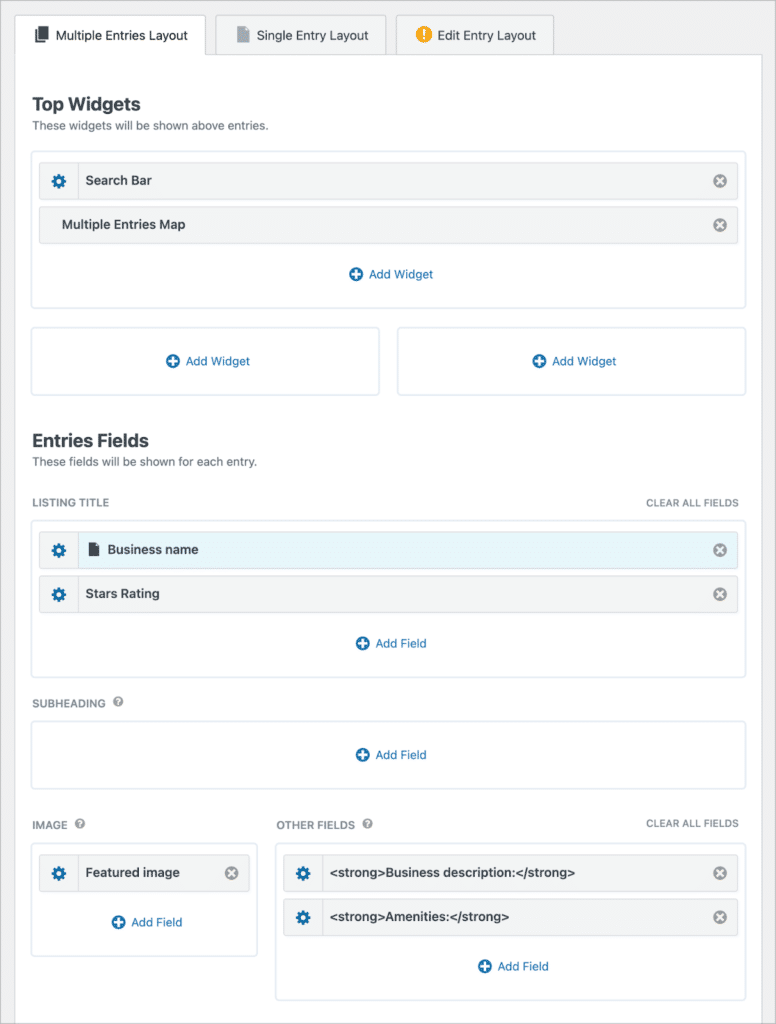
To configure the search settings, we can click on the gear icon next to the widget label. Now we can add additional search inputs, and modify the search functionality.

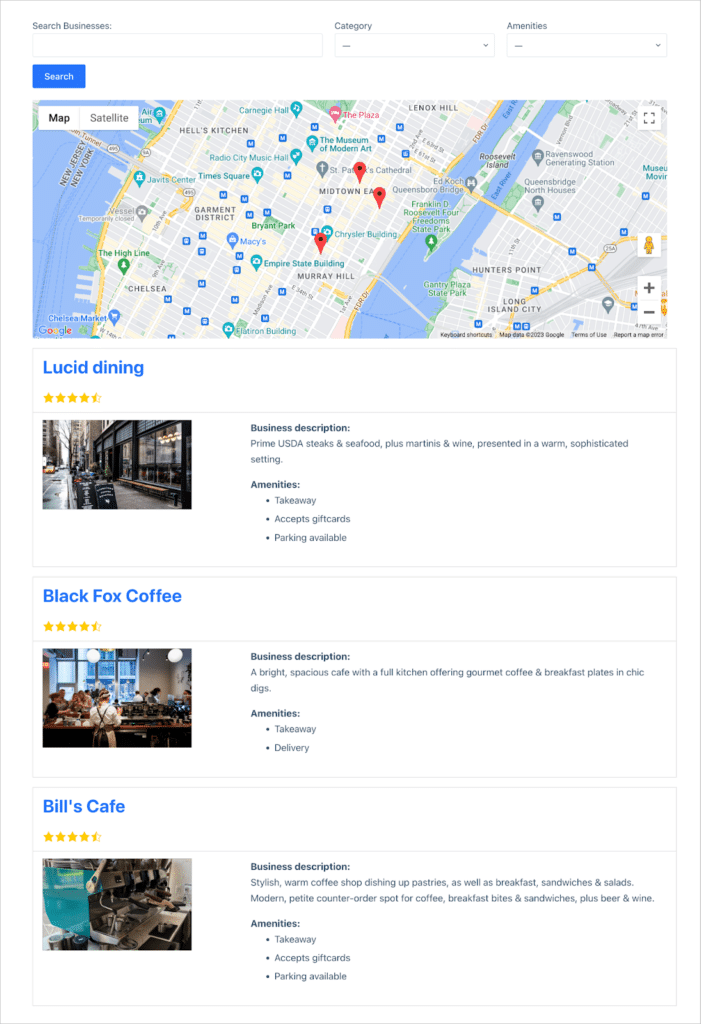
Here’s what the Multiple Entries layout looks like on the front end:

Next, we need to configure the Single Entry layout.
Configuring the Single Entry layout
To configure the single entry, we’ll click on the “Single Entry Layout” tab at the top of the View editor. Here we can configure the single entry page which will display more details about a business.
We’ll add most of the remaining form fields here, allowing users to view more information about each business. Because we enabled reviews, all business reviews will show up here.
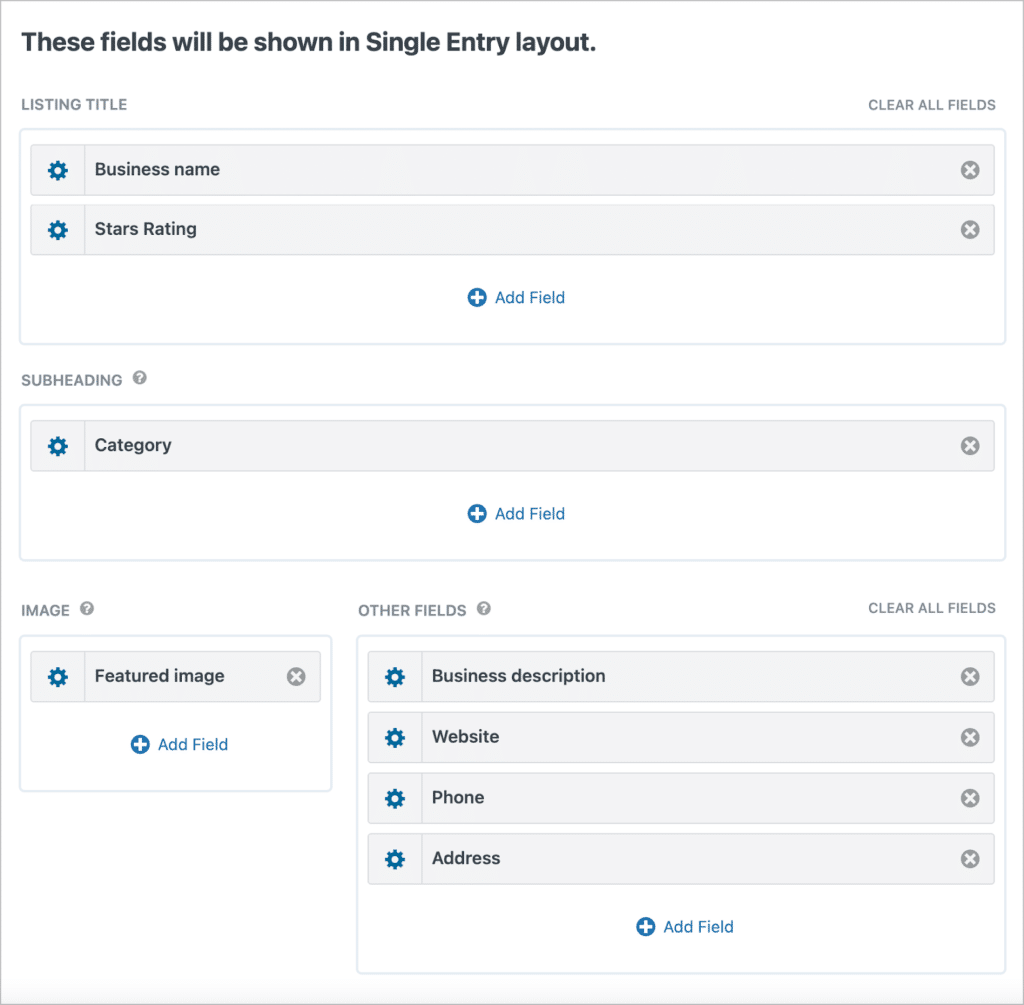
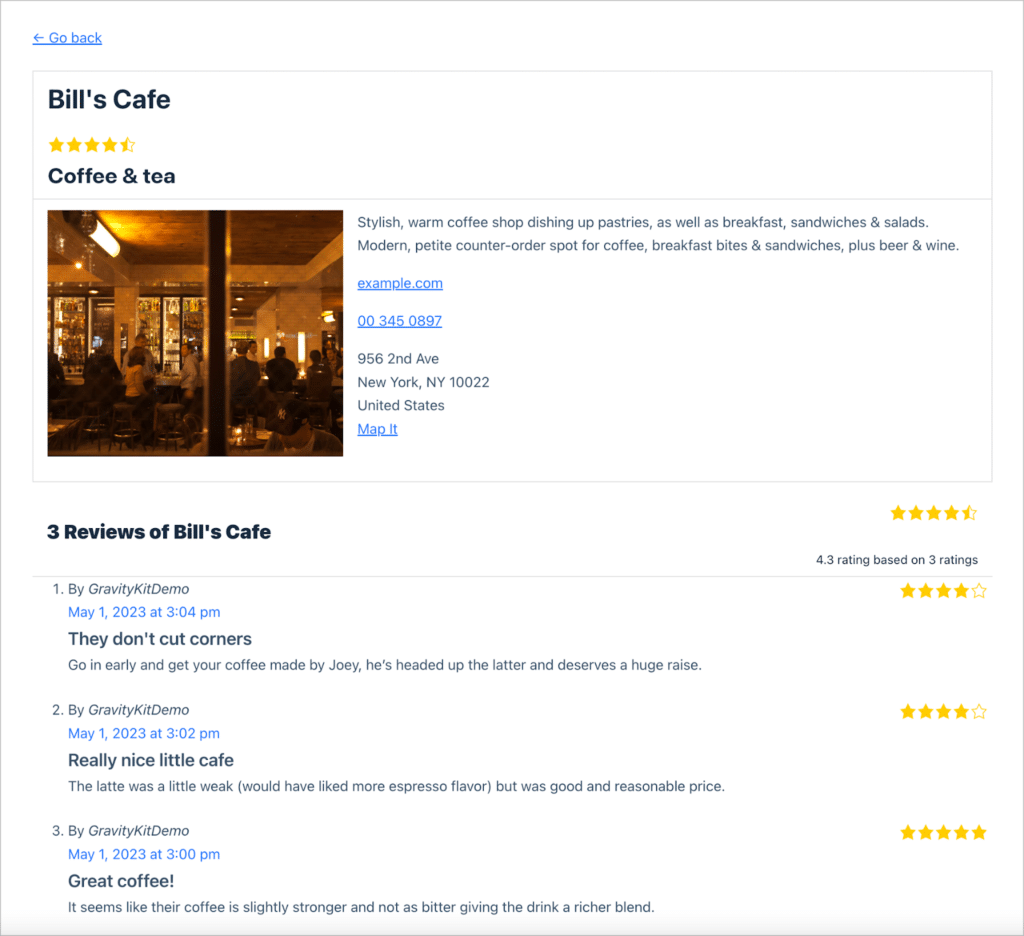
Here is what the single entry page looks like on the front end:

That’s it! We’ve successfully built a Yelp clone using Gravity Forms and GravityView.
Bonus: Customizing your Yelp clone using Gravity Forms and GravityView
In this tutorial, we showed you how to build a simple Yelp clone on WordPress. Using Gravity Forms and GravityView, there are many ways to improve and customize your Yelp clone.
Here are some extra functionalities you can add using extensions:
- Add more filtering options using GravityView’s A-Z Filters extension
- Allow directory listings to be featured using the Featured Entries extension
- Improve SEO and add social share buttons using the Social Sharing & SEO extension
- Gain finer control over which entries show up in a View using the Advanced Filtering extension
Build your own Yelp clone using GravityView
In this post, we laid out a step-by-step guide to building a Yelp clone on WordPress! We used Gravity Forms to capture business data and GravityView to display that data in a directory-style layout.
If you found this tutorial helpful, you may want to check out some other tutorials on our blog. If you’re ready to start experimenting with GravityView, sign-up for a free demo site and start building today! You can also check out our guide on how to build a Craigslist clone.

Helpful tips right in your inbox.
Subscribe to get the latest articles, information on releases and helpful Gravity Forms tips!
More articles

How to build a WordPress CRM without code (a contact database you own)
Build a simple WordPress CRM with GravityView. Turn the Gravity Forms entries you already collect into a no-code contact database you own, with no monthly fees.

Launch Log: Distance sorting for radius searches, DataTables search improvements, and import reliability fixes
The latest GravityKit releases add distance sorting to map searches, bring built-in search to DataTables, and fix GravityCharts and GravityImport edge cases.

WordPress page builder market share 2026: Elementor leads at 32.67%
Elementor reaches 32.7% of WordPress sites. WordPress Block Editor 20.6%, wpBakery 8.5%, Divi 5.7%. Latest HTTP Archive crawl, share-of-WordPress basis throughout.