Published
•
Updated
How to display user-uploaded images in Gravity Forms (with examples)
Display user-uploaded images from Gravity Forms submissions using GravityView. Build photo galleries, user profiles, and contest displays on the front end without code.
Want to turn user-submitted images into dynamic, front-end displays? With Gravity Forms’ File Upload field, users can easily upload images—but what if you could showcase those uploads automatically? Imagine building interactive image galleries, vibrant user profiles, or even custom portfolios—all without coding!
In this post, we’ll show you how to display uploaded images using GravityView, transforming your form submissions into visually engaging content. Let’s dive in.
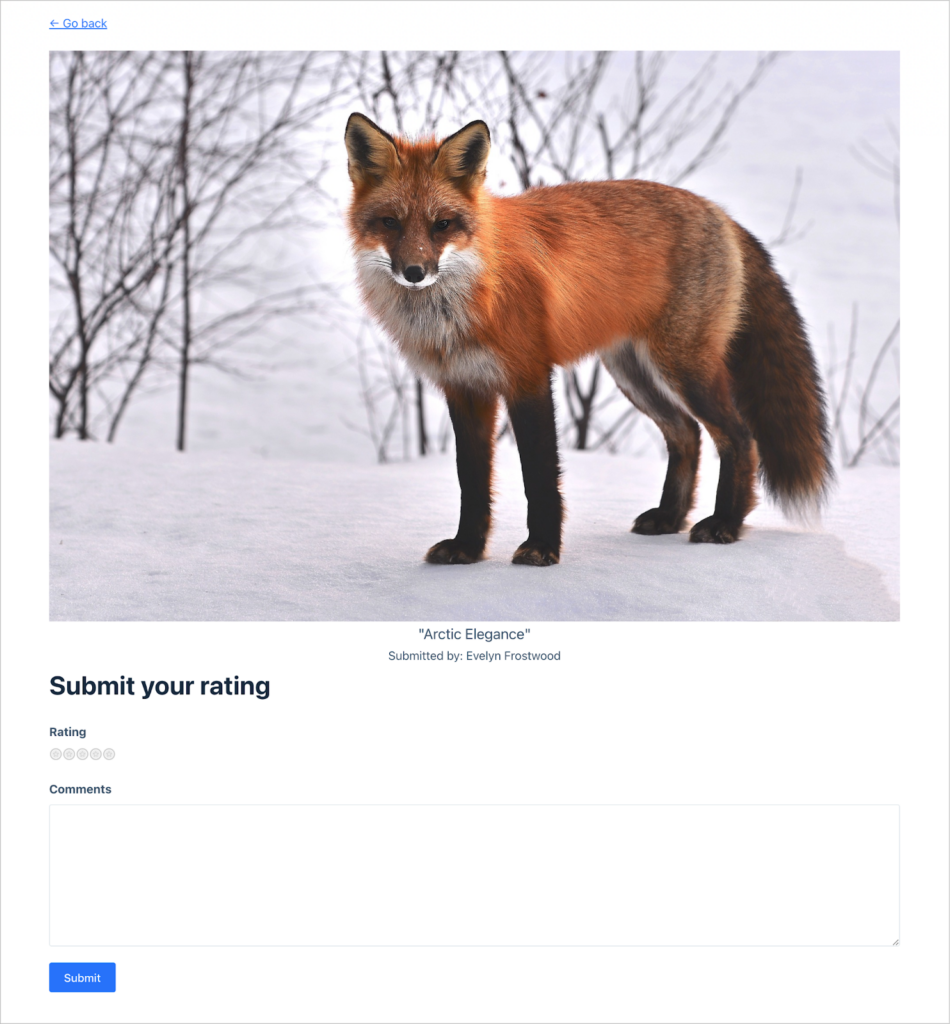
Example: Hosting an art or photo contest
In the below example, we’re using Gravity Forms and GravityView to host a photography contest—a competition where individuals submit their best photographs for judges to critique. Similar to an art competition, judges score the submissions based on a range of criteria, and the top scoring entry wins!
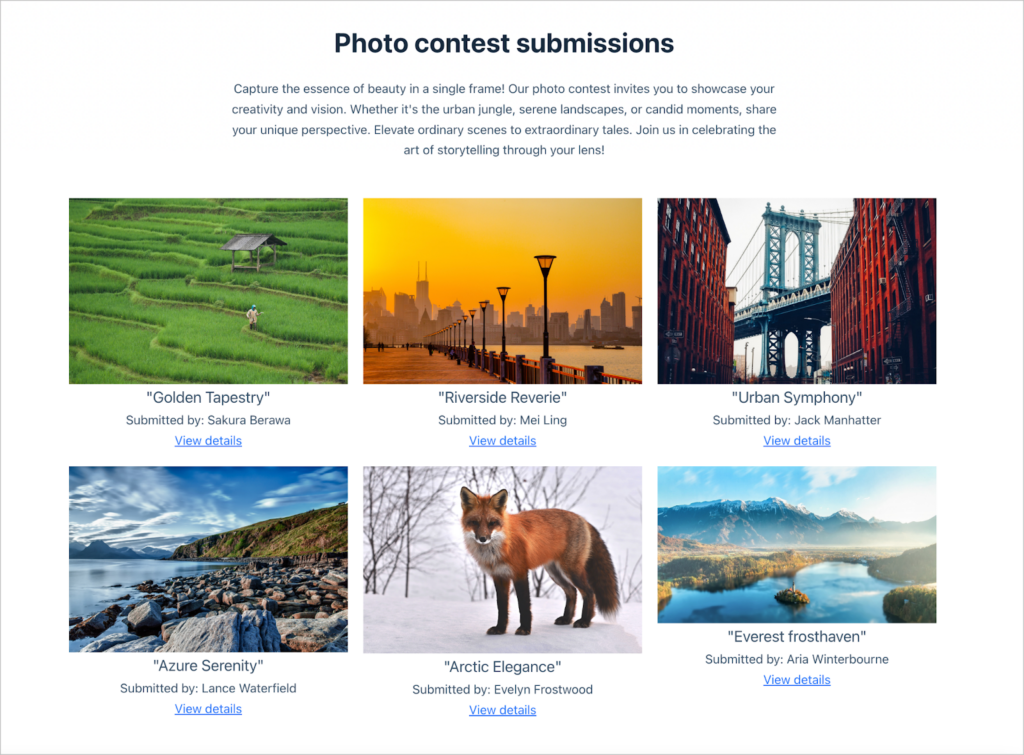
Artists upload their submissions via a Gravity Form, and GravityView handles displaying the submitted photos on the front end for judges to critique.
Pro tipIf you want to host your own art contest, read our tutorial on hosting a photography contest using GravityView.
Uploading images with Gravity Forms submissions
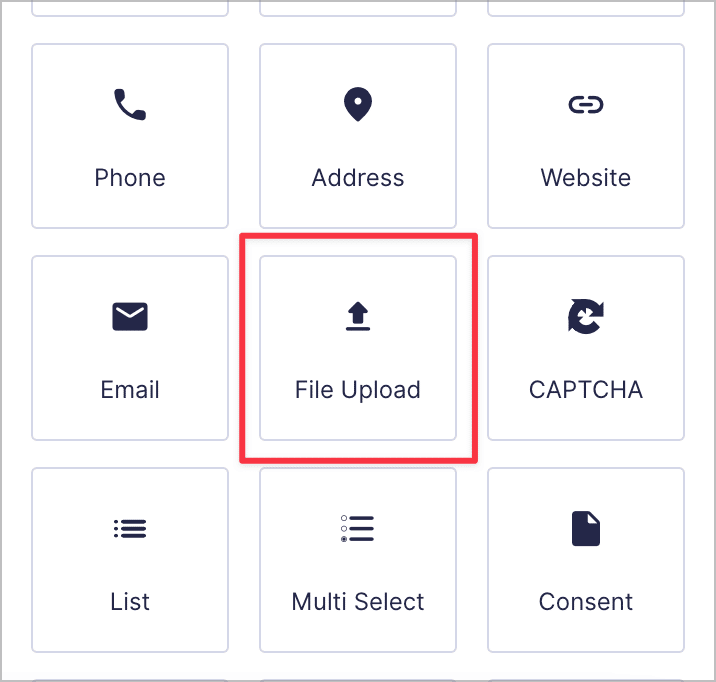
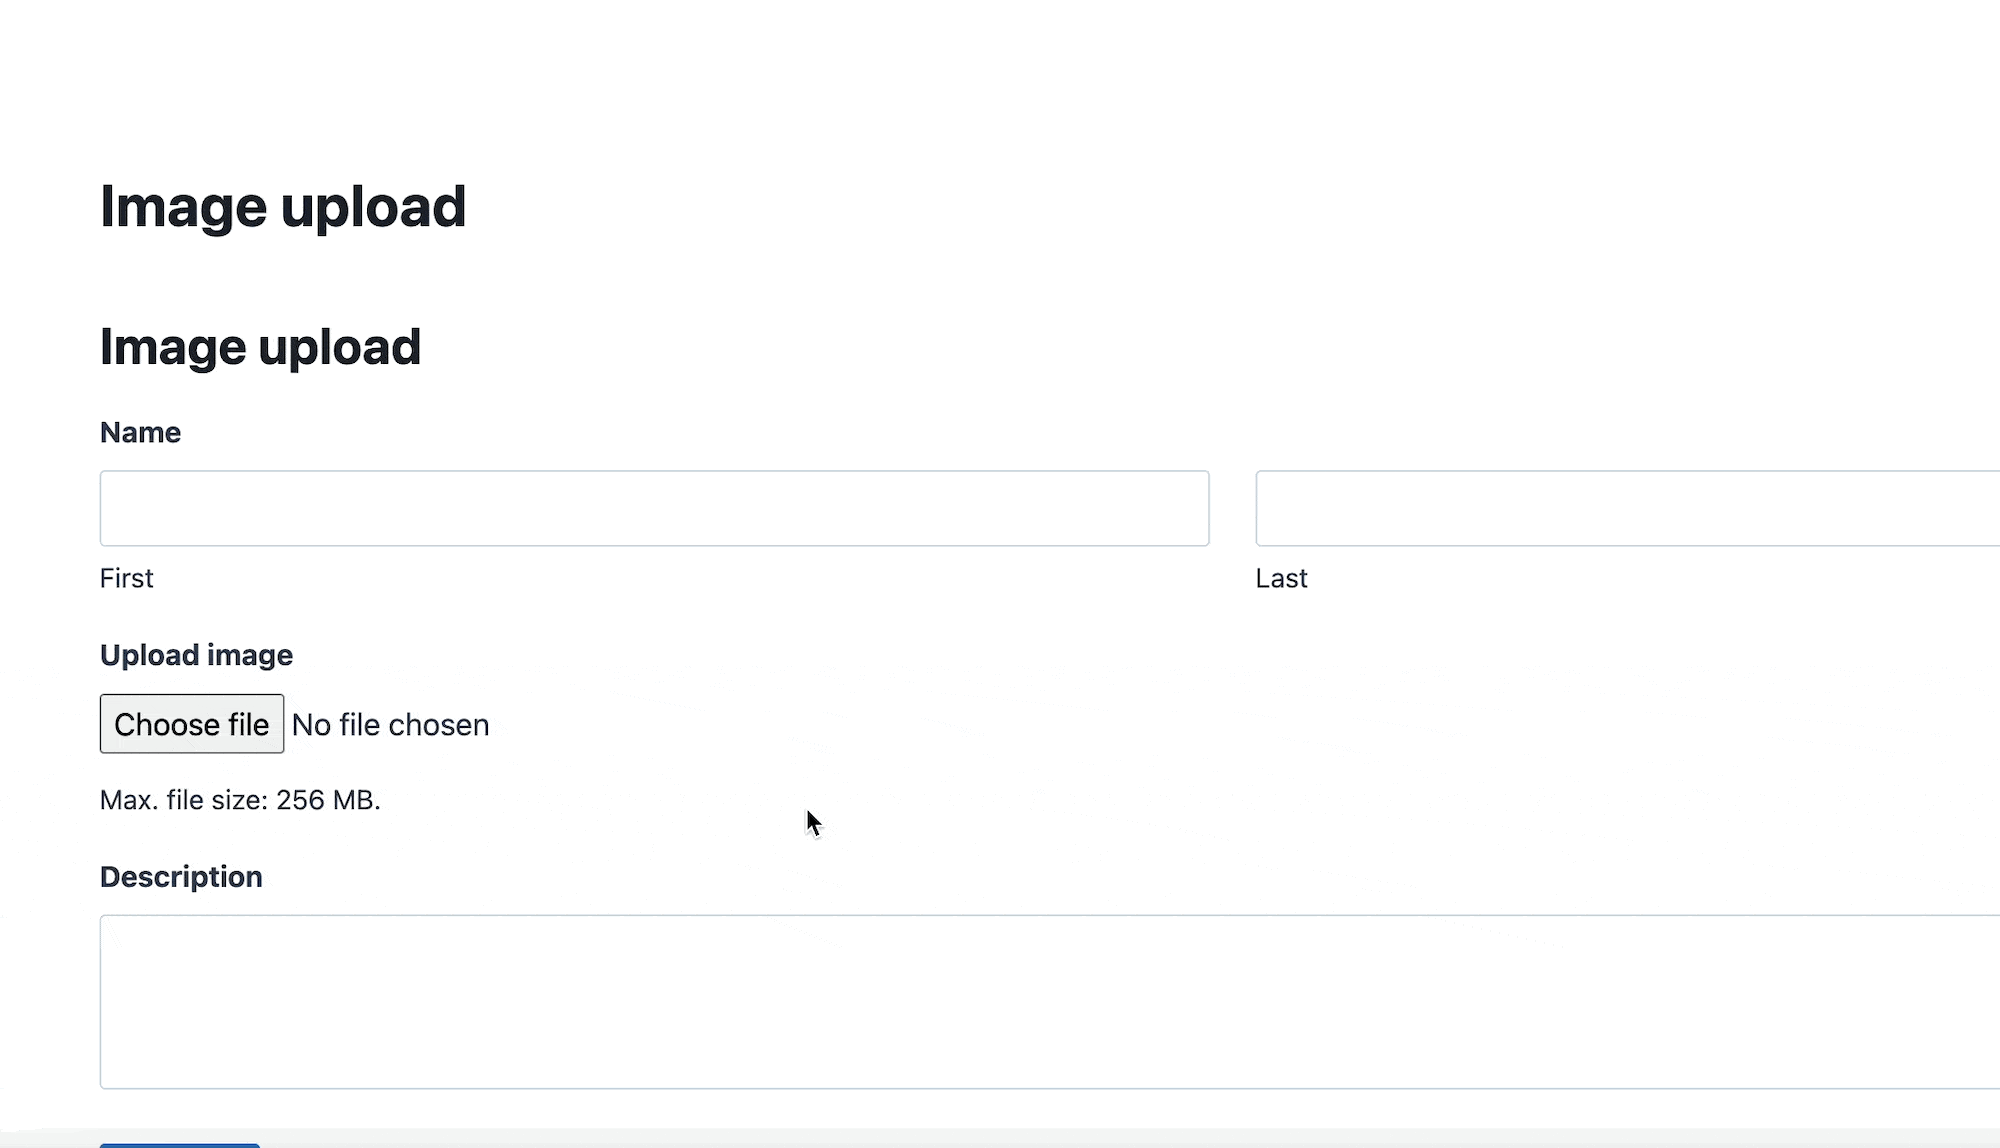
You can allow users to upload images with their form submissions by adding a File Upload field to your form. This advanced field type enables users to upload images, documents and other files as part of a form submission.
To add a File Upload field to your form, open the visual editor, open the “Advanced Fields” tab, and select the “File Upload” field.
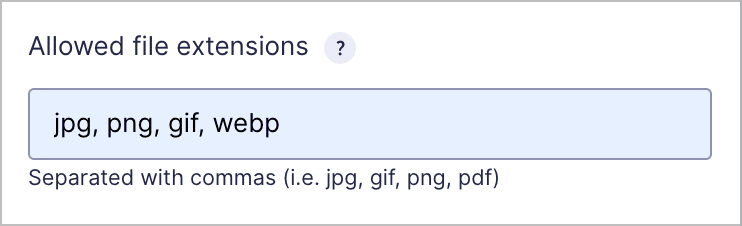
From within the field settings, you can limit the allowed file extensions to ensure that users can only upload image files. You also have the ability to set a maximum file size.
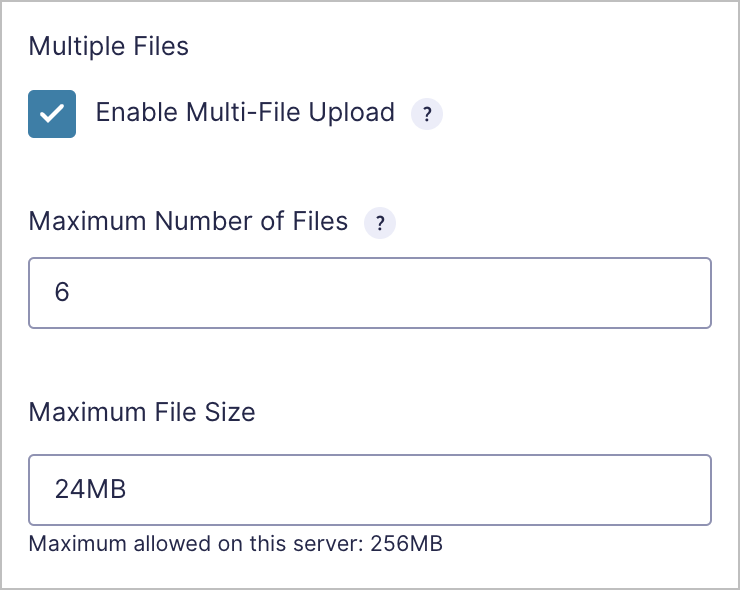
If you want users to be able to upload multiple images, simply enable the “Multi-File Upload” feature in the field settings and specify the maximum number of files.
Creating a form with a File Upload field is the most straightforward method of allowing users to upload images using Gravity Forms.
However, there are also several other image upload add-ons that give you more options and flexibility when uploading image files.
Gravity Forms image upload add-ons offer advanced features
GP File Upload Pro and Image Hopper are two popular image upload plugins for Gravity Forms. File Upload Pro adds additional functionality to the existing File Upload field, such as the ability to sort, crop and preview images.
The Image Hopper plugin is more sophisticated and includes a range of powerful functionality such as the ability to crop images, add markup, select filters, and much more. For an in-depth comparison of these two plugins, read our full review of file uploaders.
Displaying uploaded images on the front end using GravityView
GravityView is an add-on for Gravity Forms that allows you to display your form data on the front end. Using GravityView’s intuitive drag-and-drop interface, you can create attractive displays and build powerful web applications—all with no code.
To get started with GravityView:
- Create a new View and give it a name
- Link it to your form by selecting the form as the data source for the View
- Choose a View type. The View type you select will depend on how you want your data to be displayed on the front end.
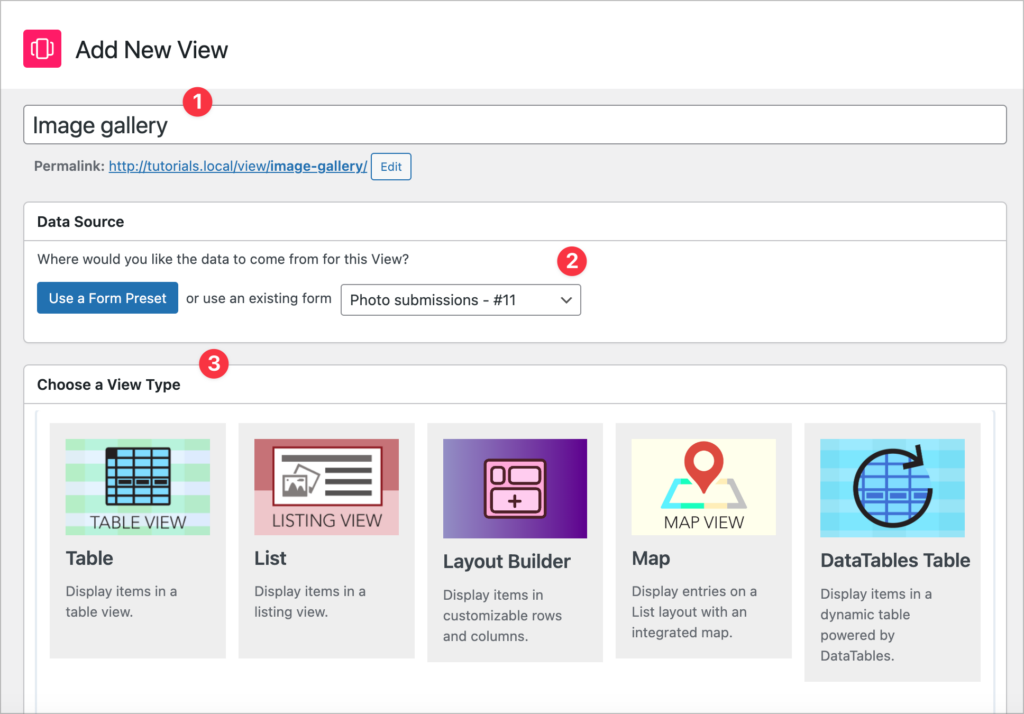
After selecting a View type, you can start configuring your View using the visual, drag-and-drop editor. Arrange your fields, add widgets, and take advantage of GravityView’s powerful customization options to create an attractive image gallery, member directory, or anything else you want to build!
When you’re done, save your View and check it out on the front end! You can display your View anywhere on your site by embedding it on a page or post using the WordPress block.
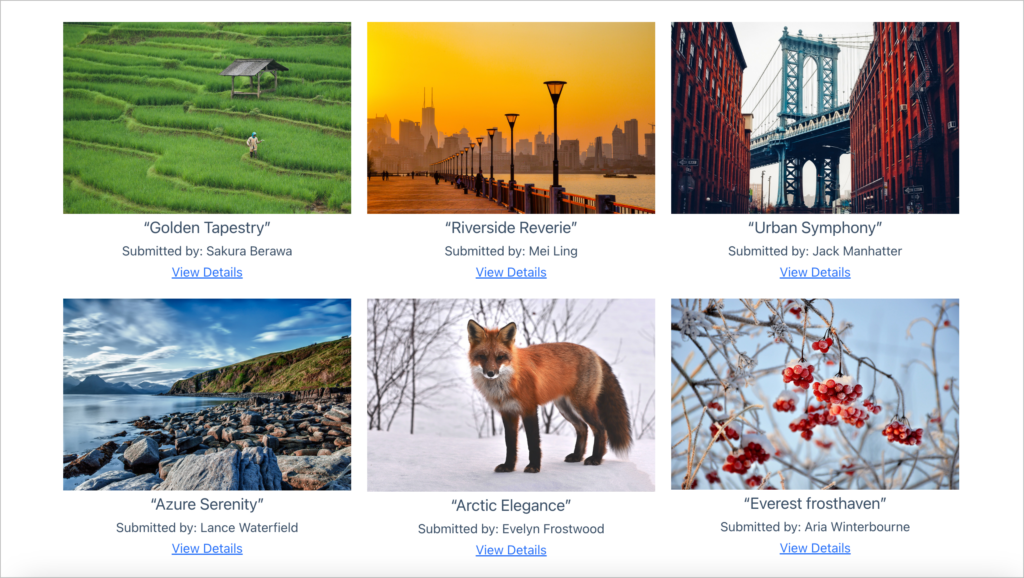
Example #1: Image gallery
With GravityView, you can turn user-submitted images into a dynamic image gallery in just a few steps. First, create a Gravity Form with a File Upload field to collect images from users. Then, use GravityView to display those images in a grid or list layout on the front end. With built-in sorting and filtering, visitors can easily browse submissions.
GravityView’s real-time updates ensure that new uploads appear automatically, making it the perfect tool for community-driven galleries or user-submitted photo contests.
Example #2: Member directory
Building a member directory with GravityView is simple. Start by creating a Gravity Form that collects user details, including names, bios, and profile pictures. Then, set up a View layout to display these submissions in a searchable, filterable directory.
You can add sorting options, custom profile links, and even restrict access based on user roles. Unlike static directories, GravityView keeps member profiles updated in real-time, making it ideal for clubs, organizations, and professional networks.

Example #3: Real estate listings
GravityView makes it easy to create a dynamic real estate listings page powered by Gravity Forms. First, design a form that allows realtors or property owners to submit details like property images, price, location, and descriptions.
Then, use GravityView to display these listings in an interactive format, complete with search and filtering options. The live database structure ensures that new listings appear instantly, making it a powerful, no-code alternative to expensive real estate plugins.

Example #4: Product reviews
With GravityView, you can easily build a user-generated review system using Gravity Forms. Start by setting up a form with fields for star ratings, review text, and product images. Then, use GravityView to display reviews anywhere on your site.
You can enable sorting by rating, add moderation controls, and even highlight top reviews. When a new review is submitted, it will appear instantly!

Example #5: Company team page
Use Gravity Forms to collect team member details such as name, role, bio, and photo. Then, arrange the entries in a stylish layout using GravityView. With built-in customization options, you can control the display format, add links to social profiles, and more. This approach is far more flexible than static pages, ensuring that team updates are easy to manage without touching code.

Pro tipYou can see GravityView in action by checking out our range of live demos and get your own free trial site preloaded with all GravityKit add-ons.
Bonus: Adding images inside a form
Now you know how to display uploaded images in Gravity Forms using GravityView, but what if you want to add images inside your forms? There are two ways to do this in Gravity Forms:
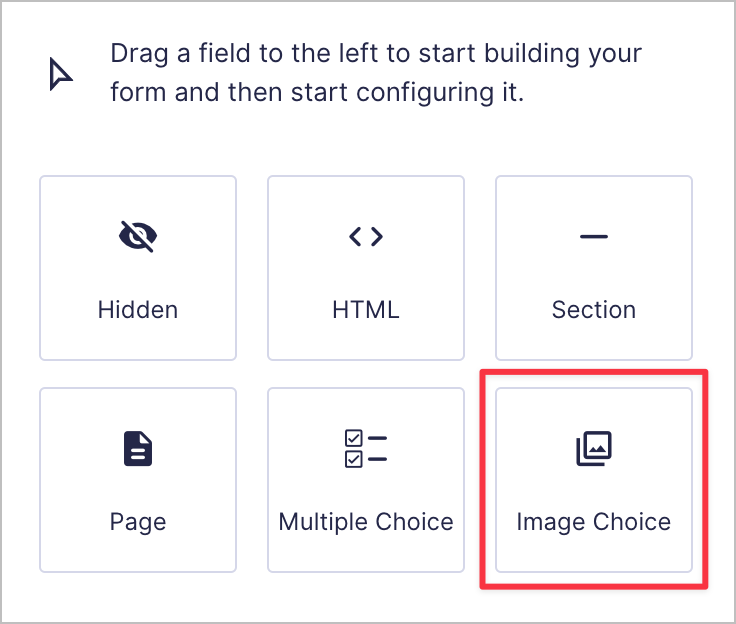
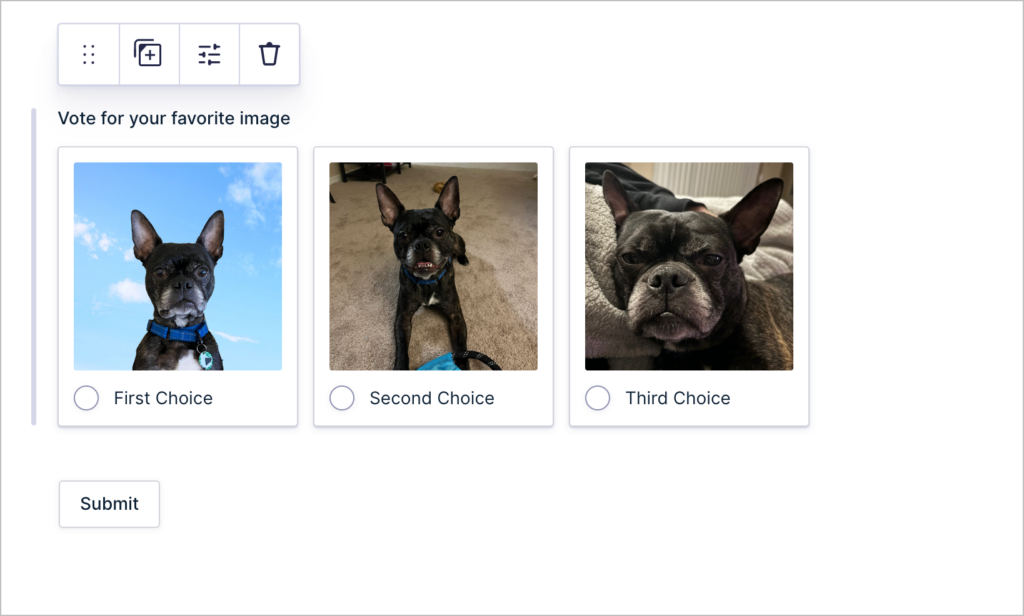
1. Add an “Image Choice” field to your form
The “Image Choice” field type enables you to add a radio buttons or checkbox field to your form where each choice has an associated image.
After adding the field to your form, open the field settings and click “Edit Choices”. Here you can add/remove choices, edit the labels and upload your images.
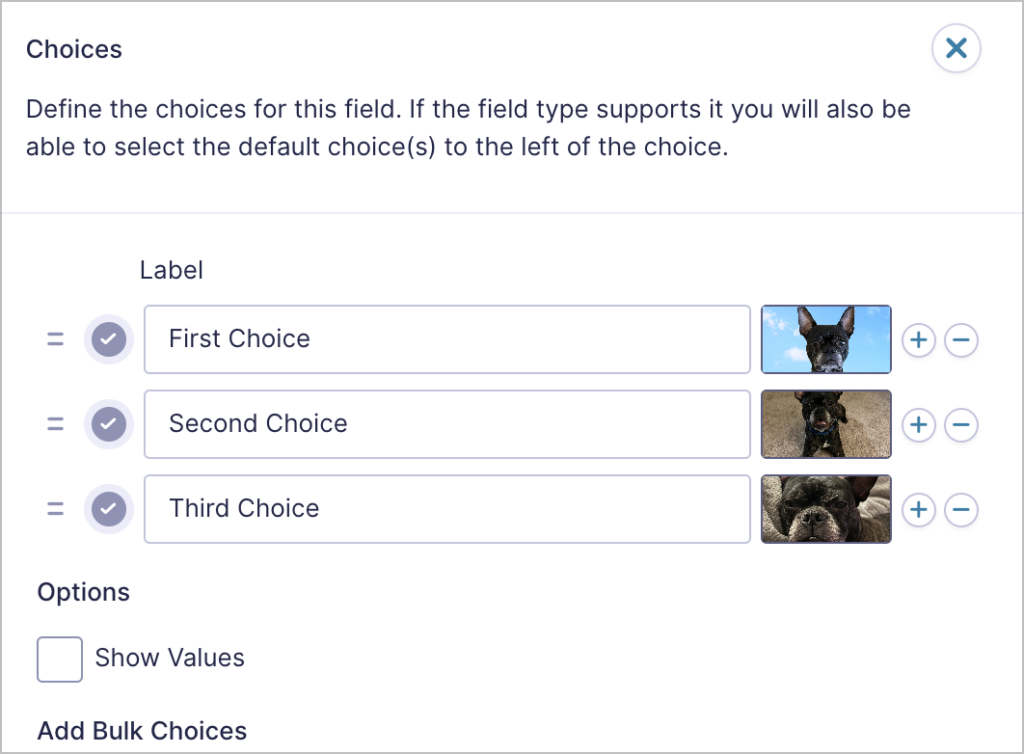
Each image will be displayed on a square card, with an option for the user to select it using a radio button or checkbox (you can choose). You can also specify the number of images a user can select or define a range (e.g., 2-3).
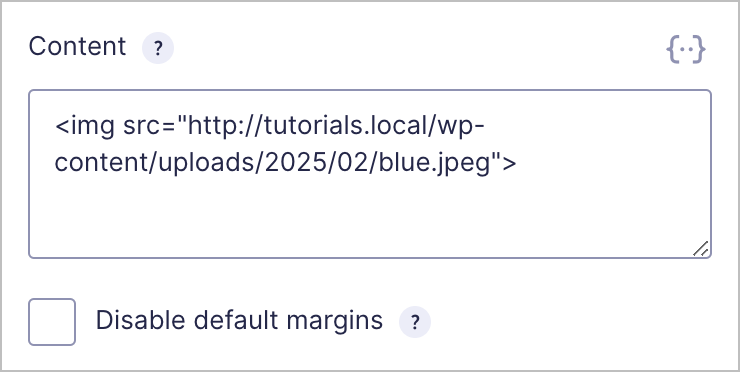
2. Add images inside an “HTML” field
The second way to add images inside a Gravity Forms form is to use the HTML field. The HTML field enables you to add custom HTML code inside your form. After adding the field to your form, simply open the field settings and add your image content inside the “Content” input box.
Pro tipTo learn more about the Image Choice field, read this helpful post on the Gravity Forms blog.
Display uploaded images in Gravity Forms
Displaying uploaded images in Gravity Forms doesn’t have to be complicated. With the right settings and the help of GravityView, you can easily showcase user-uploaded images on the front end of your website. Want to explore more ways to extend Gravity Forms? Check out our other tutorials for more powerful features!

Helpful tips right in your inbox.
Subscribe to get the latest articles, information on releases and helpful Gravity Forms tips!
More articles

Launch Log: GravityView 3.0, plus upgrades to Block MCP and GravityKit MCP
GravityView 3.0 lands with the new Vantage theme, frontend bulk actions, and AI-assisted View creation. This launch log also covers updates to GravityKit MCP, Block MCP, and Dashboard Views.

Announcing GravityView 3.0: a fresh new look, AI View creation, and native page builder support
GravityView 3.0 is here: restyle Views with the new Vantage theme, build them with AI, embed them in any page builder, and run bulk actions on the front end.

Launch Log: GravitySearch arrives, plus AI spam review and GravityView fixes
This week, releases are anchored by a brand-new product! GravitySearch joins the GravityKit suite with cross-form entry search for Gravity Forms. Alongside it, Gravity Forms Zero Spam picks up an AI-powered review step, and GravityView sees fixes for Enhanced Security, Edit Entry, and Entry…