Published
•
Updated
How to build a photo contest site on WordPress using Gravity Forms and GravityView
Build a photo contest website on WordPress using Gravity Forms and GravityView. Let participants submit photos, let judges rate entries, and display results on the front end.

Are you looking for a plugin that enables you to host a photography contest on your website?
A photography contest is a competition where individuals submit their best photographs for judges to critique. Similar to an art competition, judges score the submissions based on a range of criteria, and the top scoring entry wins!
If you’re looking to host a photo contest, you’ll need a way for participants to submit their photos and an interface where judges can view each photo and submit their ratings.
In this post, we’re going to show you how to build a robust and flexible photo contest site using Gravity Forms and GravityView. Let’s get started!
💡 Check out a live demo of the finished photo contest and get your own free trial site preloaded with all GravityKit add-ons!
Download the free photo contest form template now!
Import the template into Gravity Forms and customize as necessary.
Sneak peek
Let’s take a quick look at the finished photo contest site that we’re going to build in this tutorial.
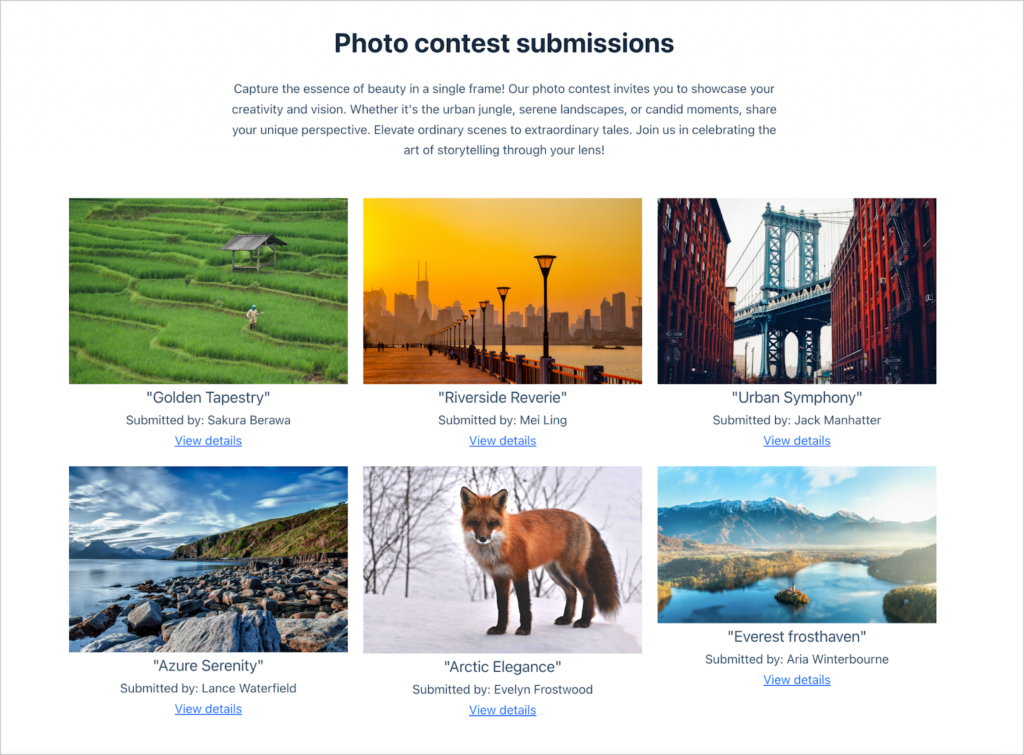
Here is the photo gallery with all the photos submitted to our contest:
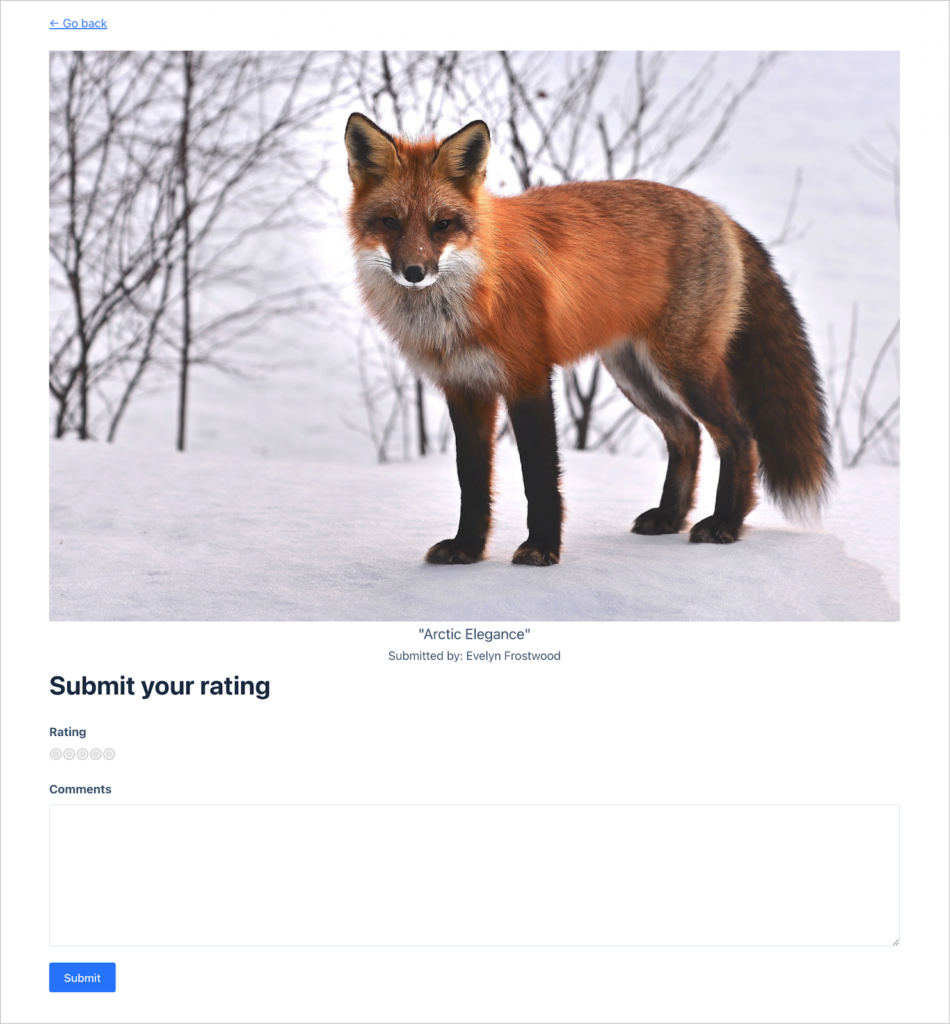
Judges have the ability to click “View details” where they can view the full-sized photo and submit a rating and comments.

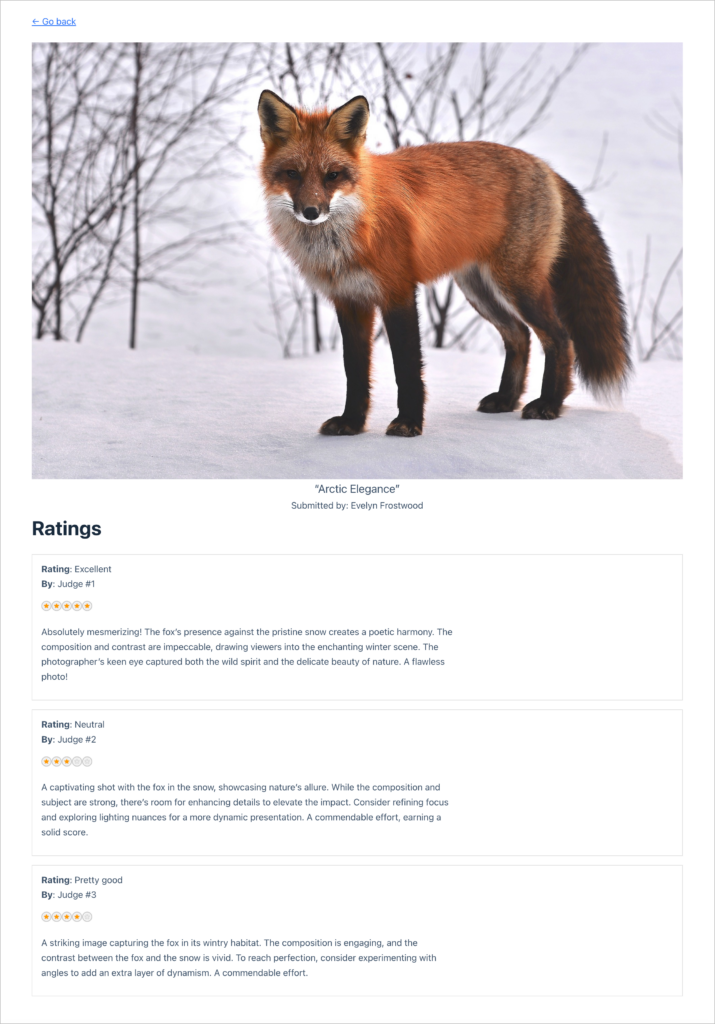
When photographers open this page, they don’t see the rating form. Instead, they see the judges’ ratings and comments.

While this is a simple example, GravityView’s powerful drag-and-drop builder enables you to easily customize the design of your photo contest!
What you’ll need
Here are the plugins and add-ons you’ll need to build a photography contest site like the one in this article:
- Gravity Forms
- Gravity Forms Survey Add-On (optional)
- GravityView
What is a photography contest?
A photography contest is a competition where individuals submit their photographs to be judged based on various criteria, such as composition, creativity, technical skill, and adherence to a theme or subject.
Professional and amateur photographers compete to showcase their talent and artistic interpretation through their submitted images. Judges evaluate the entries, and winners may be awarded prizes!
All in all, photo contests help contribute to the promotion and appreciation of photography as an art form. In fact, photography contests are a common platform for photographers to gain exposure, receive feedback, and celebrate their passion for visual storytelling.
Advantages of building a photo contest with Gravity Forms GravityView
If your organization wants to host a photography contest, or an art contest, you may be wondering why you should use Gravity Forms and GravityView to implement this functionality.
Gravity Forms allows you to capture information, including files (like high-res photos), and GravityView allows you to display that data on your website. GravityView’s advanced features also allow you to build a voting system, while giving you full control over the layout and design of the application.
Here are the steps we’re going to follow in this tutorial to build a custom photo contest:
- Create a photo submission form using Gravity Forms. This will allow users to submit their photographs (and any other important information) for entry into the competition.
- Create a View to showcase all the submitted photographs on the front end.
- Build a simple voting system, allowing judges to rate and comment on photographs, and photographers to see their ratings.
Pro tipCheck out the EarthSky Community Photos page for a real-world example of using GravityView to power a photo contest!
Creating the photo submission form
The first step is to create a form that allows photographers to submit their photos to the contest.
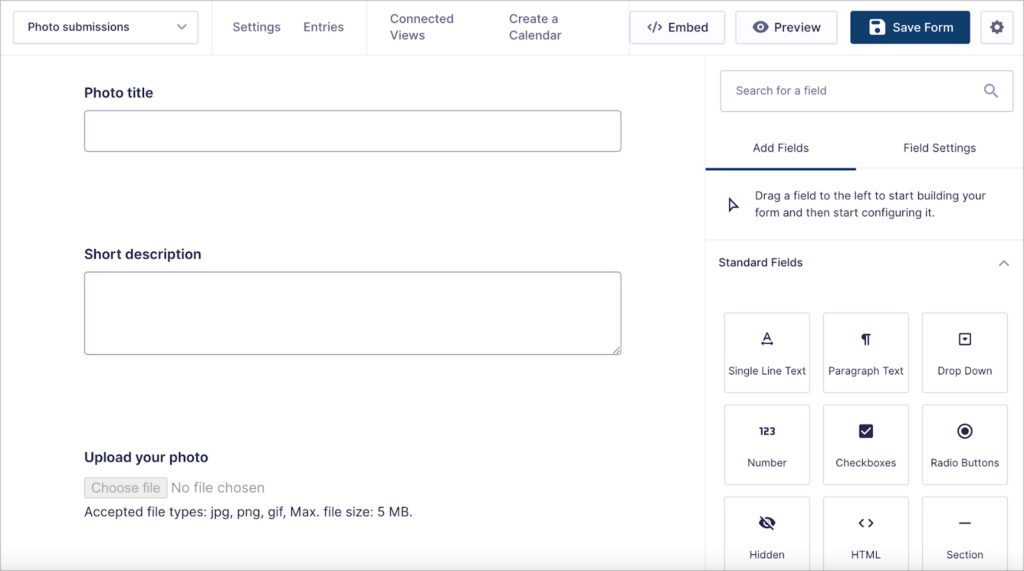
To create a new form, we’ll hover over “Forms” and click “New Form”. After giving our form a name (something like “Photo submissions”), we can start constructing the form using the Gravity Forms editor.
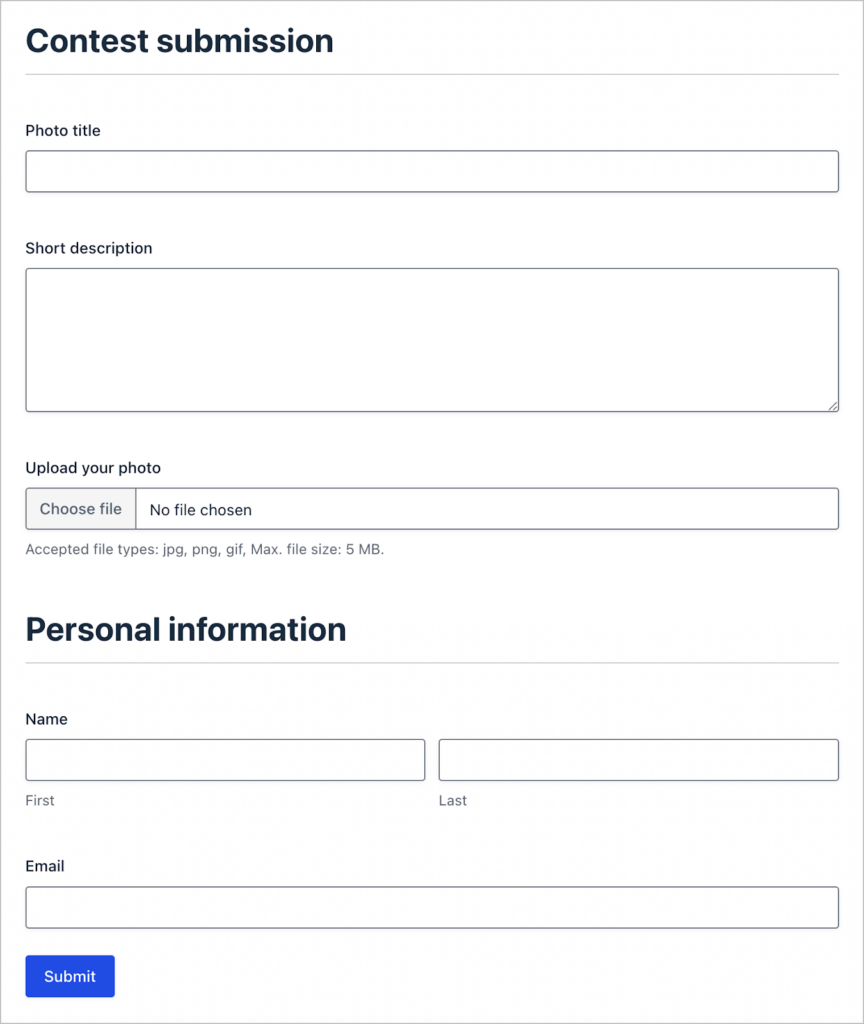
The form fields you add here will depend on the type of competition you’re running and the information you need to collect. To keep things simple, we’ll add the following fields to our form:
- Photo title (Single Line Text field)
- Short description (Paragraph Text field)
- Upload your photo (File Upload field)
- Name (Name field)
- Email address (Email field)
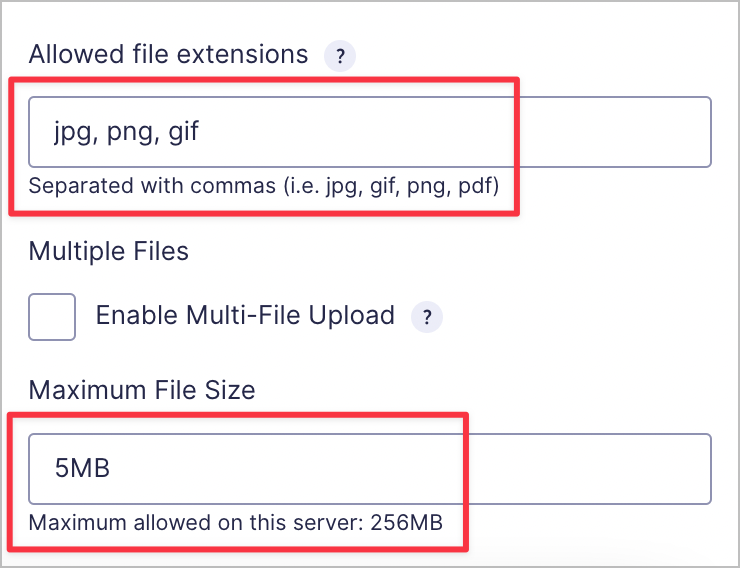
The most important field here is the File Upload field, as this is where users will upload their photograph for the competition. After adding this field to our form, we’ll open the field settings and configure the following options:
- Allowed file extensions: We’ll limit this to common image formats like jpg, png and gif.
- Multiple files: We’re going to leave this option unchecked, as we only want users to upload one photo each. However, if your competition allows users to upload multiple photos, feel free to enable this option.
- Maximum file size: We’ll set a limit here of 5 megabytes.
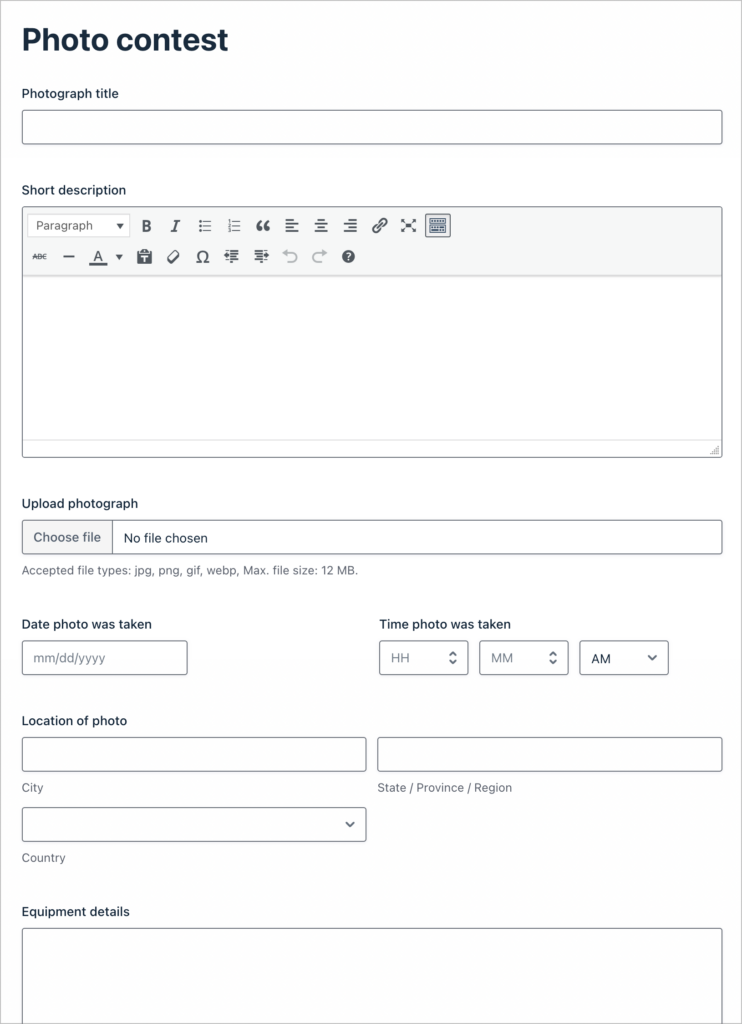
That’s it! All we need to do now is embed our form on a page that users will be able to find. Here’s what our form looks like on the front end:
The next step is to create a View to showcase submitted photographs.
Building a View to showcase photos on the front end
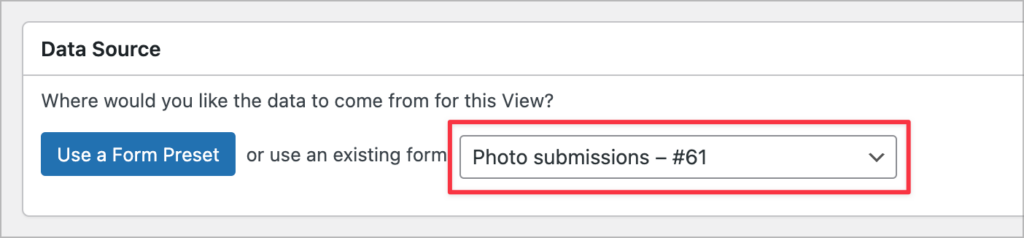
To create a new View, we’ll hover over “GravityKit” and click “New View”. After giving our View a name, we’ll need to select a data source. We’ll choose the “Photo submissions” form that we created in the previous step.
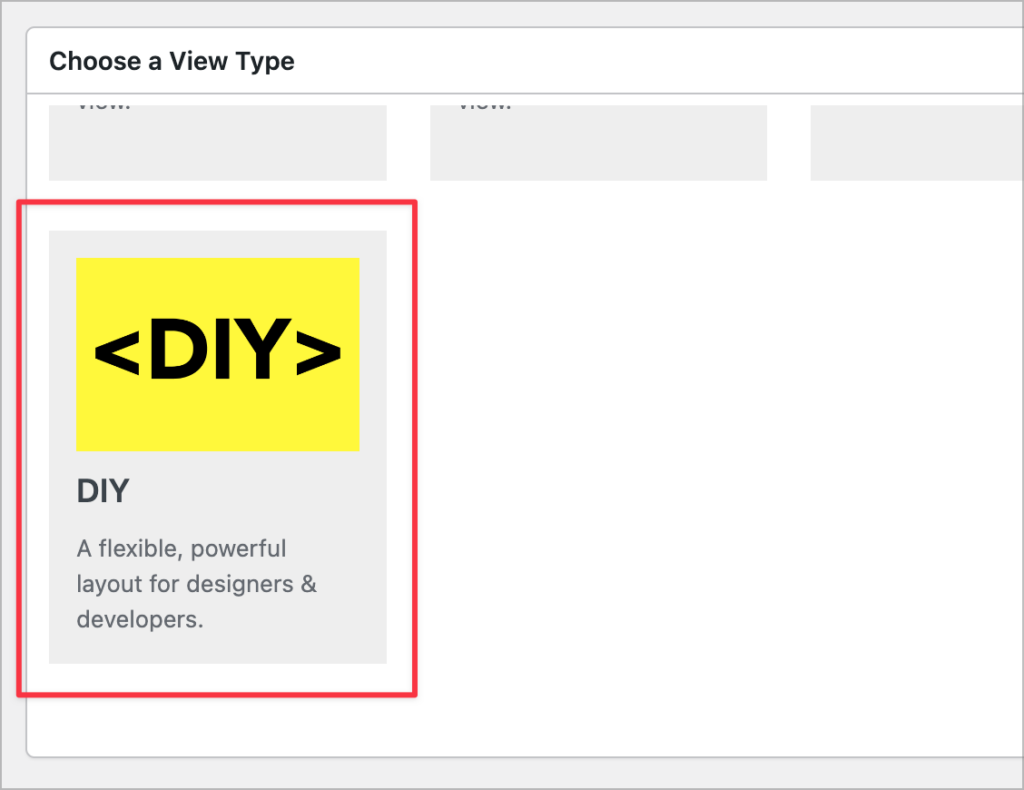
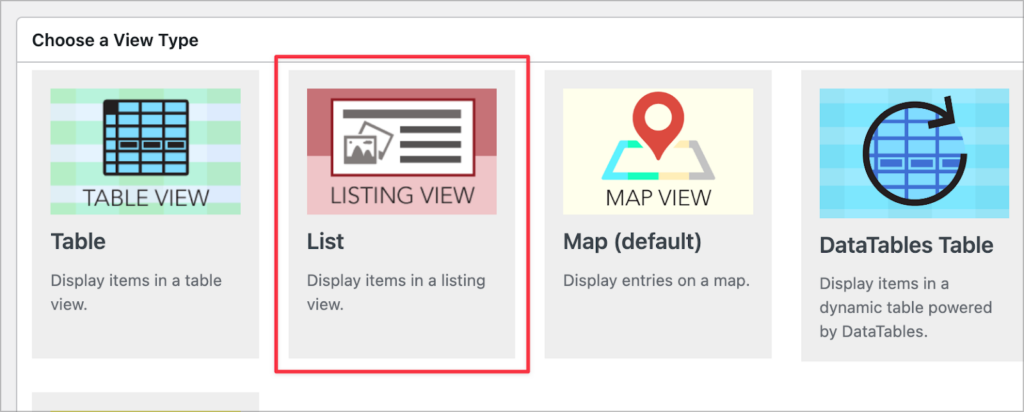
Next, we need to select a View Type. GravityView supports several preset View Types, allowing us to display data using different layouts. For this example, we’ll select the “DIY” type.
The “List” type would also work well here, but the DIY layout gives us additional flexibility when building out our design.
Pro tipLearn more about the different View types in GravityView.
Now that we’ve selected a data source and a View Type, we can start configuring the View using GravityView’s drag-and-drop editor!
Creating a grid layout
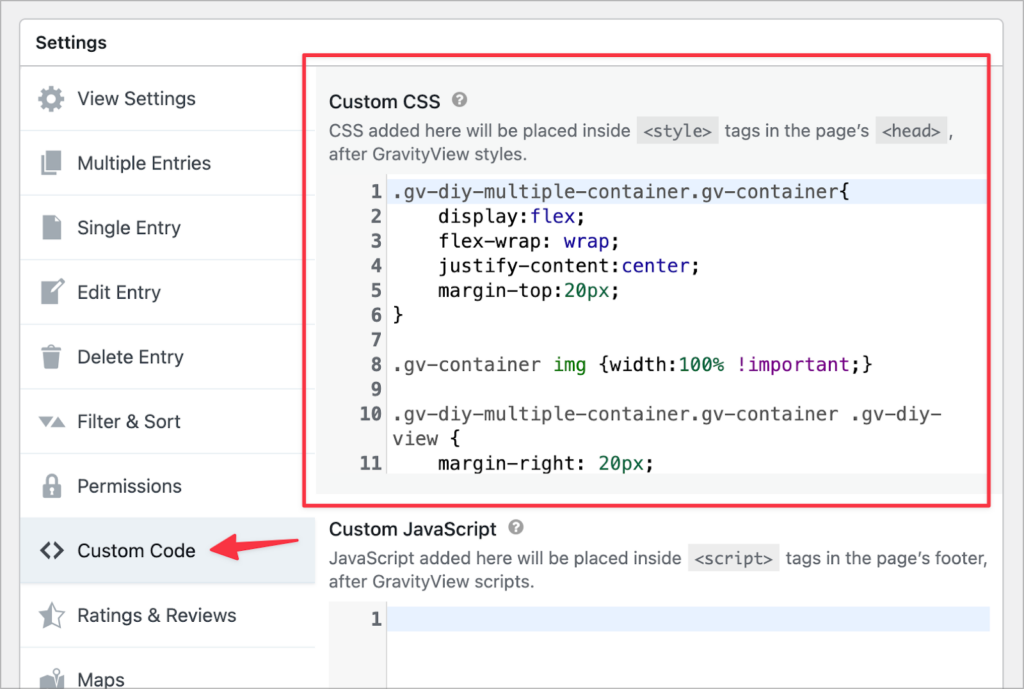
By default, GravityView will display each photo one after the other. For this example, we want to display photos in a grid rather. To transform our View into a grid, we’ll need to add the following CSS snippet to the “Custom CSS” box.
.gv-diy-multiple-container.gv-container {
	display:flex;
	flex-wrap: wrap;
	justify-content:center;
	margin-top:20px;
}

.gv-container img { width:100% !important; }

.gv-diy-multiple-container.gv-container .gv-diy-view {
  margin-right: 20px;
	width: 360px;
}
Adding fields to the View
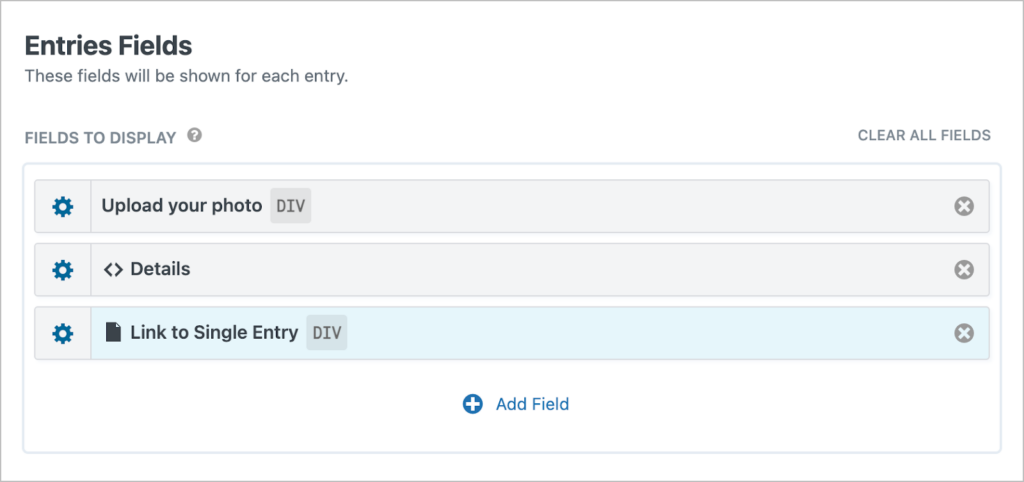
On the “Multiple Entries Layout”, we’ll add the photo field, as well as the details about the photo, such as the title and photographer’s name. We’ll also add a “Link to Single Entry” field, which will take users to a page where they can view more information about the photo.
But before we configure the Single Entry Layout, we need to build a voting system that allows judges to rate and comment on photographs. Let’s do this and then come back to the Single Entry layout to finish things off!
Creating a voting system for judges to rate photos
We’re going to create a voting system that consists of a separate form and View. The form will allow judges to add ratings and comments to photographs, and the View will display those ratings for photographers to see.
Using GravityView’s advanced functionality, we will then link ratings with photographs to ensure that ratings show up on the correct photo!
Let’s start by creating the ratings form. We’ll keep things simple by only adding 2 fields:
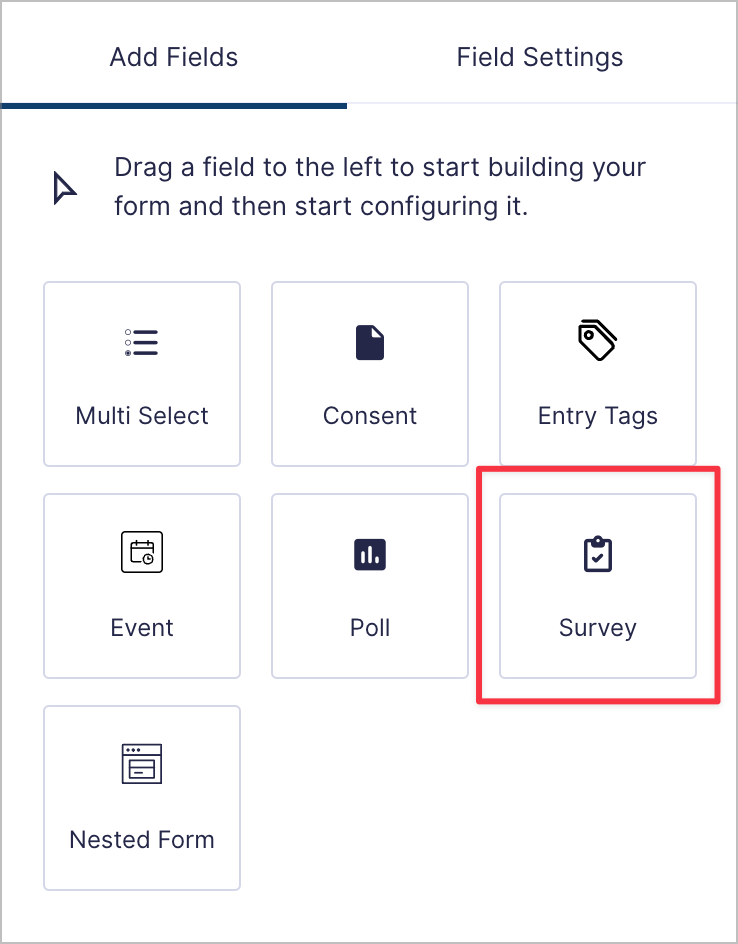
- Rating (Survey field)
- Comments (Paragraph Text field)
In this example, we’re using the Gravity Forms “Survey” field type to allow judges to give photographs a star rating (out of 5). Feel free to include additional fields and customize things as you see fit!
Here’s what our completed form looks like on the front end:

The next step is to create a simple View to display the ratings and comments underneath each photograph. For this View, we’ll select our “Submit your rating” form as the data source and select “List” as our View Type.
Next, we’ll add the rating and comments fields to the “Other Fields” section of the View Editor on the Multiple Entries tab.
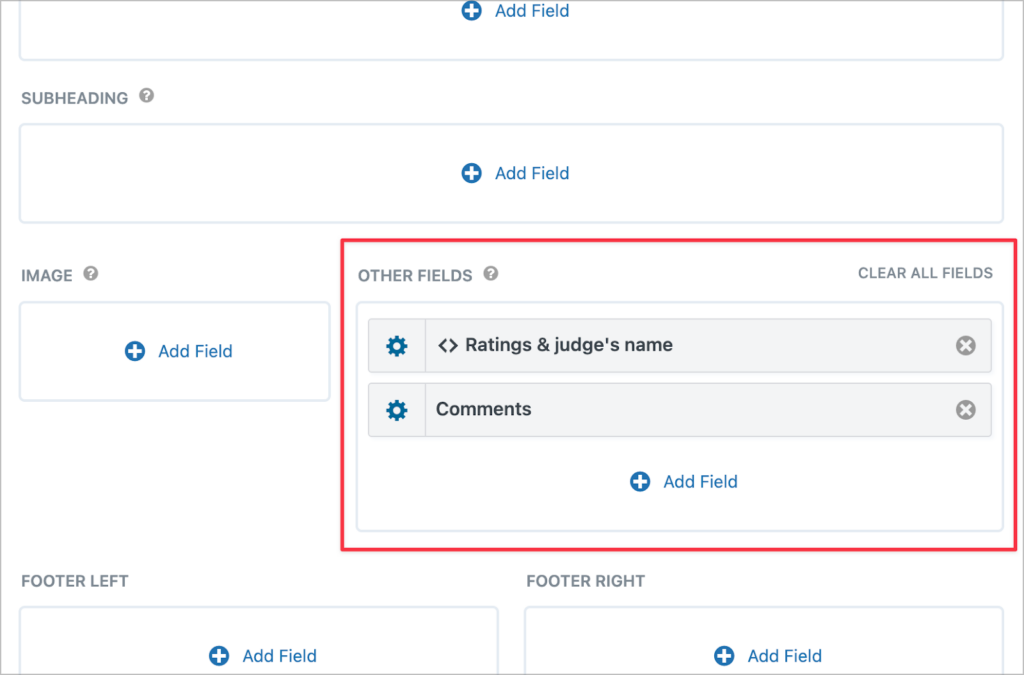
For this example, we’re using a Custom Content field to display both the rating and the user’s display name. This is helpful for seeing which judge gave which rating.
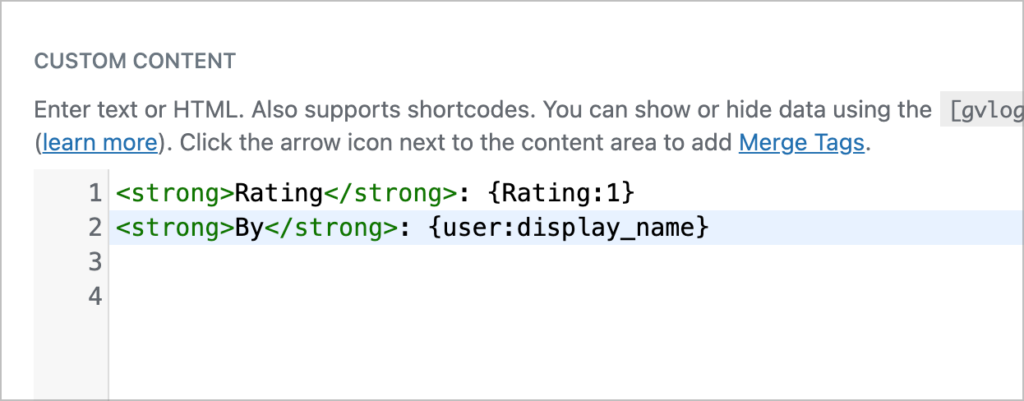
Pro tipLearn more about GravityView’s powerful Custom Content field (add shortcodes, HTML, and more to your Views!).
Okay, that’s it. Now all we need to do is tie everything together by adding the form and View to our original View.
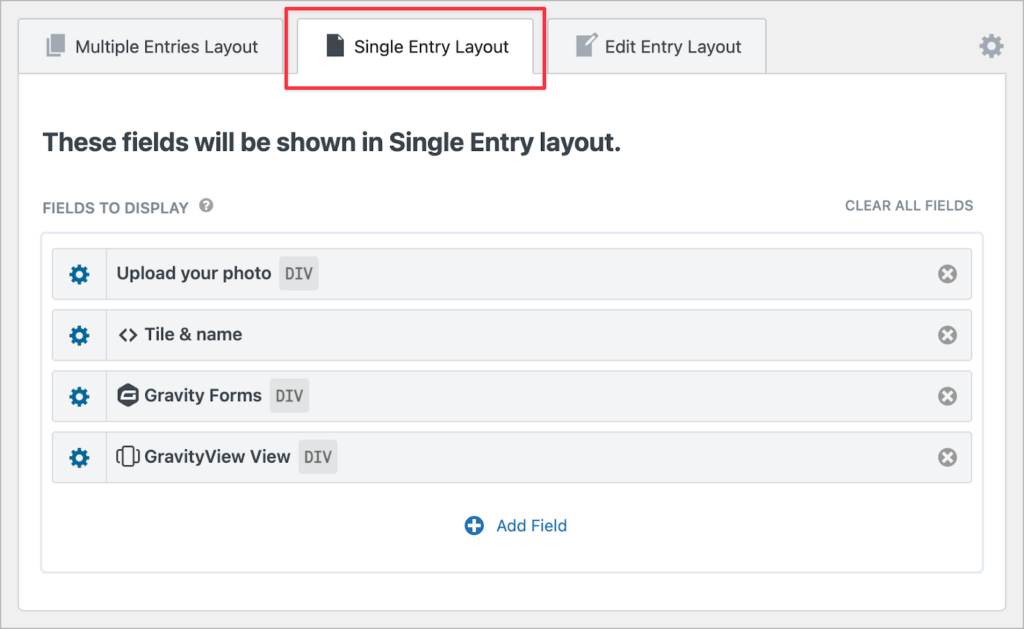
Putting things together: Configuring the Single Entry Layout
Now let’s head back to our original View and navigate to the “Single Entry Layout” tab. Here we’re going to add the photo field, the title of the photo, and the name of the photographer.
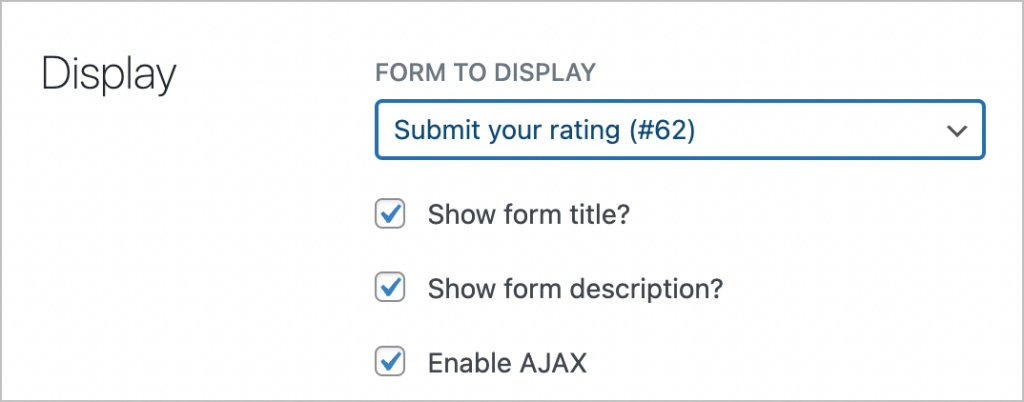
Next, we’re going to add our ratings form and View that we created in the previous step! GravityView includes a special “Gravity Forms” field for embedding existing forms into your Views. There is also a “GravityView View” field for embedding other Views into your Views!
After adding the “Gravity Forms” field, we’ll click on the gear icon to open the field settings and select our form from the dropdown menu.
After that, we’ll configure the visibility settings to ensure the form is only visible to Administrators.

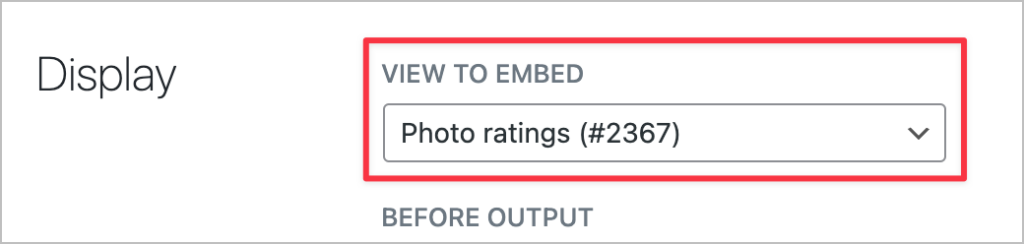
Now let’s turn our attention to the “GravityView View” field. After opening the field settings, we’ll select our ratings View from the dropdown menu.
Next, we’ll scroll down to the “Advanced” settings, where we’ll need to set the search field, search operator and search value.
- Search field: set this to
gk_parent_entry_id - Search operator: set to
is - Search value: Set this to
{entry_id}
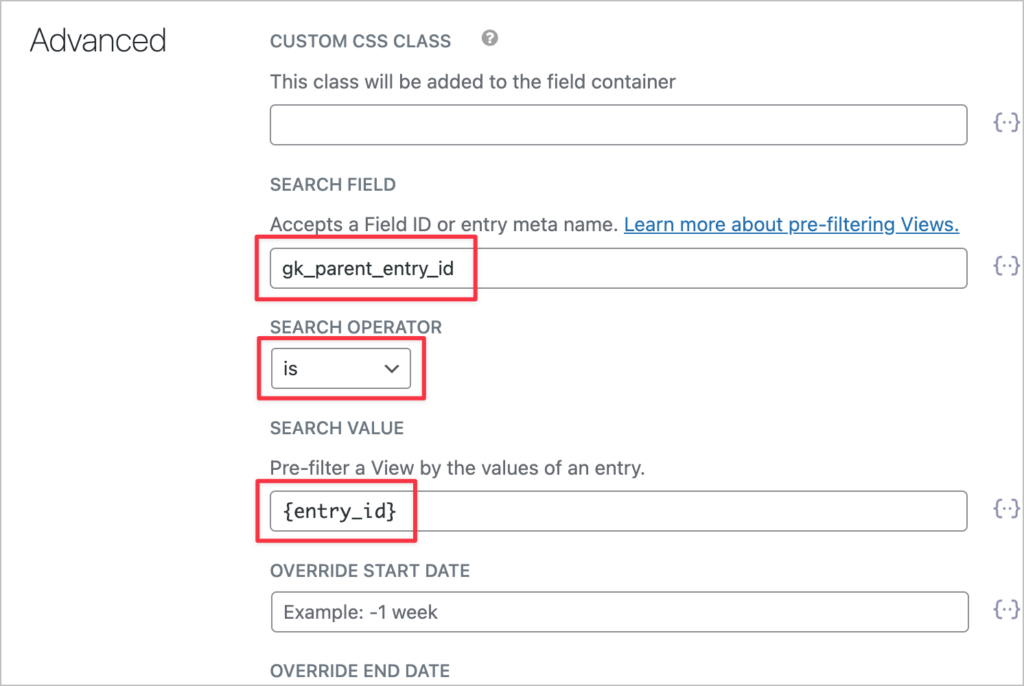
This will ensure that ratings submitted for a specific photograph will only show up for that photograph.
Okay, let’s take a look at our photo contest on the front end:

When judges click on a photograph, they will be able to add a rating and comment using the form below the photo.
When users look at the photo, they will be able to see all of the judges’ ratings and comments.
That’s it!
Host your own photo contest today
In this post, we showed you how to create a photo contest site using the powerful combo of Gravity Forms and GravityView!
By providing participants with a seamless submission process and offering judges an intuitive interface for evaluating entries, your photo contests are bound to be a resounding success.
Are you ready to start creating your photo contest site? Get GravityView today!

Helpful tips right in your inbox.
Subscribe to get the latest articles, information on releases and helpful Gravity Forms tips!
More articles

GravityKit turns 12: a year in review, and 30% off Lifetime All Access
GravityKit turns 12. A look back at a year of GravityView 3.0, GravitySearch, and AI-assisted building, plus a birthday sale on the Lifetime All Access Pass.

Launch Log: Row headers for screen readers, smarter conditional logic, and multi-View fixes
GravityView 3.1 adds row headers for screen readers, plus smarter conditional logic in GravityCalendar and fixes for DataTables, Maps, and Dynamic Lookup.

Ecommerce platform market share 2026: WooCommerce leads the web, Shopify leads the top tier
Ecommerce platform market share in 2026, from HTTP Archive data. WooCommerce leads the whole web at 6.64%, but Shopify already leads the top 1M sites.
