Published
•
Updated
How to create detailed reports in Gravity Forms and analyze your form data
Three ways to create custom reports from Gravity Forms data: CSV export for external analysis, visual dashboards with charts, and sortable front-end tables using GravityExport.

Gravity Forms in a powerful tool for collecting and managing data on your WordPress website. But what if you need to access that data for reporting purposes?
While Gravity Forms offers rudimentary support for viewing entry data and exporting to CSV, that functionality is limited, and is only accessible to administrators.
In this post, I’m going to show you three ways to create custom reports in Gravity Forms: 1) exporting entry data for external analysis, 2) building visual dashboards with charts, 3) creating tables of data that you can filter, sort, and drill into.
Wanna try it?
Spin up a demo
See GravityCharts in action on its live demo site.

1. Exporting Gravity Forms entry reports
If you simply need a way to export custom data reports from Gravity Forms, you can use the powerful GravityExport add-on. The add-on enables you to create multiple reports, with different filters and send files to remote storage locations. You can also export your data to different formats (such as Excel or PDF) for easy analysis.
After installing GravityExport and configuring your report, you can download your data using a secure, shareable URL. This makes it easy to share reports with the people who need them. For examples, you could send the report link to your marketing manager, or finance department, depending on the data you’re collecting (administrative access not required!).
Here’s an example showing how easy it is to download reports:
Here’s why GravityExport is the best Gravity Forms reporting plugin:
- Export entries in different formats
GravityExport allows you to export your form entries to different file formats including CSV, Excel and PDF.
- Safe and secure exports
Each report you create is associated with a unique and secure download URL. You can limit downloads to logged-in users only, or allow anyone to download.
- Share data easily
There’s no need to create an Admin account for users who need access to your reports. Simply send the download link to whoever needs the data.
- Remote storage
GravityExport supports remote storage, allowing you to send reports to Dropbox, FTP or a local folder on your server.
- Advanced conditional logic
Using advanced conditional logic settings, you can apply filters to your data to build custom reports.
How to generate reports for Gravity Forms using GravityExport
Here’s what you’ll need to start generating Gravity Forms reports using GravityExport.
- Gravity Forms
- GravityExport Lite (free plugin on WordPress.org)
- GravityExport (optional, provides several extra features)
Start off by going to the “Forms” page in Gravity Forms. Next, hover over your form and click on the “Settings” link. You’ll see three new feed tabs on the left. Select the “GravityExport” tab and click the button that says “Enable download URL”.

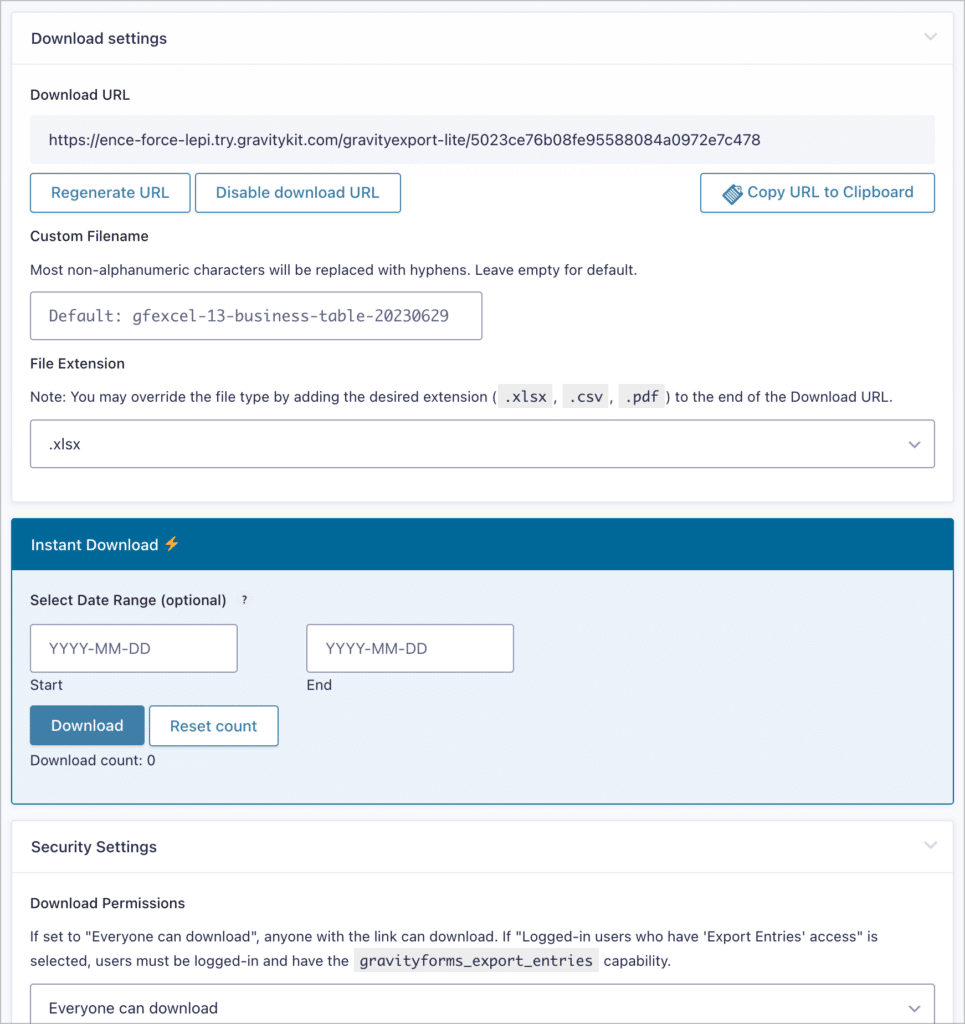
After enabling the download, you’ll see the unique download URL appear. Now you can configure the report, create filters and set up automatic exports.
Configure the report settings
There is a range of options for customizing your report. You can:
- Change the download permissions
- Choose which fields to include
- Include entry notes
- Change the entry order
- Set the column position
- Set a custom filename
- Choose the file type
- Enable multi-row splitting
- …and more!
Create multiple reports with different settings
The “GravityExport Filters” feed allows you to configure multiple reports with different fields, conditional logic settings, and file extensions.
This allows you to create multiple reports for different purposes.
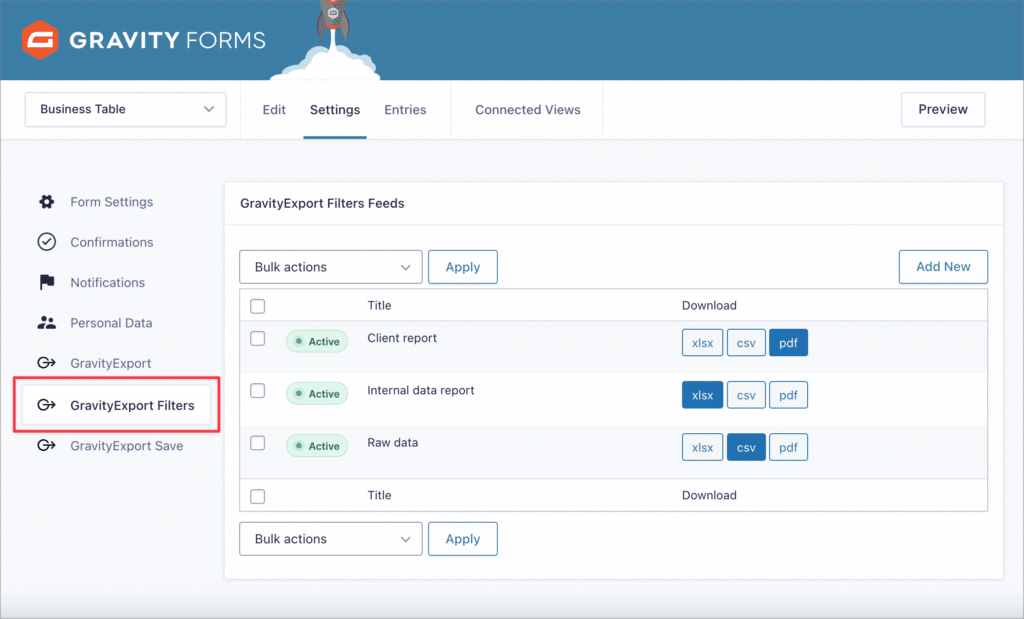
As you can see in the above screenshot, we’ve set up three separate reports—a “Client report” that exports to PDF, an “Internal data report” that saves form data to an Excel file, and another “Raw data” reports that dumps all of our form data into a CSV file.
Pro tipLearn more about exporting Gravity Forms data to PDF documents.
Sending reports to remote storage locations
The “GravityExport Save” feed allows you to automatically send reports to remote or local storage.
To create a new remote export, select the “GravityExport Save” tab and click “Add New”. Now you can give your report a name, select a file type and choose whether you want to export all entries or only single entries.
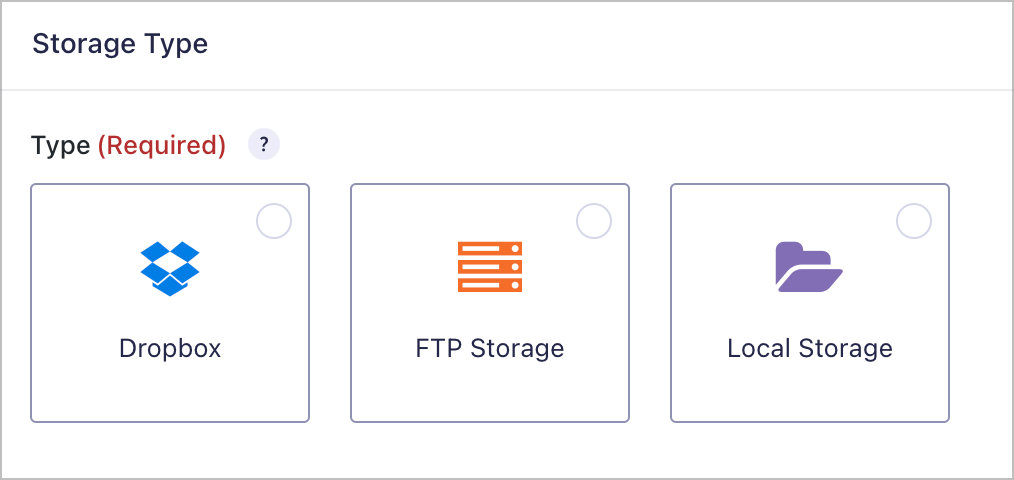
Finally, you’ll need to choose a storage location (Dropbox, SFTP or Local storage).
You can also add filters using conditional logic! This allows you to set up rules to extract the data you need. That’s it!
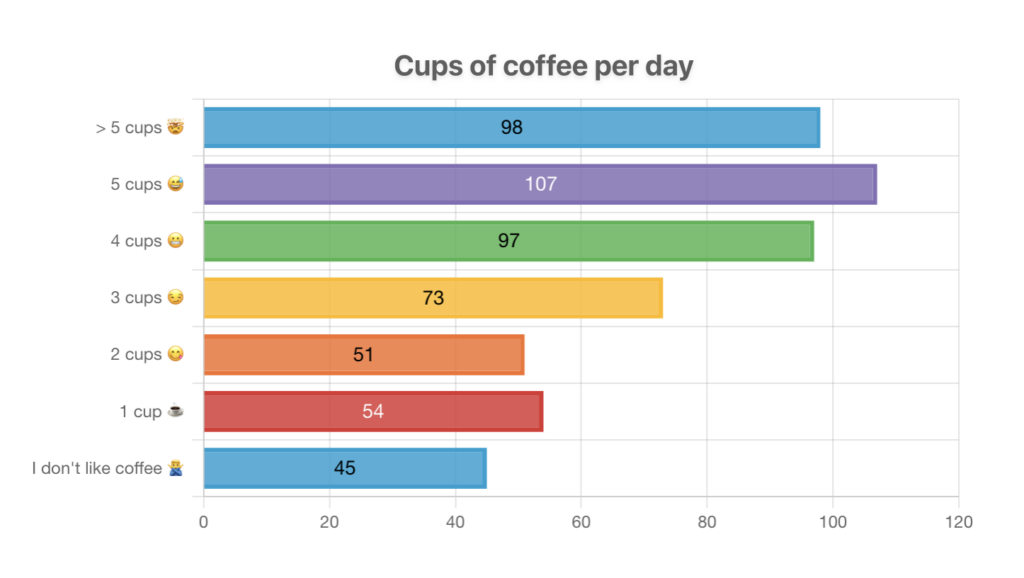
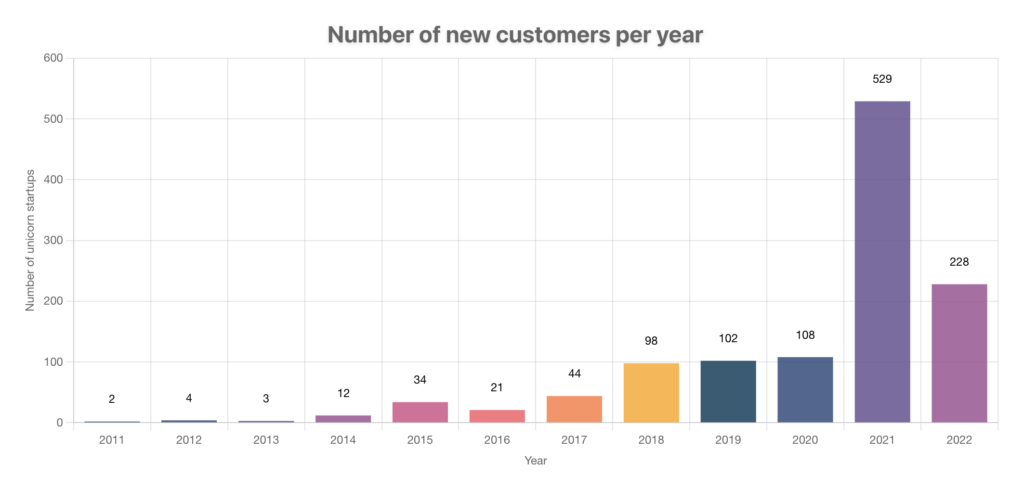
2. Building visual reporting dashboards with charts
If you’re looking to create a reporting dashboard that includes visual charts and graphs, you can use GravityCharts. Using this add-on, you can create a range of charts using a simple user interface. This gives you an easy way to visualize user submitted data.
GravityCharts supports the Checkboxes, Radio Buttons, Drop Down, Survey, Number, Poll and Quiz fields. You can also chart data over time to track how various metrics change.
With GravityCharts, you can configure multiple reports per form and embed them on pages or posts using a block or shortcode.
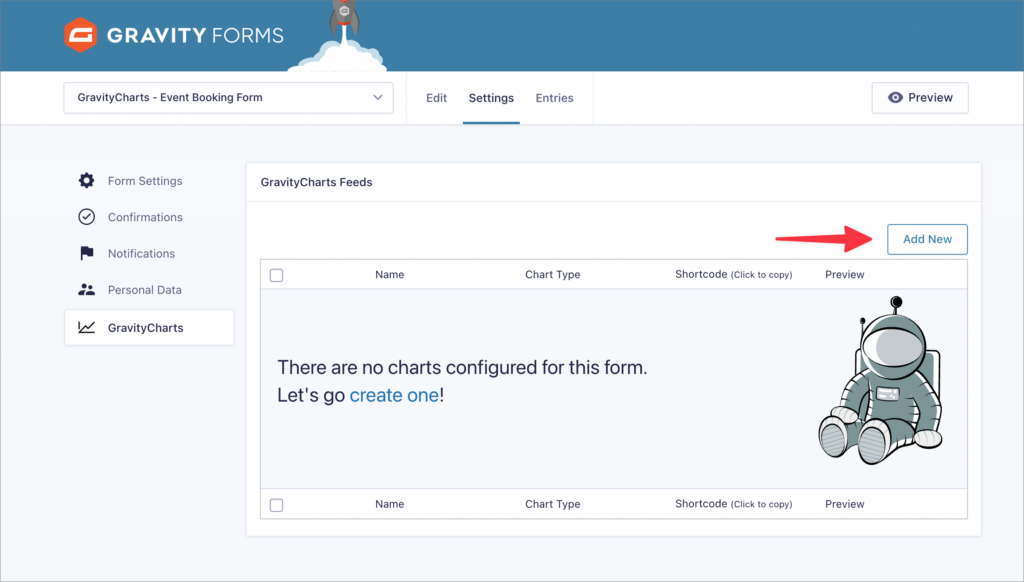
To get started, simply create a new GravityCharts feed.
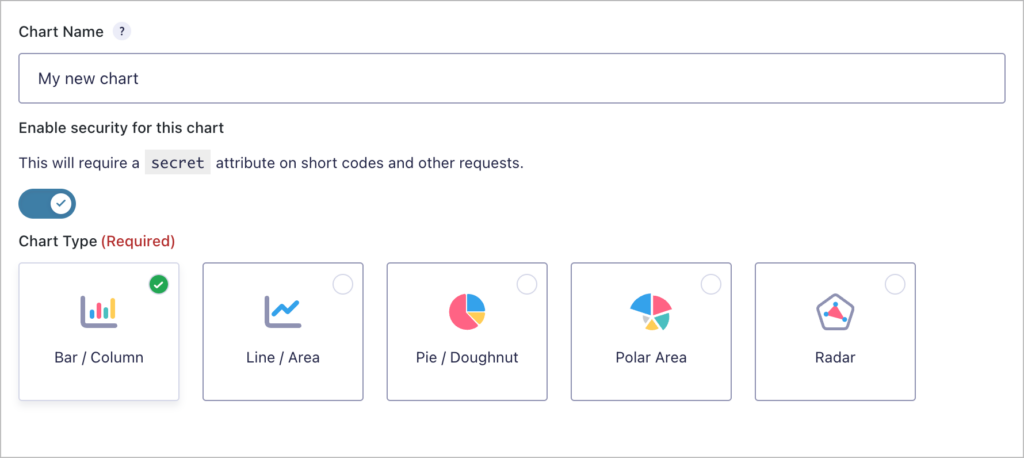
After that, you’ll need to select a chart type and choose which form fields you want to visualize.
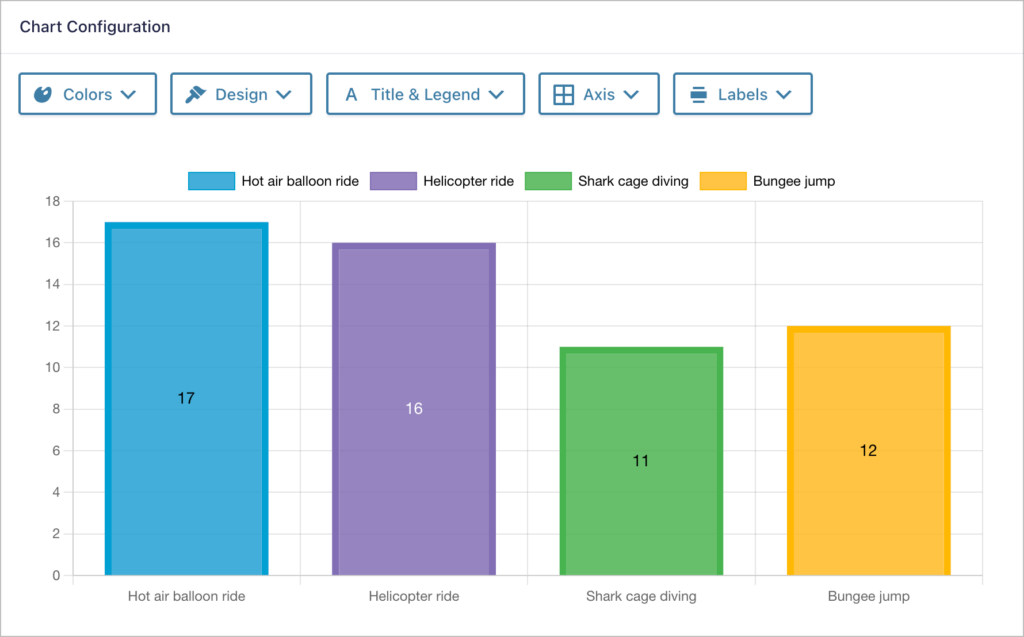
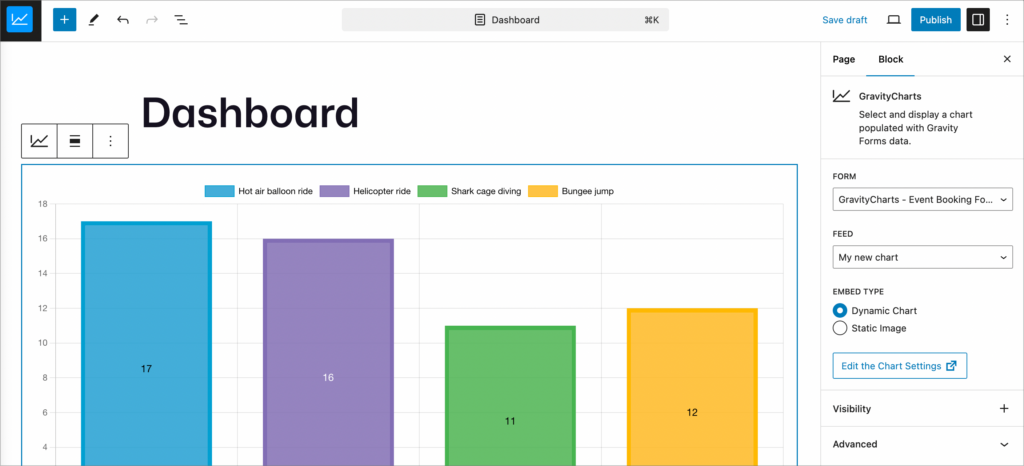
At the bottom of the page, you’ll see a live preview of your chart. The tabs above the preview include a range of options for customizing the chart’s look and feel. This enables you to build charts that match your website’s branding!
After creating your chart, you can embed it on a page using the GravityCharts WordPress block.
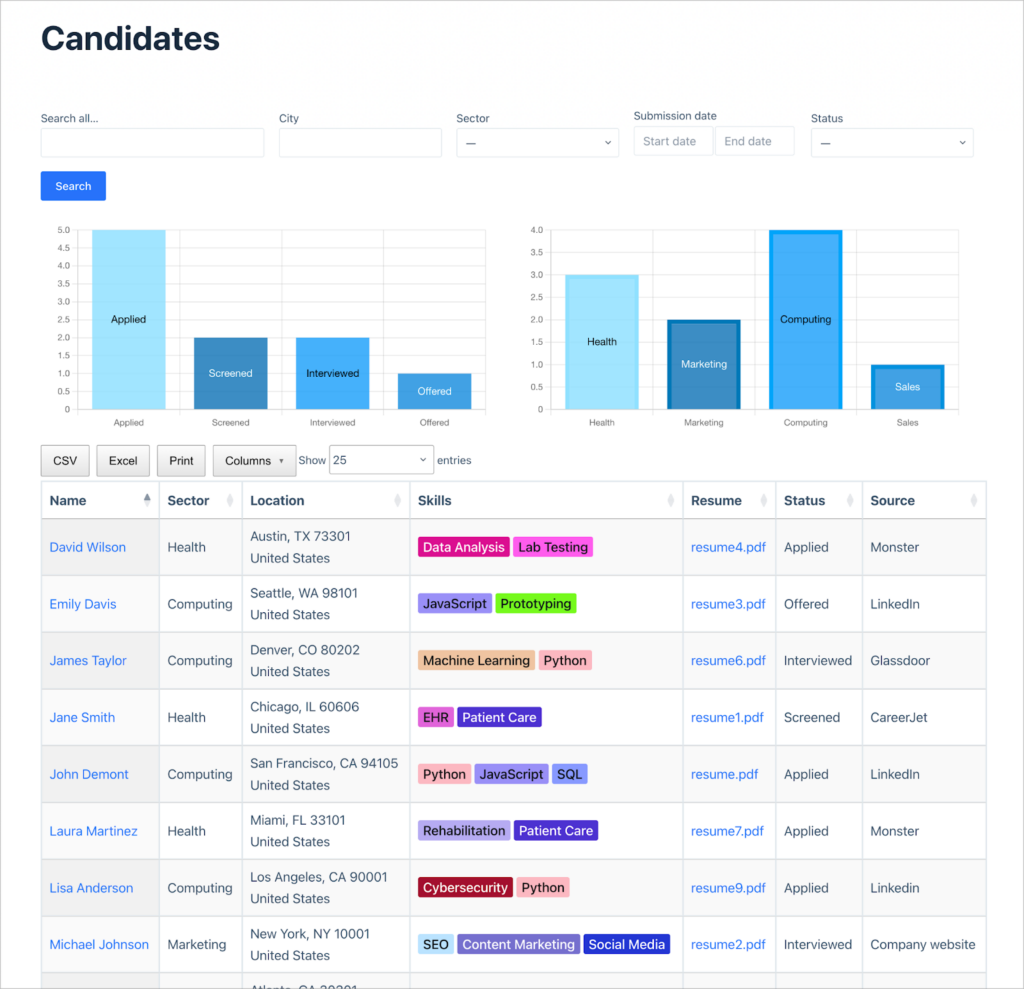
3. Creating tables of data with custom filters
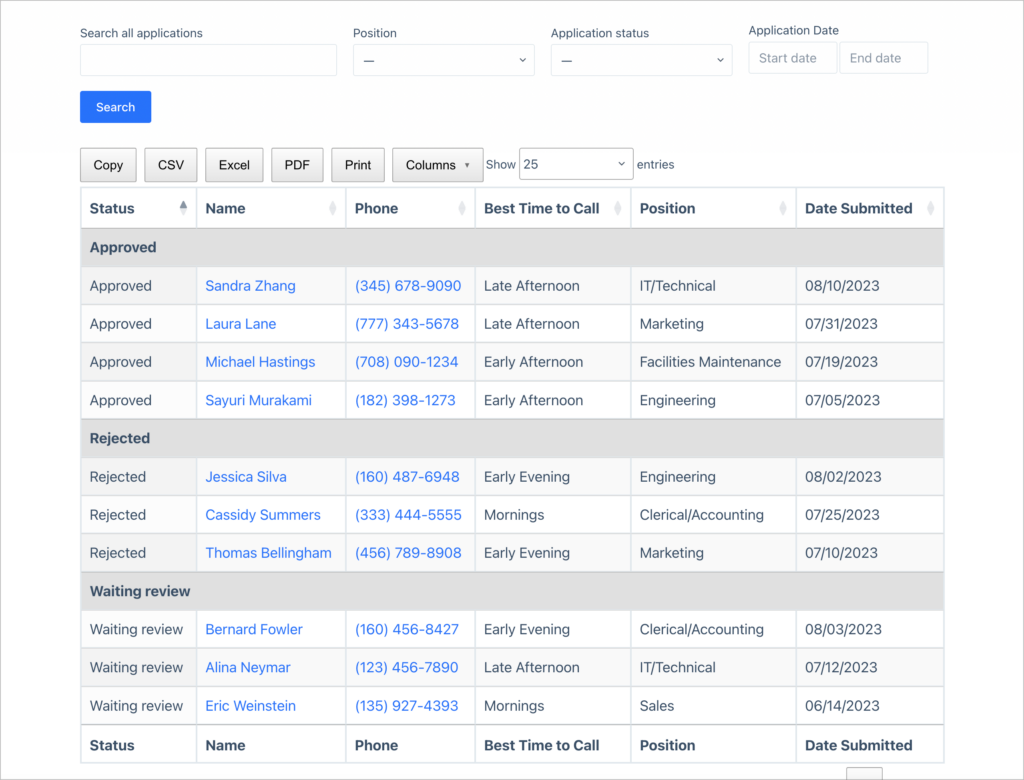
The final way to create custom reports for Gravity Forms is by using GravityView to build tables of user-submitted data with custom filtering and searching capabilities. Personally, I find that GravityView is the ideal tool for business reporting, because it also includes export functionality!
Here’s an example of a reporting dashboard for managing employment applications submitted through a Gravity Form.
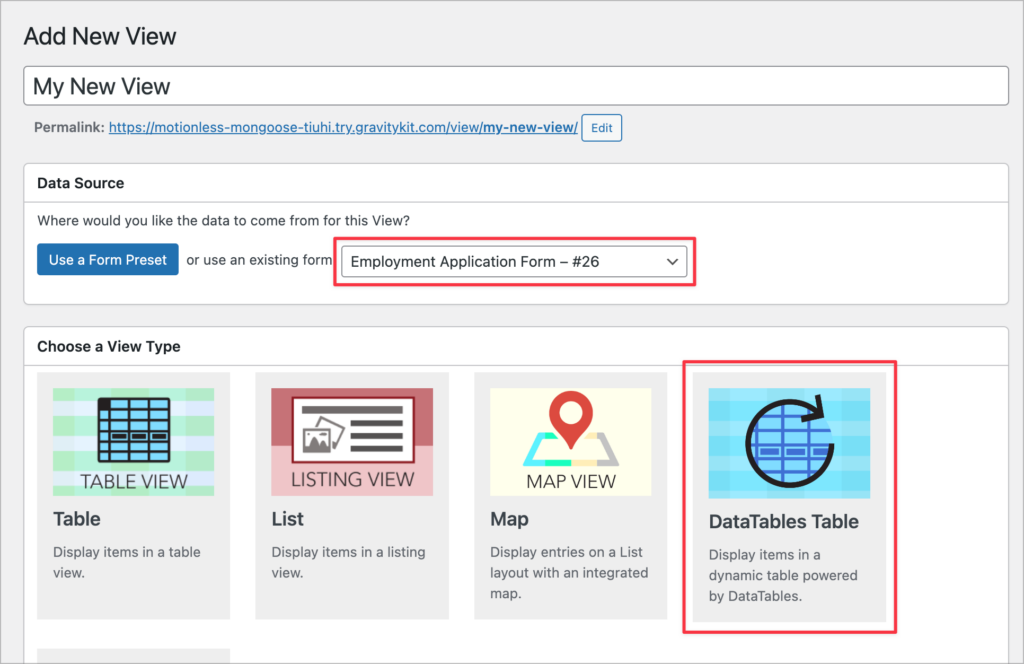
To get started with GravityView, simply create a new View, link it to an existing form, and choose a layout type.
Next, configure your View and choose which fields to display using GravityView’s drag-and-drop builder.
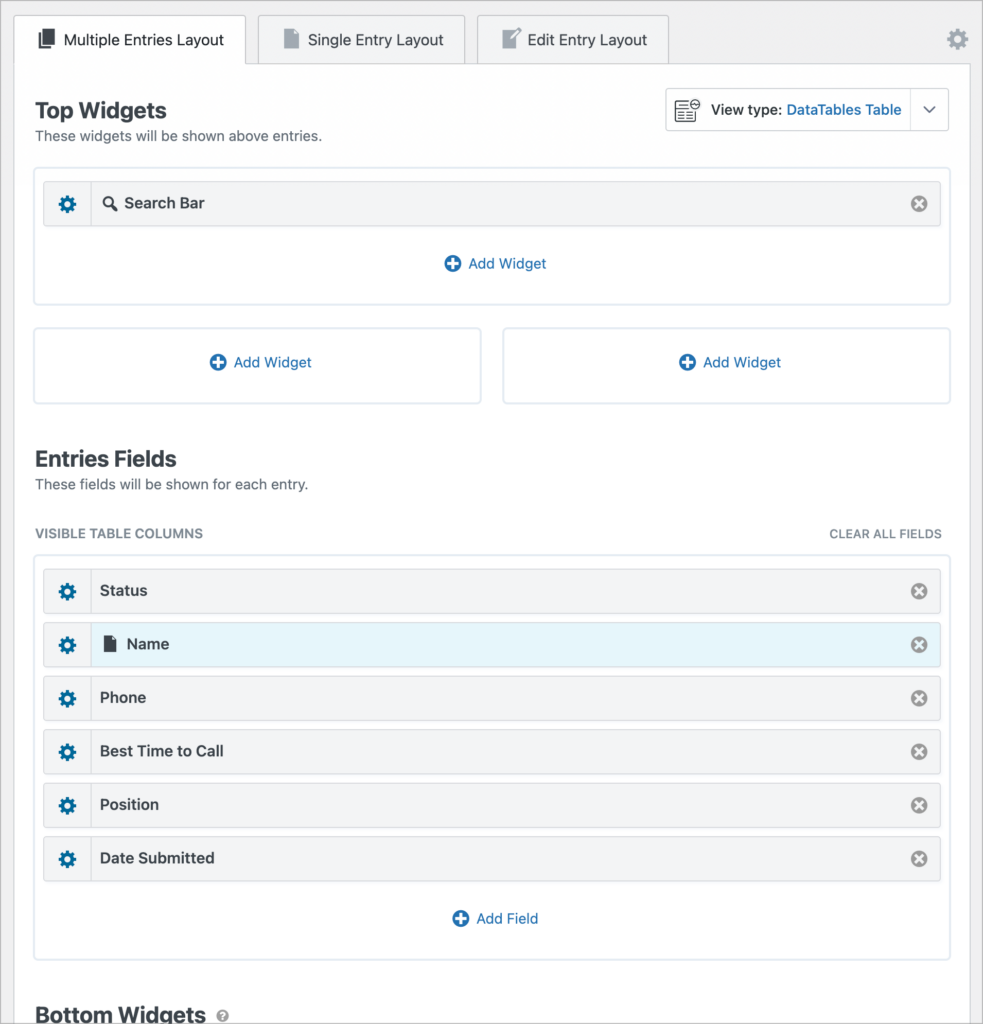
After selecting which fields to display, adding widgets, and configuring the various settings, you can embed your View on a page or post using a block or shortcode.
4. Bonus: Gravity Forms advanced reporting dashboards
If you’re looking to create integrated dashboards that include charts, tables, filters, and the ability to export data, simply combine all three methods! GravityExport, GravityCharts and GravityView all integrate with one another, enabling you to build dynamic dashboards and data displays!
Pro tipLearn more about building dynamic, form-based applications using GravityKit (all without code!) on our build it page.
Create reporting dashboards for Gravity Forms
In this post, I showed you various ways to create reports from your Gravity Forms data. From creating custom data exports, to building visual dashboards that include charts and tables. All of this and more is possible by using GravityKit’s well-integrated set of tools.
If you found this post helpful, check out more content on our blog!

Helpful tips right in your inbox.
Subscribe to get the latest articles, information on releases and helpful Gravity Forms tips!
More articles

WordPress page builder market share 2026: Elementor leads at 32.67%
Elementor reaches 32.7% of WordPress sites. WordPress Block Editor 20.6%, wpBakery 8.5%, Divi 5.7%. Latest HTTP Archive crawl, share-of-WordPress basis throughout.

Launch Log: GravityView 3.0, plus upgrades to Block MCP and GravityKit MCP
GravityView 3.0 lands with the new Vantage theme, frontend bulk actions, and AI-assisted View creation. This launch log also covers updates to GravityKit MCP, Block MCP, and Dashboard Views.

Announcing GravityView 3.0: a fresh new look, AI View creation, and native page builder support
GravityView 3.0 is here: restyle Views with the new Vantage theme, build them with AI, embed them in any page builder, and run bulk actions on the front end.