Published
•
Updated
Collect and display donations on your website using Gravity Forms and GravityView
Build a donation collection and display system on WordPress without code. Use Gravity Forms to accept payments and GravityView to show donors on the front end.

Are you looking for a way to collect and display donations on your website using Gravity Forms?
Whether you run an NGO, charity, nonprofit, or startup you may need a way for people to send you donations. There are several WordPress donation plugins out there but not all of them allow you to display donations on the front end.
In this post, we’ll show you how to use Gravity Forms and GravityView to collect, process, and display donations on the front end of your website. Keep reading to find out more! ????
💡 Check out a live demo of the latest donations and get your own free trial site preloaded with all GravityKit add-ons!
Download the free donation form template now!
Import the template into Gravity Forms and customize as necessary.
Sneak peek
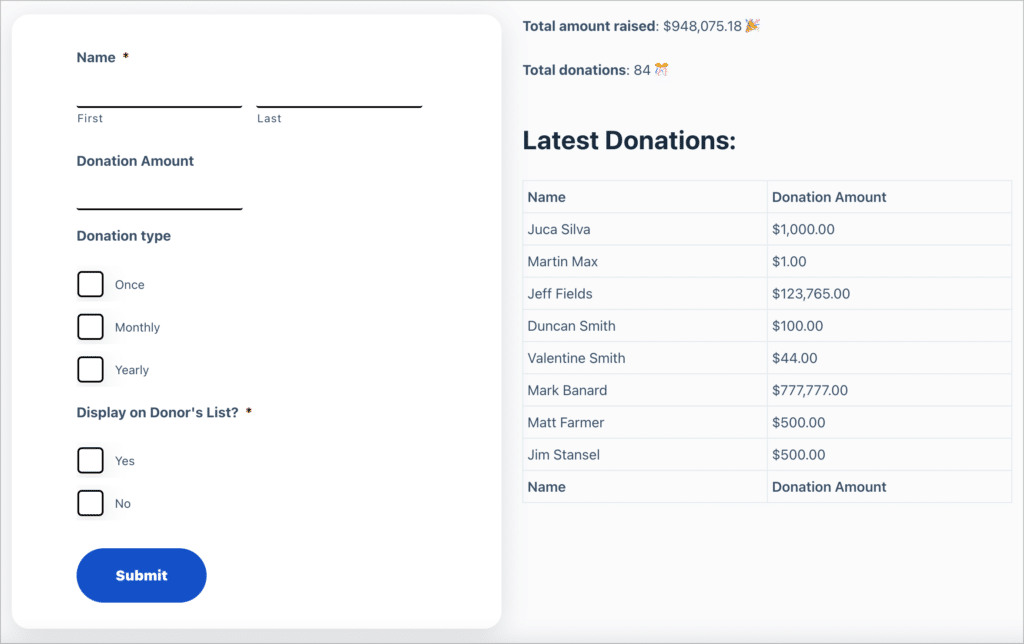
Here’s a sneak preview of what we’re going to build in this tutorial.
As you can see, on the left we have a donation form built with Gravity Forms and on the right is a GravityView table layout displaying the latest donations, including the name of the donor and the amount they donated. Finally, above the list of donations is the total amount raised.
What you’ll need
- Gravity Forms Pro or Elite license
- GravityView (any license level)
- GravityMath (optional)
Taking donations through your WordPress website using Gravity Forms
Depending on the type of organization you run, you may need to collect and manage donations through your website.
Charities
Charities engage in charitable work in order to benefit society and improve the lives of the people. Charities often help to alleviate poverty, further the arts and sciences, and raise awareness about important issues.
In order to operate, charities rely on support from the people in the form of volunteers and/or donations.
Nonprofits and NGOs
A nonprofit organization is dedicated to furthering a particular societal cause or shared mission. Nonprofits operate in a variety of different fields, including healthcare, science, religion, public safety, and more. An NGO (non-governmental organization) is a type of nonprofit group that functions independently of any government. NGOs often work to further humanitarian objectives.
Crowdfunding
The term ‘crowdfunding’ refers to a way of raising money through a collective effort between friends, family, and other individual investors. The idea behind crowdfunding is to tap into the power of the internet in order to draw donations from a large number of people online.
Whether you’re raising money for your local sports club to buy new uniforms or you’re trying to get your startup off the ground, crowdfunding campaigns can help you achieve your goal.
All of the above rely on donations or recurring memberships in one form or another.
Choosing a Gravity Forms payment add-on to accept donations
Before creating your donation form, you’ll need to choose and install a payment gateway to handle the donation process.
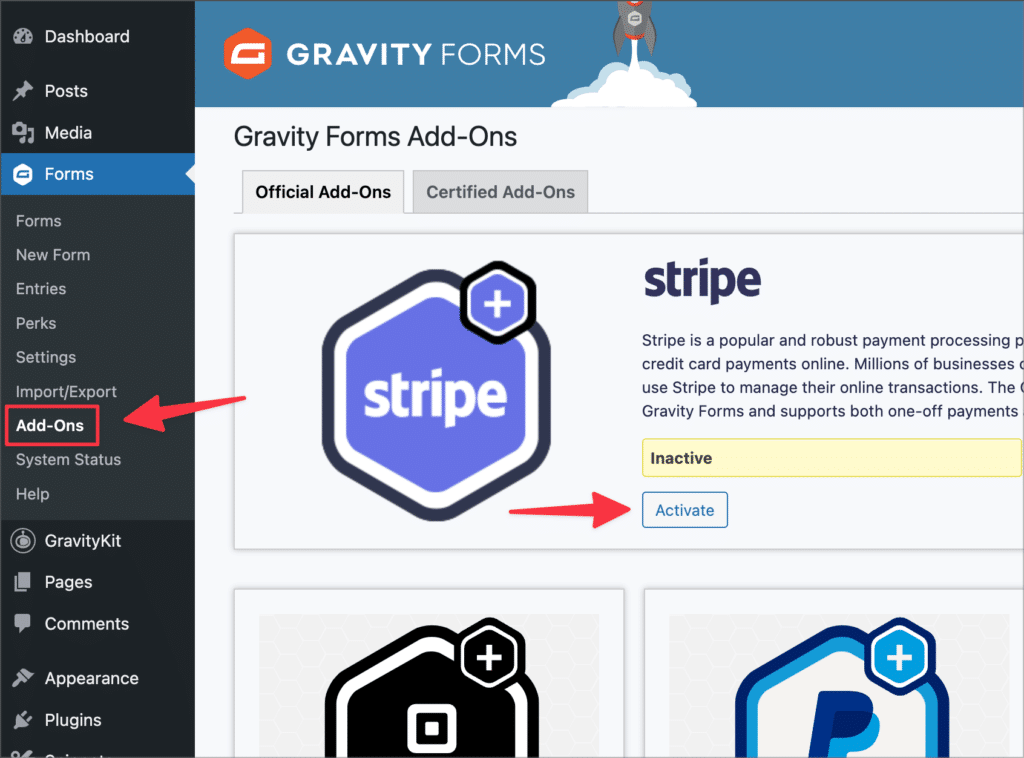
Gravity Forms supports a number of popular payment processors including PayPal (great for recurring donations) and Stripe. For access to these payment gateway add-ons, you’ll need a Gravity Forms “Pro” or “Elite” license.
Assuming you already have a Pro or Elite license, you can install and activate one or more payment processors from the Gravity Forms Add-Ons page in WordPress.
After activating your chosen payment processor, you’ll need to check out the add-on documentation to get it set up and configured.
Creating the donation form in Gravity Forms
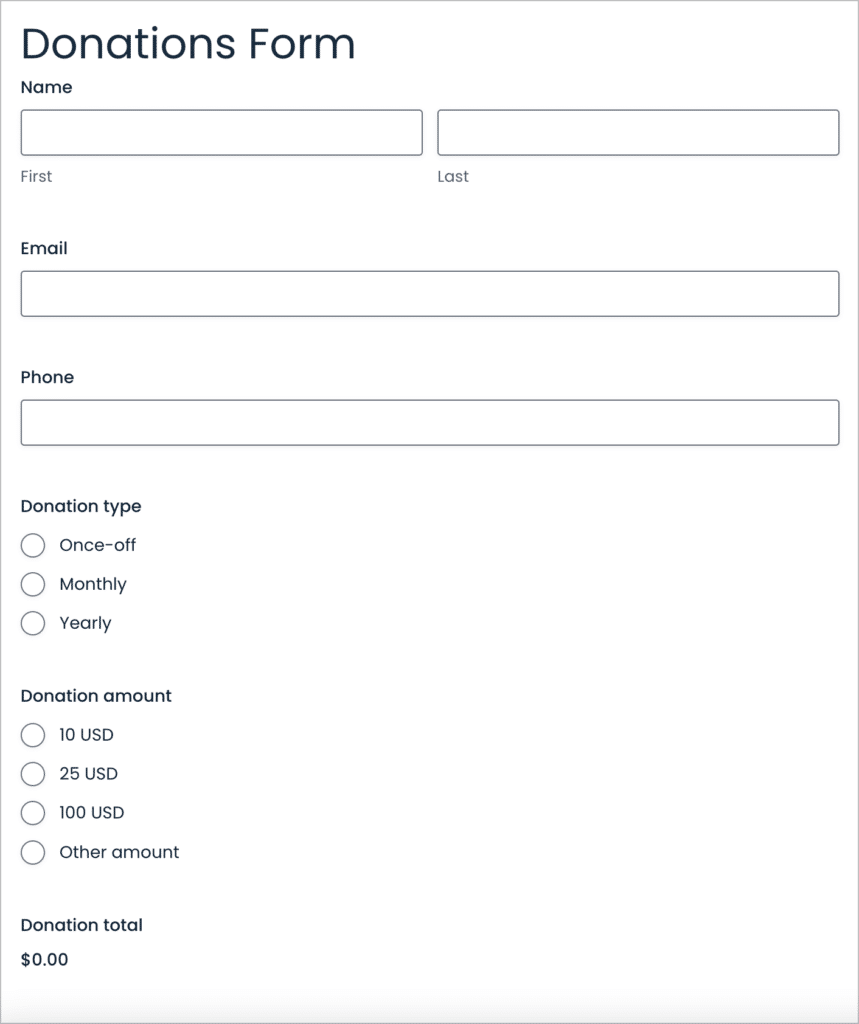
To start collecting donations through your website, the first step is to create a Gravity Forms donation form. This allows users to donate a specific, or custom, amount to your organization.
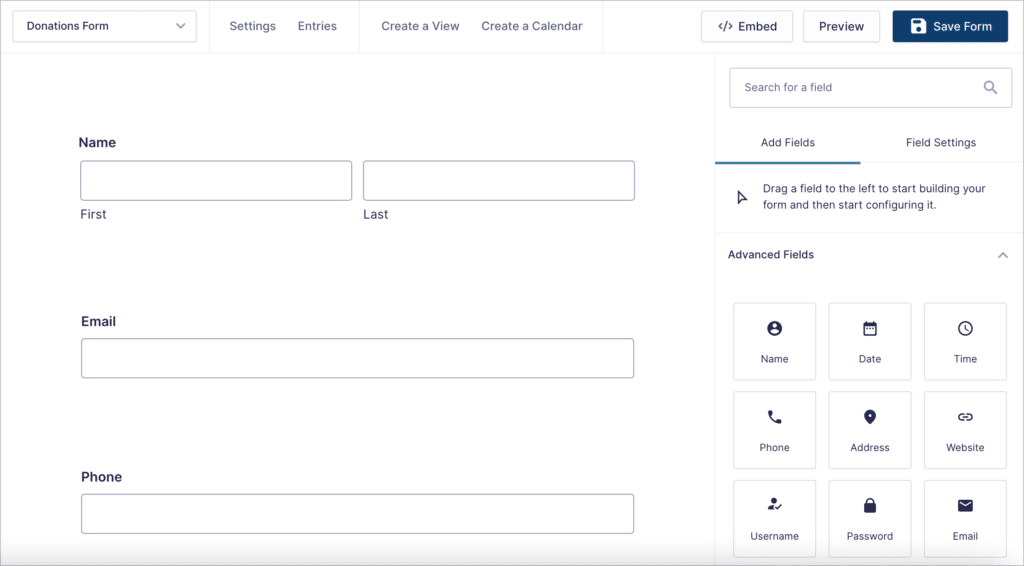
Log in to your WordPress site, hover over “Forms” in the left-hand menu and click “New Form”. After giving your new form a name, you can start adding fields to it using the drag and drop form editor.
Most donation forms include the following fields:
- Name
- A contact field (phone number and/or email address)
- Donation amount
- Payment field for credit card details
You’ll find the “Name”, “Email”, and “Phone” fields under the “Advanced Fields” tab on the right.
To accept donations, you’ll need to add pricing fields to your form. If you want to give people the option of donating different amounts, you can do this using the “Produce” field.
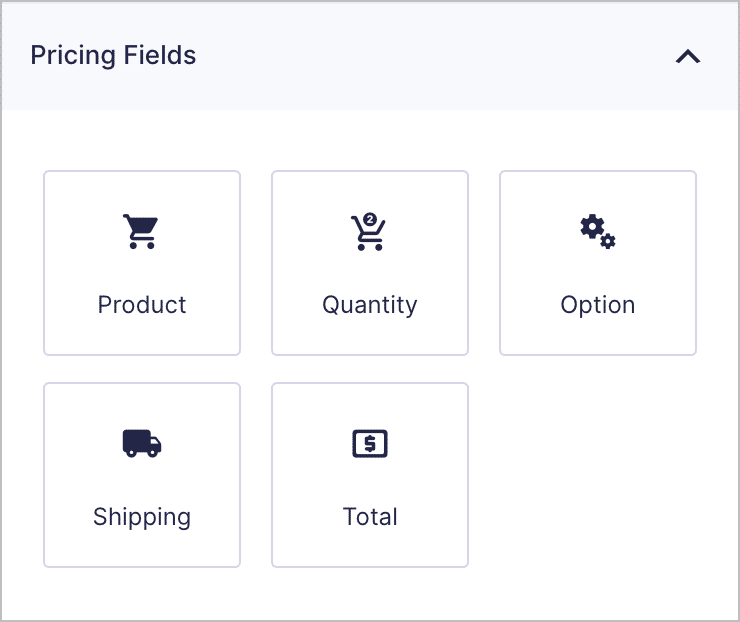
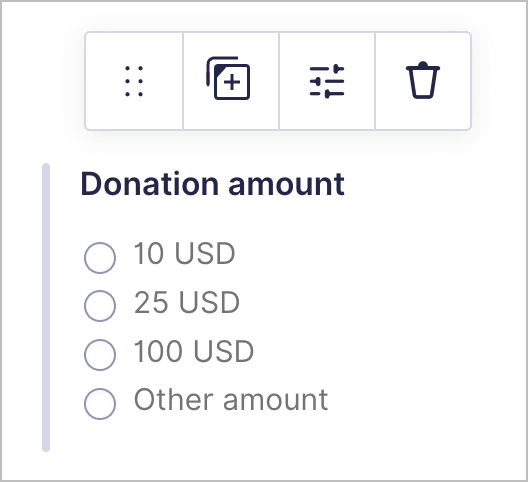
After adding the “Product” field to your form, open the Field Settings and select your desired field type. This can either be “Single Product”, “Drop Down”, ‘Radio Buttons’, or “User Defined Price” (if you want to allow the donator to choose their own amount).
When you’re finished configuring your Gravity Forms donation form, you can embed it on a page or post on your website. If you’re using the WordPress block editor (Gutenberg), you can do this by adding a Gravity Forms block to your layout and selecting your donation form from the dropdown menu.
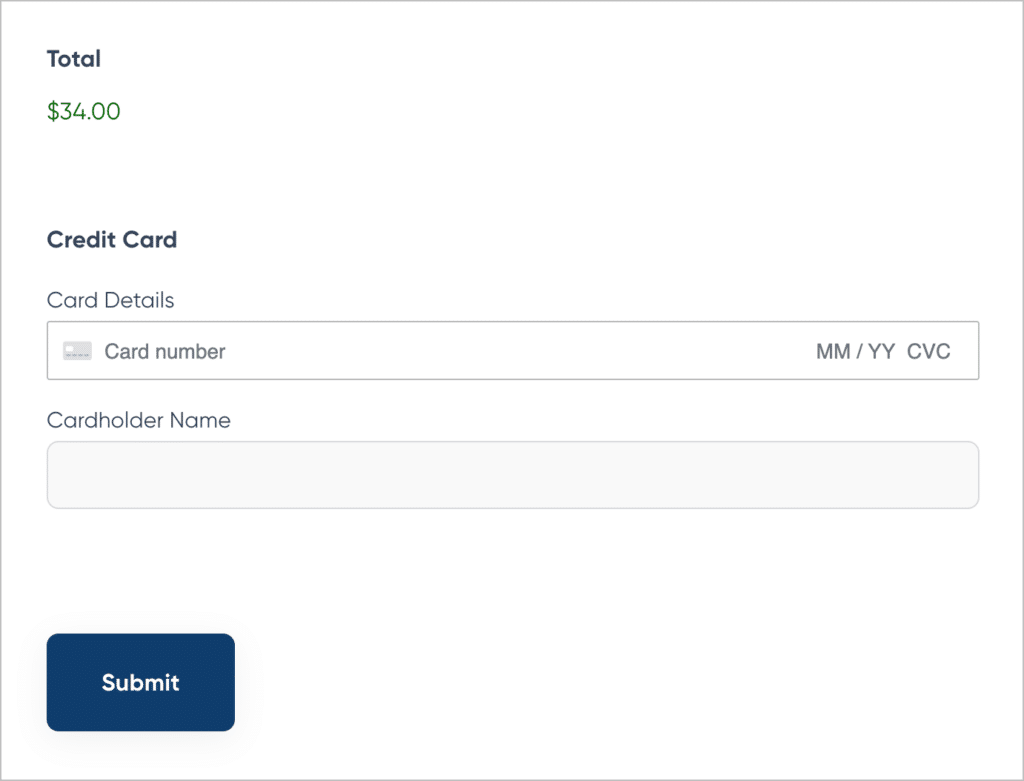
Here’s an example of a Gravity Form containing the Stripe payment field:
Now that our form is set up and we’re ready to collect donations, we can turn our attention to displaying those donations on the front end.
Displaying donations collected with Gravity Forms on the front-end
After creating your donation form and embedding it on your site, you’re ready to start accepting donations! The next step is to install GravityView and create a View so you can display donations on the front end.
Installing GravityView
GravityView is an add-on for Gravity Forms that allows you to display form data on the front end of your website. GravityView’s diverse layouts and powerful filtering settings allow you to display donations in a variety of ways. But before we get to that, you’ll need to install the GravityView plugin.
When you’re done, log into your WordPress website, head over to the “Plugins” page, and click “Add New”. Now upload the plugin folder you downloaded in the previous step.
After installing and activating GravityView, you’re ready to start building your first View.
Creating a new View
“Views” allow you to display Gravity Forms entries on the front end. To create a new View, hover over “GravityKit” in your WordPress admin menu and select “New View”.
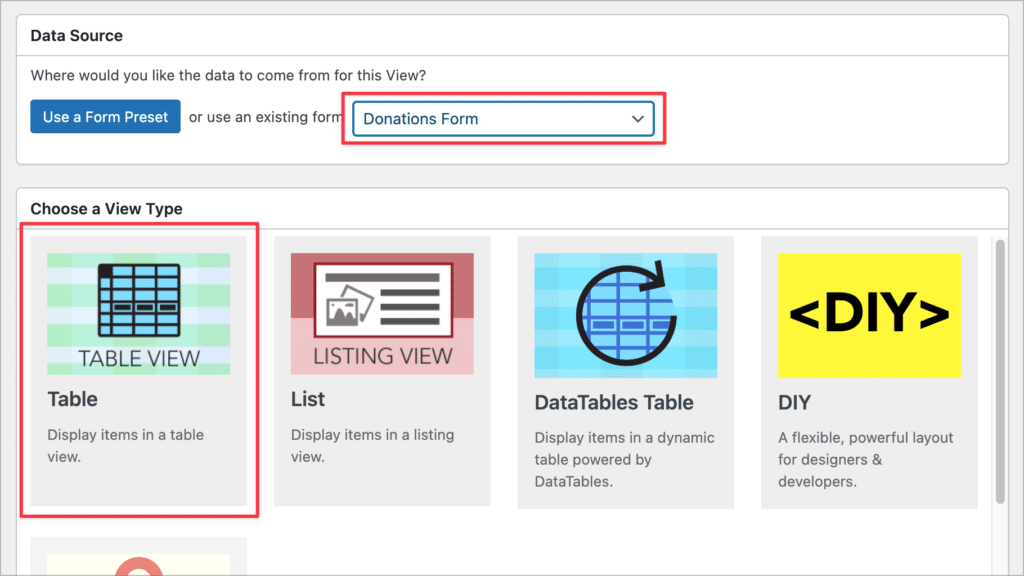
Next, give your View a name and select your newly created donation form as the Data Source. Now, under where it says “Choose a View Type”, select a layout. For this example, we’ll choose the “Table” layout.
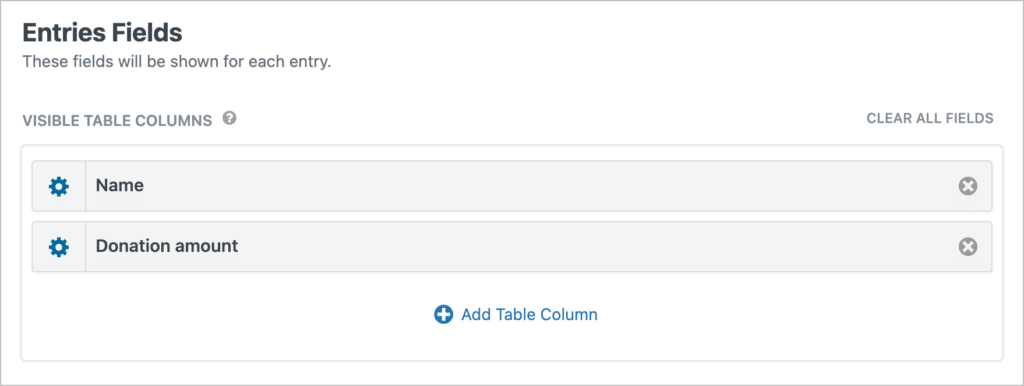
After selecting a layout, you can start constructing your new View using GravityView’s intuitive drag and drop interface. You can add fields to your View by scrolling down to the “Entries Fields” section and clicking on the “Add Table Column” button. Now, simply click on the field name to add it as a column in your table.
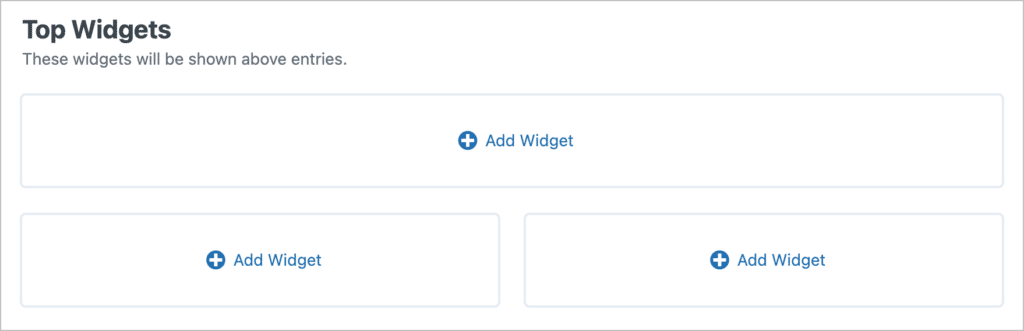
You may also wish to add widgets to your View. Widgets make it easier to navigate your View and search for entries. You can add widgets to the top or bottom widget areas by clicking on the “Add Widget” button.
After creating your View, you may wish to change the way donations are displayed by modifying the View Settings.
Holding donations for approval
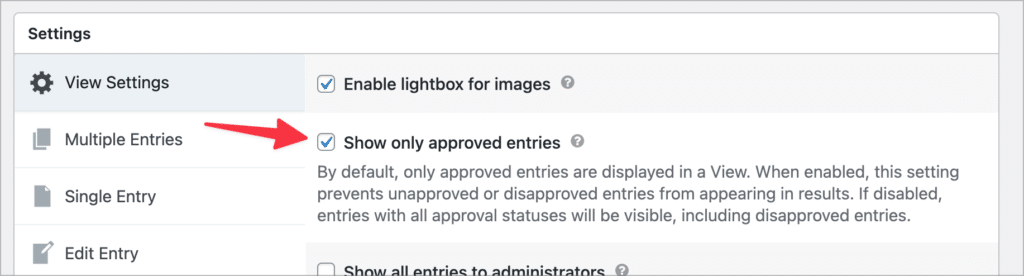
If you would like to approve donations before they show up on the front end, you can do this using GravityView in-built approval system. To enable entry approval, scroll down to the View Settings meta box and check the box that says “Show only approved entries”.
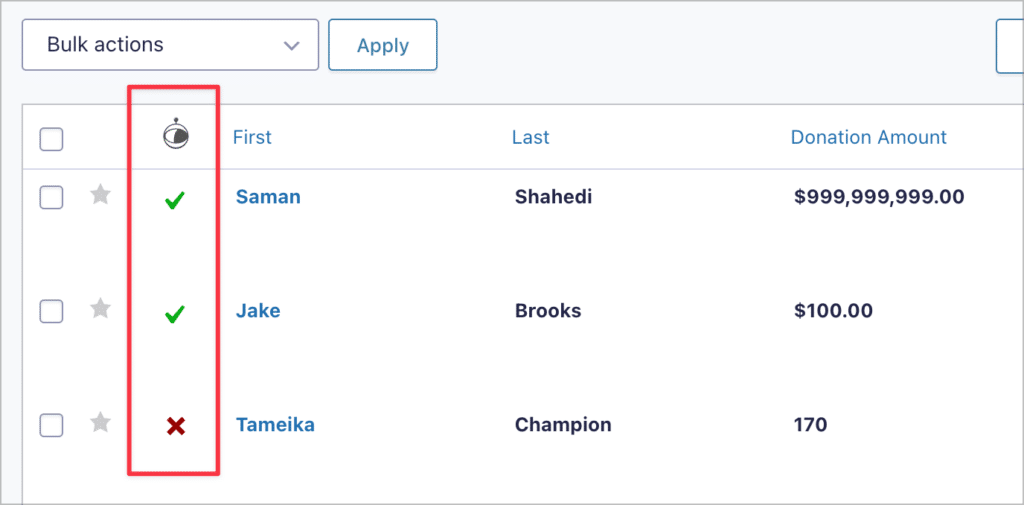
You will now be able to approve donations first in Gravity Forms before they show up on the front end. To approve a donation, simply go to the Gravity Forms ‘Entries’ page and select either a checkmark or a ‘x’ next to the entry.
Embedding your View on the front end
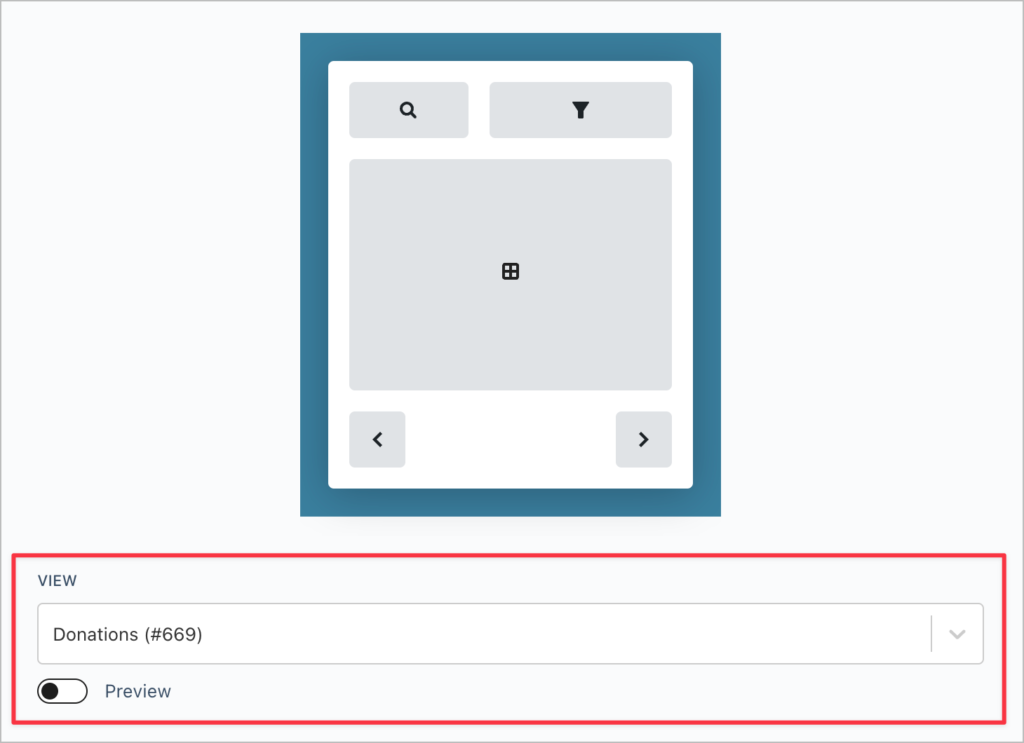
After configuring your View, you can embed it on your website using the GravityView block.
As you receive new donations, the View will update automatically to include the latest donor and the amount donated. If you enabled entry approval, you’ll need to approve new donations before they can be displayed.
Displaying the total amount raised
Along with each individual donation, you may also wish to display the total amount raised. This is easy to accomplish using our math plugin!
GravityMath is an add-on for Gravity Forms that allows you to perform advanced calculations using your form data. You can calculate averages, totals, and much more.
Using the [[gravitymath]] shortcode
GravityMath allows you to perform calculations using the powerful [gravitymath] shortcode.
To calculate the sum of a field in Gravity Forms, you need two things:
- The form ID
- The merge tag of the field you want to sum
So for example, let’s say our form ID is ‘1’ and the merge tag for the donation field is ‘{donation amount:2}‘, our shortcode would look like this:
[gravitymath scope="form" id="1"] {donation amount:2} [/gravitymath]The “scope” tells the shortcode where to pull data from. In this case, we’ve set it to “form” because we’re working with form entry data.
If you’re summing a product pricing field, you’ll need to add the :price operator to convert the currency format to a number format.
[gravitymath scope="form" id="1"] {donation amount:2:price} [/gravitymath]If you wanted to display the total number of donations received, you could tweak the above shortcode by adding the :count operator, like this:
[gravitymath scope="form" id="1"] {donation amount:2:count} [/gravitymath]When you’re done constructing your shortcode, simply paste it into a WordPress “Shortcode” block. When loading the page on the front end, the shortcode is replaced by the total amount raised!
Putting it all together: Creating the donation page
Now you know how to create a donation form, display donations on the front end, and calculate the total amount raised! Finally, we can put everything together on one page.
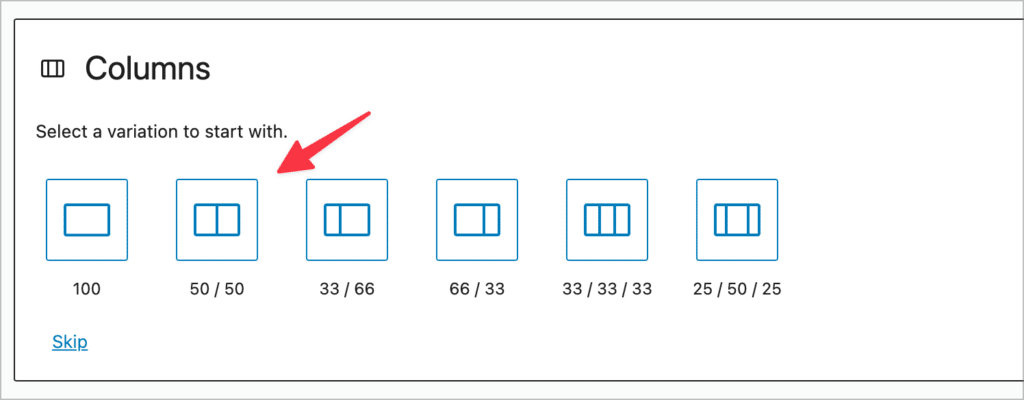
To do this, create a new page and add a “Columns” block to it using the WordPress block editor. You can do this by clicking on the ‘+’ icon and searching for “Columns”. The columns block allows you to add different width columns to your page layout – select the “50 / 50” variation.
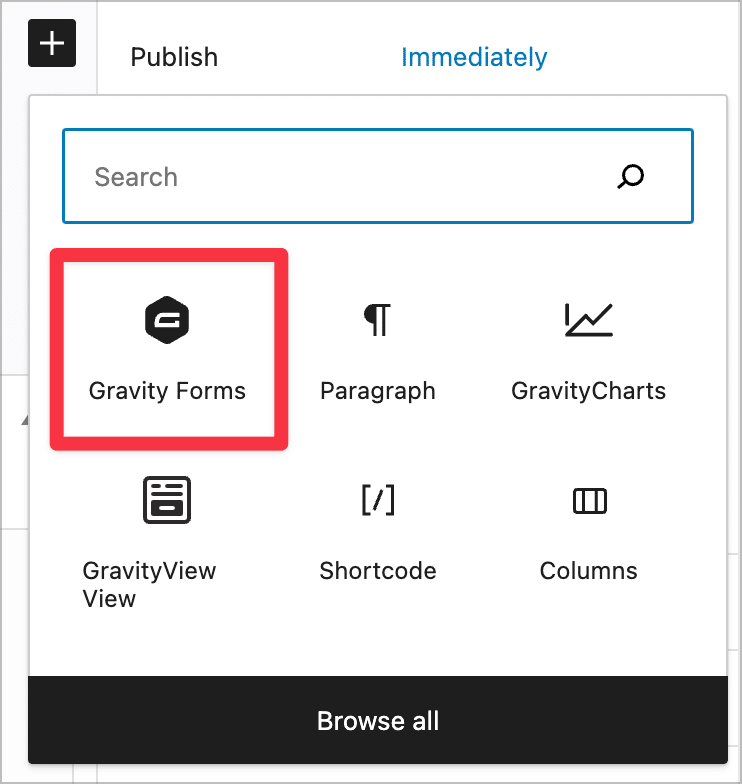
Now add a Gravity Forms block to the left column by clicking on the ‘+’ icon and searching for “Gravity Forms”. After adding the block, select your donation form from the dropdown menu. Finally, embed your View in the right-hand block using the “GravityView – View” block.
If you would like to display the total amount raised, you can do this by adding the [[gravitymath]] shortcode to another “Shortcode” block (as described above).
That’s it!
Bonus: Displaying donations in different categories
If your organization raises money for multiple causes, you may wish to allow your donors to select a cause to donate towards. In this case, it’s helpful to split donations into separate categories.
If you want to display donations in different categories, you can accomplish this using our Advanced Filtering extension. The Advanced Filter gives you finer control over which entries are displayed in a View by allowing you to filter entries using conditional logic.
Start displaying Gravity Forms donations on your website today
If you run a charity, NGO, or nonprofit organization, you probably need a way to accept donations through your website. While there are several WordPress donation plugins out there, many of them are confusing and lack certain key features.
Gravity Forms integrates with a range of payment processors, allowing you to accept donations through your website. Using GravityView you can then display those donations on the front end. You can also calculate and display donation totals using the Math by GravityView plugin.
If you found this post helpful, read our tutorial on how to build a fundraising dashboard next!

Helpful tips right in your inbox.
Subscribe to get the latest articles, information on releases and helpful Gravity Forms tips!
More articles

Launch Log: Distance sorting for radius searches, DataTables search improvements, and import reliability fixes
The latest GravityKit releases add distance sorting to map searches, bring built-in search to DataTables, and fix GravityCharts and GravityImport edge cases.

WordPress page builder market share 2026: Elementor leads at 32.67%
Elementor reaches 32.7% of WordPress sites. WordPress Block Editor 20.6%, wpBakery 8.5%, Divi 5.7%. Latest HTTP Archive crawl, share-of-WordPress basis throughout.

Launch Log: GravityView 3.0, plus upgrades to Block MCP and GravityKit MCP
GravityView 3.0 lands with the new Vantage theme, frontend bulk actions, and AI-assisted View creation. This launch log also covers updates to GravityKit MCP, Block MCP, and Dashboard Views.