Published
•
Updated
How to build a student registration system on WordPress (without code)
Build a custom student registration system on WordPress using Gravity Forms and GravityView. Register students for courses and add them to a searchable front-end database without code.

Did you know that more than 20 million students enrolled for college in the US in 2022?
Schools, colleges and other educational institutions all need a way to register new students, safely store their information, and update it when necessary.
In this tutorial, we’ll show you how to build a custom student registration system on WordPress using Gravity Forms and GravityView. We’re going to register students for courses and add them to a searchable database on the front end that admins and professors can access.
Let’s get started!
Download the free student registration form template now!
Import the template into Gravity Forms and customize as necessary.
Sneak peek
Here’s a sneak peek at what we’re going to build in this tutorial:
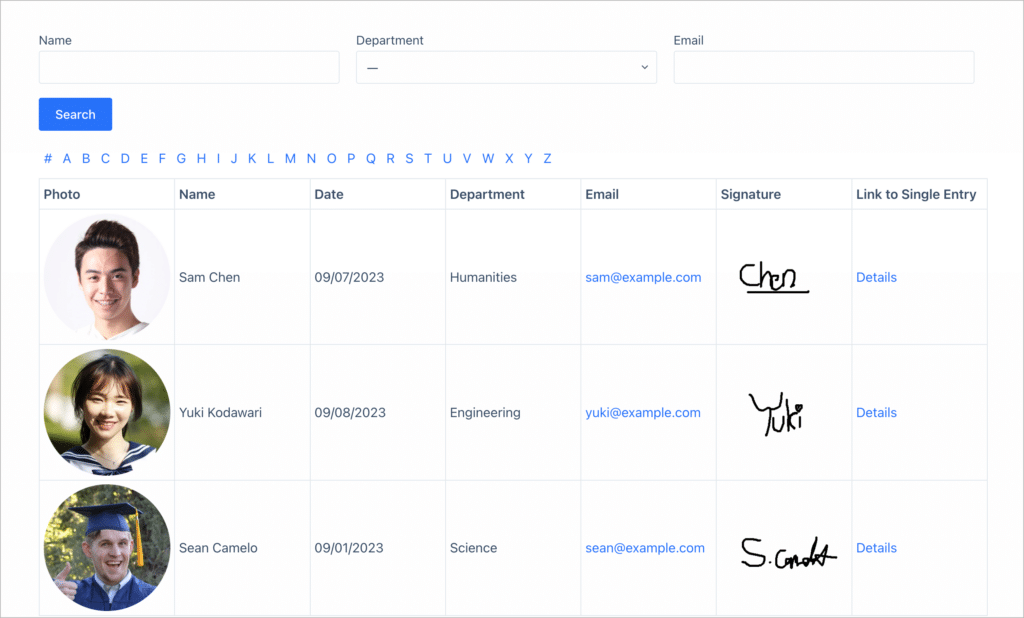
As you can see, it’s a relatively simple database containing information about each newly registered student, including their signature which they must give when completing the registration form.
Clicking on the “View Details” link takes us through to the Single Entry page, where we can view each student’s profile.
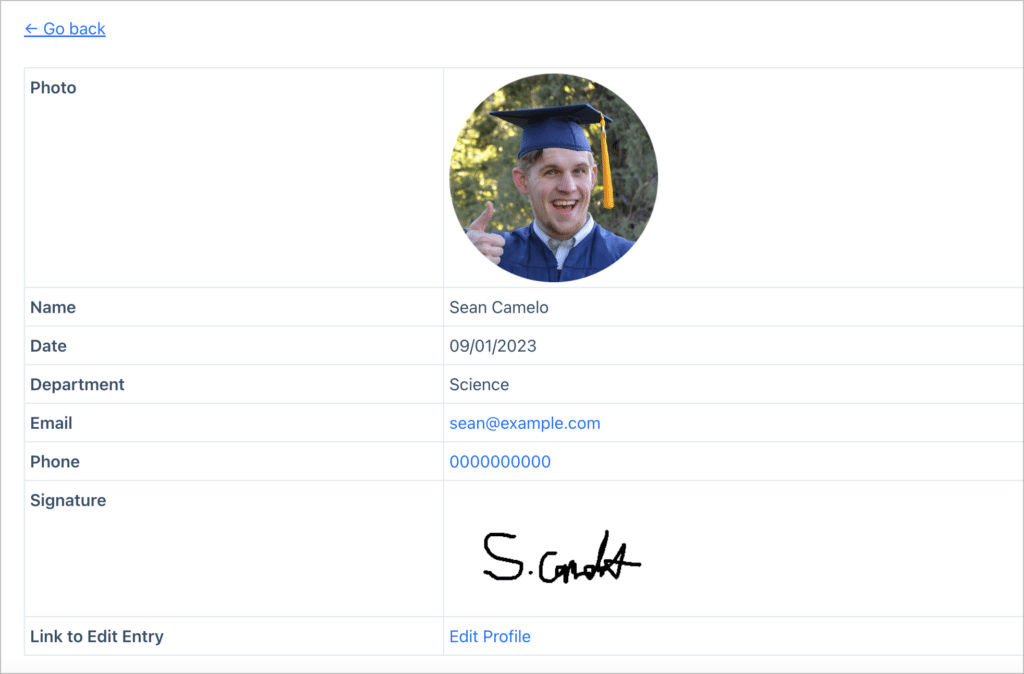
When students register, they’ll receive account information, allowing them to log in and view (as well as edit) their details from the front end! This is a simple example, but you could easily add more information here if needed!
Wanna try it?
Spin up a demo
See what you can build with GravityView — explore the live demo.

What you’ll need
Here are the plugins you’ll need if you want to follow along with this tutorial:
- Gravity Forms
- GravityView
- Gravity Forms User Registration Add-On (optional)
- Gravity Forms Signature Add-On (optional)
We’re going to use Gravity Forms as our student enrollment solution, and we’ll use GravityView as our front-end user management system!
Why build a student registration system on WordPress?
If you’re looking to build a student registration system for your educational institution, WordPress may be the ideal platform on which to do so.
Who can benefit from having a student registration system?
- Educational institutions such as colleges and universities
- Schools such as primary or high schools
- Any individual or institution that runs online courses or e-learning programs
WordPress is ideal because:
- Using plugins, you can easily host online courses on WordPress
- Managing users and permissions is easy, and user registration is a built-in feature
- WordPress itself is free and easy to use for non-technical users
Installing add-ons (optional)
Depending on your needs, you may wish to install one or more Gravity Forms add-ons. Here are a couple of suggestions:
- User Registration Add-On (requires a Gravity Forms Elite license)
This add-on allows you to register a new user on your site when they submit a Gravity Form (this is helpful if you’re hosting online courses on your site or you want users to be able to edit their details again later).
- Signature Add-On (requires a Gravity Forms Elite license)
The Signature add-on adds a new Signature field to Gravity Forms, allowing users to sign their name using their mouse or trackpad. This is helpful if you need to capture signatures as part of the student registration process. This may also help you eliminate paperwork!
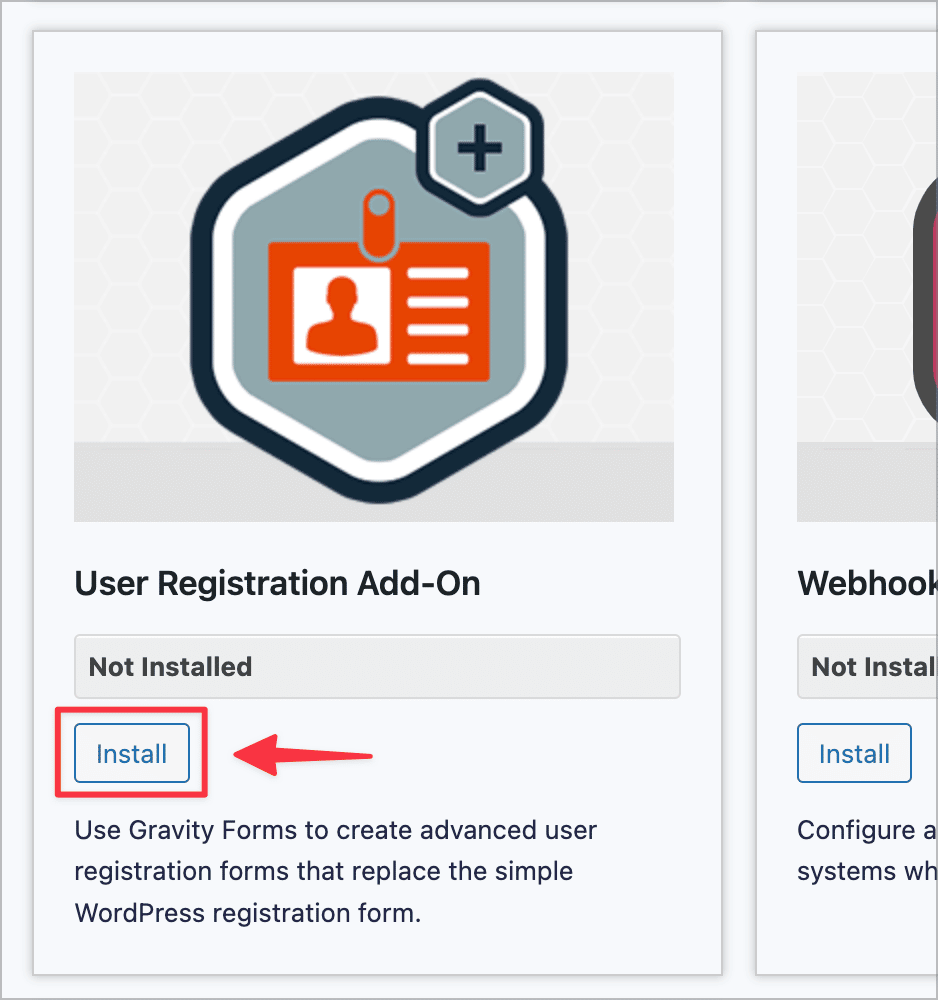
To install an add-on for Gravity Forms, hover over “Forms” in your WordPress menu and click “Add-Ons”. Here you’ll see a list of available add-ons. Simply scroll down to your chosen add-on and click “Install”.
Now that you’ve installed the add-ons you need, you can start building your student registration form in Gravity Forms.
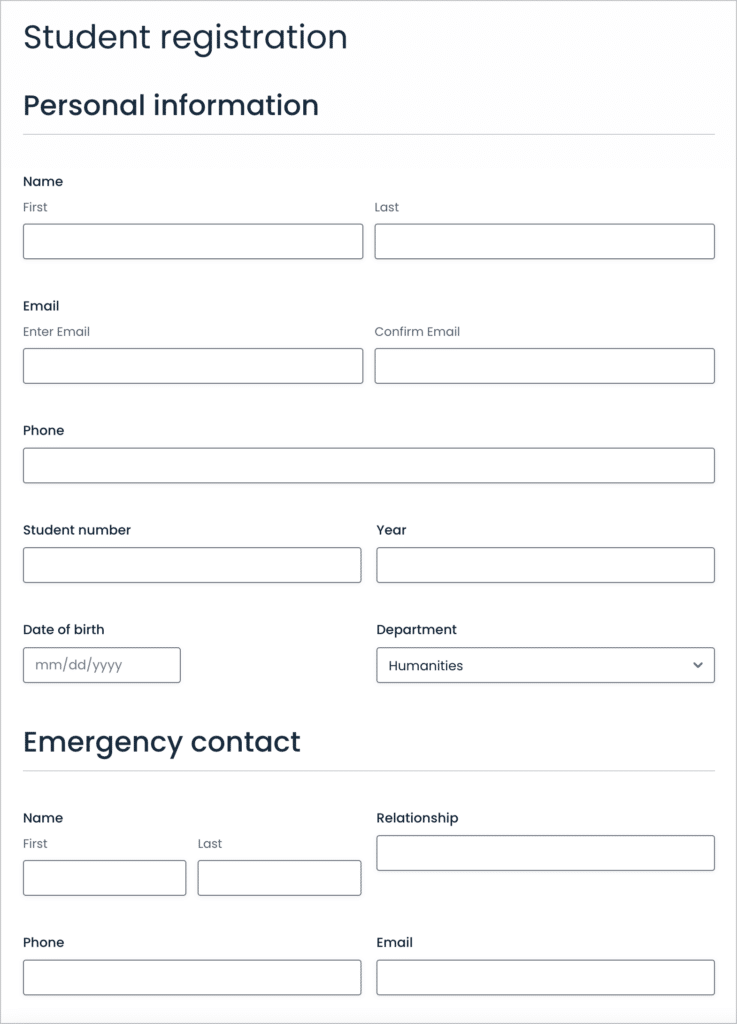
Creating the student registration form
To create a new form in Gravity Forms, hover over “Forms” and click “New Form”. Now you can start adding fields to your form using the Gravity Forms drag and drop visual editor.
If you’re using the User Registration Add-On to register new students on your site, your form will need to have a “Username” and “Email” field. You can also add a “Password” field if you want to allow students to set their own passwords. However, this is not required.
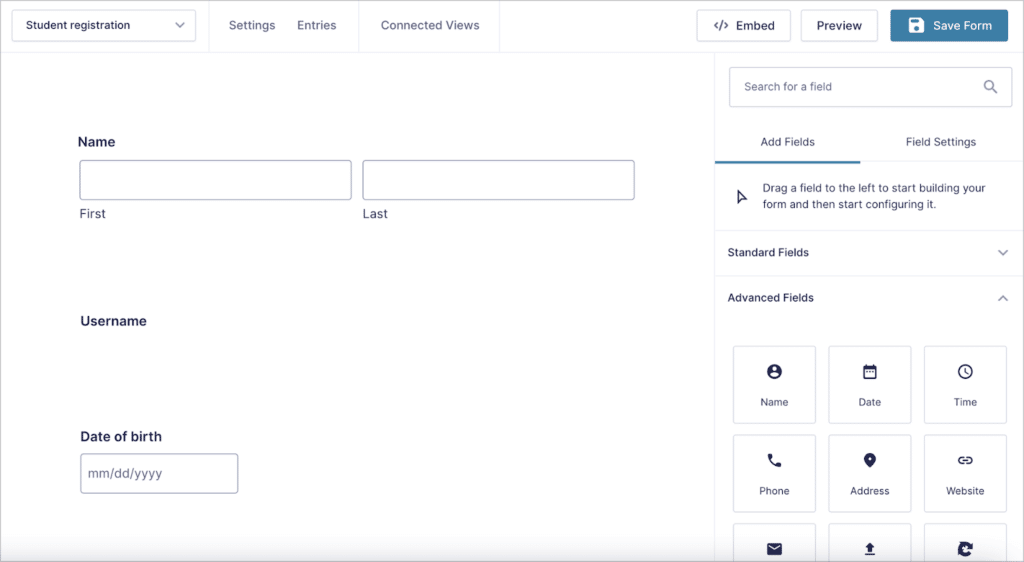
For this example, we’ll keep things simple by adding the following fields to our form:
- Name (“Name” field)
- Username (“Username” field)
- Date of birth (“Date” field)
- Email (“Email” field)
- Phone (“Phone” field)
- Department (“Dropdown” field)
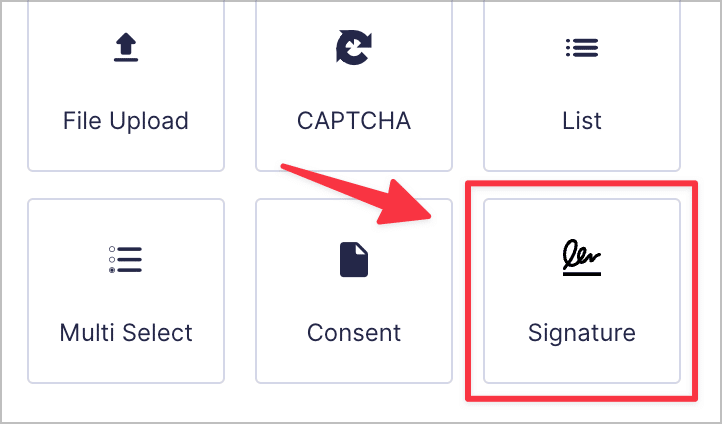
- Signature (“Signature” field)
If you’re using the Signature Add-On, you can find the “Signature” field under the “Advanced Fields” tab.
Here’s what our student registration form looks like on the front end:
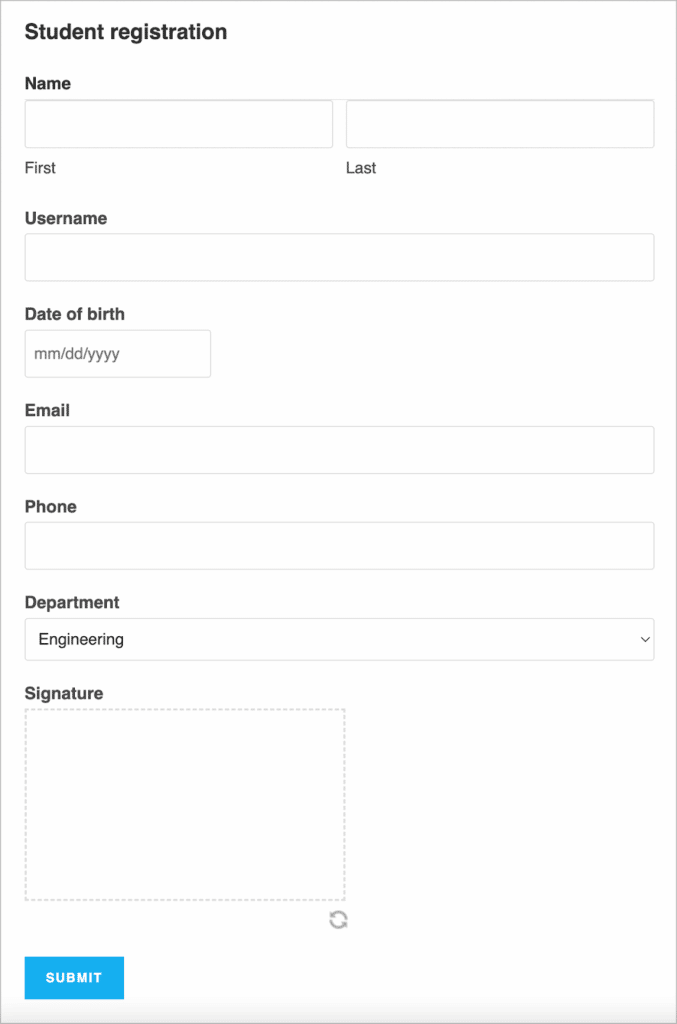
The Signature field provides a box where users can use their mouse to sign their signature. The Signature field also supports touchscreen for users on a mobile or tablet device.
Save time by downloading the free student registration form template now!
Pro tipIf your student registration form is quite long (i.e., if it contains a lot of fields), consider creating a Multi-Page form.
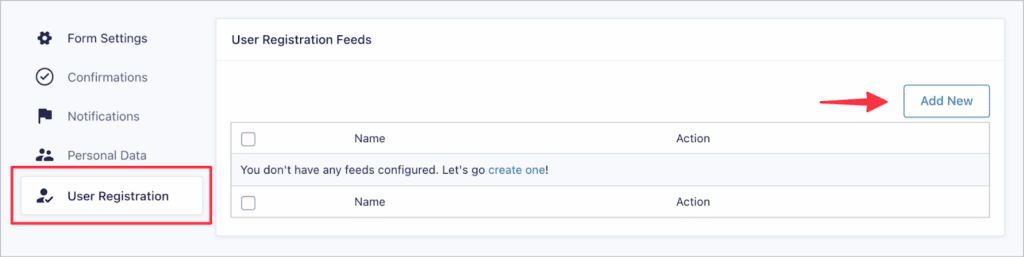
Adding a User Registration feed
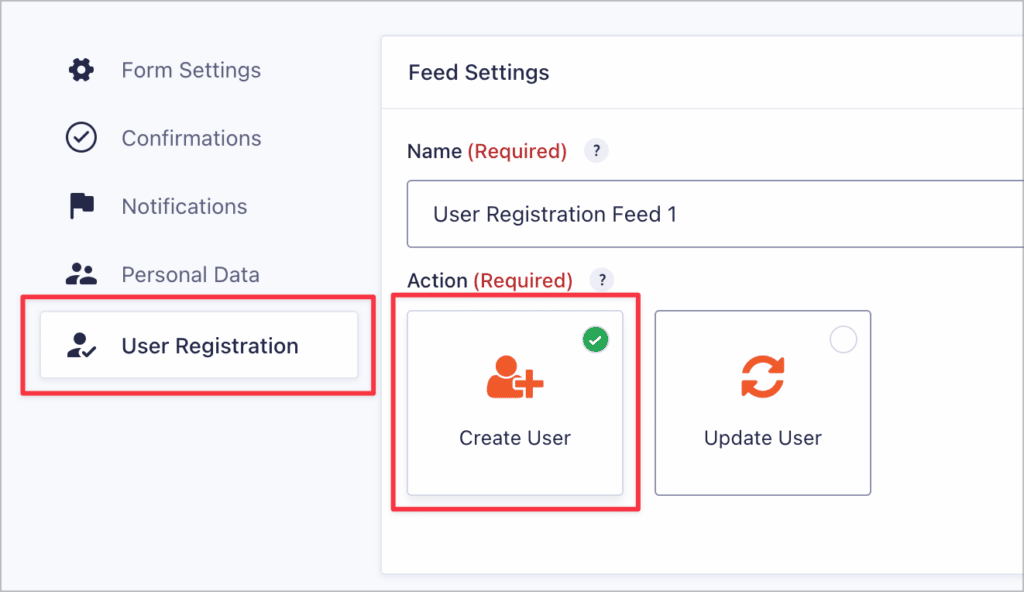
From inside the form editor, hover over “Settings” and click on “User Registration”. Now create a new User Registration feed by clicking the “Add New” button.
Now you can configure the User Registration feed. Start by selecting an action (this is the activity that happens when the user submits the form). In this case, it should be “Create User”.
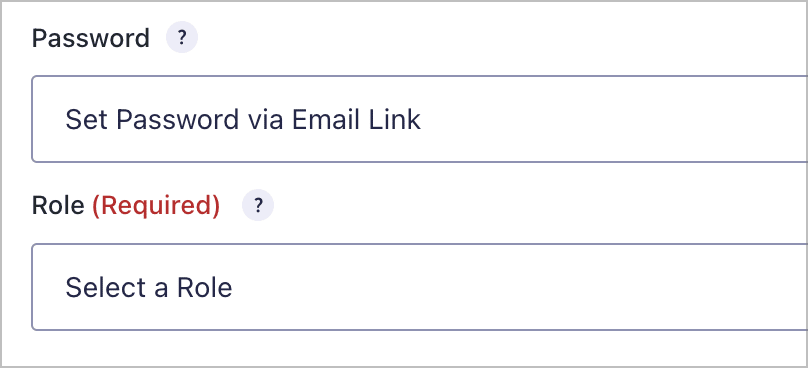
The next step is to map the various user-related fields to the relevant fields in your form. If your form doesn’t have a “Password” field, users can set their passwords via email link.
You’ll also need to select a user role for new registrants.
Pro tipYou can use the free Members plugin to manage user capabilities and create new, custom user roles.
Building the student database using GravityView
Now that you have your student registration form set up, you can start building your student database using GravityView. GravityView’s Table layout will allow you to create a powerful database for WordPress user management.
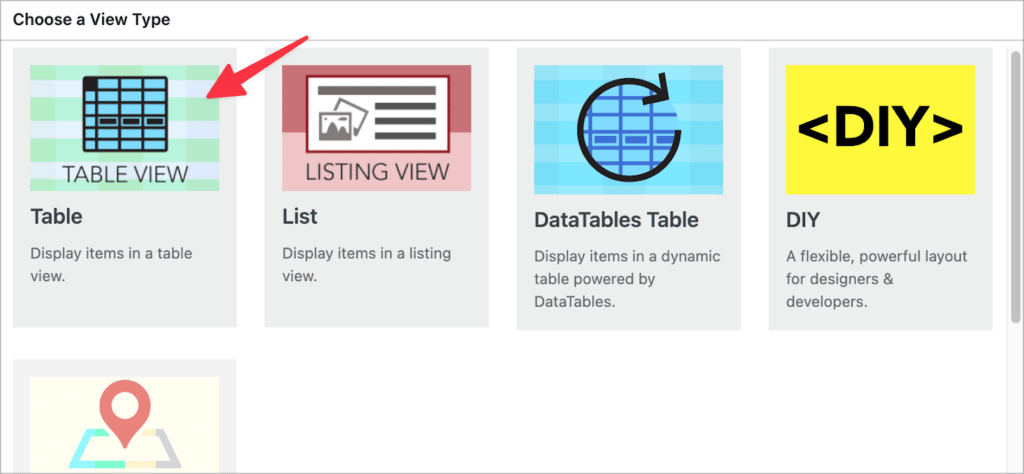
Hover over “GravityKit” and click “New View”. Now give your View a name and select your user registration form as the data source. Now you’ll need to choose a View type. For a database application, it’s best to select either the “Table” or “DataTables” layout.
For this example, we’ll go ahead and select the “Table” layout.
After choosing your layout, you can start constructing your View using GravityView’s drag and drop builder.
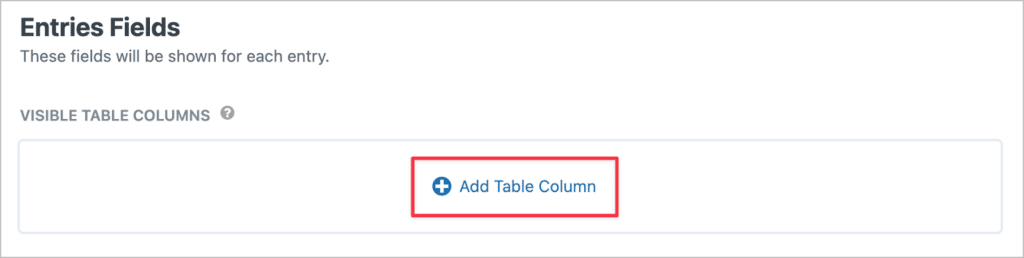
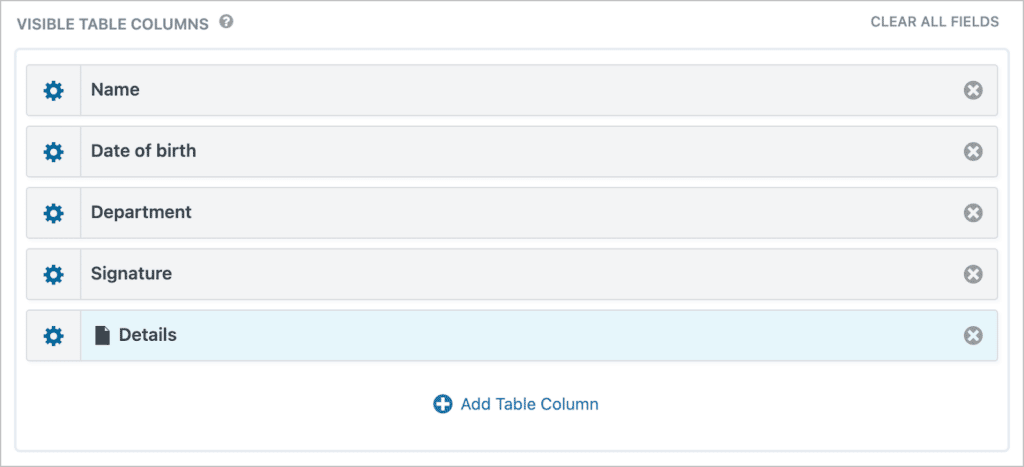
Start by adding columns to the Multiple Entries Layout. This is the main table where each of the student profiles will be displayed, one after the other. To add a new field, click on the “Add Table Column” button. Each new field you add here will display as a column in your table.
Here we’ve added the “Name”, “Date of birth”, “Department” and “Signature” fields. You’ll notice there’s also another field labeled “Details”. This is the field that will link through to the Single Entry page, allowing us to display additional information about each student. Think of the Single Entry page as a student’s “profile” page.
We’ll get back to the Single Entry Layout soon, but before that you may want to add widgets to your View.
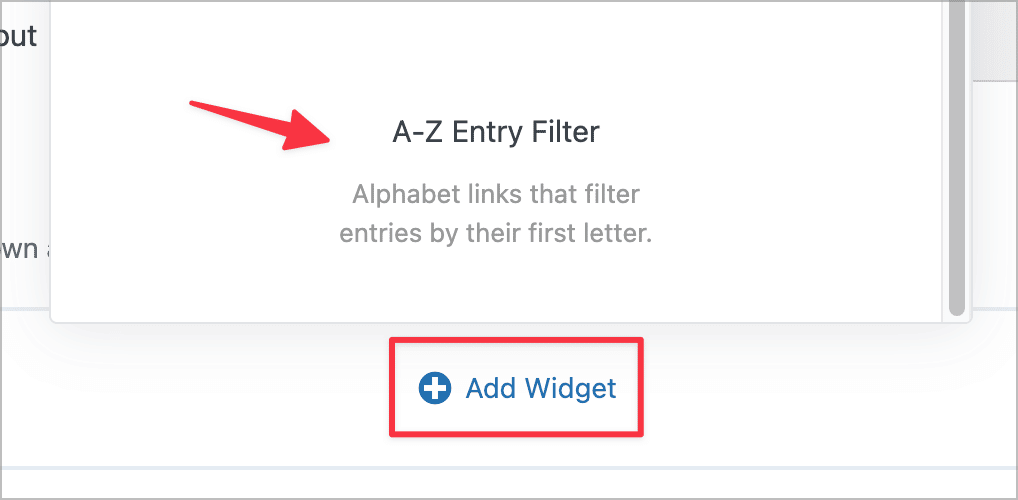
Adding widgets
To add a new widget, click on the “Add Widget” button. GravityView support multiple widgets including a Search Bar, Page Links, Custom Content and even a Gravity Forms widget.
Widgets are tools that help users navigate your View. In this example, we’ll add an “A-Z Filters” widget at the top, allowing Admins to filter students by the first letter of their first or last name. If you want to use the A-Z Filter, you’ll need to install the A-Z Filters Extension.
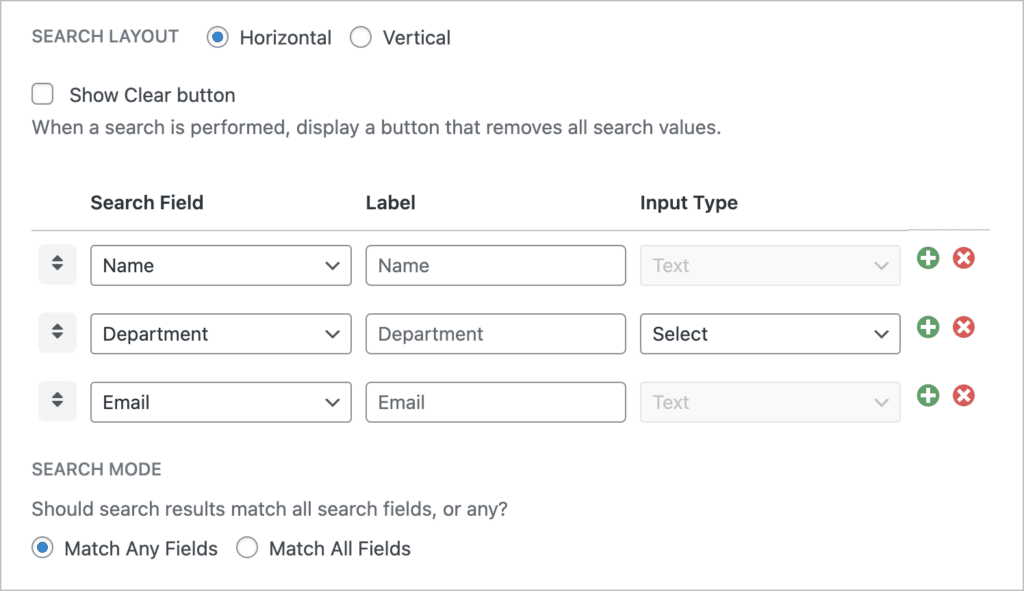
We’ll also add a Search Bar widget, allowing Admins and course organizers to search for students based on name, department, or email address.
Here’s what our student database looks like on the front end.
Okay, now that you’ve finished configuring the Multiple Entries Layout, you can start adding fields to the Single Entry page.
Configuring the Single Entry page
Head back to the View editor and click on the “Single Entry Layout” tab.

Now you can start adding fields here to show additional information about each student. Here’s what our Single Entry page looks like on the front end:
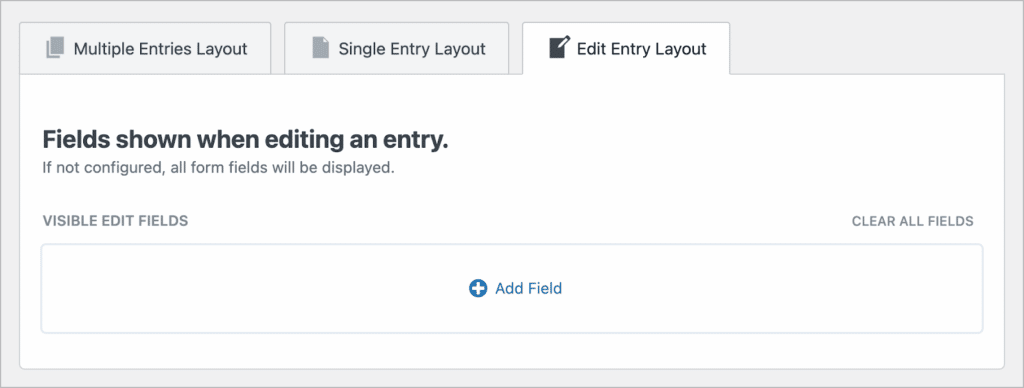
So far, we’ve created a student registration form and built a database to house student information. There’s one more (optional) step, which is to configure the Edit Entry Layout and allow students to update their information from the front end.
(Optional) allowing students to edit their profiles from the front end
This step is optional because you may only want Admins to be able to update student information. However, if you would like students to be able to edit their own information from the front end, enable “User Edit” by scrolling down to the View Settings, clicking on “Edit Entry” and checking the box that says “Allow User Edit”.

The next step is to click on the “Edit Entry” tab at the top and configure the Edit Entry layout. The fields you add here will be editable from the front end.
That’s it! You’ve successfully built a custom user registration system on WordPress using Gravity Forms and GravityView.
Pro tipEnjoyed this tutorial? Read our guide on how to build a student portal for assignment submissions next!
Bonus: Segmenting students by course
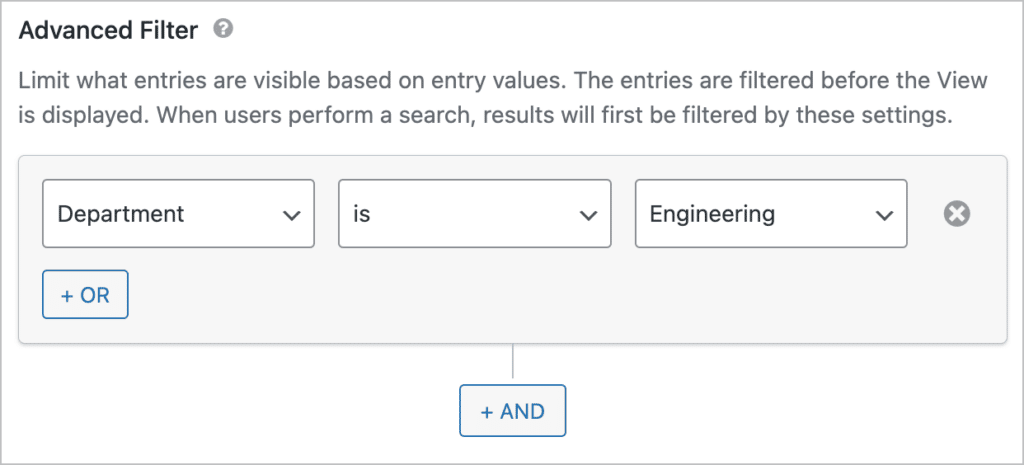
If you are enrolling college students for different courses, you may want a way to segment users by course. You can accomplish this using our Advanced Filtering extension.
The Advanced Filter allows you to filter the entries in your View using one or multiple conditions. To only display students who registered for courses in the Engineering department, we would add the following condition:
To learn about the GravityView Advanced Filtering extension, check out our documentation.
Build your WordPress student registration system now
Having a student registration system is important for schools, colleges and other educational institutions.
In this post, we showed you how to build a student registration system on WordPress using Gravity Forms and GravityView. First we created a student registration form and then we built a custom database to store and display student information.
If you’re interested in using Gravity Forms to build a WordPress student registration system, check out GravityView today!

Helpful tips right in your inbox.
Subscribe to get the latest articles, information on releases and helpful Gravity Forms tips!
More articles

10 things you can ask AI to do with Gravity Forms (using the free GravityKit MCP)
See 10 practical things you can ask AI to do with Gravity Forms using the free GravityKit MCP: create forms, manage entries, build Views, and more.

Launch Log: theme template editing in Block MCP, Shield silentCAPTCHA for Zero Spam, and GravityView fixes
Block MCP adds safe theme template editing, Gravity Forms Zero Spam gains Shield silentCAPTCHA support, and GravityView fixes lightbox and notice bugs.

GravityKit turns 12: a year in review, and 30% off Lifetime All Access
GravityKit turns 12. A look back at a year of GravityView 3.0, GravitySearch, and AI-assisted building, plus a birthday sale on the Lifetime All Access Pass.
