Published
•
Updated
How to build a recruitment CRM platform on WordPress
Build a custom recruitment CRM on WordPress to manage job applicants and candidate relationships. Uses Gravity Forms and GravityKit as an affordable alternative to SaaS recruitment tools.
Are you looking to build a WordPress website for a recruitment agency, or a CRM system for managing job applicants?
SaaS tools for this sort of thing can be expensive. They can also be overkill for smaller businesses. So, why not create a customizable solution that you can host on your own domain?
I’m Casey, in charge of marketing here at GravityKit, and I’m going to show you exactly how to do this using WordPress, Gravity Forms and GravityKit!
I’ve already written about building a job board, creating a job application management system, and building an application review system. But in this post, I’m going to focus on candidate relationship management, and show you how to create a CRM tool for recruiters!
Let’s get started.
Download the free candidate entry form template now!
Import the template into Gravity Forms and customize as necessary.
Sneak peek
Here’s a quick look at the finished recruitment platform, or “candidate relationship management system” if you will.
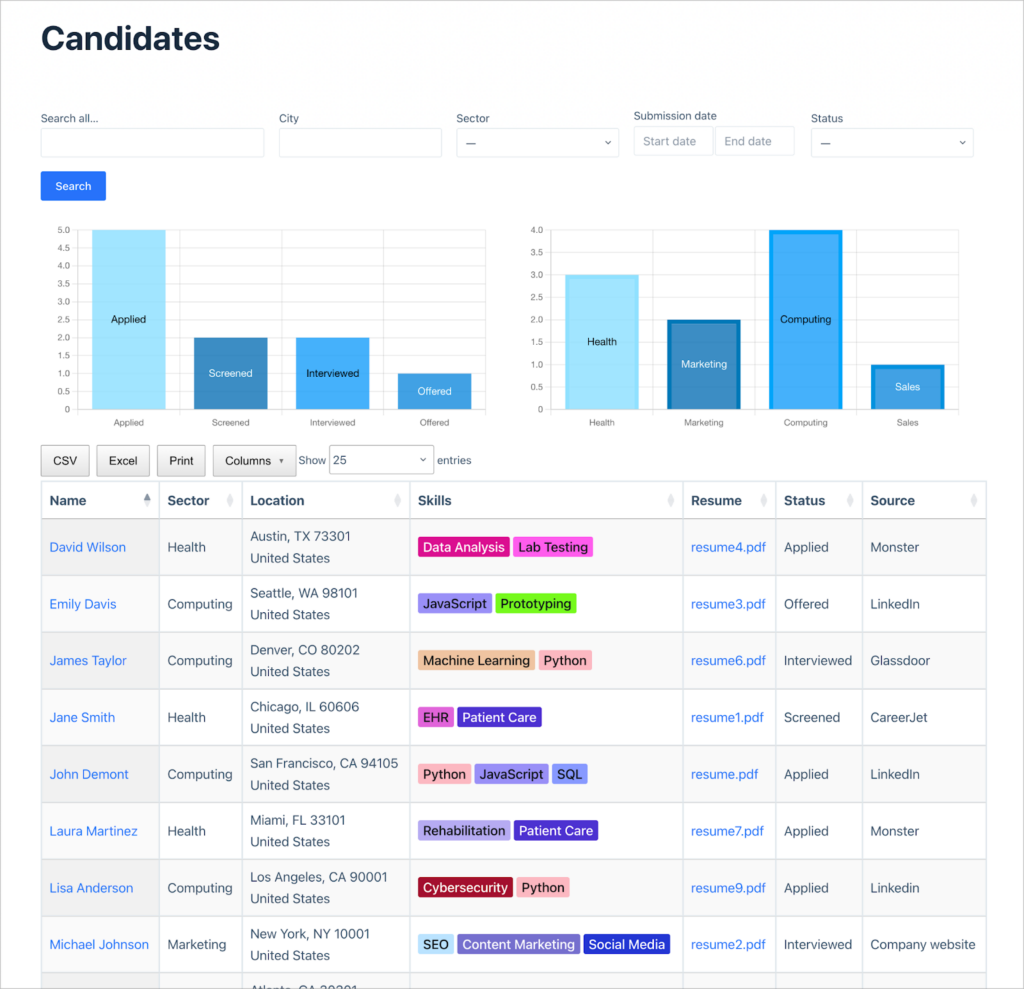
As you can see, we have a database of candidates with various charts above that give us an overview of how many candidates belong to each sector and status. There is also a search bar for filtering candidates by different metrics, and built-in export functionality, enabling you to export candidate lists to CSV or Excel!
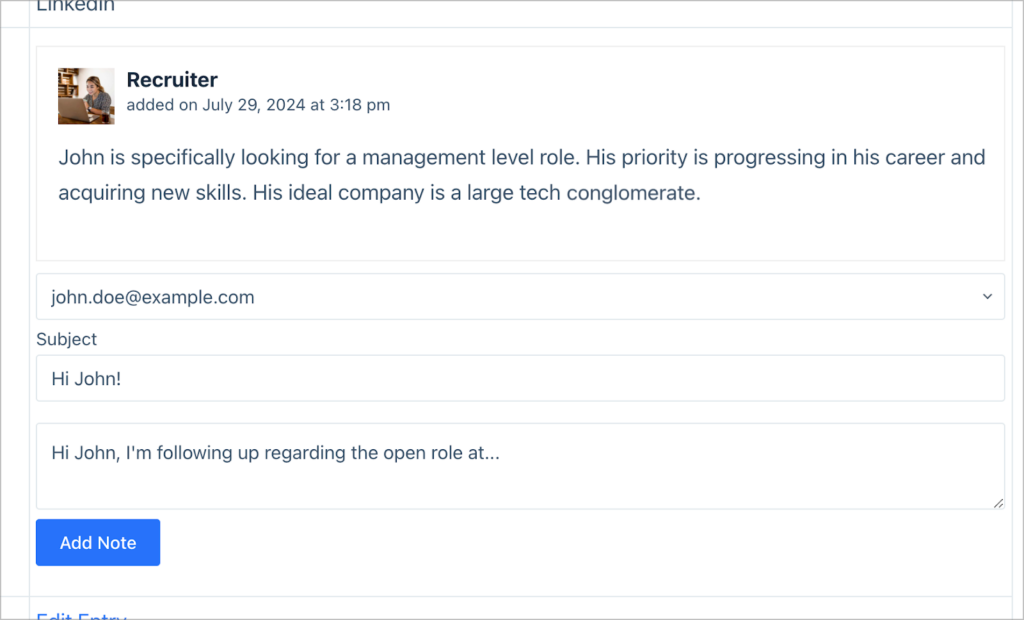
Clicking on the name of a candidate opens the Single Entry page, enabling you to view more information about a specific candidate.
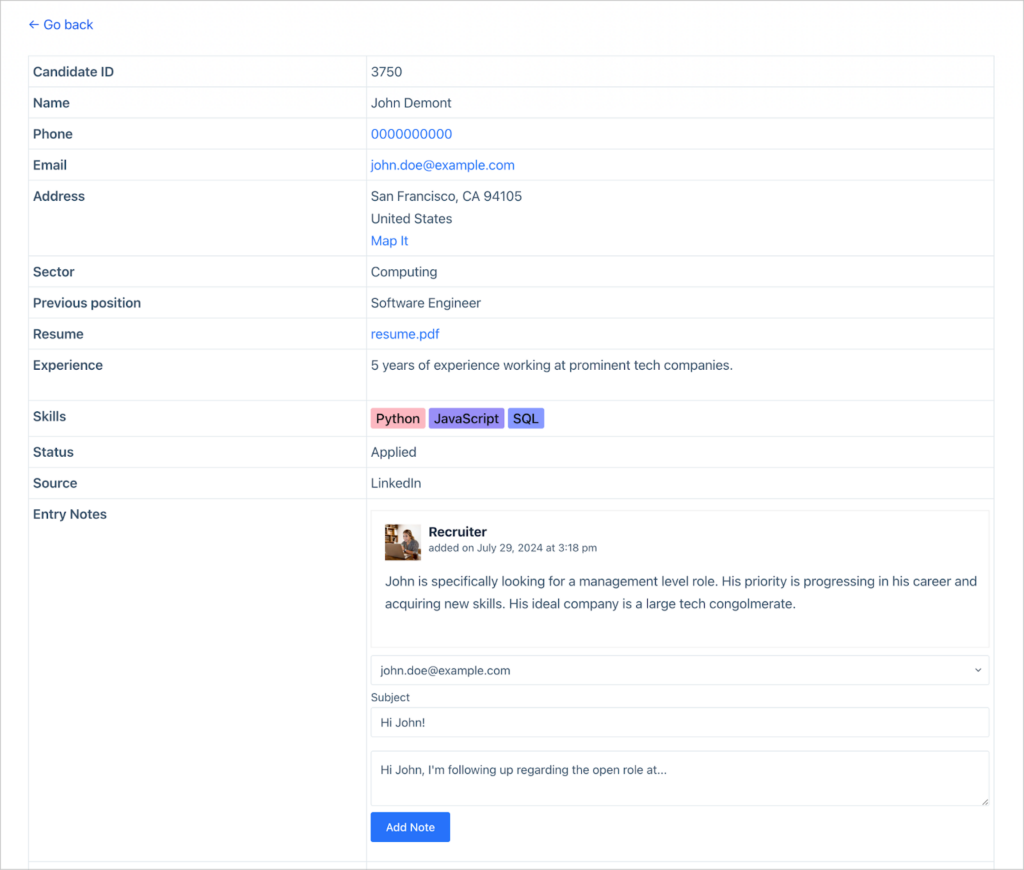
On this page, you can also add notes to a candidate’s profile, or send them emails directly!
I set up this system as a simple example to mimic some prebuilt tools that I’d seen online. Of course, there’s nothing stopping you from customizing things, or adding additional functionality using our suite of tools 9that’s the beauty of using GravityKit!).
Now, on with the tutorial.
Wanna try it?
Spin up a demo
See a live recruitment CRM built with GravityView — explore the demo.

What you’ll need
Here are the plugins you’ll need to build a recruitment platform like the one above:
- Gravity Forms
- GravityView Pro
- Gravity Forms Entry Tags (free!)
- GravityCharts (optional)
Creating a form to input candidate information
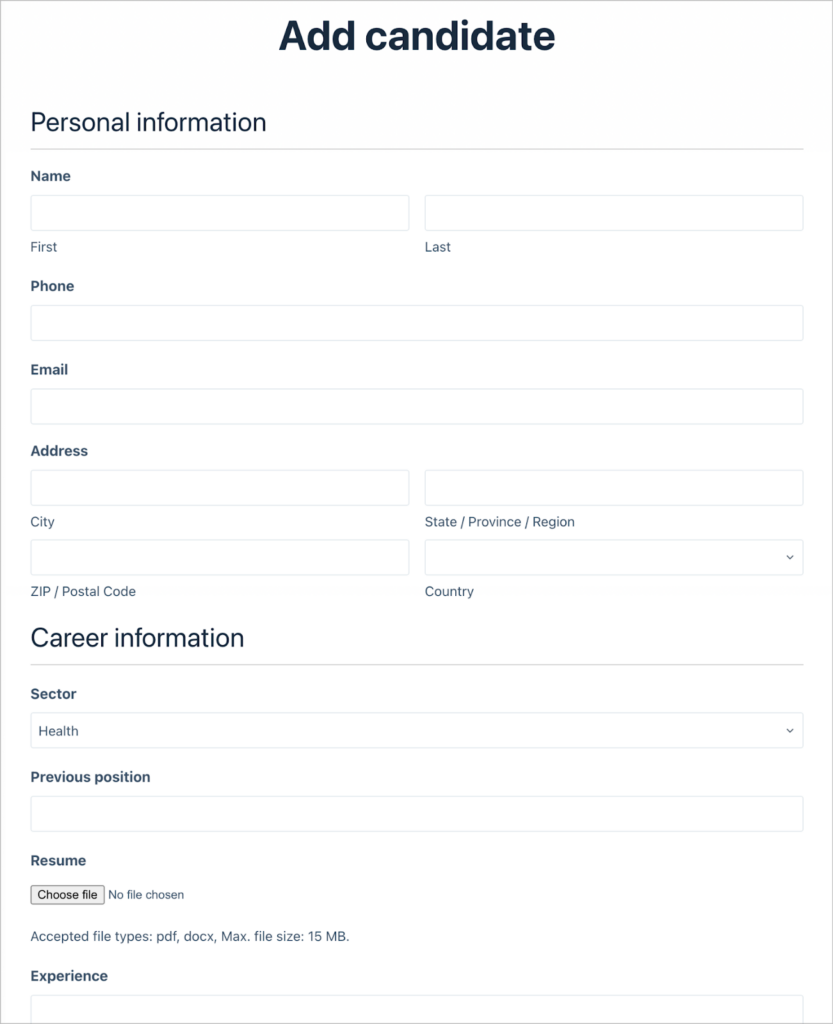
The first thing we need to do is create a form for adding new candidates to the database. We’ll hover over “Forms”, click “New Form” and start from a blank canvas. Now we can add the fields we need using the Gravity Forms drag-and-drop editor.
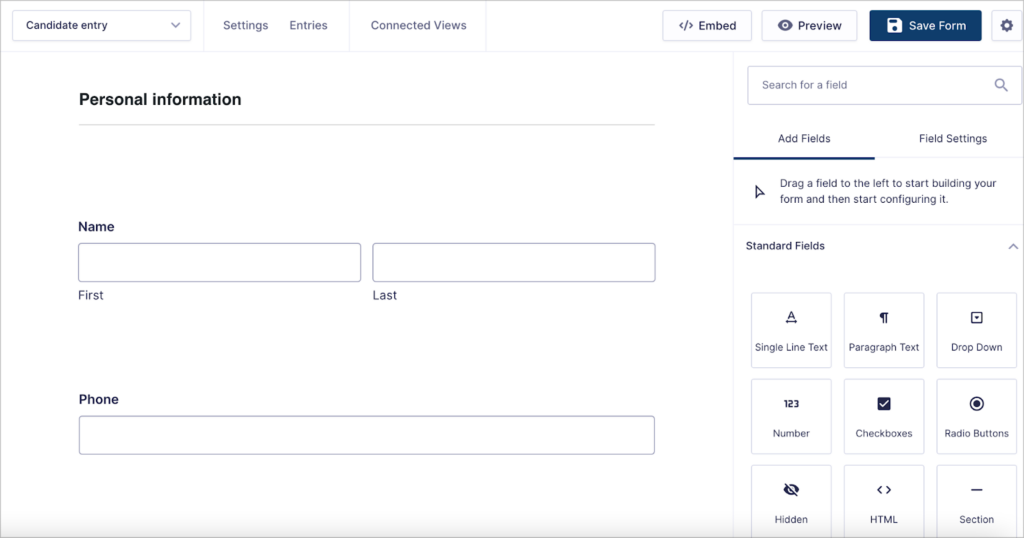
Feel free to add any fields you feel are necessary here. For this example, I added the following fields:
Personal information (section)
- Name (“Name” field)
- Phone (“Phone” field)
- Email (“Email” field)
- Address (“Address” field)
Career information (section)
- Sector (“Drop Down” field)
- Previous position (“Single Line Text” field)
- Resume upload (“File Upload” field)
- Experience (“Paragraph Text” field)
- Skills (“Entry Tags” field)
Pipeline (section)
- Status (“Drop Down” field)
- Source (“Single Line Text” field)
For the “Skills” field, we’re using the Gravity Forms Entry Tags add-on (it’s free!). Those are the color coded tags you can see in the screenshots above. Those tags are also clickable, which make them aesthetically pleasing AND useful!
Pro tipI find it helpful to split long forms into sections using the “Section” field. It just makes things easier to manage and more user friendly.
Now that our form is set up, we have an easy way to add new candidates to our database. The next step is to build a front-end interface to searching, filtering, exporting, editing, and emailing candidates!
Creating the candidate CRM database
To build the front-end interface, we’re going to use GravityView! To add a new View in GravityView, we’ll hover over “GravityKit” and click “New View”.
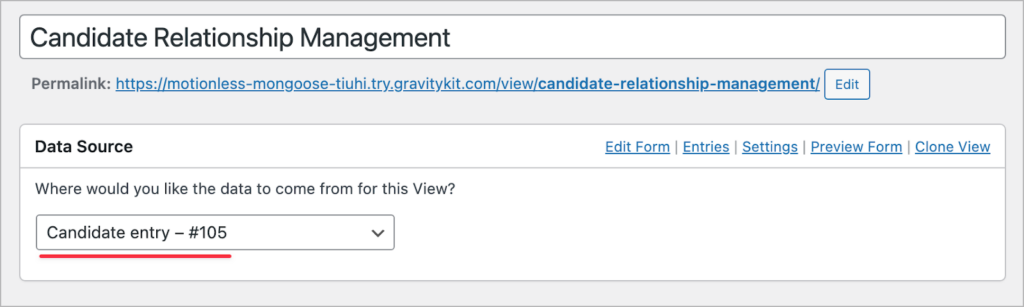
First, we’ll give our View a name. After that, we need to select a data source. This will be the form we created in the previous step!
Now we can choose a View type. GravityView support a range of View types for displaying data using different layouts. For this application, we’ll choose the “DataTables table” layout available with GravityView Pro.
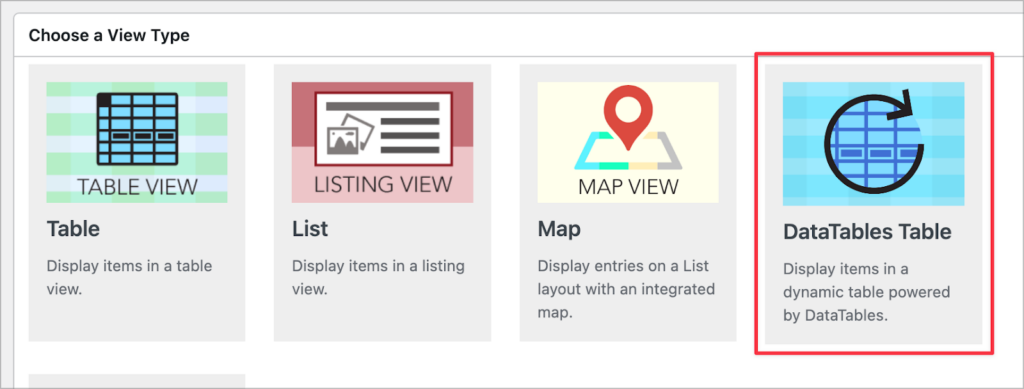
The reason we’re choosing to use this View type is because it includes built-in export functionality that’s useful for CRM type applications!
Okay, now that we’ve chosen our View type, we can start configuring the View itself. Let’s start with the Multiple Entries Layout—this is the main table that contains all candidates.

Scrolling down to the “Entries Fields” section first, here we can add columns to the table for each field we want to display.
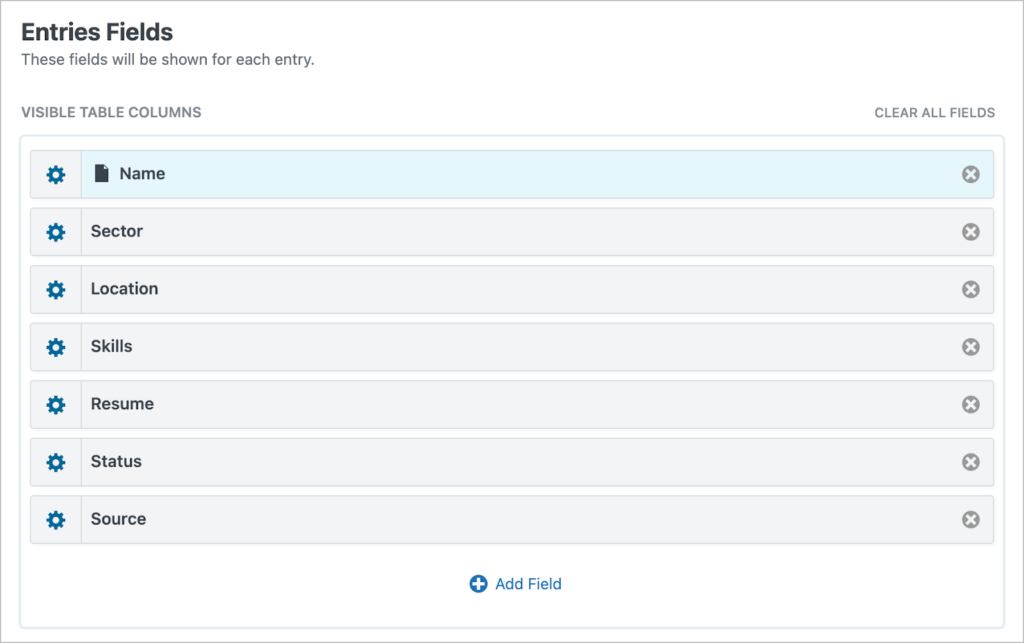
Let’s add the following fields:
- Name
- Sector
- Location (Address)
- Skills
- Resume
- Status
- Source
Next, we’ll scroll up to the “Top Widgets” area and add a search bar widget.
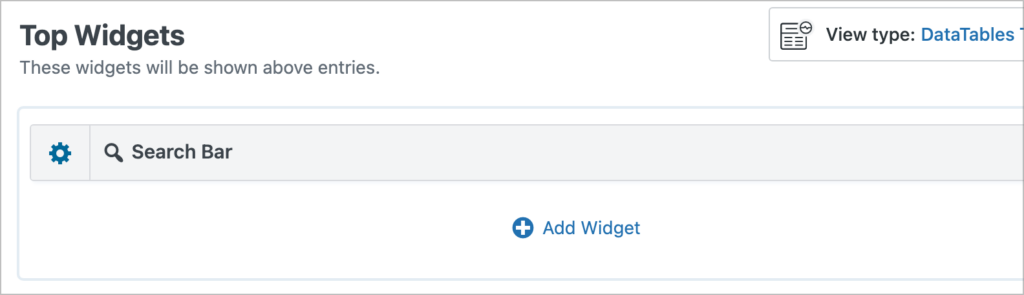
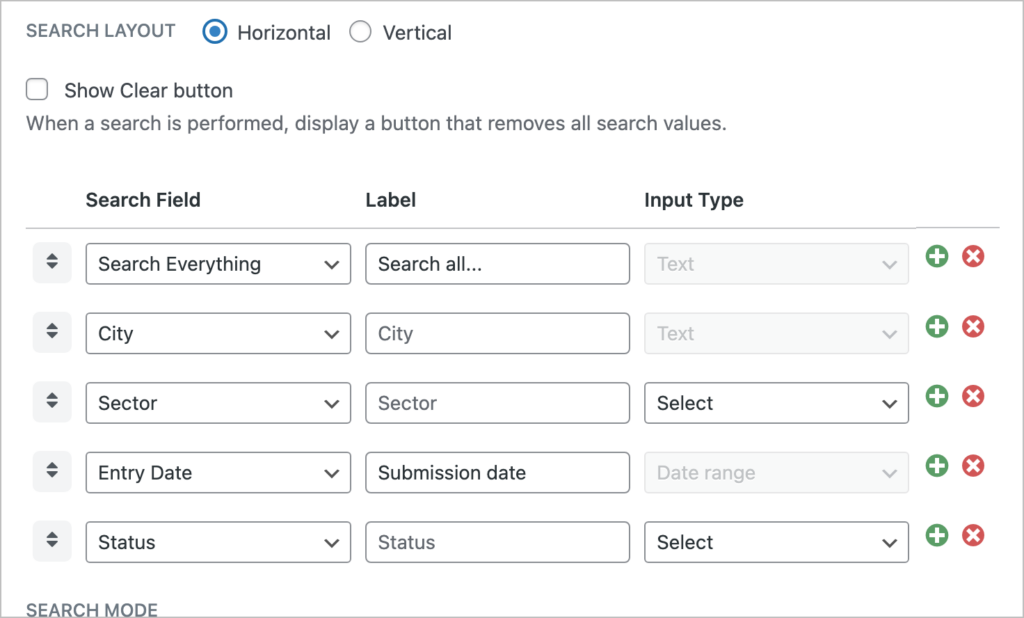
By clicking on the gear icon, we can configure the search bar settings. Here we can add search input fields for any of the fields in our View. To make it easy to search for candidates, let’s add search inputs for the “City”, “Sector”, “Entry Date”, and “Status” fields.
That’s all for the Multiple Entries layout (for now!), let’s turn our attention to the Single Entry layout.
Configuring the Single Entry layout
To configure the Single Entry page, we’ll click on the “Single Entry Layout” tab at the top of the View editor.

Here we’re going to add all our form fields! This will enable us to see all the information associated with a single candidate.
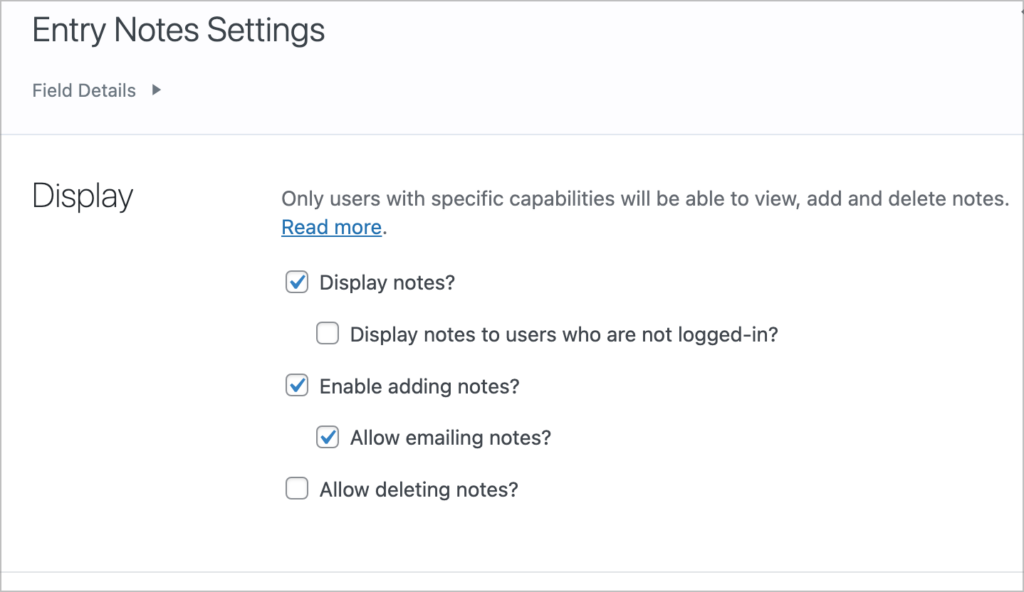
Recruiters may also want to add notes to candidate profiles and track their communications, so for that we’ll use the “Entry Notes” field.
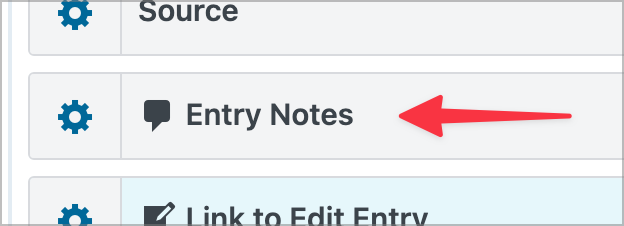
Entry notes is a built-in Gravity Forms functionality that enables you to add notes to entries and email those notes to other users. We can configure how this works by modifying the field settings in GravityView.
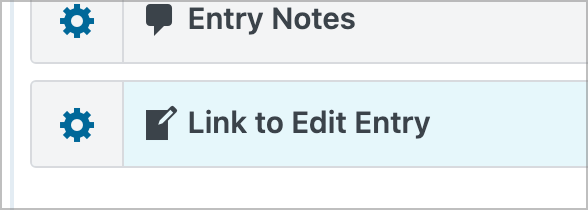
Finally, we’ll add an “Edit Entry Link” field, enabling recruiters to update candidate profiles. This is useful for changing the status of a candidate, updating their contact details, or even removing them from the database.
Pro tipIf you only want certain fields to be editable, you can add them to the “Edit Entry Layout” in the View editor (by default, all fields are editable).
Modifying the View settings
Finally, we’ll scroll down to the settings, and click on “DataTables”. Here you’ll find a range of options for customizing your DataTables View!
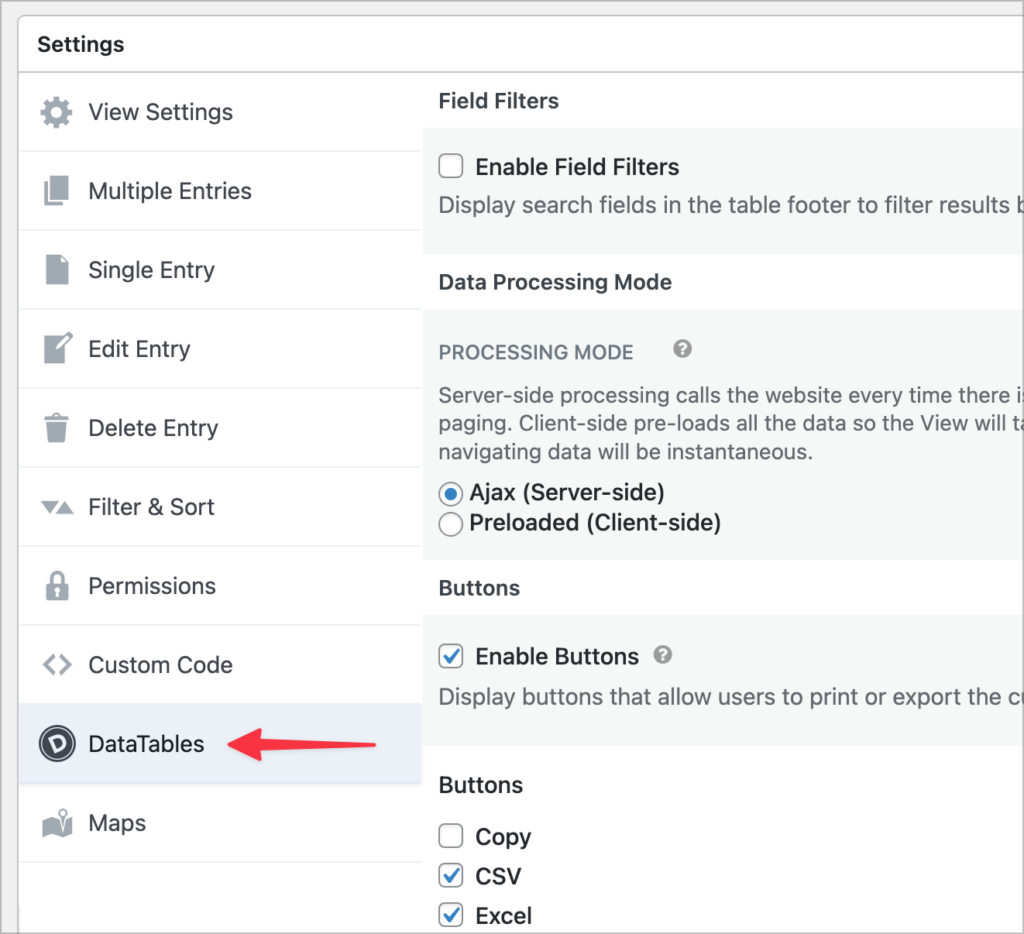
I would recommend you take some time to go through these settings to configure things to your liking. Here are the settings I usually use:
- The “Preloaded” processing mode for faster data loading
- Enable buttons and select all export formats (Excel, PDF, CSV)
- Enable responsive tables
- Enable field filters (if you require more granular filtering)
Adding charts and reporting
In case you’re wondering how I added those sleek-looking charts to the dashboard, I used GravityCharts!
Personally, GravityCharts is one of my favorite plugins. It makes it easy to create professional charts, and it integrates seamlessly with GravityView (i.e., your charts will update automatically when you perform a search).
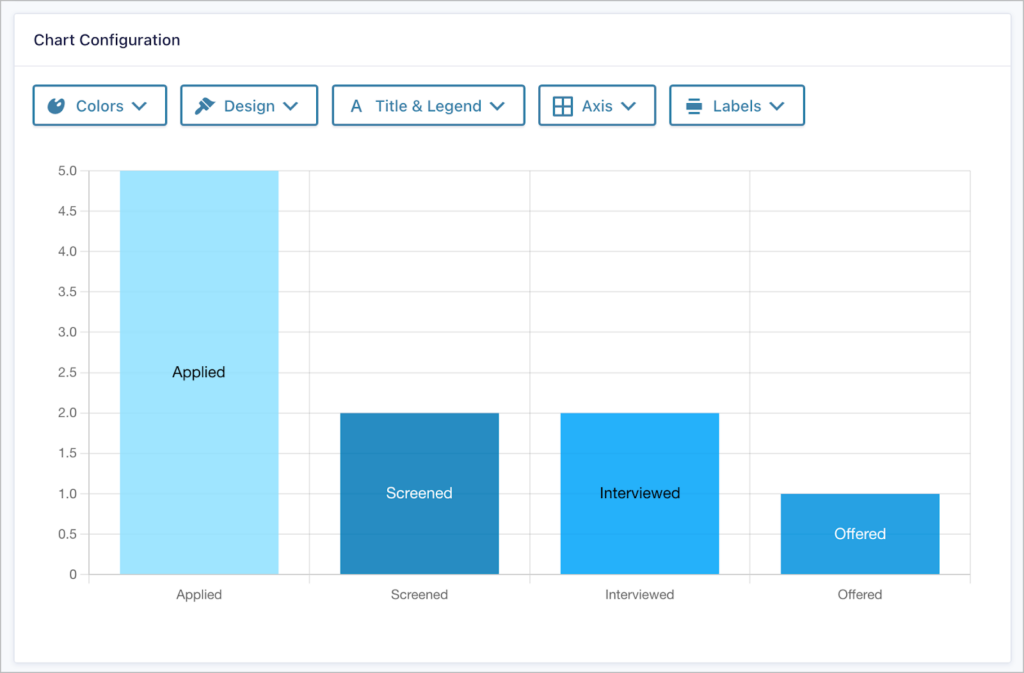
To create a new chart, we’ll open the settings for our “Candidate entry” form and click on “GravityCharts”. Here we can add one or more charts to visualize data collected through our form!
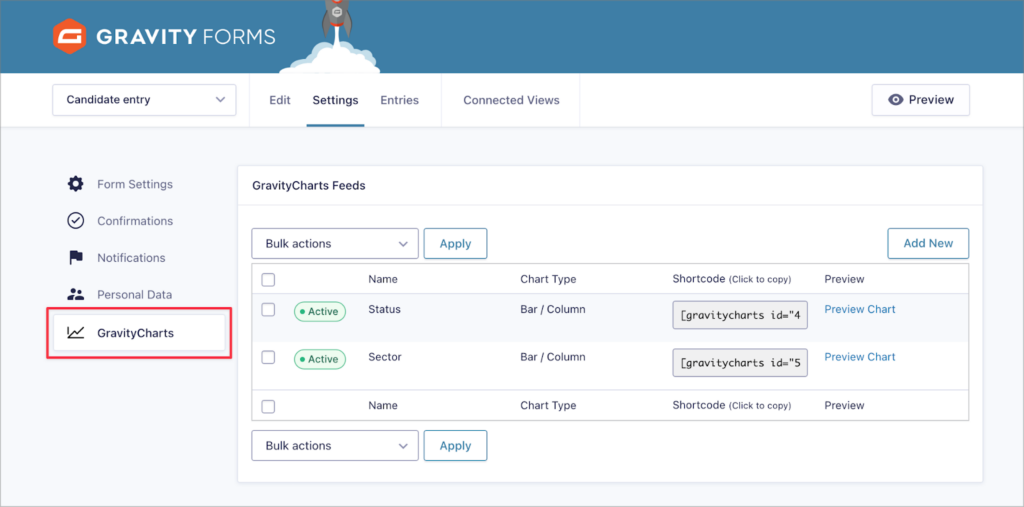
For this example, we’ve created a couple of column charts for visualizing the number of candidates at each stage in the pipeline, and the number of candidates in each sector.
To add these to our front-end interface, all we need to do is go back to the View editor, and add a new “GravityCharts” widget (or in this case, two of them!).
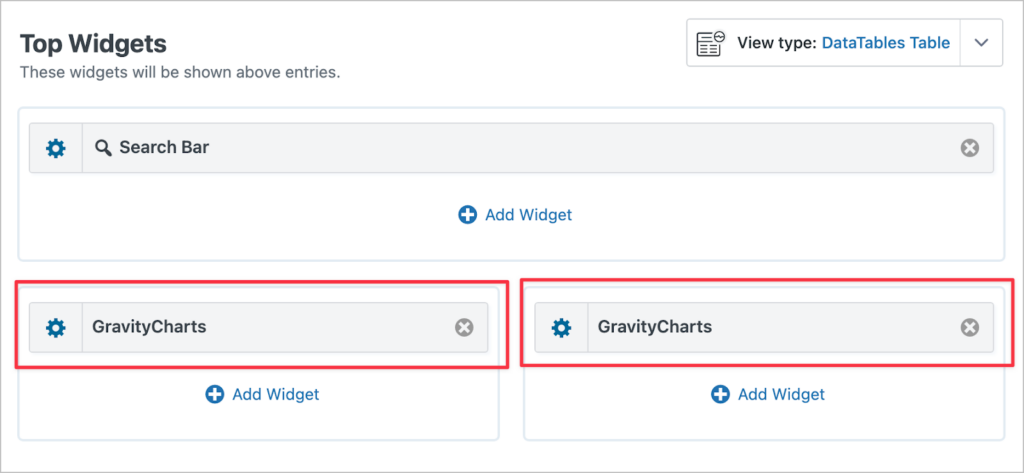
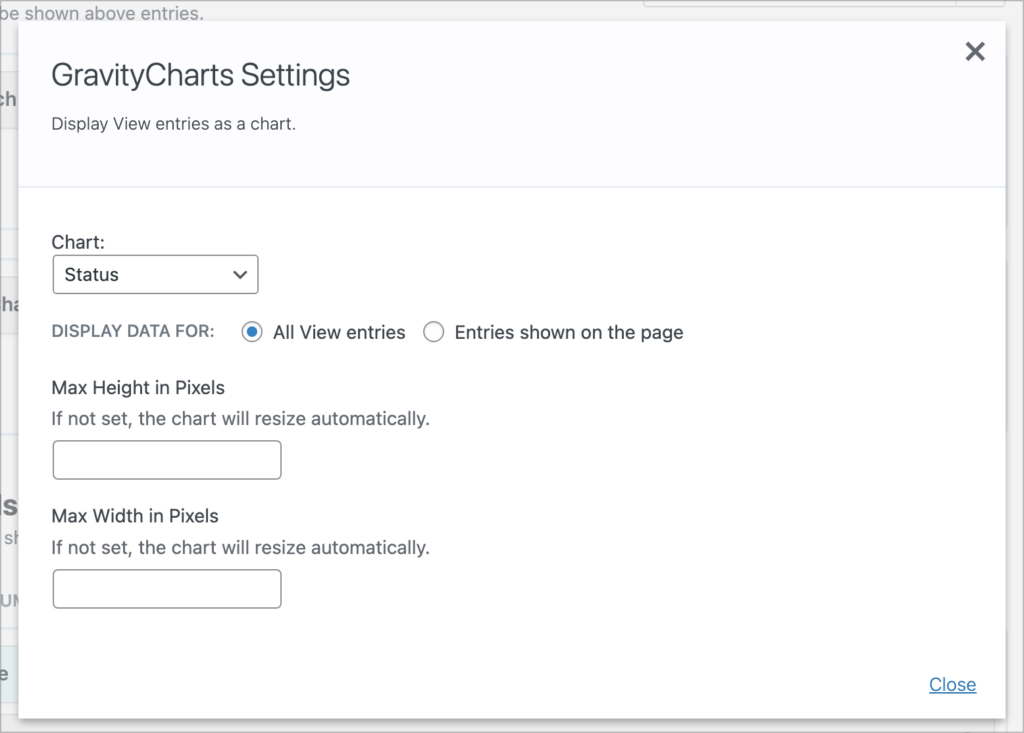
We can then open the widget settings and select the exact chart we want to display.
That’s it! Now let’s see what our recruitment CRM platform looks like on the front end:
So, what do you think? Would you build this for a client, or perhaps for yourself? Is there anything you’d do differently? Let me know!
Build a recruitment agency website on WordPress
While Gravity Forms enables you to collect data, GravityKit helps you interact with that data in a meaningful way and build custom web applications! In this post, I showed you how to create a custom candidate relationship management system on WordPress for recruiters or hiring managers.
If you found this tutorial interesting, take a look at our other how-to guides to see what else is possible with GravityKit!

Helpful tips right in your inbox.
Subscribe to get the latest articles, information on releases and helpful Gravity Forms tips!
More articles

10 things you can ask AI to do with Gravity Forms (using the free GravityKit MCP)
See 10 practical things you can ask AI to do with Gravity Forms using the free GravityKit MCP: create forms, manage entries, build Views, and more.

Launch Log: theme template editing in Block MCP, Shield silentCAPTCHA for Zero Spam, and GravityView fixes
Block MCP adds safe theme template editing, Gravity Forms Zero Spam gains Shield silentCAPTCHA support, and GravityView fixes lightbox and notice bugs.

GravityKit turns 12: a year in review, and 30% off Lifetime All Access
GravityKit turns 12. A look back at a year of GravityView 3.0, GravitySearch, and AI-assisted building, plus a birthday sale on the Lifetime All Access Pass.
