Did you know that Gravity Forms supports AJAX? Enabling AJAX means that your forms no longer require a page reload to validate and submit entries.
If you’ve installed Gravity Forms on your website, you may have a number of questions related to AJAX functionality. You may be wondering how to enable AJAX submission and validation for new forms, or you may have encountered an AJAX error, and you’re not sure what to do about it.
I’m going to answer all of these questions (and more) in this post. Keep reading to find out everything you need to know about Gravity Forms AJAX submissions!
Table of contents
How to enable Gravity Forms AJAX submission on existing forms
AJAX is disabled by default on new Gravity Forms. However, you can enable AJAX on new or existing forms in just a few clicks. Here’s how to do it.
The process for enabling AJAX on your existing forms is different depending on which editor you’re using (either the WordPress “Classic” editor or the newer Gutenberg “Block” editor). Let’s take a look at how to enable AJAX for existing forms in both editors.
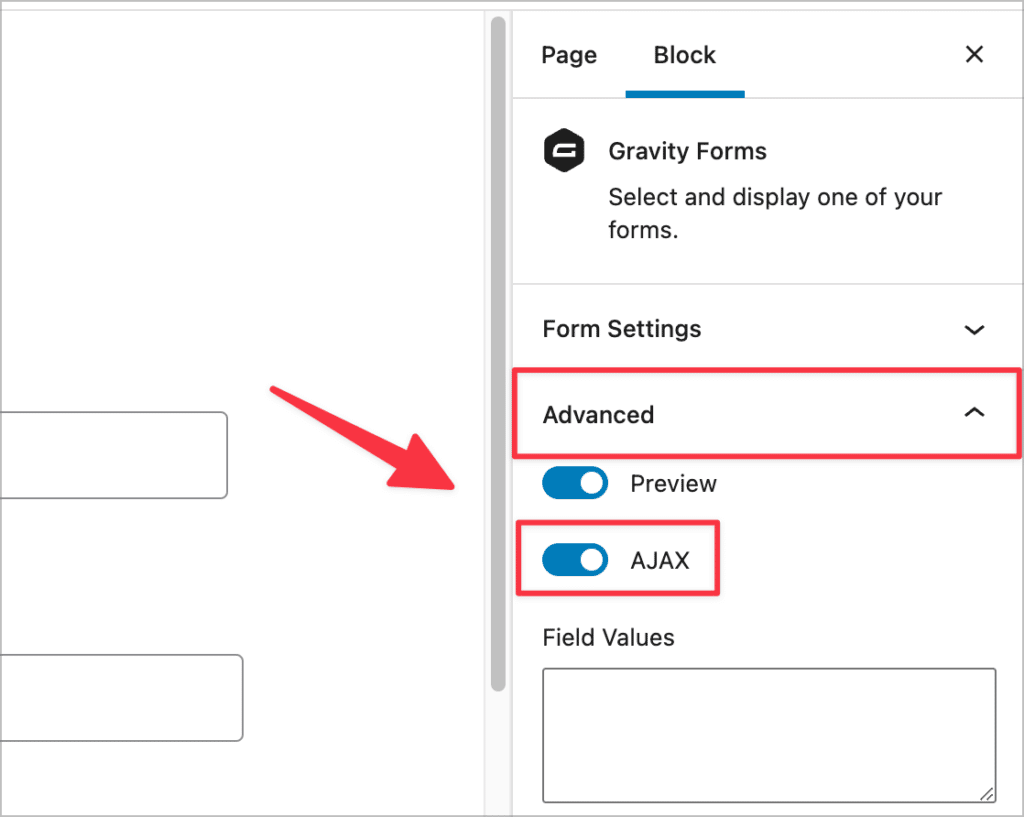
Start by editing the page where your form is embedded. Next, locate the “Gravity Forms” block and click on it to open the Block Settings in the right-hand panel. Now open the “Advanced” settings panel and toggle “AJAX” on.
Still using the WordPress Classic editor? In this case, you’ll need to add a shortcode parameter to enable the AJAX submit functionality.
Start by editing the page where your form is embedded. Now, locate the Gravity Forms shortcode. The shortcode will look something like this (give or take a few parameters):
[gravityform id="34" title="true" description="true"]To enable AJAX, all you need to do is add ajax="true" before the closing bracket, like this:
[gravityform id="34" title="true" description="true" ajax="true"]It doesn’t matter what order you place place ajax="true"; it can be the first or last attribute in your shortcode.
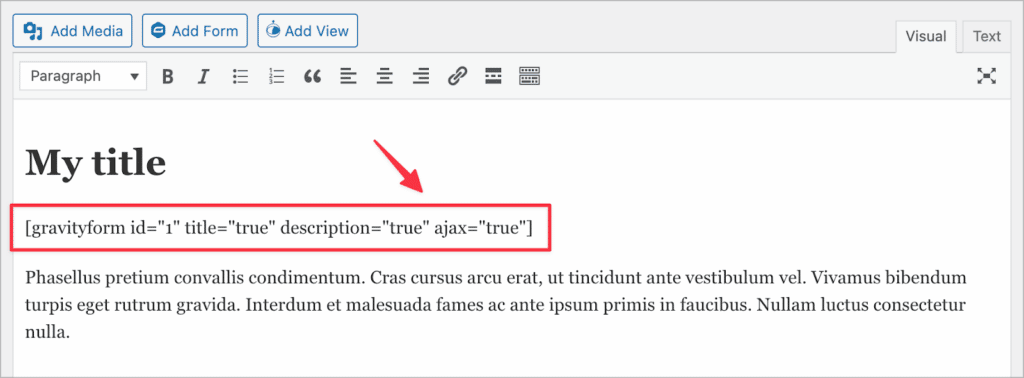
That’s it! As you can see, enabling AJAX for existing forms in Gravity Forms is simple. Now let’s take a look at enabling AJAX on new forms when adding them to a page or post.
Enabling AJAX submission on new forms
Now let’s look at how to enable AJAX submission when adding a new Gravity Form to a page or post.
Start by navigating to an existing page/post, or simply create a new one. Next, click the ‘+’ icon to add a new block to your page and select the “Gravity Forms” block. If you can’t find it in the block picker, type “Gravity Forms” into the search bar.

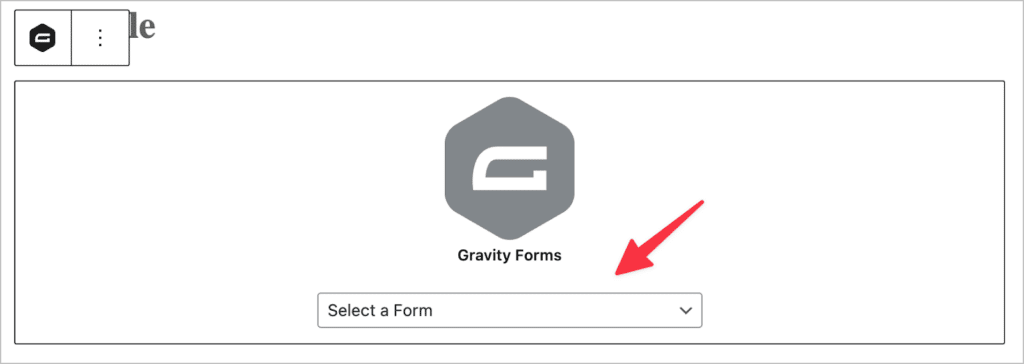
After adding the Gravity Forms block to your page layout, select the form you want to embed from the dropdown menu.
Next, open the “Advanced” settings panel on the right and toggle “AJAX” on.
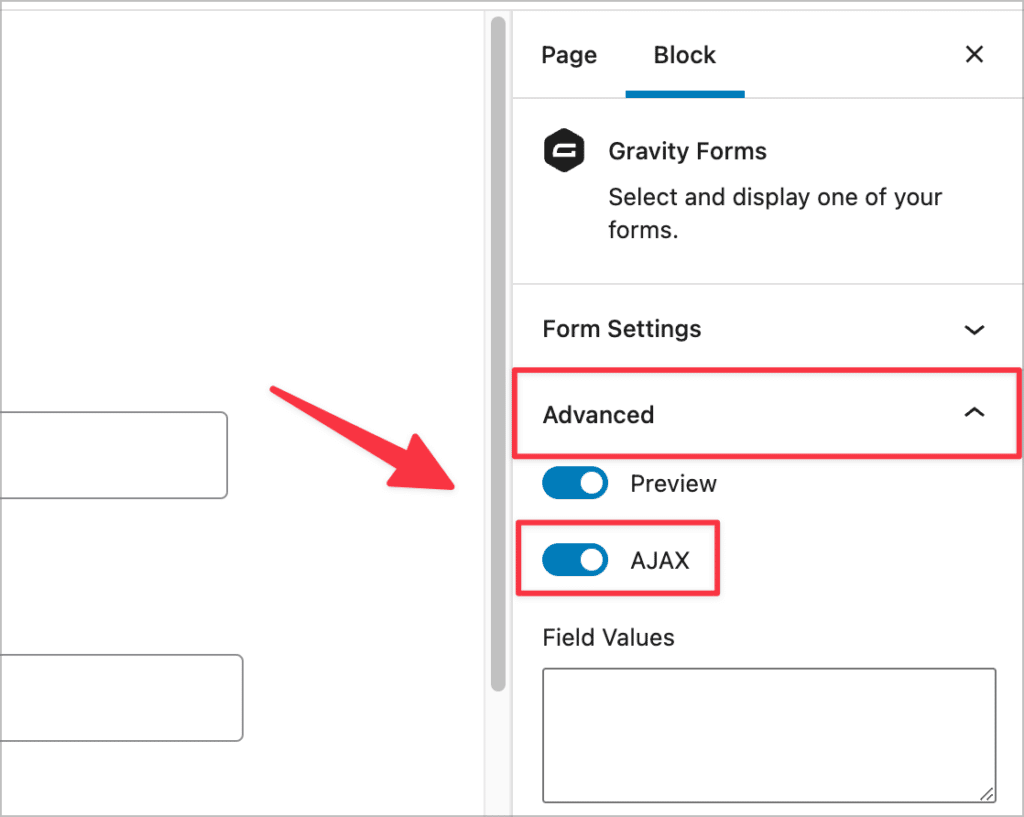
That’s it! Now save the post or page, and you’re done.
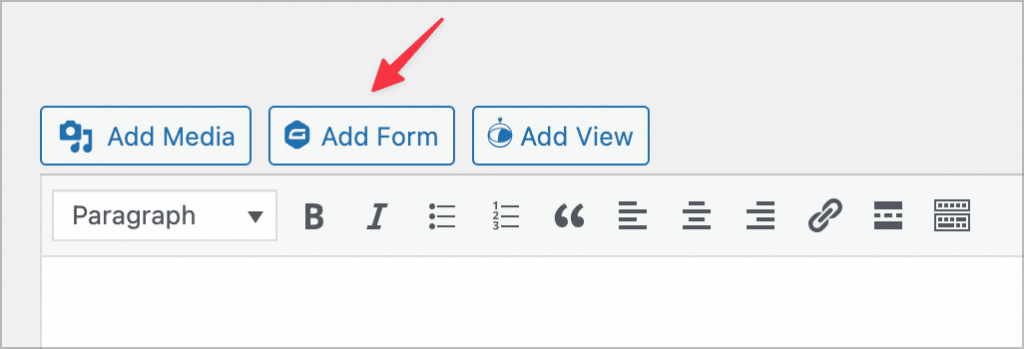
If you’re using the Classic editor, start by navigating to an existing page/post, or simply create a new one. Next, click on the “Add Form” button above the editor.
Now, select the form you want to embed from the dropdown menu and check the box that says “Enable AJAX”.
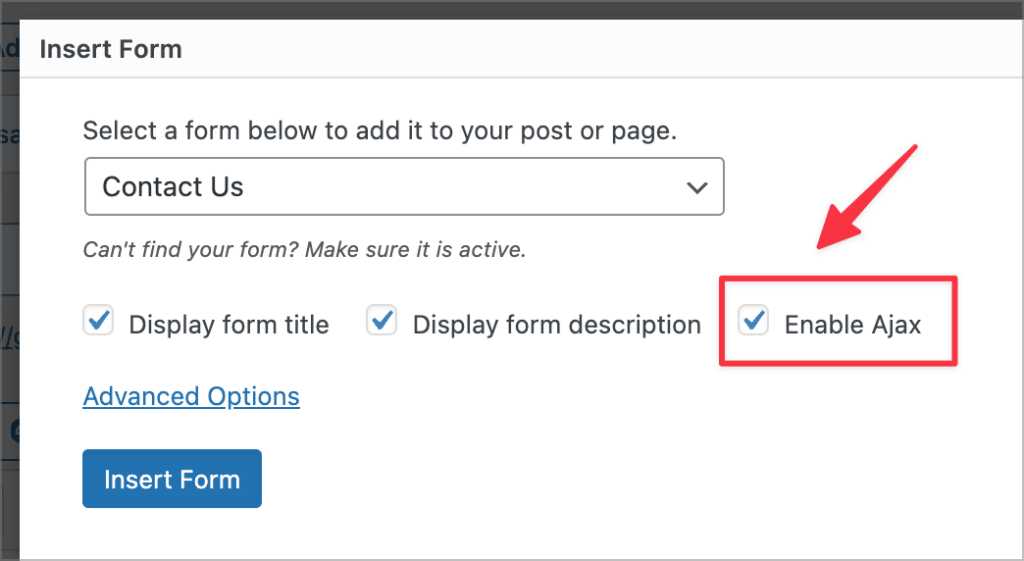
Finally, click “Insert Form” and save your post or page.
As you can see, it’s quick and easy to enable AJAX on new or existing forms!
💡 Pro tip: Are you looking to build dynamic web applications with Gravity Forms? Check out our kit of powerful add-ons!
Gravity Forms AJAX not working? Here’s what to do
Are you running into problems when trying to submit a Gravity Form using AJAX? It’s not common to encounter errors with AJAX submit, but it can happen due to conflicts or configuration issues with your site or form. Here are a few things that may be causing problems with AJAX submission and how to fix them.
Check your shortcode for errors
If your form is embedded using the Gravity Forms shortcode, double check that there are no mistakes, such as a missing double quote, or misspelled words.
Try disabling Google reCAPTCHA
In the past, Google reCAPTCHA was incompatible with AJAX. Many people would enable reCAPTCHA and then discover that their form wasn’t working properly with AJAX enabled.
This problem was fixed in 2019 when Google released an update that made reCAPTCHA compatible with AJAX. However, it might still be worth disabling it and submitting the form again just to see what happens. If it works when reCAPTCHA is disabled, try using the honeypot field as an alternative anti-spam measure.
Check for JavaScript errors
If Gravity Forms AJAX submit simply isn’t working, check the console for JavaScript errors. If you see an error such as “gform is not defined”, then there’s a high chance that scripts are not being enqueued correctly. This may be due to your theme or plugins causing conflicts.
If you’re not able to debug the issue yourself, enlist the help of a developer or contact Gravity Forms support.
Embed your form using the WordPress editor
If you’ve embedded your forms using a third-party solution, this may cause problems with AJAX submit. Try embedding the form again using the default WordPress editor instead.
Disable caching plugins
If you’re using aggressive caching to speed up your site, this may cause problems with Gravity Forms AJAX submit. Try disabling any caching plugins and testing the form again. If it works, you may need to adjust your caching settings or try a different caching plugin altogether.
Check for plugin or theme conflicts
One of the most common causes of errors in WordPress is different plugins interfering with each other. If none of the solutions above have worked for you, try disabling all plugins except Gravity Forms and switching to one of the default themes. Test your form again and if it works, then you know the problem was due to a plugin or theme conflict.

Forcing AJAX on all forms
If you have a website with multiple forms set up and you have forgetten to enable AJAX on each of them individually, you can use the gform_form_args filter to force AJAX on all forms across your site! Here’s an example:
add_filter( 'gform_form_args', 'filter_gravity_forms_force_ajax' );

/**
 * Modifies the Gravity Forms form settings to set "ajax" to true.
 *
 * @param array $form_args An array of Form Arguments when adding it to a page/post (like the ID, Title, AJAX or not, etc.).
 *
 * @return array
 */
function filter_gravity_forms_force_ajax( $form_args ) {
    $form_args['ajax'] = true;

    return $form_args;
}
Understanding AJAX
AJAX stands for Asynchronous JavaScript And XML; it’s a programming technique that allows you to access information from a web server after a page has already loaded.
AJAX allows applications to exchange data with a web server in the background using the built-in XMLHttpRequest object. Using AJAX, it’s possible to update parts of a web page without reloading the entire page.
Enabling AJAX form submission in Gravity Forms is sleek and improves the user experience by not requiring a page refresh.
Gravity Forms AJAX for multi-page forms
Gravity Forms allows you to create multi-page forms (also called multi-step forms). After creating a multi step form, you can embed it on your site and enable AJAX just as you would with a regular form: simply open the block settings, click on the “Advanced” tab and toggle “AJAX” on.
Start using AJAX with your Gravity Forms today!
AJAX is a powerful programming technique that enables applications to read data from a web server without reloading the page. Gravity Forms supports AJAX, which means you can validate and submit form entries on your site without reloading the whole page.
Turning on AJAX submission is a straightforward process and can improve your website from a UX perspective, so why not try it out?
To learn more about Gravity Forms, read How to Use Gravity Forms: The Ultimate Guide, or subscribe to our newsletter below!

Helpful tips right in your inbox.
Subscribe to our weekly newsletter for tips, special offers, and more!
Helpful tips right in your inbox.
Subscribe to our weekly newsletter for tips, special offers, and more!
