Published
•
Updated
How to build a Yellow Pages clone on WordPress
Build a Yellow Pages-style business directory on WordPress using Gravity Forms and GravityView. Collect listings with a form and display them in a searchable, filterable directory.

In its day, the Yellow Pages was a globally recognized directory service that helped people find local service providers.
In this tutorial, we’re going to show you how to create your own Yellow Pages clone on WordPress. To build the directory, we’re going to use Gravity Forms and GravityView. We’ll create a listing form to collect business information using Gravity Forms and then display that information on the front end using GravityView.
Ready to start building your WordPress Yellow Pages clone? Let’s get started!
Check out a live demo of the finished Yellow Pages clone and get your own free trial site preloaded with all GravityKit add-ons!
Download the free business listing form template now!
Import the template into Gravity Forms and customize as necessary.
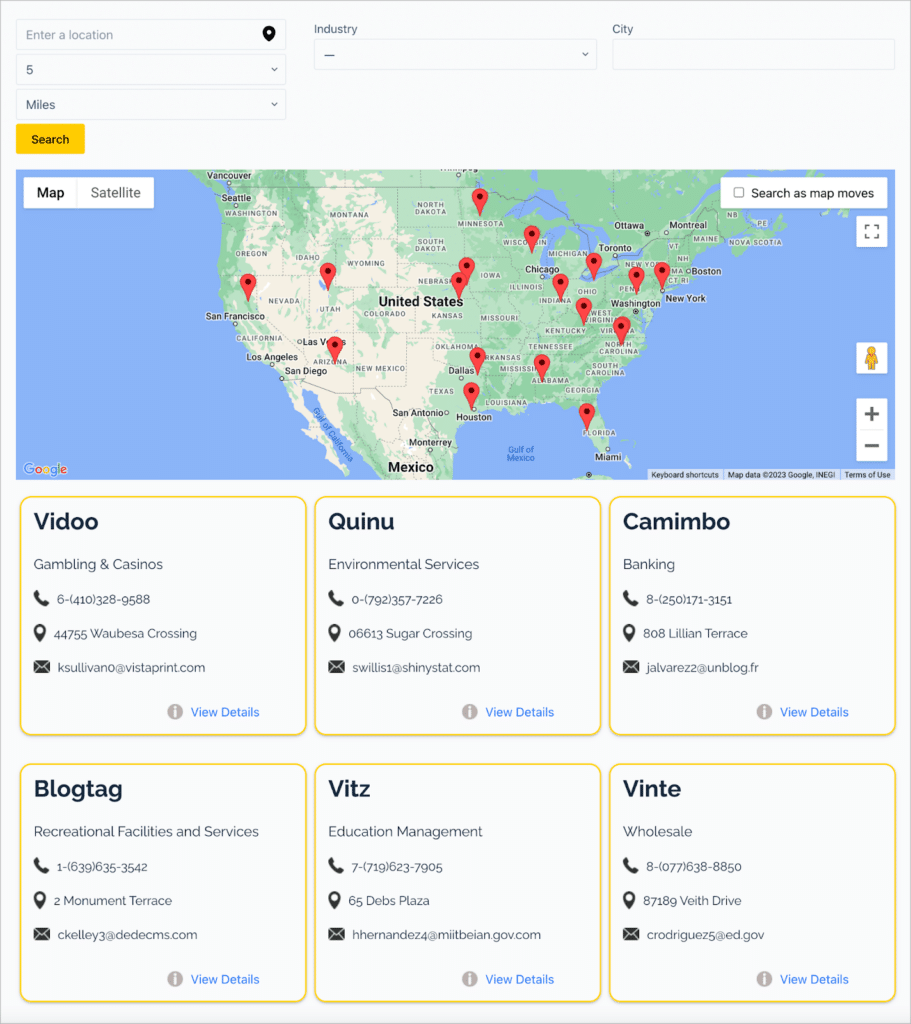
Sneak Peek
Here’s a preview of what our Yellow Pages clone looks like:
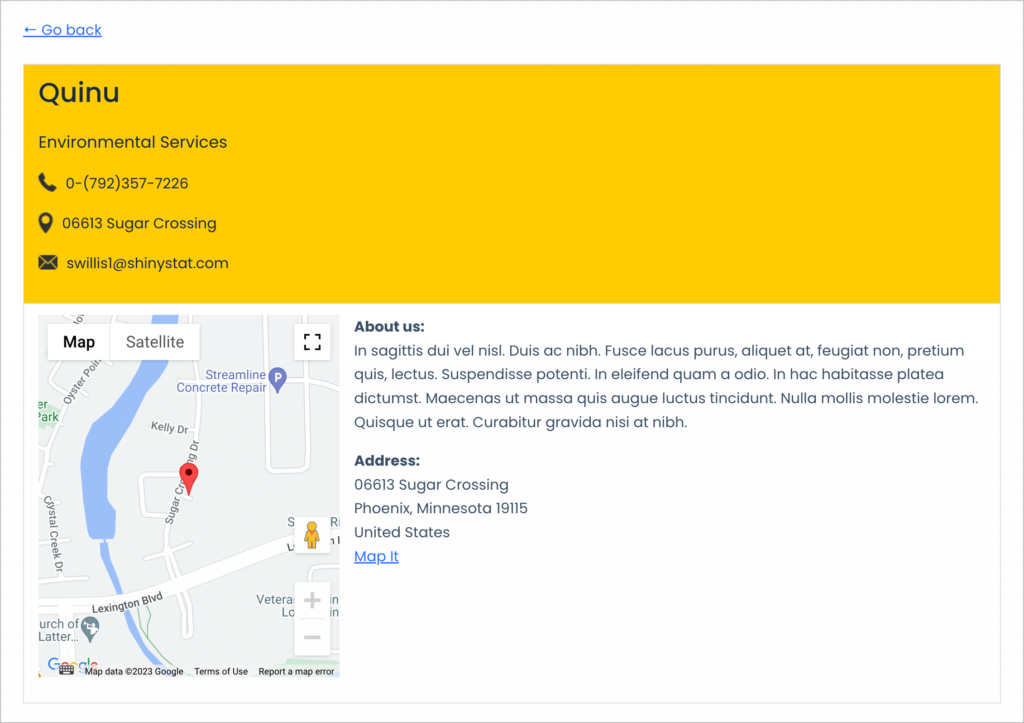
When you click on the title of a business, you’ll be taken to the Single Entry page to view more details about that specific business.
Thanks to the flexibility of Gravity Forms and GravityView, there are no limits to what you can do when it comes to building a directory on WordPress.
What you’ll need
Here are the plugins and extensions you’ll need to build a Yellow Pages clone:
- Gravity Forms
- GravityView
- Gravity Maps Extension (optional)
What is the Yellow Pages?
The Yellow Pages was originally a phone book created to provide consumers with a comprehensive list of local businesses. The Yellow Pages has now moved online. However, it has since become eclipsed by the likes of Yelp and other more modern directory solutions.
Listings in the Yellow Pages include information such as the business name, contact information, hours of operation, and reviews. The Yellow Pages also offers users the ability to search for specific types of businesses in their area. This makes it easier than ever to find the service provider that you’re looking for!
Why build a Yellow Pages clone on WordPress?
Building a Yellow Pages clone on WordPress is a great way to create a comprehensive directory of businesses and services. It can be used to showcase local businesses, promote products or services, or simply provide information about different companies in the area.
WordPress’s easy-to-use platform and user-friendly interface makes it easy for you to create an attractive and professional website that will help you stand out from the competition.
Moreover, you could turn your directory into a business by charging companies to post listings or selling advertising space!
Building a Yellow Pages clone using Gravity Forms and GravityView
Gravity Forms is the most powerful form builder for WordPress. GravityView compliments Gravity Forms by allowing you to display form entries on the front end! Using these two plugins allows you to build directories and other dynamic web applications.
You may be wondering why you can’t just use a Yellow Pages plugin for WordPress or a Yellow Pages WordPress theme? The truth is that while there are themes and plugins available for creating directories, few of them offer the flexibility that comes with GravityView’s drag-and-drop builder.
Here are the steps we’re going to follow for creating a Yellow Pages clone using Gravity Forms and GravityView:
- Create a directory listing form
- Build a View to display listings on the front end
- Configure the search functionality
- Add map widget to display business locations
Okay, let’s get started!
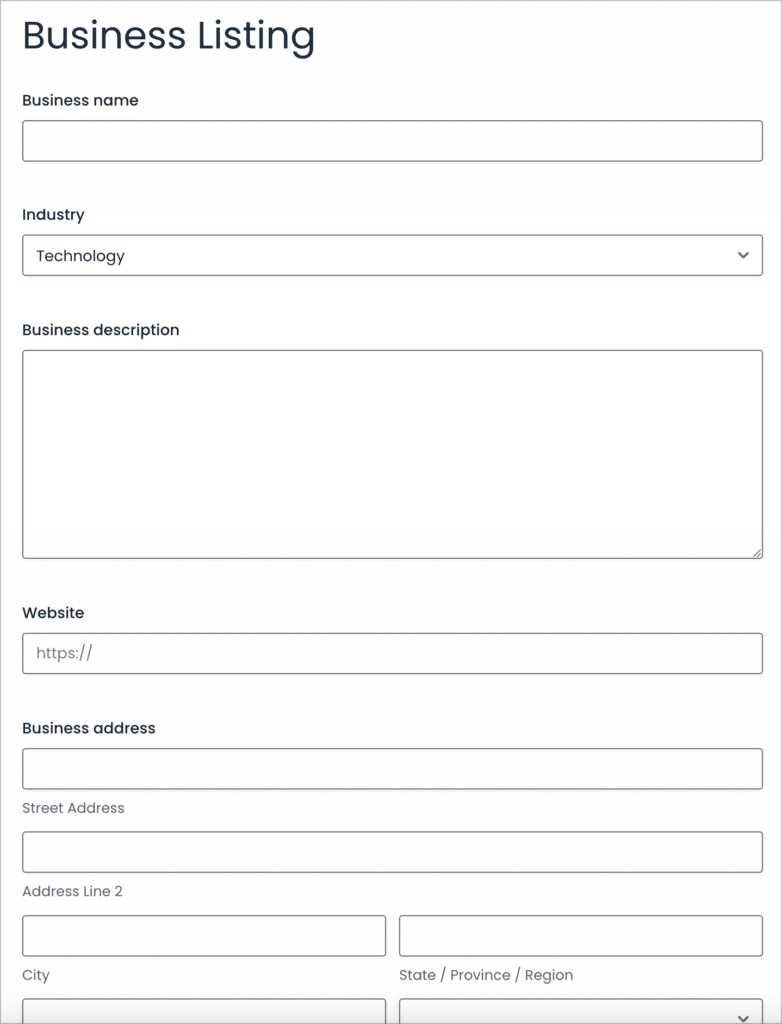
Creating the directory listing form
The first step is to create a directory listing form. This will allow businesses to create their own listing on the directory.
To create a new form, we’ll hover over “Forms” and click “New Form”. Now we can start adding fields to our form using the Gravity Forms visual builder.
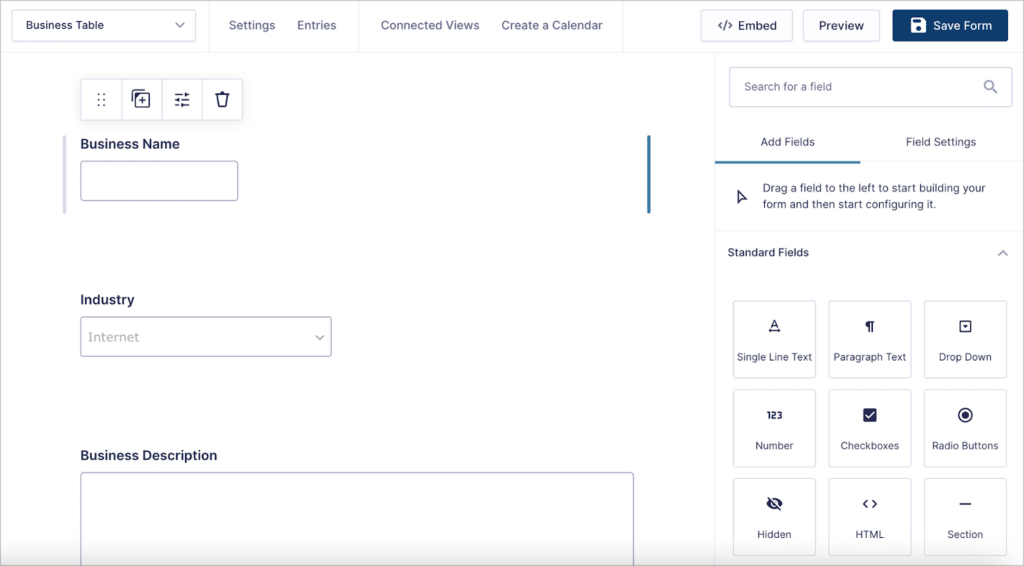
We’ll keep things simple by adding the following fields to our form:
- Business name (Single Line Text field)
- Industry (Dropdown field)
- Business description (Paragraph Text field)
- Address (Address field)
- Business phone (Phone Number field)
- Business email (Email field)
- Web address (Website field)
You may also want to add fields for the opening hours, services provided, and images. You can save time by downloading the free business listing form template now!
After creating our form, the next step is to build a front-end View to display business listings!
Pro tipCharge businesses for listing on your directory by creating a subscription form.
Building a View to display directory listings
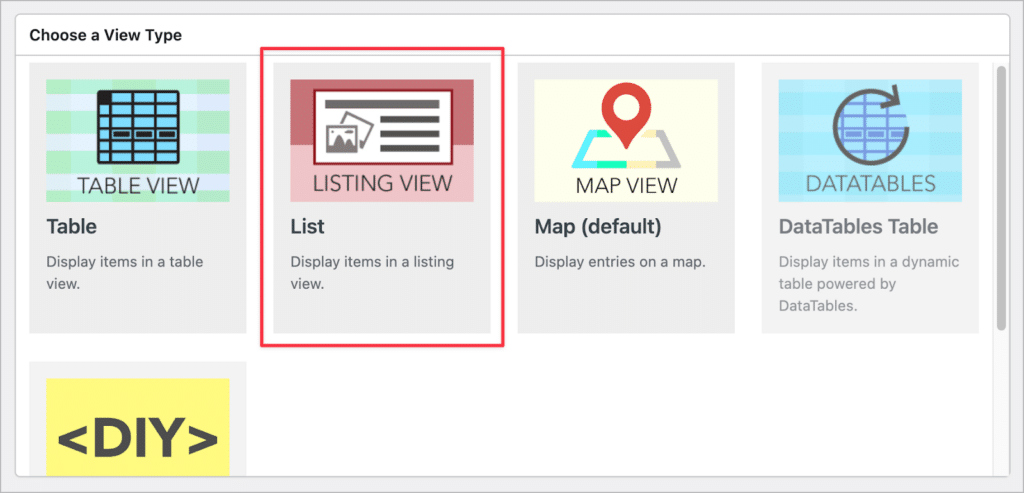
To Create a new View, we’ll hover over “GravityKit” and click “New View”. After giving our View a name, we’ll select our business listing form as the data source. After that, we’ll need to choose a View Type.
GravityView includes several “View Types”, allowing us to display Gravity Forms data using different layouts. For our Yellow Pages clone, we’ll select the “List” layout.
After choosing a View Type, we can begin to construct our directory using GravityView’s drag and drop builder! We’ll start by configuring the “Multiple Entries” layout, as this will be our main directory page.

To add fields to the View, all we need to do is click the “Add Field” button and select the field we want to add from the list. Here’s what a typical directory layout might look like when using the “List” View Type:
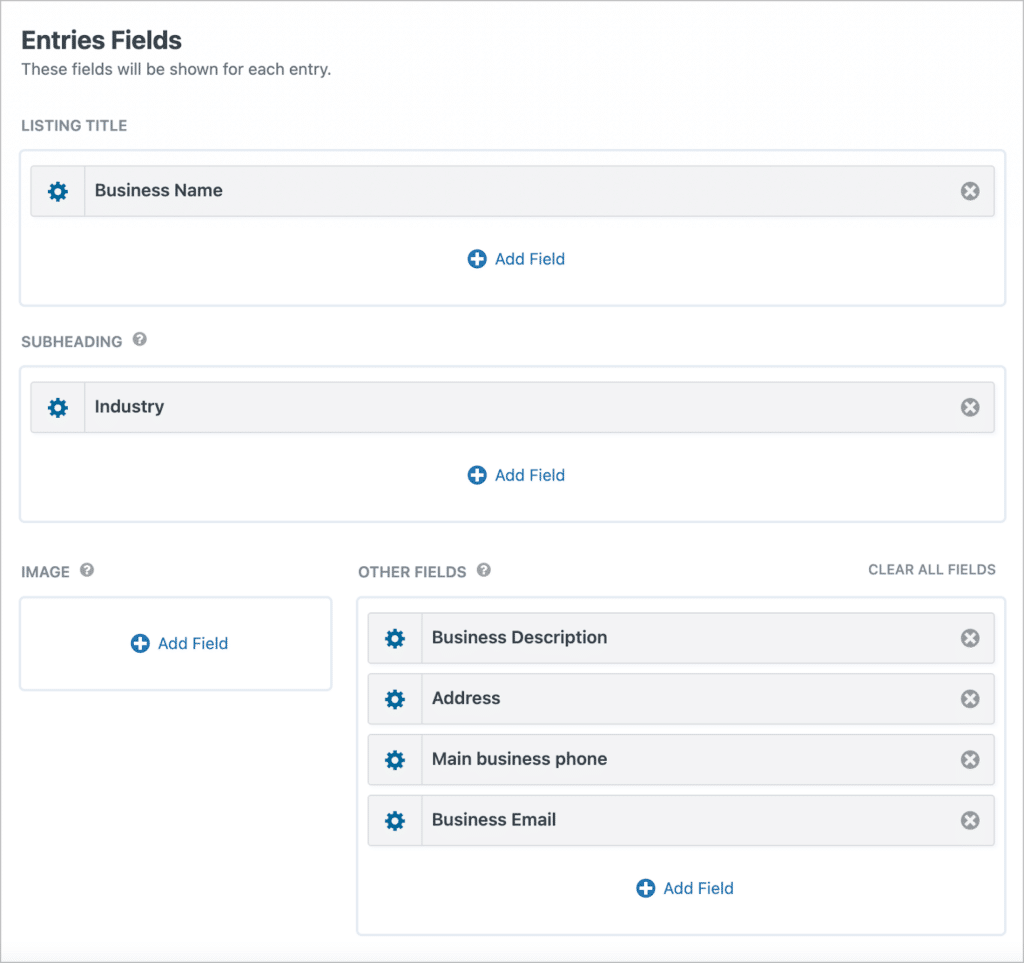
As you can see, the View has different sections for the listing title, subheading and “other fields”. There’s even an image section for directories that display images!
Seeing as our goal here is to replicate the look and feel of the Yellow Pages website, we’re not going to use the above layout. Instead, we’ll add each form field to a Custom Content field. But before we do that, we’ll need to add the following CSS code to turn our list View into a grid View!
.gv-list-multiple-container.gv-container{
	display:flex;
	flex-wrap: wrap;
	justify-content:center;
}

.gv-list-multiple-container.gv-container .gv-list-view {
        margin-right: 10px;
        width: 370px; /* adjust this width */
	border: 2px solid #FFD100 !important;
	border-radius: 15px;
	box-shadow: rgba(50, 50, 93, 0.25) 0px 2px 5px -1px, rgba(0, 0, 0, 0.3) 0px 1px 3px -1px;
}
With the above CSS code, View entries will display in a grid layout, instead of one-after-the-other, like a regular list.
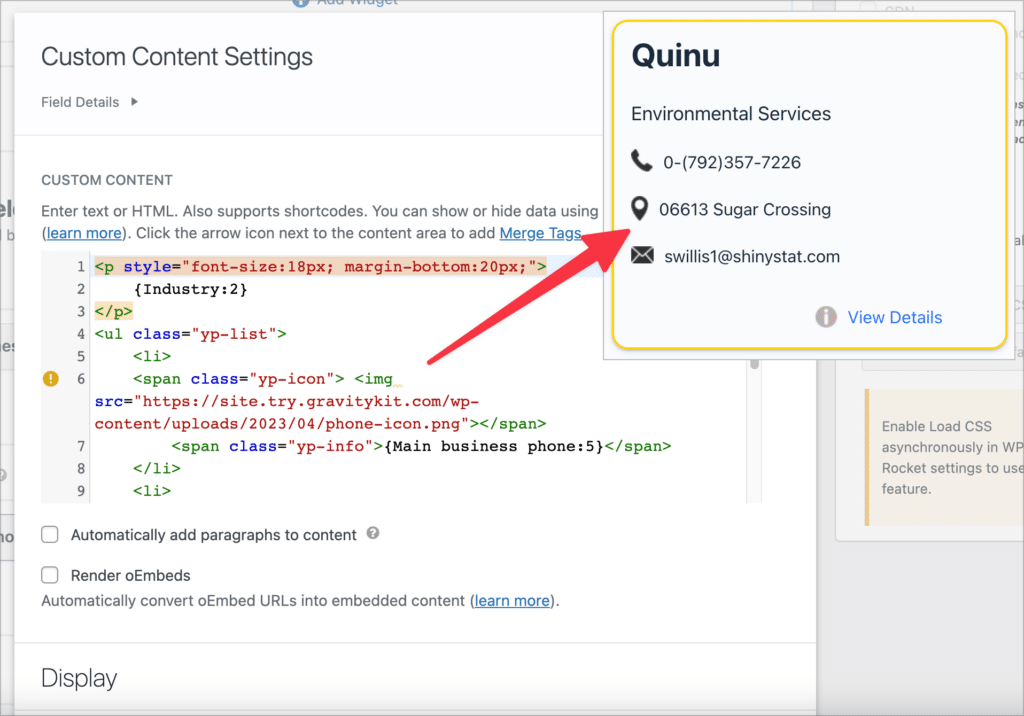
Next, we’re going to build out the structure for our listings using the Custom Content field. The GravityView Custom Content field has a text editor that supports HTML, CSS, shortcodes and merge tags! This gives us more flexibility when it comes to styling!
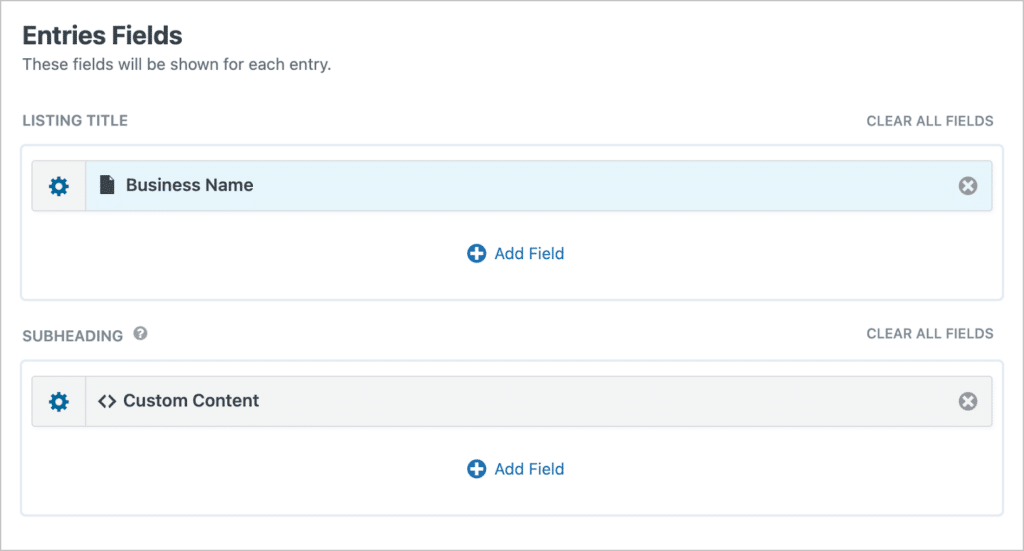
Inside the Custom Content field, we’re adding our own HTML structure with Gravity Forms merge tags to display the business information dynamically. We chose this structure because we think it look nice, but feel free to come up with your own layout!
Pro tipHere is a link to a Gist with all the custom code (including CSS styles) we used in this tutorial.
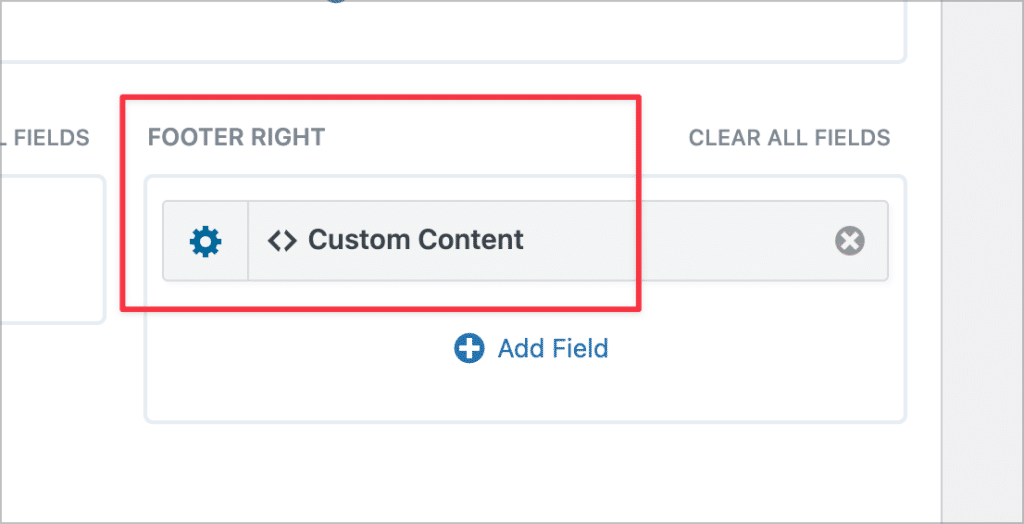
The Yellow Pages website also has a link in the bottom left allowing users to report errors with listings. We can add this too in the “Footer Right” section of the View editor.
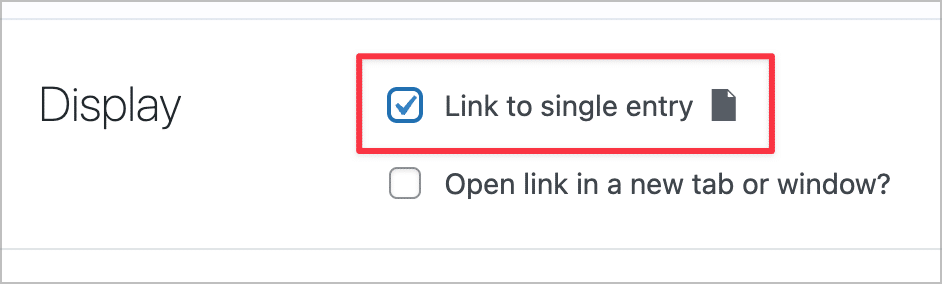
Finally, we’ll click on the gear icon next to the “Business Name” field to open the field settings and check the box that says “Link to single entry”. This will make the listing title a clickable link that takes the user to the single entry page where they can view more details about that business.
Before we move on to configuring the Single Entry layout, let’s add a map!
Adding the Map widget (optional)
If you want your directory to have a map for geolocation searches, go ahead and add a “Multiple Entries Map” widget to the Top Widgets area.
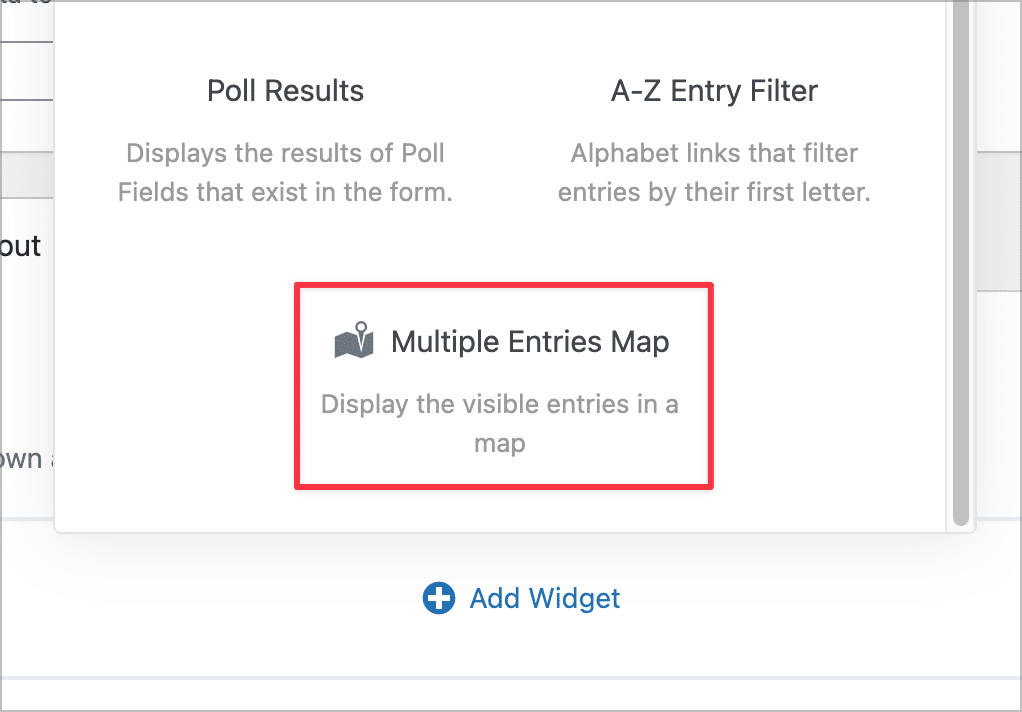
With this widget, addresses will be geocoded and displayed as markers on a Google Map. You can also add a “Geolocation radius” search input to your Search bar, allowing users to search for businesses nearby!
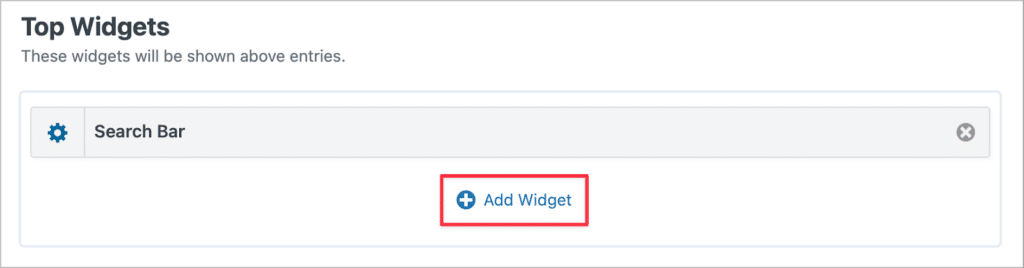
Adding a Search Bar widget
To add a search bar to our directory, we’ll click on the “Add Widget” button in the “Top Widgets” area and select the “Search Bar” widget.
Now we can click on the gear icon to open the widget settings, where we can configure the search functionality. Here we can add different search inputs, change the search layout and modify the search mode.
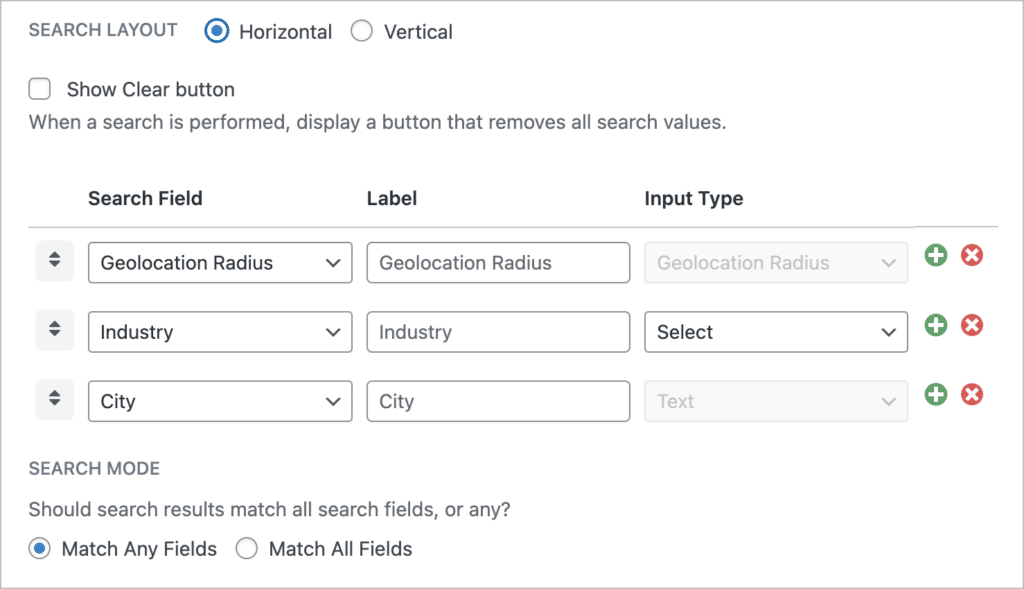
We’ll go ahead and add search inputs for “Geolocation Radius”, “Industry”, and “City”. The “Geolocation Radius” input will allow users to search for listings near their current location, or an address that they type in.
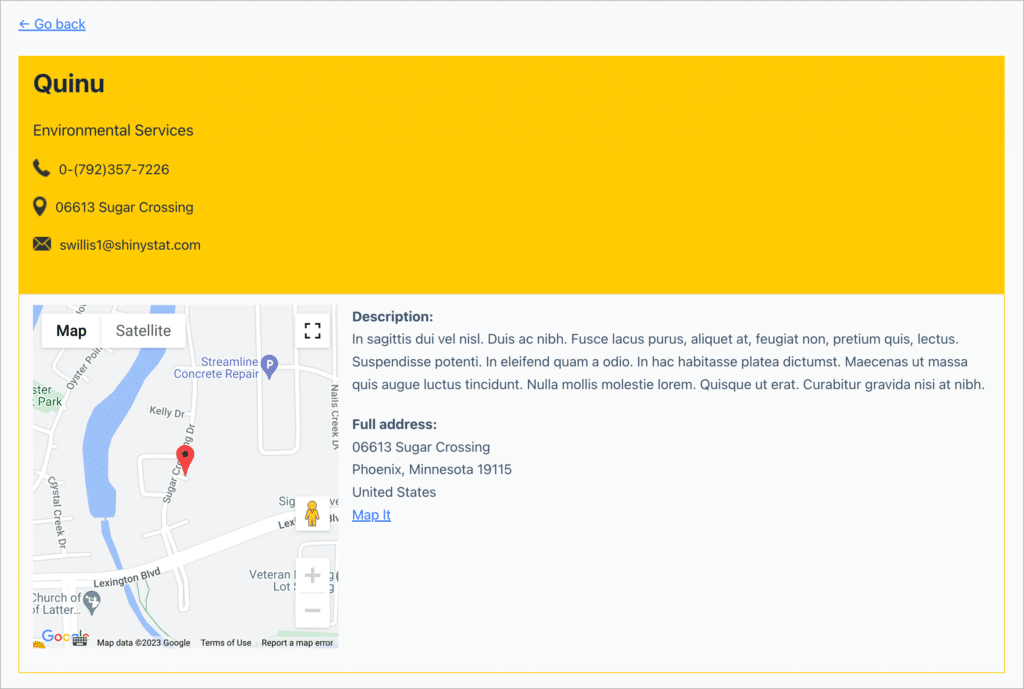
That’s it! Now we can start configuring the Single Entry layout.
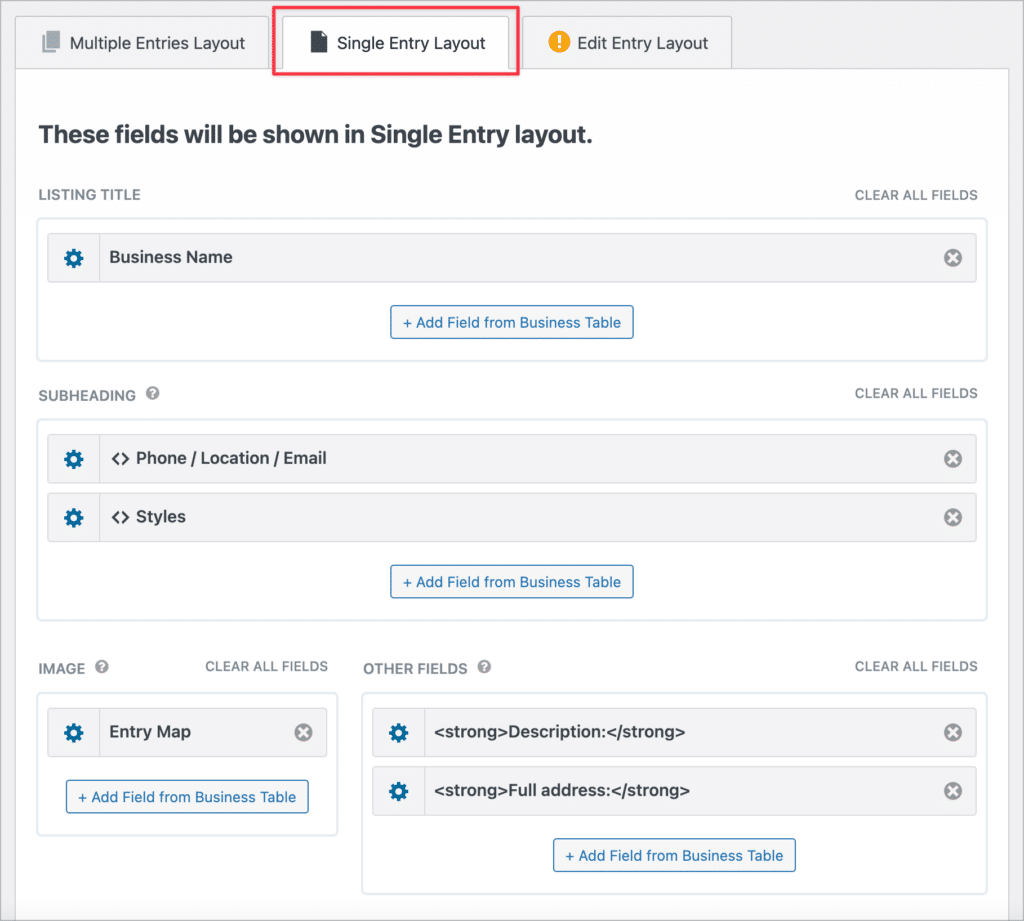
Configuring the Single Entry layout
The single entry page is where users can view more detail about a single listing. Here we’re going to add the same fields as we added to the Multiple Entries page, as well as the business description and address.
Here’s what the Single Entry page looks like on the front end:
Pro tipConfigure the Edit Entry layout to allow business owners to edit their listings from the front end.
Build your own Yellow Pages clone on WordPress
The Yellow Pages was a popular directory service that helped people find local businesses and service providers.
In this tutorial, we showed you how to create your own Yellow Pages clone on WordPress using Gravity Forms and GravityView! First we built a listing form using GravityView, and then we created a View to display listings on the front end.
If you enjoyed this tutorial, check out our demo site to see what else is possible using GravityView! You can also read our guide on building a Zillow clone using GravityView!

Helpful tips right in your inbox.
Subscribe to get the latest articles, information on releases and helpful Gravity Forms tips!
More articles

Launch Log: Distance sorting for radius searches, DataTables search improvements, and import reliability fixes
The latest GravityKit releases add distance sorting to map searches, bring built-in search to DataTables, and fix GravityCharts and GravityImport edge cases.

WordPress page builder market share 2026: Elementor leads at 32.67%
Elementor reaches 32.7% of WordPress sites. WordPress Block Editor 20.6%, wpBakery 8.5%, Divi 5.7%. Latest HTTP Archive crawl, share-of-WordPress basis throughout.

Launch Log: GravityView 3.0, plus upgrades to Block MCP and GravityKit MCP
GravityView 3.0 lands with the new Vantage theme, frontend bulk actions, and AI-assisted View creation. This launch log also covers updates to GravityKit MCP, Block MCP, and Dashboard Views.