Published
•
Updated
How to create student report cards using GravityView (with PDF export!)
Build online student report cards with Gravity Forms and GravityView. Includes PDF export, grade entry forms, and a free downloadable template for schools and universities.
Most educational institutions, from schools to universities, issue student reports each year or term, giving students (or their parents) an overview of their grades for each subject.
If you work for an educational institution, you may be exploring solutions for creating student report cards online. One way to do this is by using WordPress!
In this post, we’ll show you how to create attractive student report cards using Gravity Forms and GravityView (including PDF export)! Keep reading to find out more.
Check out our live demo applications and get your own free trial site preloaded with all GravityKit add-ons!
Download the free student report form template now!
Import the template into Gravity Forms and customize as necessary.
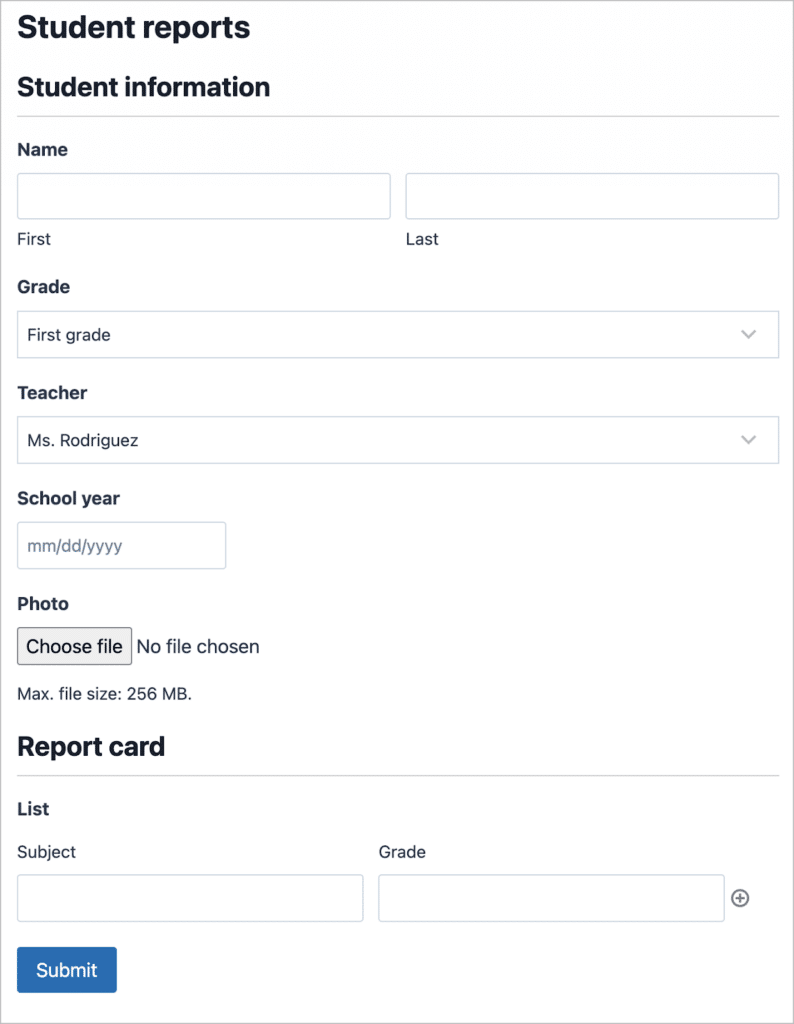
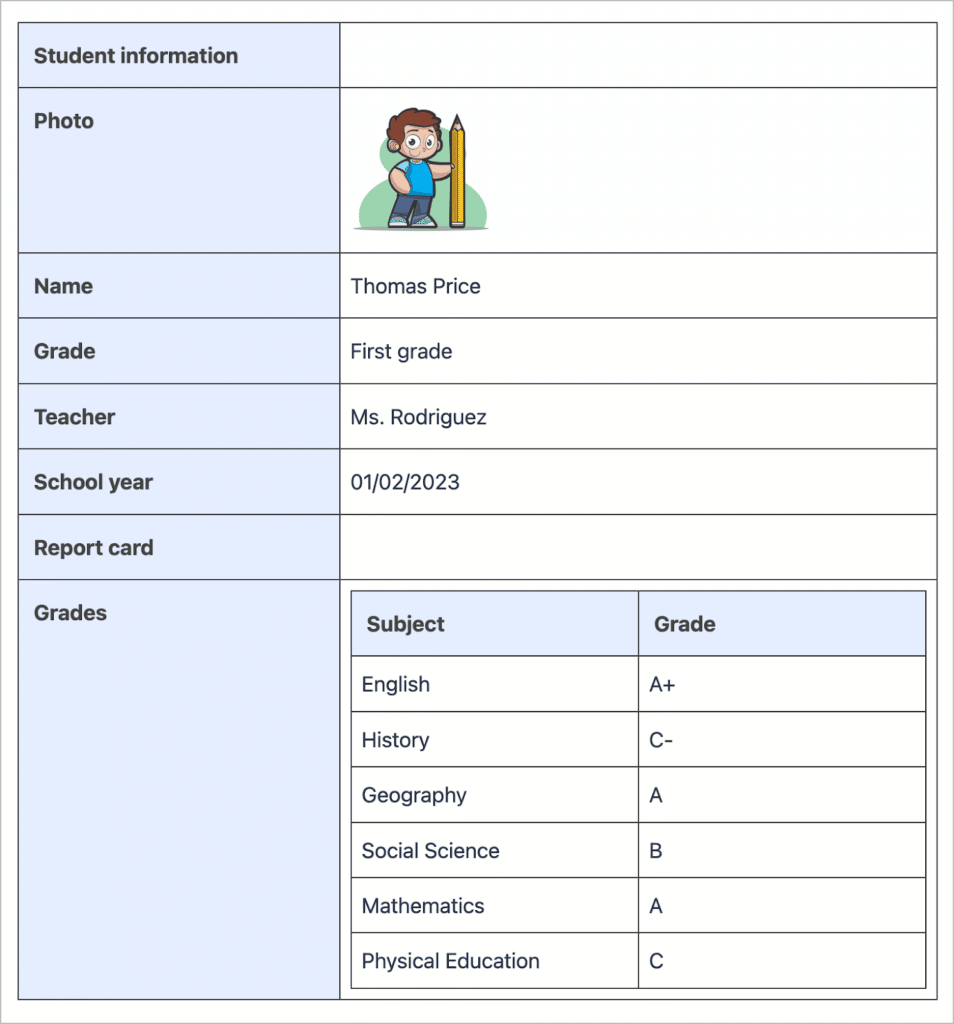
Sneak peek
Here’s what our finished report card looks like:

Using GravityView, you can create a variety of different layouts and structures for your report cards–you’re not limited to a single design! We’re also going to add a PDF export link, allowing students to export their reports as PDF documents.
What you’ll need
Here are the plugins/extensions you’ll need to follow along with this tutorial:
- Gravity Forms
- GravityView
- Gravity PDF (free / optional)
- PDF for GravityView extension (optional)
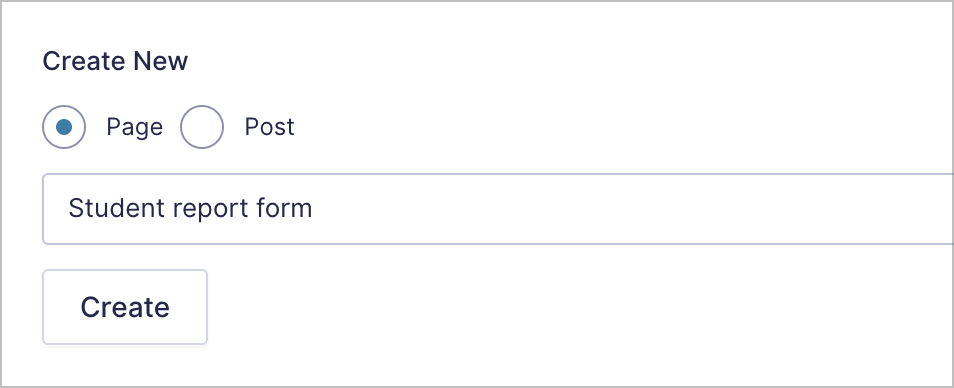
Creating the report form
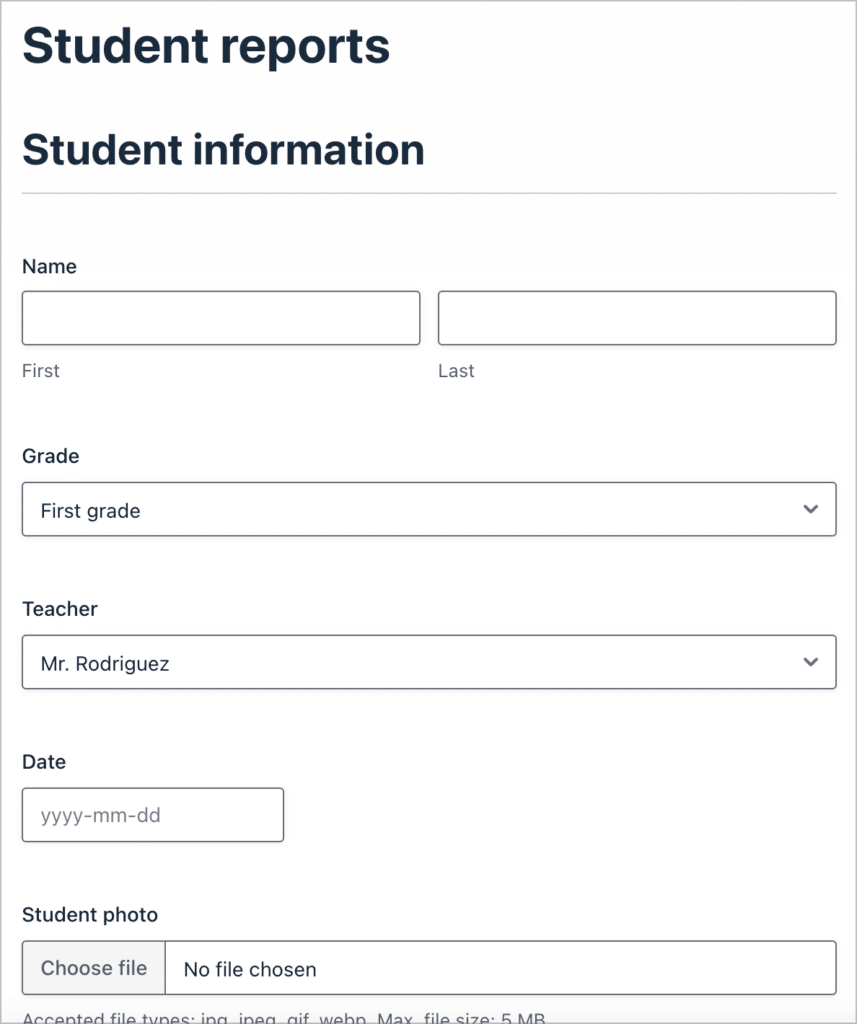
To start, we’ll need to create a form for teachers to enter a student’s grades. We’ll hover over “Forms” in the WordPress Admin menu and click “New Form”. After giving our form a name, we can start adding fields using the drag and drop form builder.
To add a field to our form, all we need to do is find the field we want to add in the right-hand panel and click on it, or drag and drop it into the form. Feel free to add any fields you feel are necessary here. We’ll keep things simple by adding the following fields:
- Name (name field)
- Grade (Drop Down field)
- Teacher (Drop Down field)
- School year (Date field)
- Photo (File Upload field)
- Grades (List field)
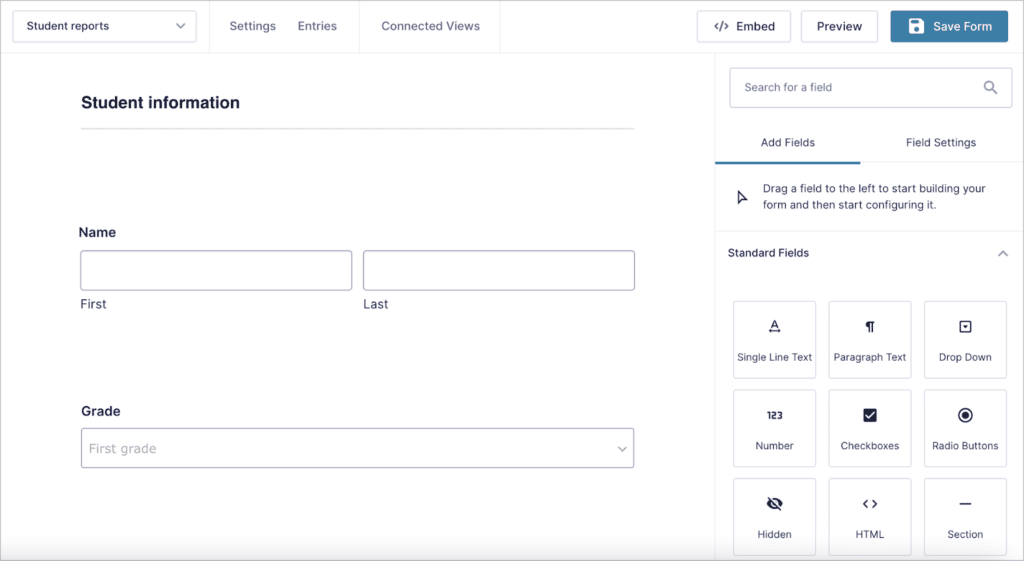
The final field we’re going to add is a “List” field. This is going to provide space for the teacher to record the student’s grades for different subjects. The List field works well for this purpose because the user filling out the form can add and delete rows as they see fit.
After adding the List field to our form, we’ll enable the “multiple columns” option in the field settings.
Now we can add a column for “Subject” and one for “Grade”. If you want to add additional columns, you can do so by clicking on the “+” icon.
Here’s a peek at what it looks like when filling out a “List” field in Gravity Forms:
After creating your form, we’ll hit “Save” and embed it on a new page. We can do this by clicking on the “</> Embed” button at the top of the editor and creating a new page.
That’s it! Here’s what our form looks like on the font end:
The next step is to turn the data we collect from Gravity Forms into report cards using the GravityView visual editor.
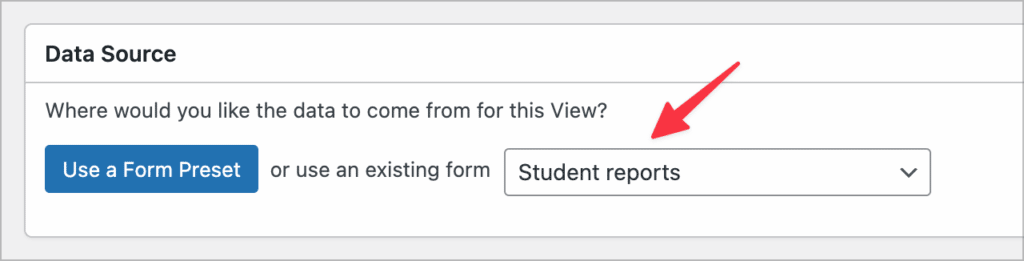
Creating the View
We’ll hover over “GravityKit” in the WordPress menu and select “New View”. After giving our View a name, we’ll need to select our “Student reports” form as the data source.
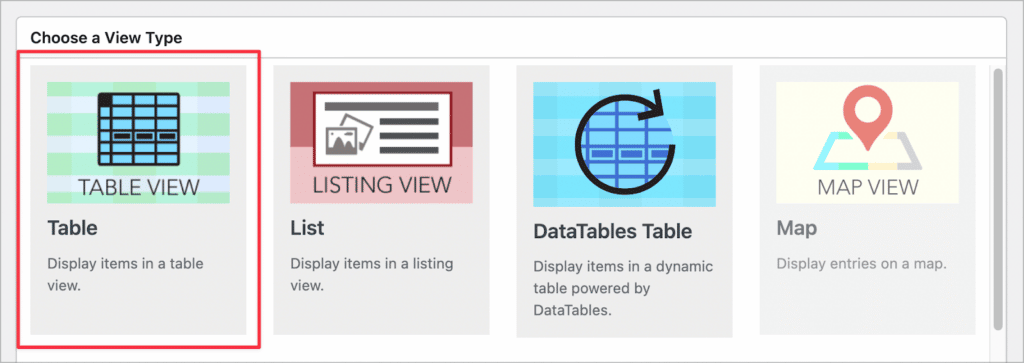
Now we can choose a View Type. This is the layout we want to use for displaying our Gravity Forms data. Depending on the design of your report card, you’ll probably want to select either the “Table” or “List” layouts.
After selecting a View Type, we can begin adding fields and widgets to the View using GravityView’s simple drag-and-drop builder.
Configuring the Multiple Entries Layout
Let’s start by configuring the Multiple Entries Layout–this is where we’re going to display a list of the student’s report cards (assuming they have more than one!). For example, there may be one for every school year, or one per term.

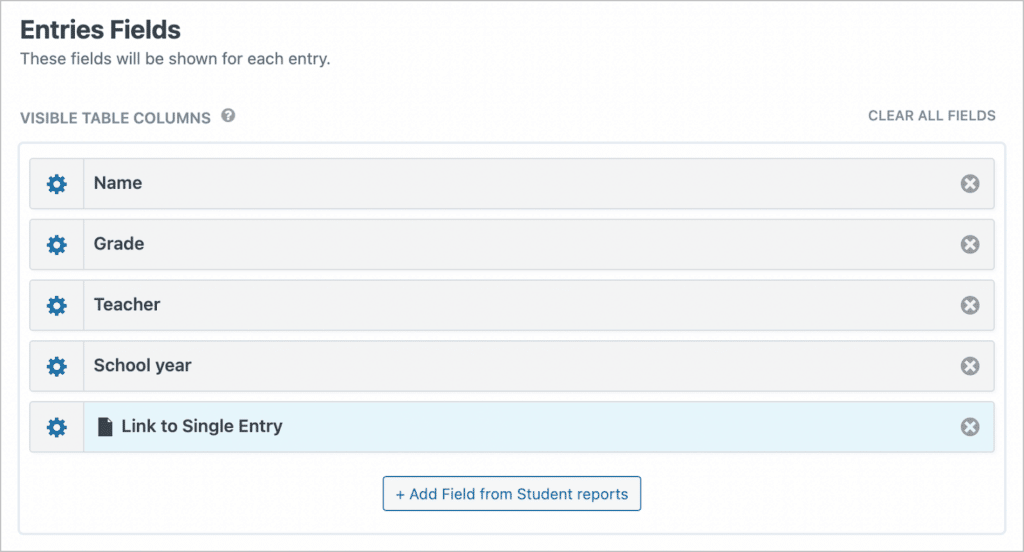
In the “Entries Fields” section of the View, we can add the form fields we want to display. Here we’ll add the student’s name, grade, teacher and the school year the report was created for.
Finally, we’ll also add a “Link to Single Entry” field, allowing students to go to the Single Entry page and view the entire report in full (we’ll configure this in the next section).
If you want to, you can add widgets here (such as search bars) that make it easier for students to search and filter their reports.
To add a search bar, we’ll click on the “Add Widget” button at the top of the View editor and select the “Search Bar” widget.
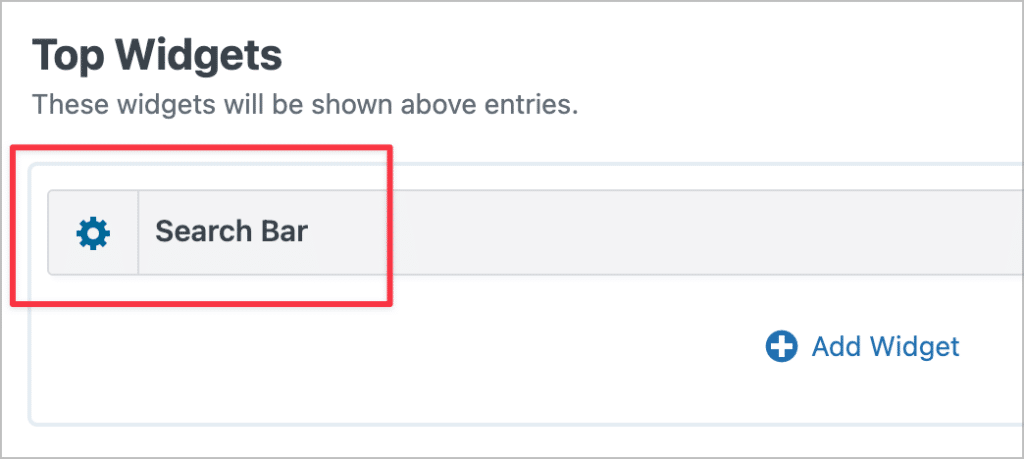
Now we can click on the gear icon to configure the search inputs. In this case, we’ll simply add the ability for a user to search by grade.
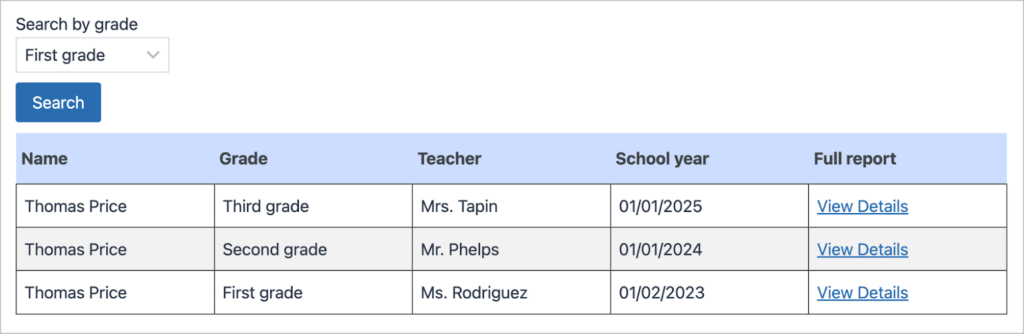
Here’s what the Multiple Entries layout looks like on the front end.
Things are looking good, but we still have some work to do!
Configuring the Single Entry Layout
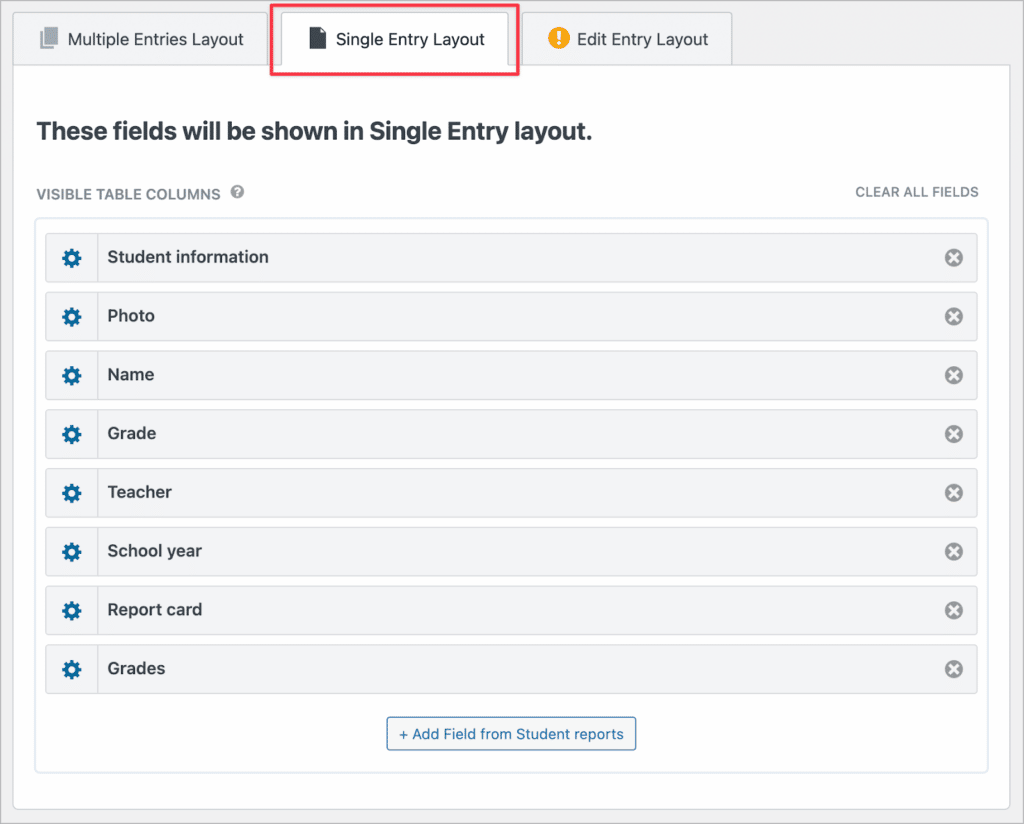
After configuring the Multiple Entries Layout, we can turn our attention to the Single Entry layout. This is where users can view a single report in full detail.
Here, we can add fields by clicking on the “Add Field” button, just as we did on the Multiple Entries Layout. We’ll go ahead and add the student information at the top and the actual grades below.
That’s it! The final step is to configure the View settings and add an Advanced Filtering condition to ensure that students only see their own report cards, and not those intended for other students!
Adding an advanced filtering condition
We need to filter the View to ensure that students only see their own report cards. We can do this using the GravityView Advanced Filtering extension. This extension allows us to filter the entries in a View using conditional logic.
As all students need to be logged in before viewing their report, we’re going to add a filter that checks whether the first name on their account matches the first name on their report. If the two match, then the report will be displayed.
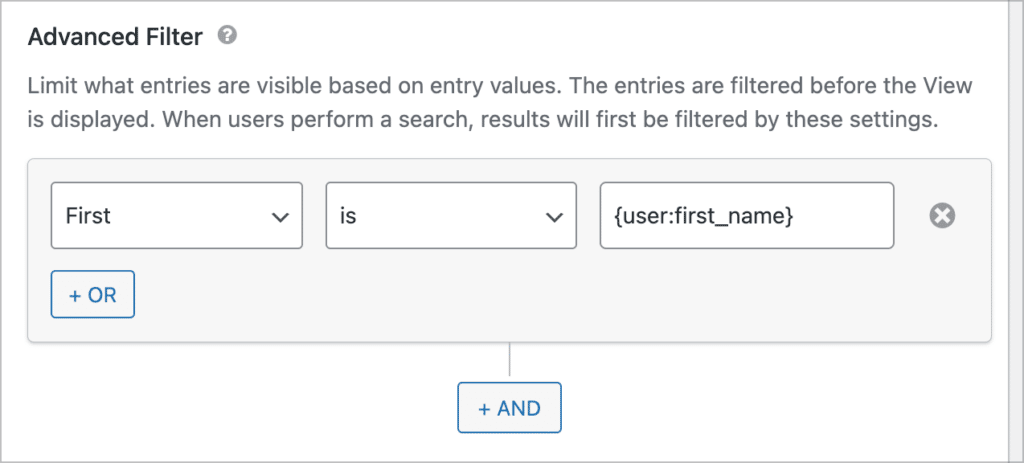
The {user} merge tag allows us to access user meta, such as the name, email address and ID of the user. As long as one of these values exists in our form too, we can use it to create advanced filtering conditions.
Pro tipTo learn more about using the {user} merge tag, enroll in our short course on Gravity Guide!
Adding a PDF export link
Using “Gravity PDF” and the “PDF for GravityView” extension, you can easily add a PDF download link to the single entry page in GravityView. This will allow students to download their reports as a PDF document, exactly how it looks on the website!
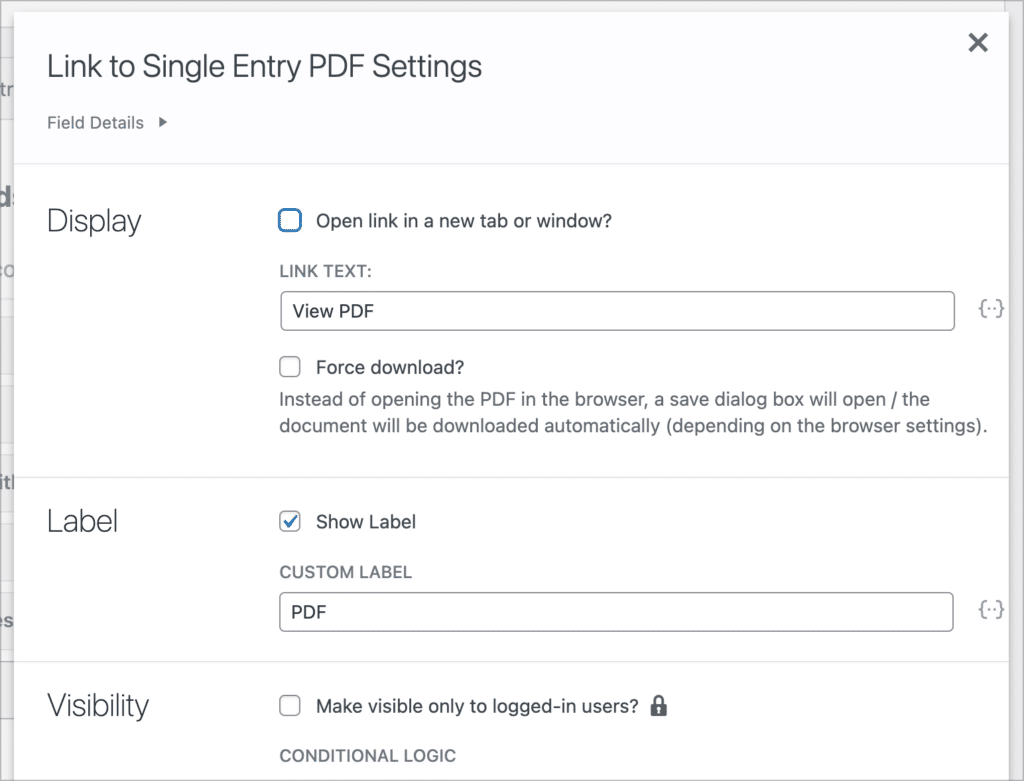
To add a PDF download link, simply navigate to the Single Entry Layout in the View editor, click “Add Table Column” and select the “Link to Single Entry PDF” field.
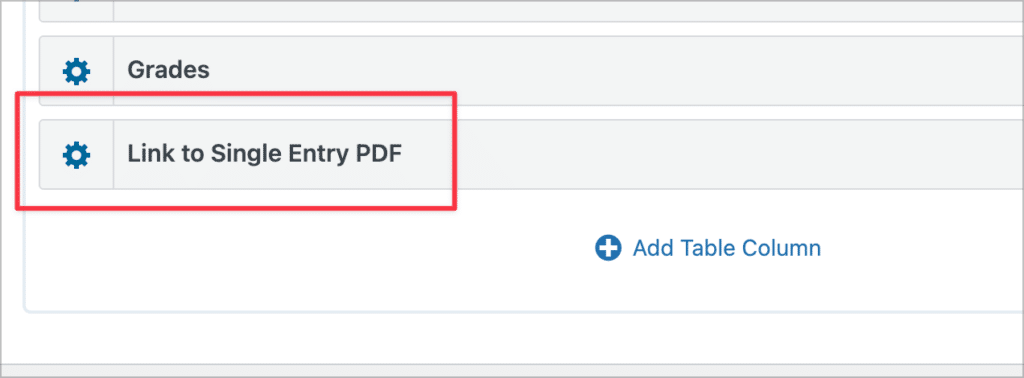
To modify the link text, update the visibility settings, and more, click on the gear icon to open the field settings.
That’s it!
Embedding your View on the front end
Now that we’ve configured our View and added the advanced filtering condition using the {user} merge tag, the next step is to embed the View on a page or post.
To embed our View, we’ll start by copying the [gravityview] embed shortcode (you’ll find it above the “Update” button on the right).
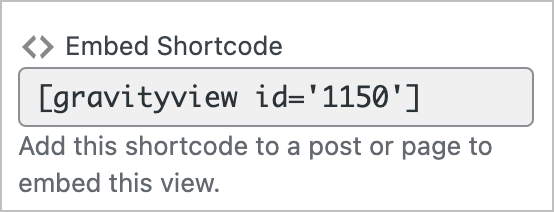
Next, we’ll create a new page and paste the shortcode inside a Gutenberg “Shortcode” module.

Now let’s take a look at our new report card system on the front end. When a student logs in, they’ll see a table containing all of their reports.

By clicking “View Details”, they will be able to see the report in its entirety!
For this example, we’re using some simple CSS styles to improve the look of our report cards.
Bonus: Adding styles to your View
Your Views will look different depending on the theme you’re using, as Views inherit their styles from the theme. However, the HTML structure that GravityView uses makes it easy to add your own custom CSS.
Here are the styles we used to achieve the above look:
Pro tipFor guidance on adding custom CSS to a WordPress website, read this helpful doc.
Use Gravity Forms and GravityView to create student report cards
Schools and other educational institutions issue report cards to students several times per year. Having an online system where teachers can enter student grades and create report cards automatically can help schools save time and boost efficiency.
In this post, we showed you how to create student report cards using Gravity Forms and GravityView. If you found this tutorial useful, read our guide on building a student portal for assignment submissons next!

Helpful tips right in your inbox.
Subscribe to get the latest articles, information on releases and helpful Gravity Forms tips!
More articles

How to build a WordPress CRM without code (a contact database you own)
Build a simple WordPress CRM with GravityView. Turn the Gravity Forms entries you already collect into a no-code contact database you own, with no monthly fees.

Launch Log: Distance sorting for radius searches, DataTables search improvements, and import reliability fixes
The latest GravityKit releases add distance sorting to map searches, bring built-in search to DataTables, and fix GravityCharts and GravityImport edge cases.

WordPress page builder market share 2026: Elementor leads at 32.67%
Elementor reaches 32.7% of WordPress sites. WordPress Block Editor 20.6%, wpBakery 8.5%, Divi 5.7%. Latest HTTP Archive crawl, share-of-WordPress basis throughout.