Published
•
Updated
How to build a PDF invoice generator using PDF for GravityView
Build a PDF invoice generator on WordPress using GravityView and the PDF for GravityView Extension. Add a customer dashboard where clients can view orders and download invoices.

If you sell products or offer services through your website, you may need a way to generate professional PDF invoices for your customers to download.
In this post, we’ll show you how to generate PDF invoices on your WordPress site using GravityView and the powerful PDF for GravityView Extension. We’ll also build a customer dashboard where customers can view their recent orders and download invoices whenever they need to!
Before we begin, a big thank you to our friends over at Gravity PDF for helping us build the demo, and providing us with the inspiration for this tutorial 🙌
💡 Check out a live demo of the finished PDF invoice generator and get your own free trial site preloaded with all GravityKit add-ons!
Sneak peek
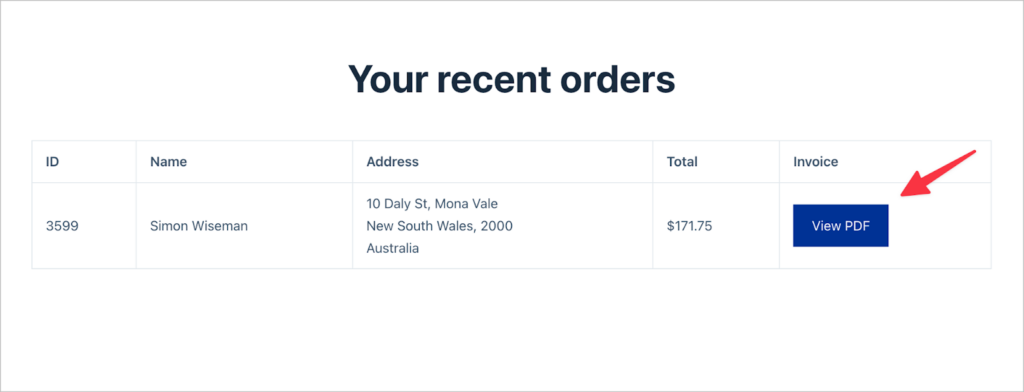
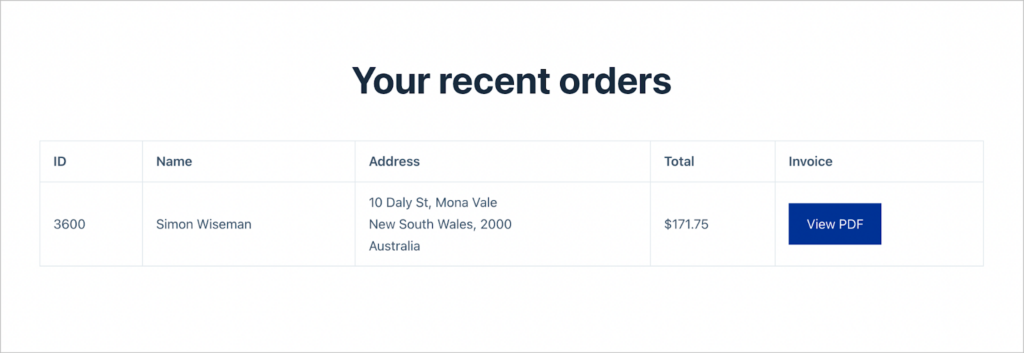
Let’s take a look at the finished PDF invoice generator that we’re going to build in this tutorial. Here is the user’s dashboard page showing a list of their recent orders:
When clicking on the “View PDF” button, the user will be able to view and download a professional PDF invoice that includes their name, address, order number, amount due to be paid, and other important details:
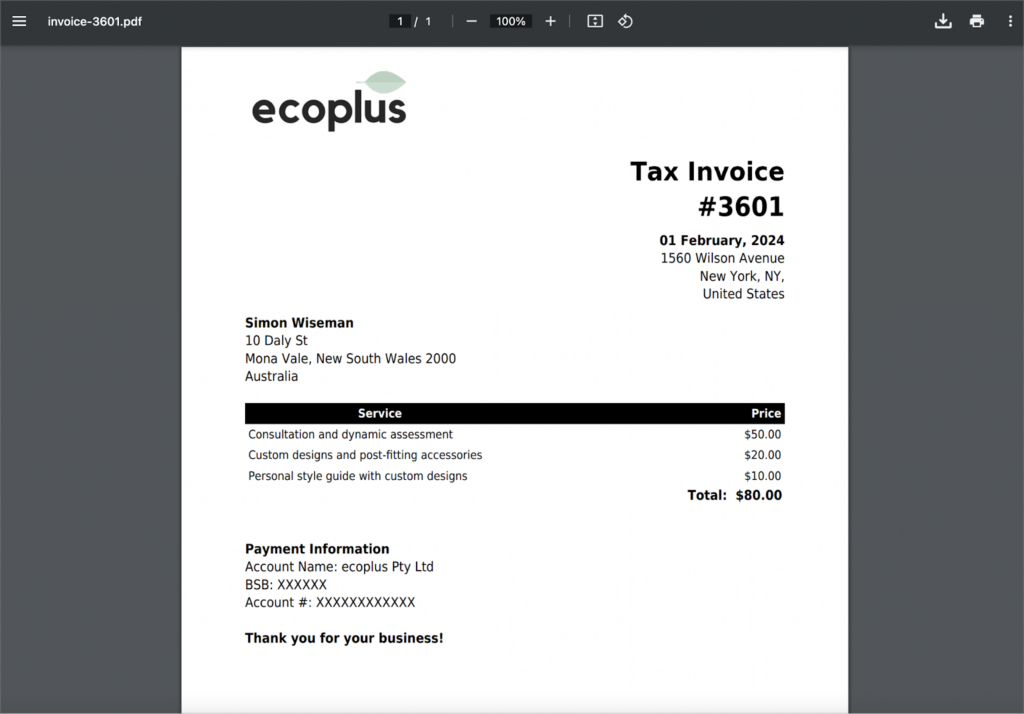
The generated PDF is highly customizable, meaning you’re not limited to the above design! Keep reading to see how we built it.
What you’ll need
Here are the plugins/extensions you’ll need to build a PDF invoice generator like the one in this tutorial:
Creating an order form
The first step is to create an order form in Gravity Forms. This will enable us to gather customer order info. GravityView will then generate a PDF based on the information submitted through the form.
To create a new form, we’ll hover over “Forms” and click “New Form”. After choosing to create a new, blank form, we can start adding fields using the Gravity Forms drag and drop editor!
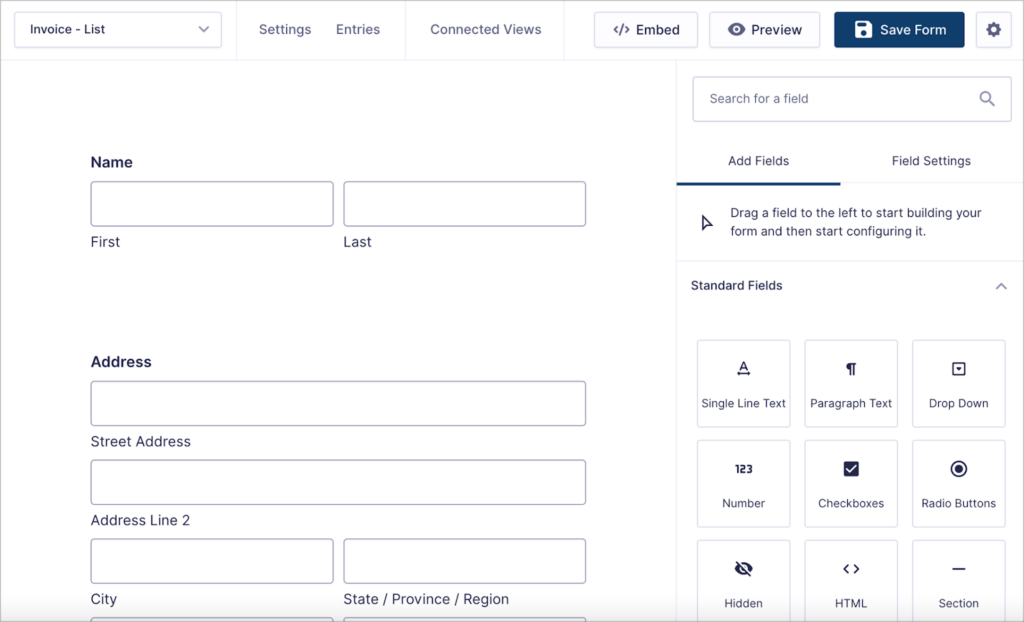
Feel free to add any fields you feel are necessary here. The fields you add will depend on the information you need to collect from the user.
We’ll keep things simple for this example by adding the following fields:
- Name (“Name” field)
- Address (“Address” field)
- Services required (“Checkbox” field)
- Total (“Number” field)
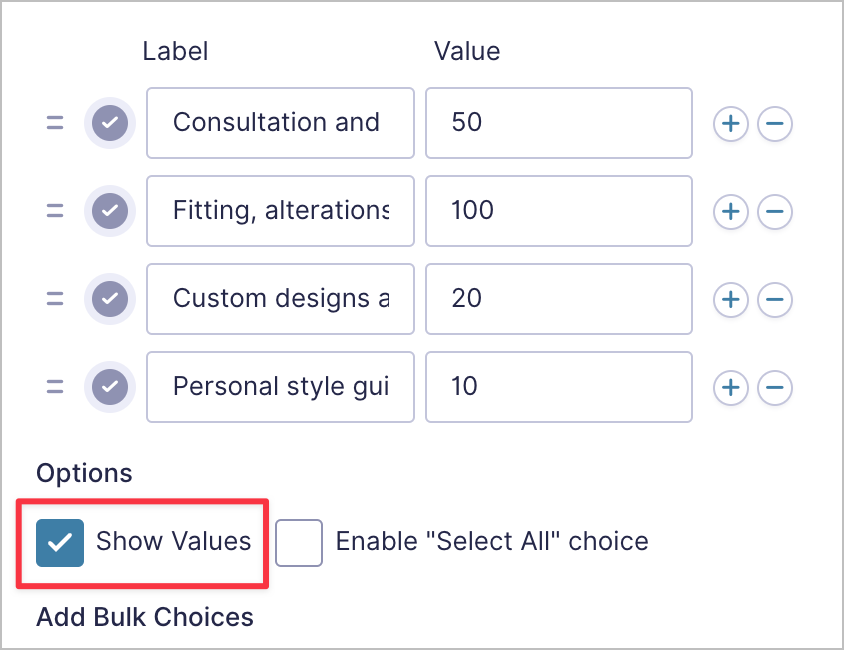
After adding the “Services required” field, we’ll click on the field settings to edit the choices. The first thing we need to do is check “Show Values”. Then, we’ll add the services we offer to the “Label” column and the cost of those services (in dollars) to the “Value” column.
Next, we’ll open the field settings for the “Total” field and change the number format to “Currency”. We’ll also check “Enable Calculation”. This will allow us to sum up the costs of each of the services selected and output the total amount.
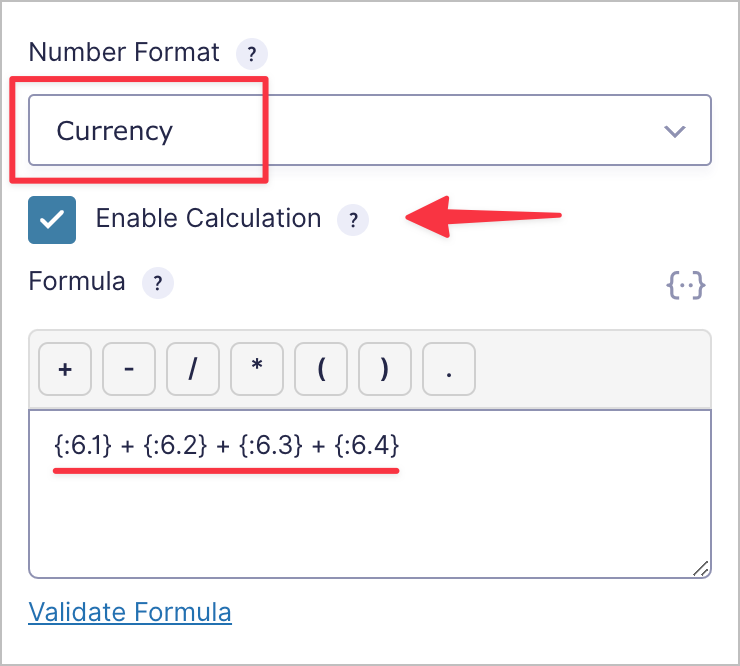
We can use Gravity Forms merge tags to write the calculation. As you can see, all we’re doing is summing the values associated with each service. Now the total amount will automatically populate depending on the services selected!
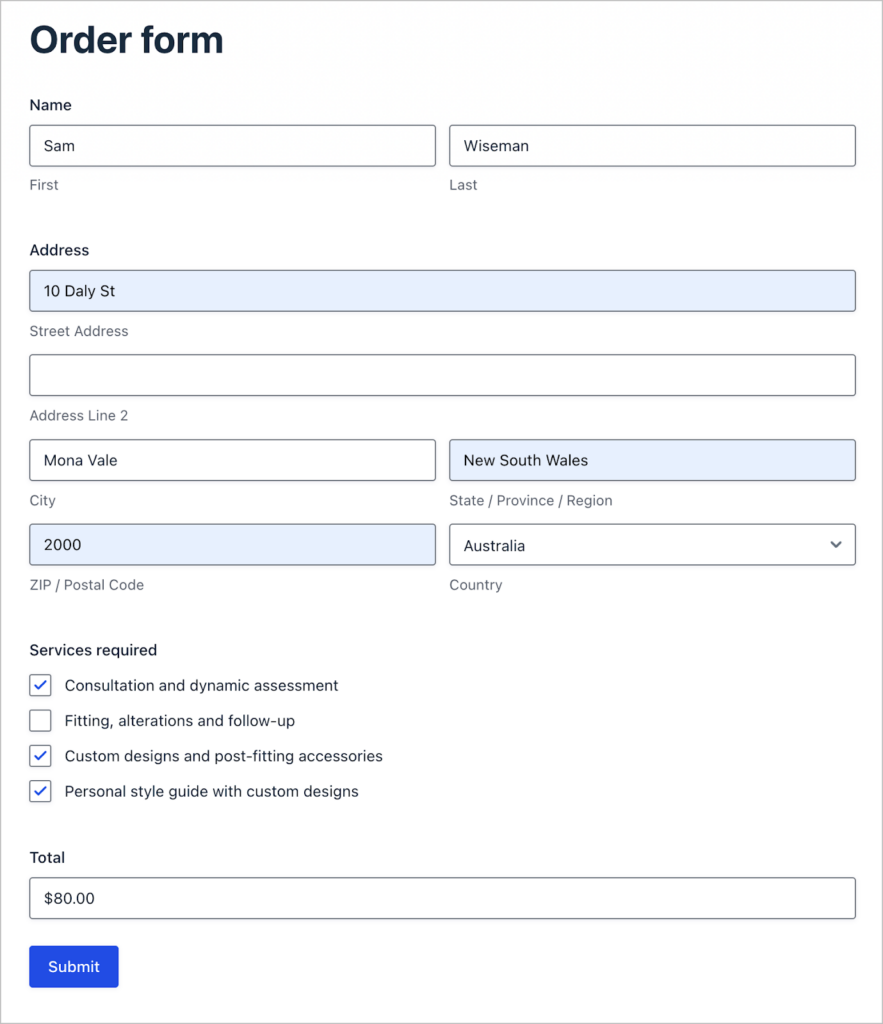
Here’s what our order form looks like on the front end:
Now that our form is complete, the next step is to build the customer dashboard page with PDF download links.
Building the customer dashboard View
GravityView enables us to display Gravity Forms entries on the front end. We’re going to build a View that displays a customer’s orders, along with a link to download a custom PDF invoice!
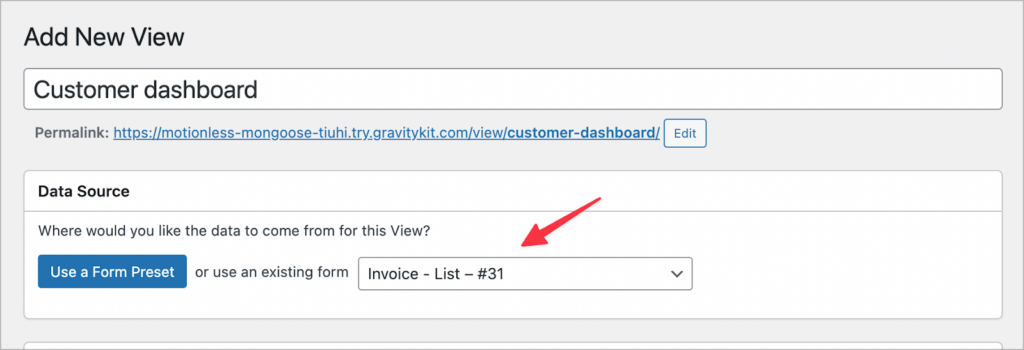
To create a new View, we’ll hover over “GravityKit” and click “New View”. After giving our View a name, we’ll need to select a data source. This tells GravityView where to get the data from. In this case, we’ll select the order form that we created in the previous step.
Next, we need to choose a View Type. For this example, we’ll select the “DIY” option. Although we could use any View Type here, the DIY layout gives us additional flexibility when designing the PDF invoice.
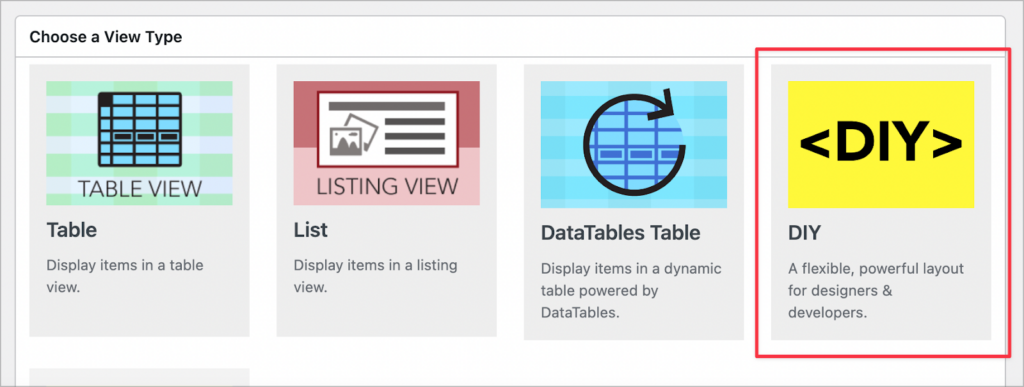
After selecting a View Type, we can start constructing our View using GravityView’s drag-and-drop builder!
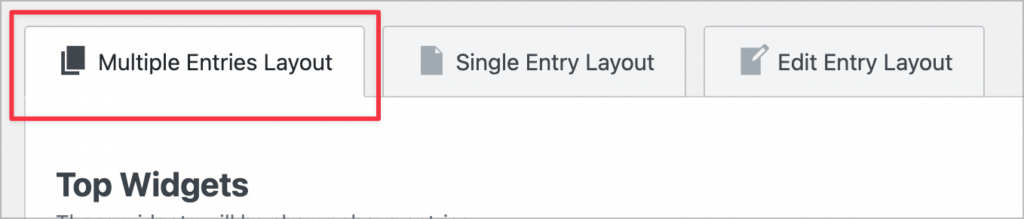
We’ll start with the Multiple Entries Layout. This will be our overview page where users will be able to see their recent orders. Later, we’ll configure the Single Entry Layout, which will act as the design for our PDF invoices.
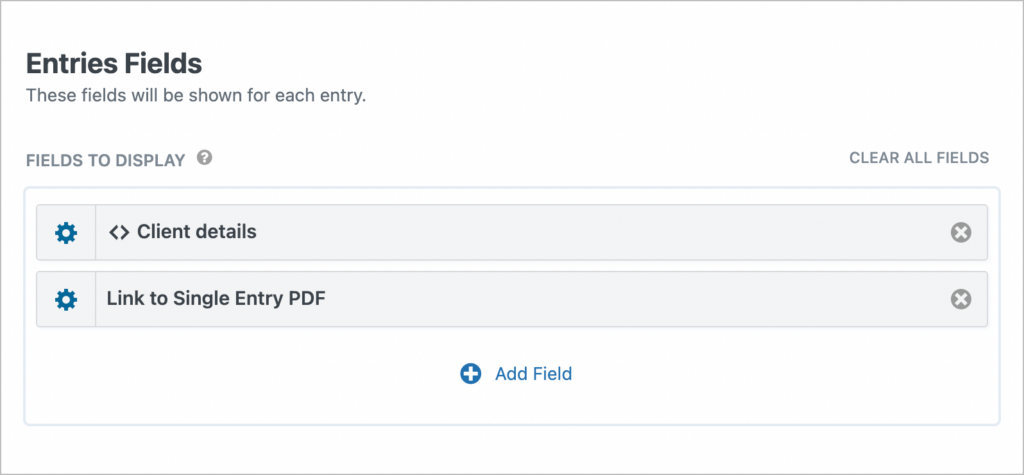
What makes the DIY View type so powerful is that it enables us to create custom layouts using HTML and CSS. For the Multiple Entries layout, we only need two fields; a Custom Content field and a “Link to Single Entry PDF” field.
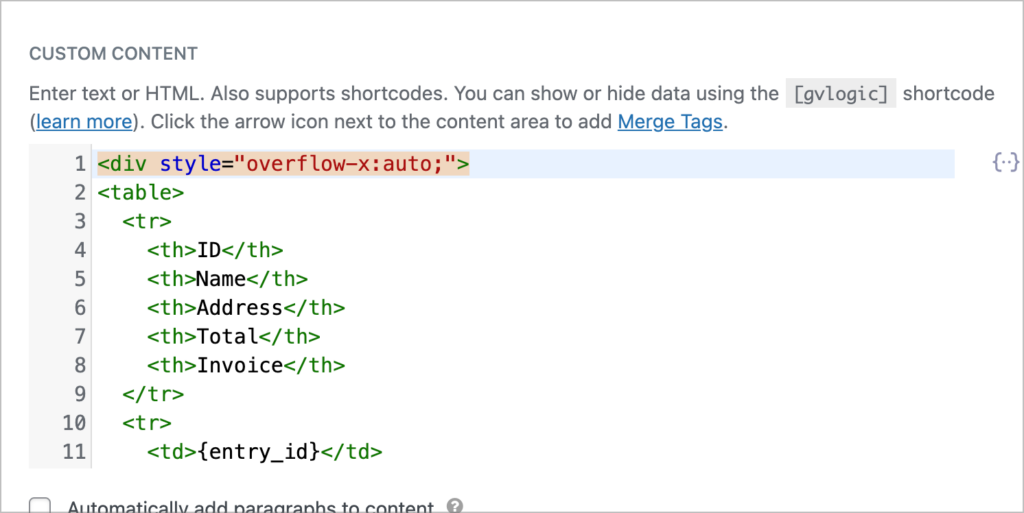
We can then use the flexibility of the DIY View type to create a tabular structure with HTML code.
💡 Pro tip: Learn more about the GravityView DIY layout builder.
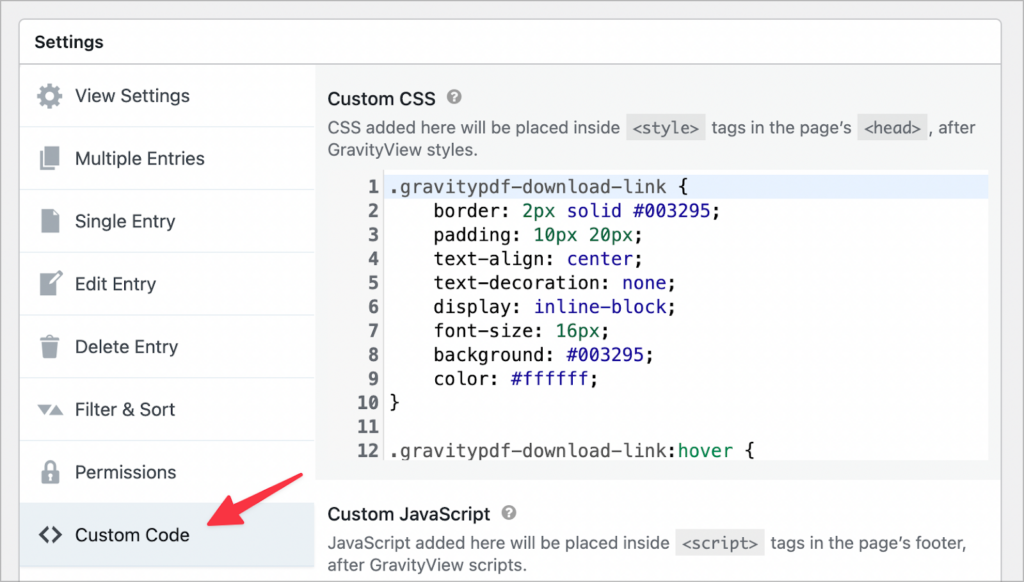
We’ll also add some custom styles to the PDF download link:
Here’s what our Multiple Entries layout looks like on the front end:
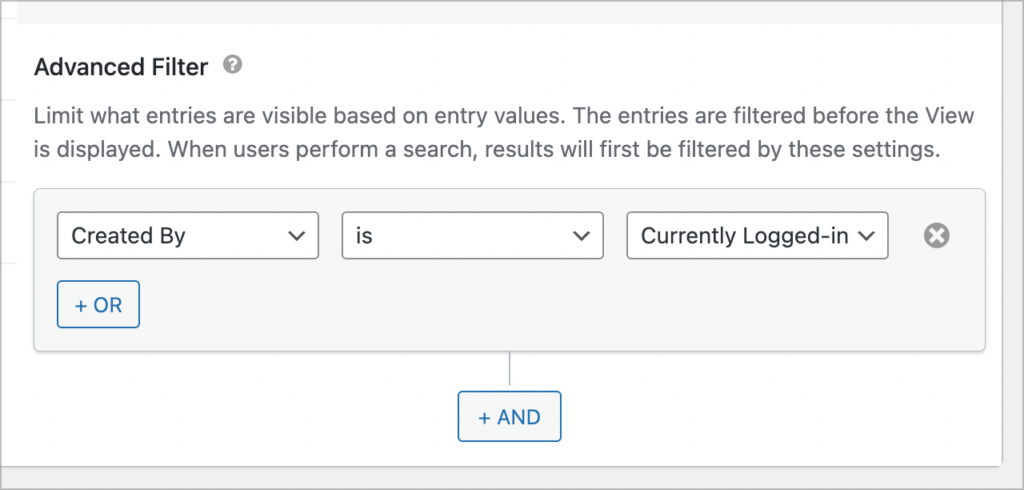
Finally, we’re going to add an advanced filtering condition to our View to ensure that users only see their own orders. We can do this from the “Filter & Sort” tab in the View settings.
Okay, that’s it for the Multiple Entries page. Let’s turn our attention to the Single Entry layout, where we’re going to design our PDF invoice.
Configuring the PDF invoice
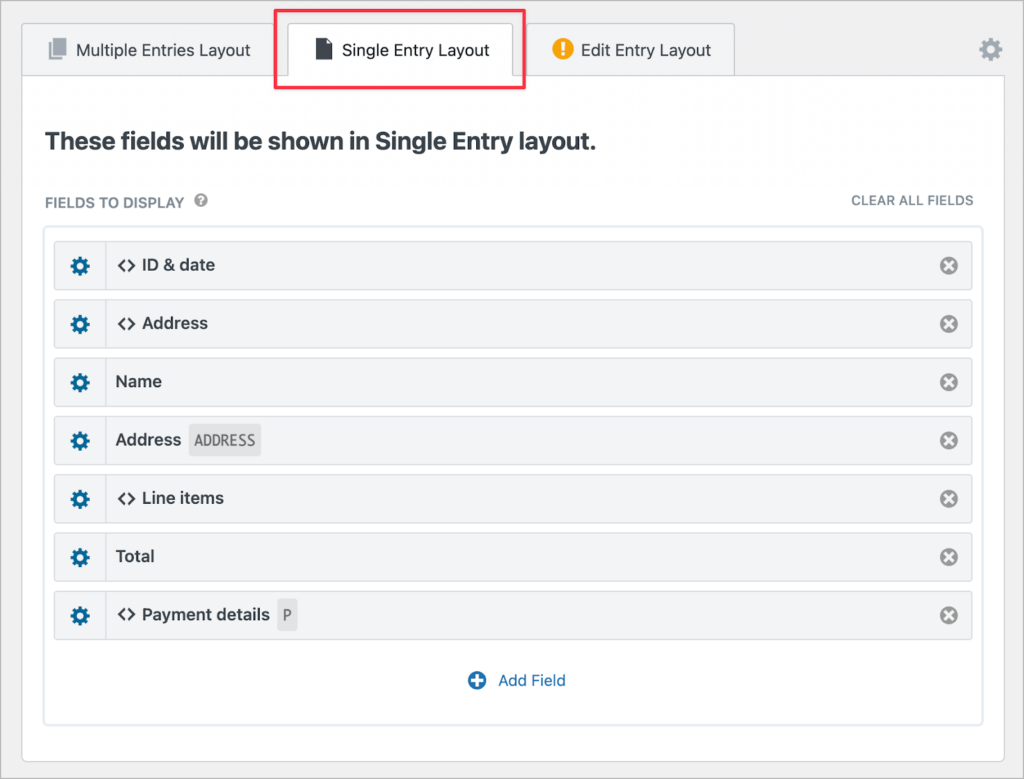
The GravityView Single Entry Layout enables us to showcase information about an individual entry. This will also serve as the design for our PDF invoice.
Here we’re going to add all the necessary information that needs to be on the invoice. Here’s an overview of all the fields we added here. Let’s go through them one by one.
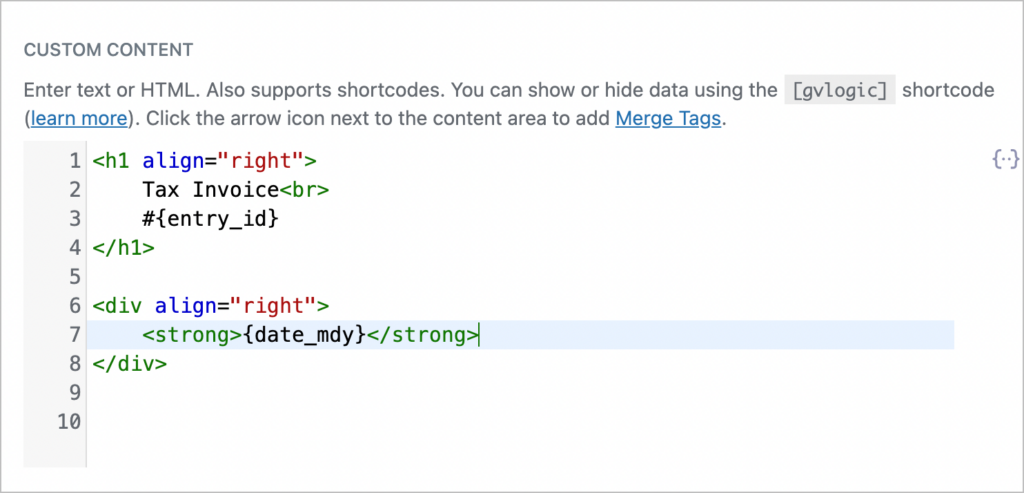
At the top of the invoice, we’re going to add the invoice ID and date to a Custom Content field and align them to the right. For the ID, we’ll use the unique entry ID generated by Gravity Forms.
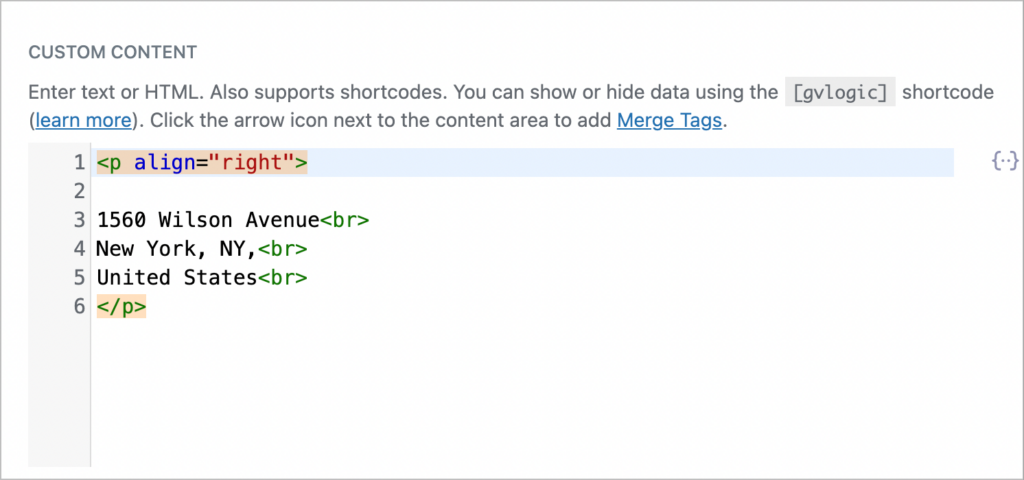
Next, we’ll add the Address of our company, and also align it to the right using a Custom Content field:
Next, we’ll add the “Name” and “Address” fields, which will output the name and address of the customer.
After that, we’ll add the line items in the invoice—here’s where things get really fun!
Displaying fields conditionally using gvlogic
The line items on the invoice are the services requested by the customer. We’ll also need to show the cost for each, with the total at the bottom.
However, not every customer will select the same services, so we need a way to show services and associated costs ONLY if they were ordered by a customer. Luckily, GravityView has a handy shortcode that enables us to do just that!
The gvlogic shortcode makes it easy to display/hide fields based on conditions. We’re going to use it here to conditionally display line items and costs in a table, depending on whether they were part of the customer’s order.
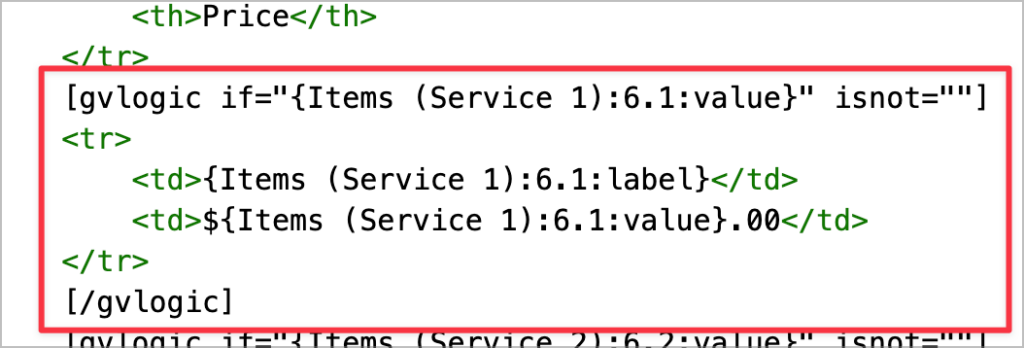
As you can see, we’re using merge tags to display the label and value of the service in a table format. The table row is wrapped in a [[gvlogic]] shortcode so it will only be visible if the customer selected that service. This gives us a powerful way to build PDFs dynamically based on conditions that we set!
Here is the HTML code we used (including shortcodes!) if you want to copy/paste it. Just make sure to replace the merge tags with your own!
<table>
	<tr>
		<th>Service</th>
		<th>Price</th>
	</tr>
	[gvlogic if="{Items (Service 1):6.1:value}" isnot=""]
	<tr>
		<td>{Items (Service 1):6.1:label}</td>
		<td>${Items (Service 1):6.1:value}.00</td>
	</tr>
	[/gvlogic]
	[gvlogic if="{Items (Service 2):6.2:value}" isnot=""]
	<tr>
		<td>{Items (Service 2):6.2:label}</td>
		<td>${Items (Service 2):6.2:value}.00</td>
	</tr>
	[/gvlogic]
	[gvlogic if="{Items (Service 3):6.3:value}" isnot=""]
	<tr>
		<td>{Items (Service 3):6.3:label}</td>
		<td>${Items (Service 3):6.3:value}.00</td>
	</tr>
	[/gvlogic]
	[gvlogic if="{Items (Service 4):6.4:value}" isnot=""]
	<tr>
		<td>{Items (Service 4):6.4:label}</td>
		<td>${Items (Service 4):6.4:value}.00</td>
	</tr>
	[/gvlogic]
</table>
💡 Pro tip: Learn more about gvlogic and how to use this powerful shortcode for displaying or hiding content on your site.
Underneath the line items, we’re going to add the “Total” field, and finally, we’ll add the payment details for our company.
Configuring the PDF settings
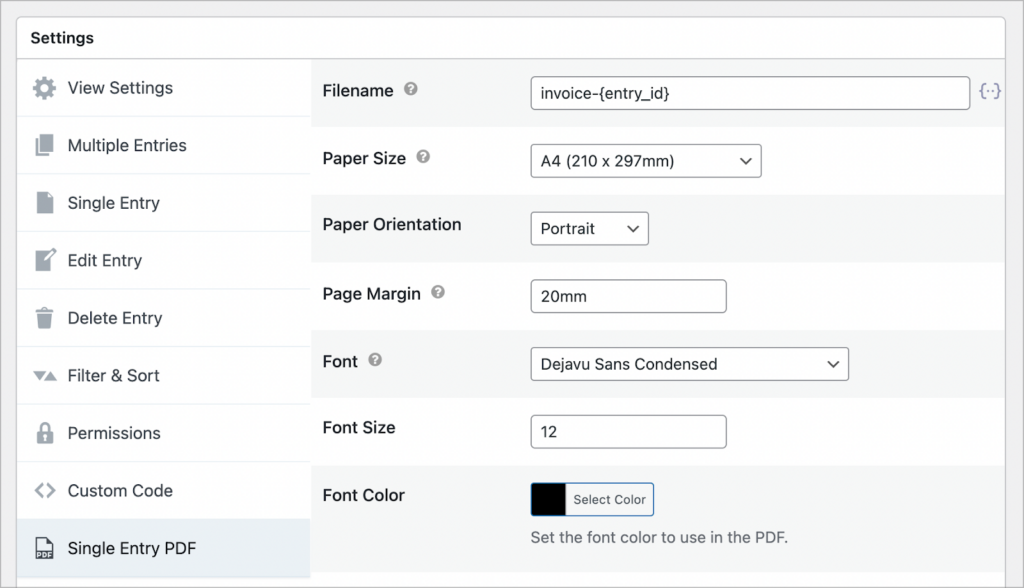
All that’s left to do now is configure the PDF settings. To do this, we’ll scroll down to the View settings and click on the “Single Entry PDF” tab. Here there is a range of options for customizing the look of our PDF.
We can choose a custom filename, change the paper size, fonts, text size, and more.
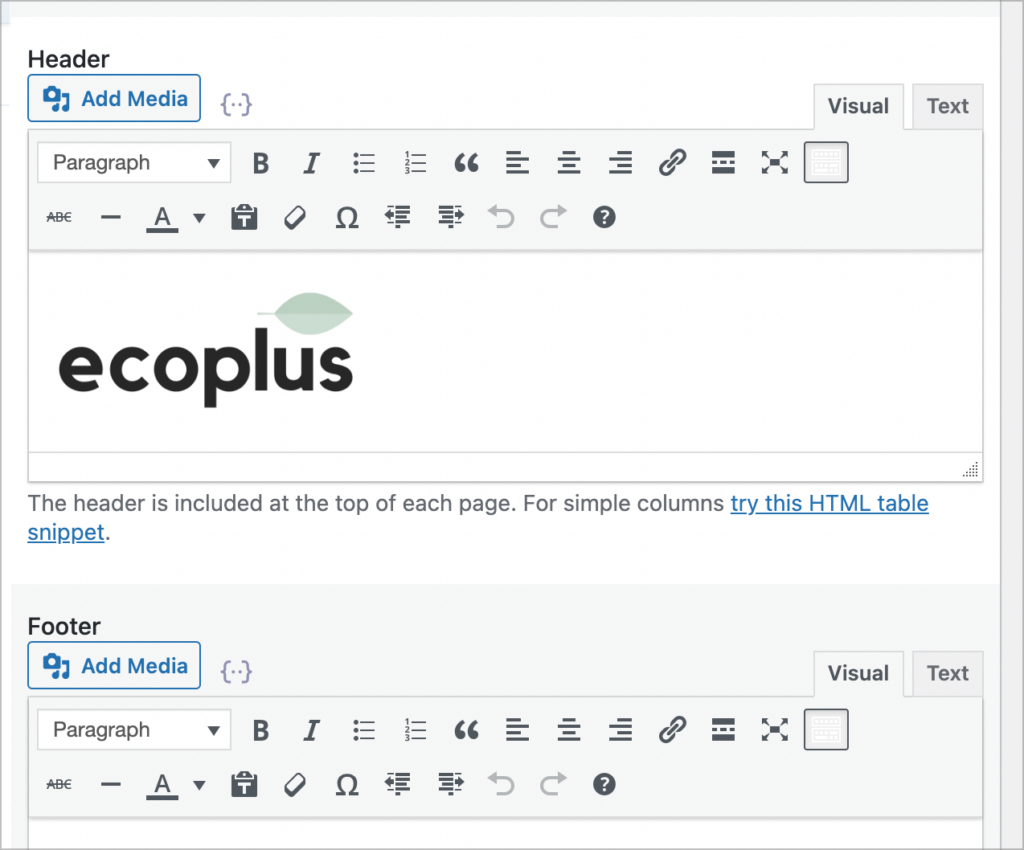
Scrolling down, we can set a custom header and footer. Here, we’ll add our company’s logo to the header.
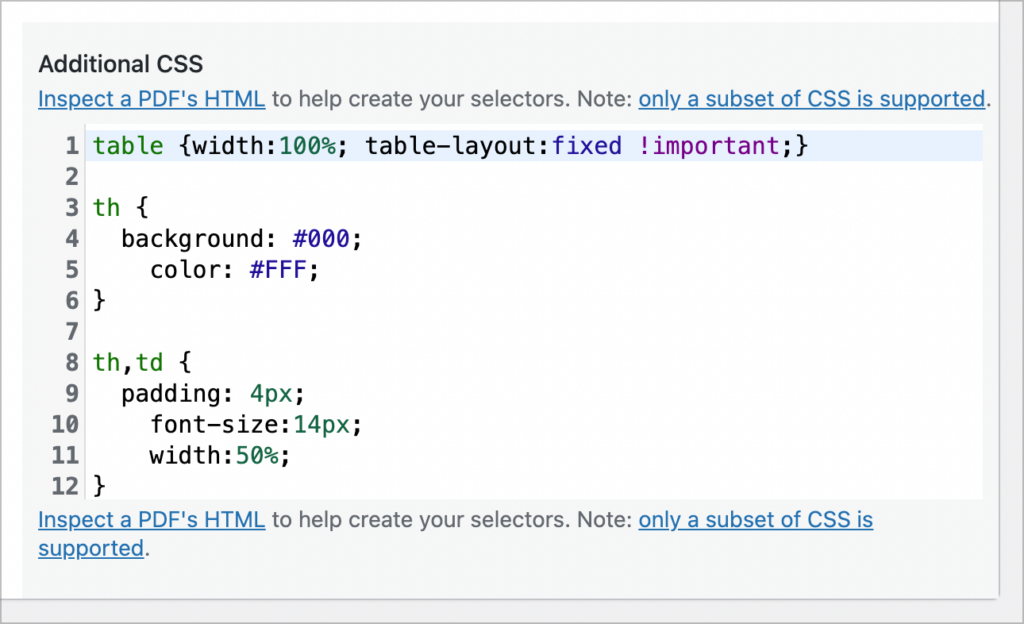
Finally, we’re going to add some custom CSS to the “Additional CSS” box. This will enable us to style the custom table we’re adding to showcase the different line items.
Phew! That’s it. Now let’s take a look at the finished PDF invoice on the front end:
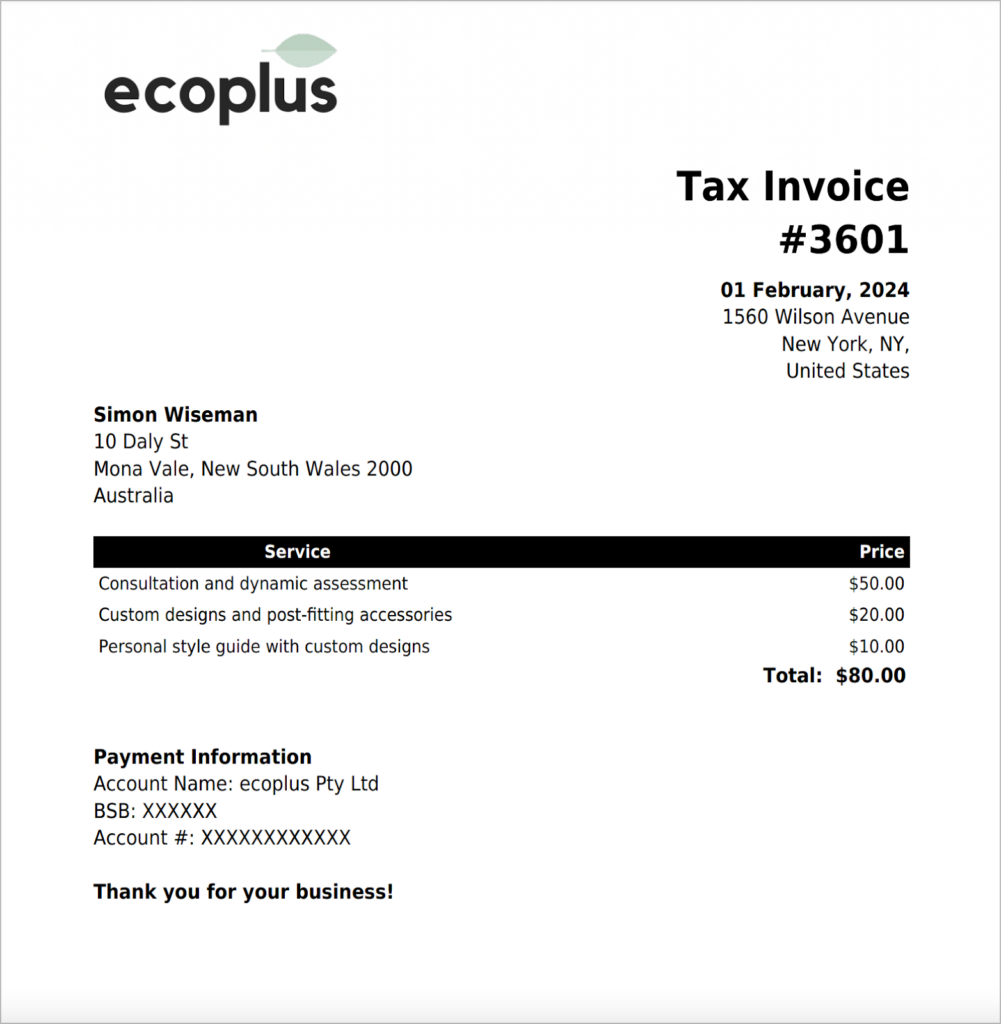
That’s it. With a bit of creativity, we created an invoice generator that outputs professional PDF invoices that contain unique information for each customer!
Create professional PDF invoices in GravityView
Using PDF for GravityView, you can create professional looking PDFs that match the layout of your Single Entry page.
In this post, we built a PDF invoice generator. Use this to automate different aspects of your business, or simply add powerful new functionality to your existing web applications! If you found this tutorial helpful, subscribe to our newsletter below so we can notify you when we publish new content.

Helpful tips right in your inbox.
Subscribe to get the latest articles, information on releases and helpful Gravity Forms tips!
More articles

How to build a WordPress CRM without code (a contact database you own)
Build a simple WordPress CRM with GravityView. Turn the Gravity Forms entries you already collect into a no-code contact database you own, with no monthly fees.

Launch Log: Distance sorting for radius searches, DataTables search improvements, and import reliability fixes
The latest GravityKit releases add distance sorting to map searches, bring built-in search to DataTables, and fix GravityCharts and GravityImport edge cases.

WordPress page builder market share 2026: Elementor leads at 32.67%
Elementor reaches 32.7% of WordPress sites. WordPress Block Editor 20.6%, wpBakery 8.5%, Divi 5.7%. Latest HTTP Archive crawl, share-of-WordPress basis throughout.