Published
•
Updated
How to migrate your Gravity Forms entries to a new website
A step-by-step guide to migrating Gravity Forms entries from one website to another, covering export, import, and how to transfer feeds, settings, and add-on data as well.

Are you planning to move your Gravity Forms entries from one website to another? Whether you’re redesigning your website, switching hosting providers, or consolidating multiple sites, migrating your Gravity Forms entries is crucial to maintaining your valuable data.
In this article, we’ll guide you through the step-by-step process of safely transferring your form submissions to a new website.
We’ll walk you through each stage of the migration, from exporting your entries to importing them into your new website. As a bonus, we’ll also show you how to migrate other Gravity Forms related data such as feeds, settings, workflows, files, add-on configurations, and more!
Let’s get started.
Steps for migrating form entries
Here are the steps we’ll need to take to migrate Gravity Forms entries from one site to another:
- On the site with the entries, go to the Gravity Forms Import/Export page and export your form entries to a CSV file
- Install Gravity Forms and GravityImport on the new site
- Use GravityImport to import the CSV file containing your entries to the new site
Now let’s go through each step in more detail.
Export your form entries as a CSV file
The first thing we need to do is export our form entries from our existing website so that we can import them to our new site later on. Gravity Forms has an export functionality built in, allowing us to export existing form entries to a CSV file.
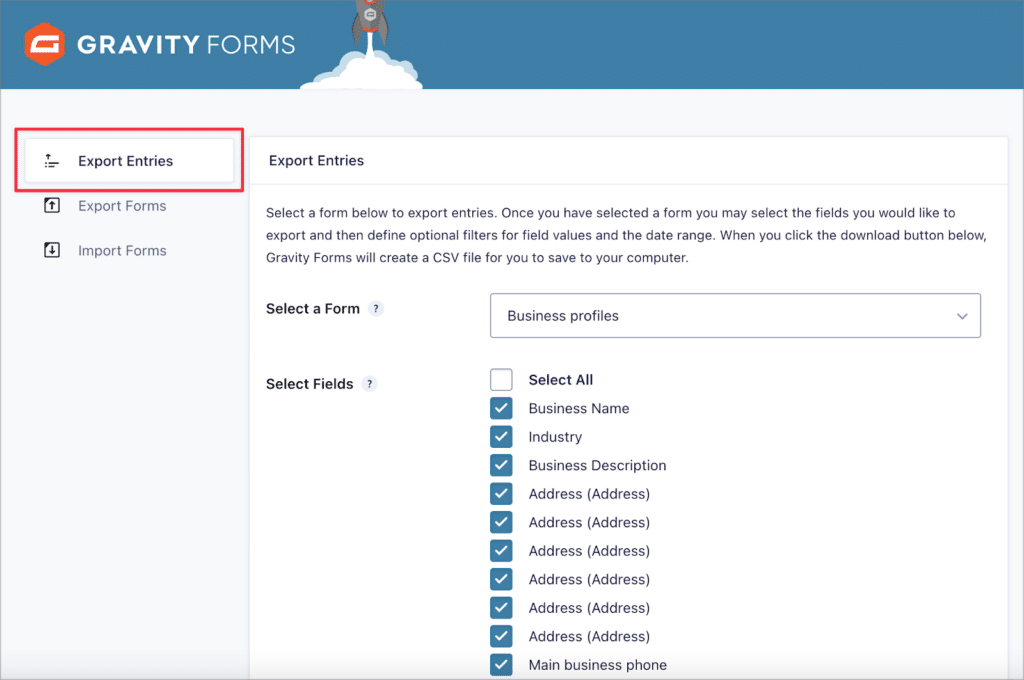
Hover over “Forms” in your WordPress menu and click “Import/Export”. Next, ensure you’re on the “Export Entries” page by clicking on the tab to the left.
Now you can select the form with the entries you want to export from the drop down menu. You can also select the specific form fields that you want to export (this is helpful if you want to exclude fields from the export file).
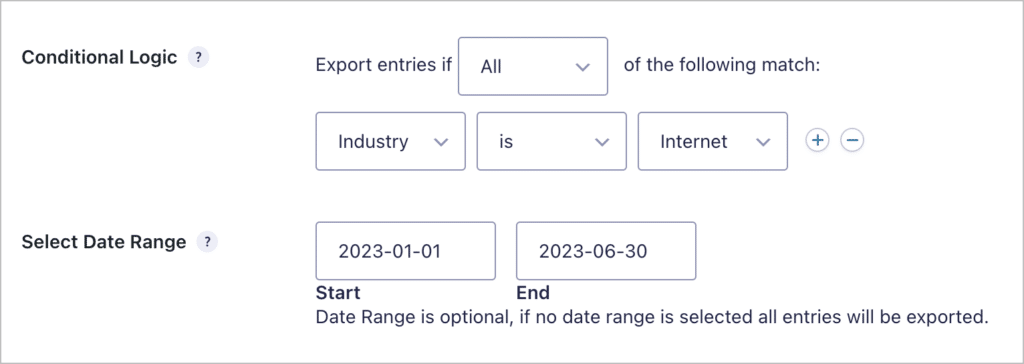
After selecting your fields, scroll down to find two additional options—conditional logic and date filtering. Conditional logic allows you to apply conditions to the exported entries (e.g. only export entries where the “Industry” field is set to “Internet”).
Date range filtering allows you to limit the exported entries to those that were submitted within a given date range (e.g. only export entries submitted between January and June, 2023).
That’s it! After configuring the export, click “Download Export File” to download a CSV file of your exported entries. Save this file somewhere you’ll remember as you’re going to need it in the next step!
Optional: export your forms as well
Gravity Forms also allows you to export your forms. This is helpful if you want to migrate one or more of your existing forms to a new website! When you export a form in Gravity Forms, it will be downloaded as a JSON file, which you can then import to another WordPress website running Gravity Forms.
Here’s how to do this:
- Hover over “Forms” and click “Import/Export”
- Click on “Export Forms” on the left and select the form you want to export
- Go to the new site, click on “Import/Export” again, and select “Import Forms”
- Upload the JSON file you downloaded from the old site
It’s also important to note that GravityImport handles form migration as well by allowing you to rebuild your old forms automatically during the import process! More about this below.
Getting started with the GravityImport add-on

GravityImport is a certified add-on for Gravity Forms that enables you to import form entries from a CSV file. The plugin provides a simple, streamlined import process for Gravity Forms entries, as well as automatic form creation!
Here are just some of the powerful features included in this add-on:
- Map the fields in your CSV file to fields in an existing form
- Run existing form feeds when new entries are imported
- Import entries based on conditions using conditional logic
- Receive an error log if entries fail to import
To install GravityImport, start by purchasing the plugin from our website (don’t forget to choose whether you want a single site or multi site license). After purchasing the plugin, download the ZIP file from your account page and install it like you would any WordPress plugin.
💡 Pro tip: If you’re looking to migrate your forms and entries from a different form plugin (e.g. Contact Form 7 or WPForms) to Gravity Forms, read our guide here.
Import the CSV file containing your form entries
After installing GravityImport on your new site, you can import the CSV file containing your form entries to Gravity Forms!
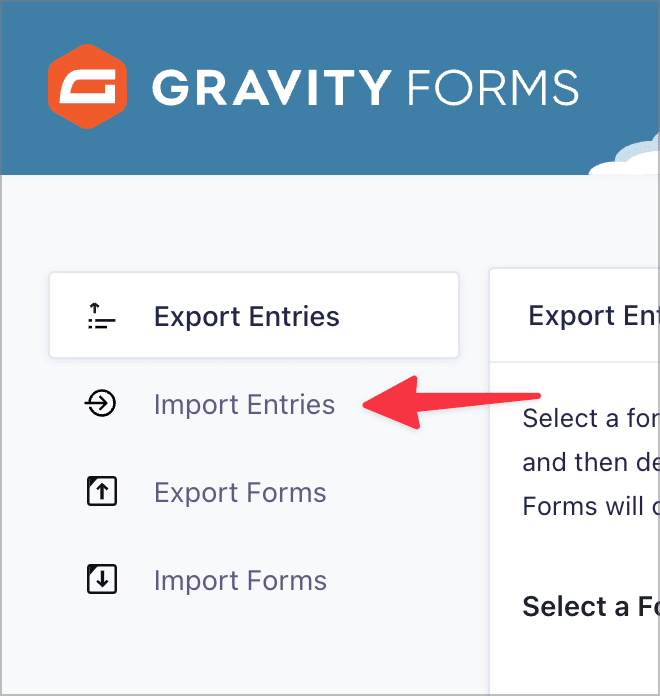
To do this, hover over “Forms”, click “Import/Export” and then select “Import Entries” on the left.
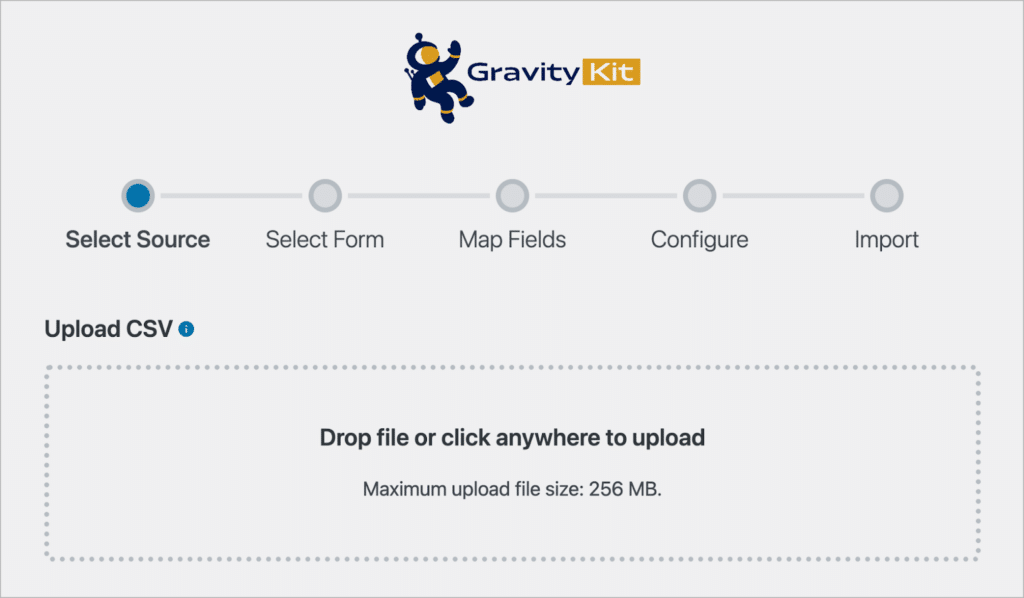
This will begin the import process by prompting you to upload a CSV file. You can either drag and drop the file into the box, or you can click in the box and select the file from your computer.
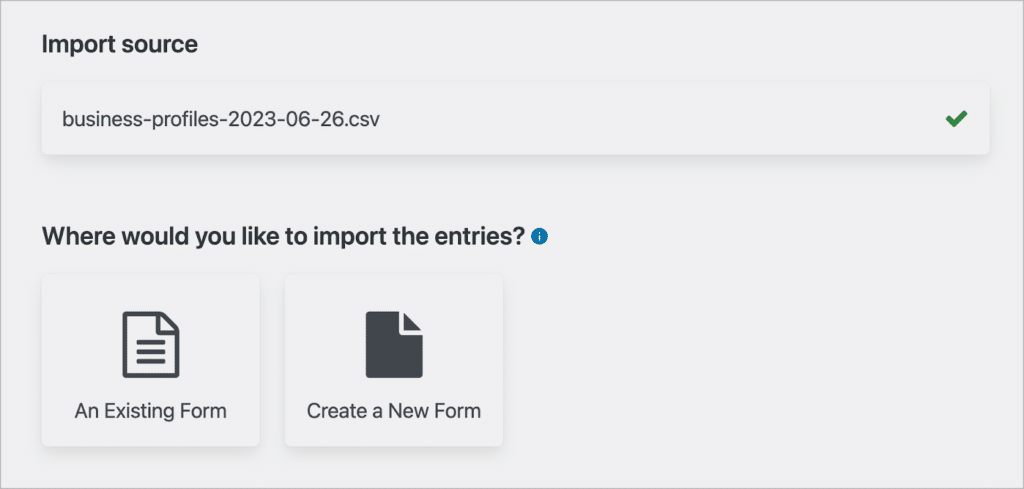
After uploading the CSV file containing your form entries, you can select whether you want to import the entries to an existing form or create a new form. If you select “Create a New Form”, GravityImport will build a new form for you based on the fields in your CSV file!
However, if you already have a form, simply click “An Existing Form” and select the form from the list. For this example, we’ll create a new form.
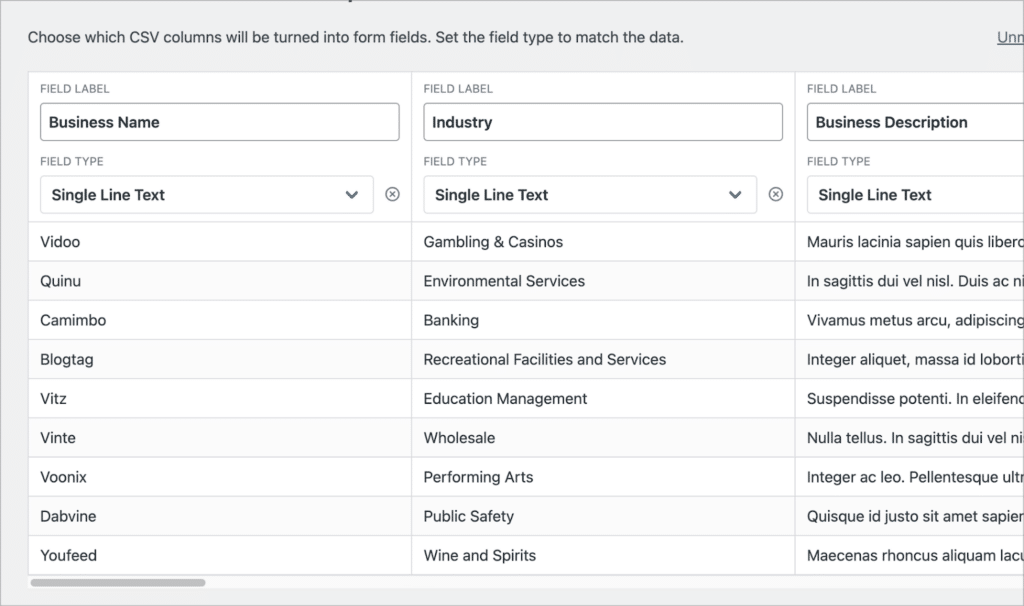
The next step is to map your form fields. Here, you’ll need to choose which columns in your CSV should map to which form fields. GravityImport will attempt to map this based on the data it detects, but it’s important to go through and check that all the field mappings are correct.
After mapping your fields, the final step is to configure the import options. Here, you’ll see various options for customizing your import. You can continue processing if errors occur, filter entries using conditional logic, and enable Gravity Forms email notifications.
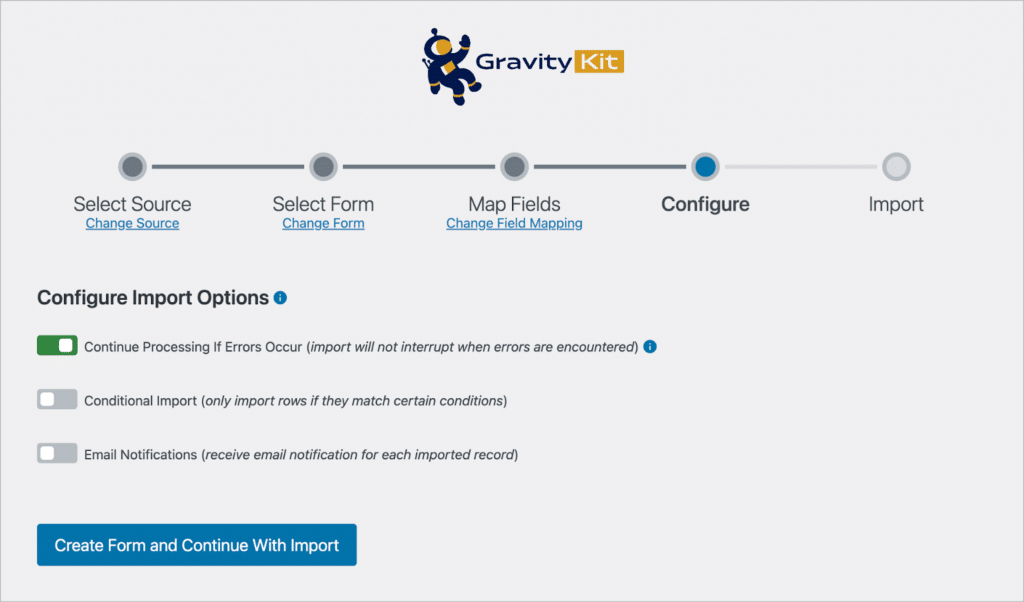
When you’re done, click the big blue button to begin the import! GravityImport will then begin to import your entries, one by one. This process won’t take long!
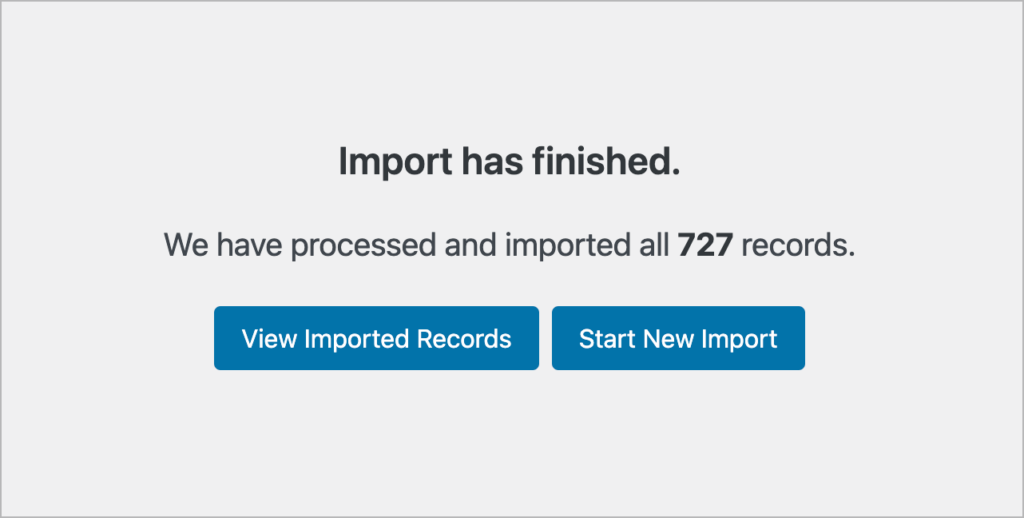
When the import has finished, click “View Imported Records” to see your new entries in Gravity Forms.
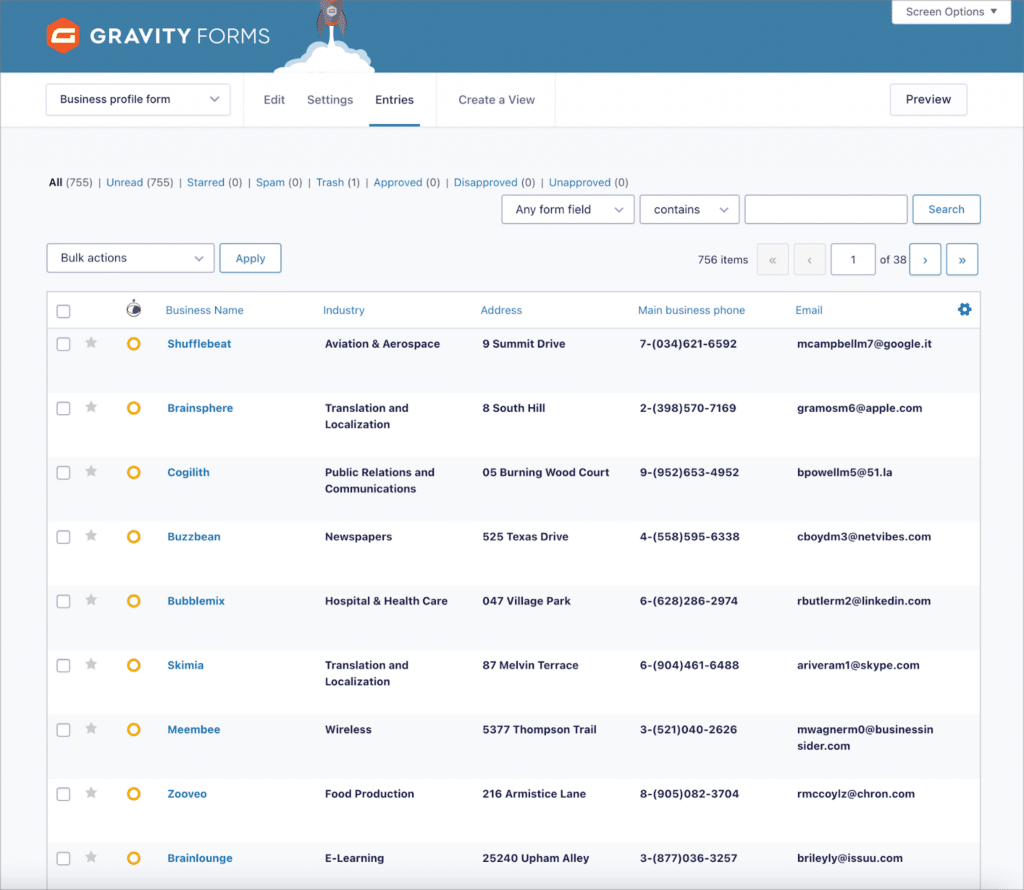
As you can see, GravityImport has created a new form for us (“Business profile form”) and imported all of our 700+ entries!
Bonus: Migrating other Gravity Forms data to a new website (workflows, feeds, settings, etc)
Migrating form entries is one thing, but what if you need to migrate other Gravity Forms data, such as forms, add-on settings & feeds, uploaded files, workflows, and other add-on configurations? For that you’ll need our add-on, GravityMigrate.
GravityMigrate is the ultimate, all-in-one import/export plugin for Gravity Forms. GravityMigrate makes it easy to transfer your important Gravity Forms data from one website to another with only a few clicks.
You start by selecting the forms you want to export. Next, you choose any additional data that you want to export along with your forms. This could be entries, files, add-on feeds, settings, or any other form-related data.

When you’re done, GravityMigrate will generate a ZIP file containing all your data that you can download to your computer. You can then go to your new website and import the file using GravityMigrate’s import functionality.

All of your data will be imported to your new site just as it was on the old site! It’s that easy. To learn more about GravityMigrate, check out our documentation.
Migrate your Gravity Forms entries today
Migrating your Gravity Forms entries to a new website doesn’t have to be a daunting task. With the right tool, such as GravityImport, the process can be made simple and efficient!
If you’re looking to migrate more than just form entries, you can use GravityMigrate, our powerful all-in-one migration plugin for Gravity Forms data.
By following the steps outlined in this guide, you’ll be well-equipped to navigate the migration process with confidence. Remember, both GravityImport and GravityMigrate offer an array of features designed to streamline the entire process, ensuring your data remains intact and accessible.

Helpful tips right in your inbox.
Subscribe to our weekly newsletter for tips, special offers, and more!
Helpful tips right in your inbox.
Subscribe to our weekly newsletter for tips, special offers, and more!

Helpful tips right in your inbox.
Subscribe to get the latest articles, information on releases and helpful Gravity Forms tips!
More articles

Launch Log: Row headers for screen readers, smarter conditional logic, and multi-View fixes
GravityView 3.1 adds row headers for screen readers, plus smarter conditional logic in GravityCalendar and fixes for DataTables, Maps, and Dynamic Lookup.

Ecommerce platform market share 2026: WooCommerce leads the web, Shopify leads the top tier
Ecommerce platform market share in 2026, from HTTP Archive data. WooCommerce leads the whole web at 6.64%, but Shopify already leads the top 1M sites.

Launch Log: 3D map enhancements, smarter filtering, and improved performance on large data sets
GravityKit’s July 9 launch log: 3D map starting views and viewport loading, searchable field-to-field filtering, and fixes across DataTables and more.