Published
•
Updated
How to register and organize teams using Gravity Forms and GravityView
Register and manage teams with Gravity Forms and GravityView. Group members by department, league, or team, and display profiles on the front end without writing any code.
Whether you manage a nonprofit, a startup or a sports team, having a way to manage and organize groups of people is important.
In this post, we’re going to show you how to register, organize and manage teams on your website using Gravity Forms and GravityView. Using this guide as an example, you’ll be able to:
- Manage employees in different departments
- Organize competitions
- Separate athletes into leagues
- And much more!
In this post, we’ll build a directory of basketball players that represent different teams. We’ll show you how to register new team members, display their profiles on the front end, and group different athletes—all using Gravity Forms and GravityView.
Let’s get started!
Check out our live demo applications and get your own free trial site preloaded with all GravityKit add-ons!
What you’ll need
Here’s what you’ll need if you want to follow along with this tutorial:
- Gravity Forms
- Gravity Forms User Registration Add-On (optional)
- GravityView
- GravityView Advanced Filtering extension
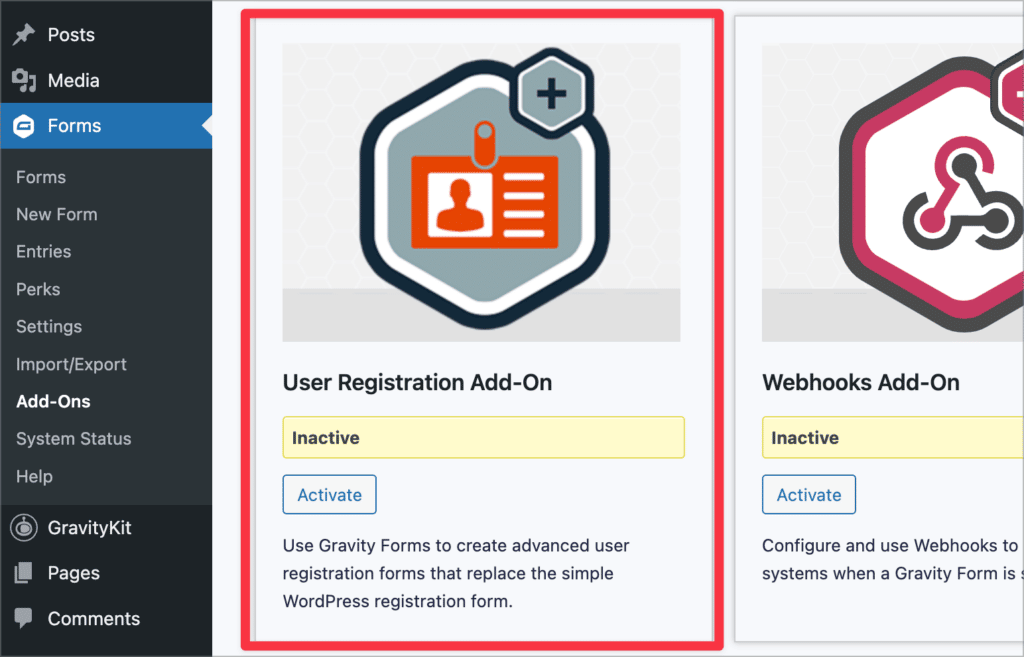
Installing the Gravity Forms User Registration Add-On (optional)
If you want team members to have a profile on your website, you’ll need to install and activate the Gravity Forms User Registration add-on. This add-on allows you to register users on your site when they submit a form. The User Registration add-on is available with the Gravity Forms Elite license.
To install the add-on, hover over “Forms”, click “Add-Ons”, scroll down to the User Registration Add-On and click “Install”. When it’s finished installing, click “Activate”.
Now let’s move on to creating the registration form.
Creating the athlete registration form
We need to create a registration form in order to register new athletes on our website.
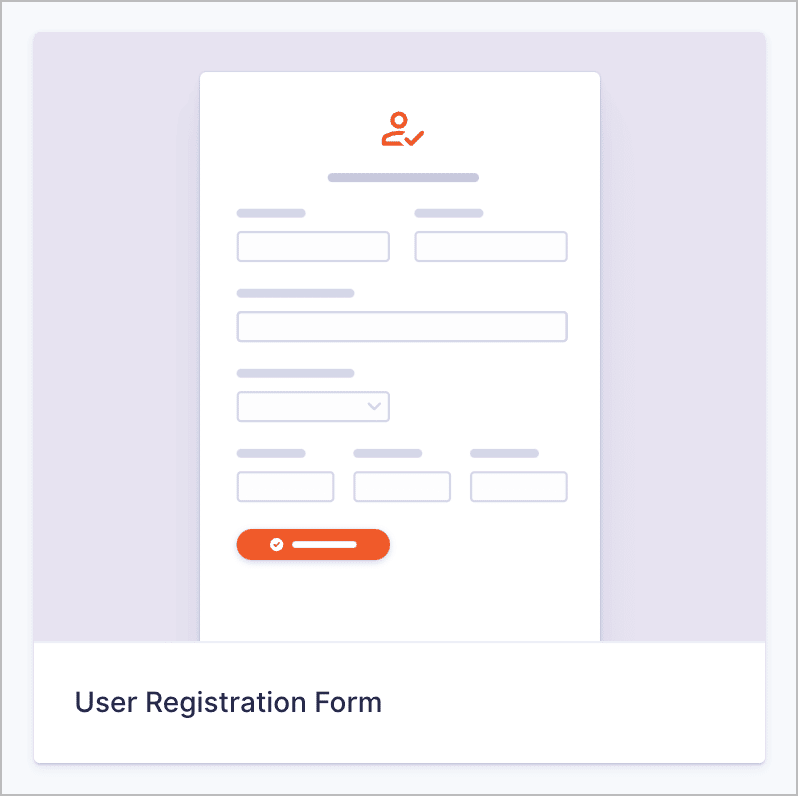
To create a new form, we’ll hover over “Forms” and click “New Form”. Next, we’ll select the “User Registration Form” template, as this already contains most of the fields that we need!
Pro tipLearn more about the Gravity Forms template library.
After giving our form a name, we’ll be able to customize it using the Gravity Forms visual editor. The form template already contains a Name, Email, Username and Password field. Feel free to add any additional fields you feel are necessary.
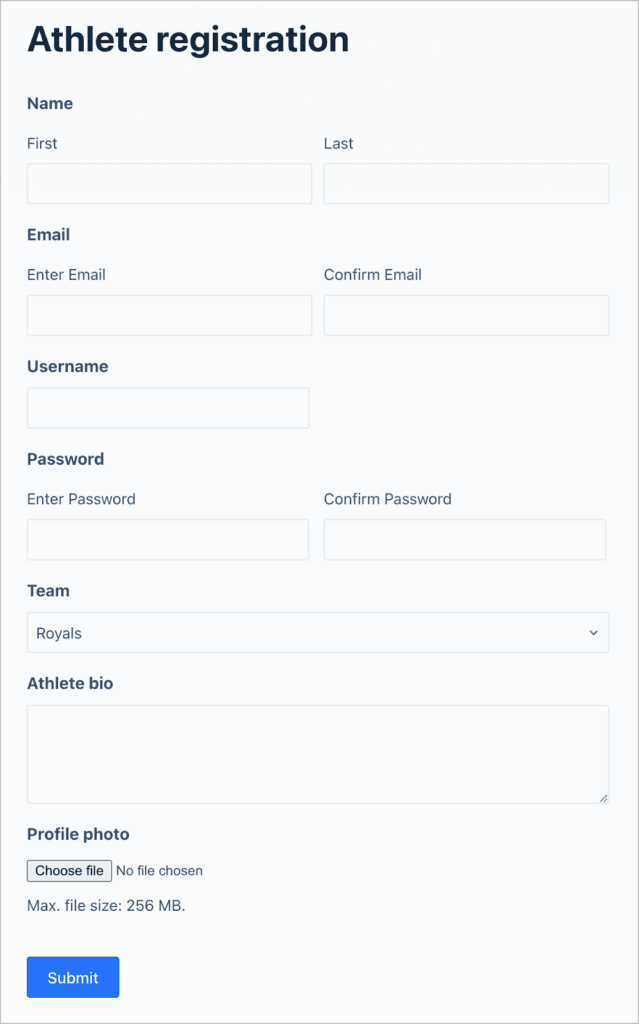
One field we will need to add is a “Team” field, allowing users to select the team that they belong to. We’ll use a Drop Down field for this. We’ll also add a File Upload field allowing them to upload a profile picture, as well as a Paragraph Text field titled “Athlete bio”.
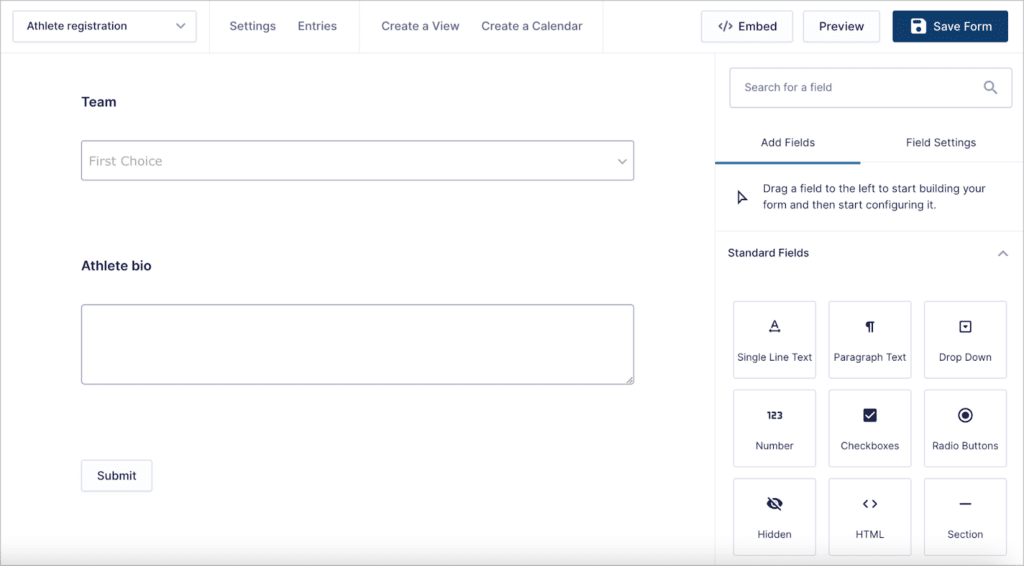
Here’s what our athlete registration form looks like on the front end.
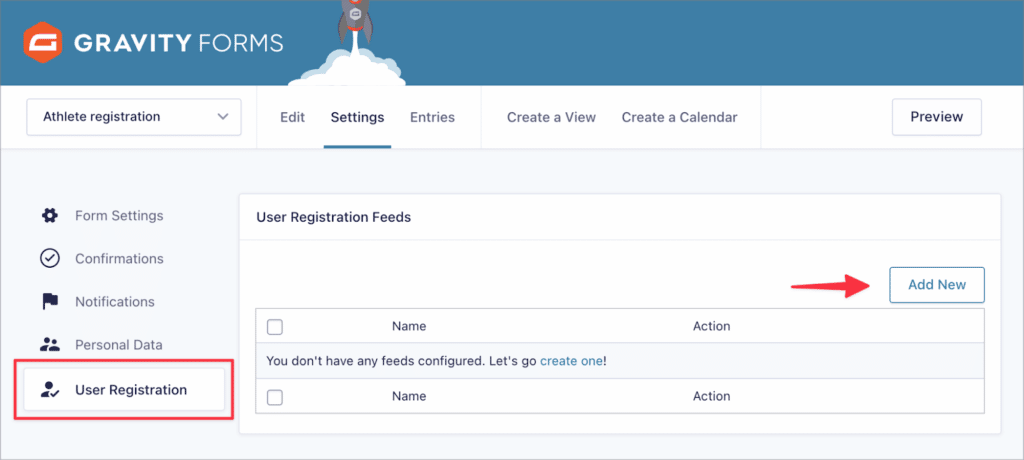
Now that we have our athlete registration form set up, we need to create and configure a User Registration feed to register new athletes on our site.
Configuring a User Registration feed
To create a new User Registration feed, go to the form settings page, select the “User Registration” tab on the left, and click “Add New”.
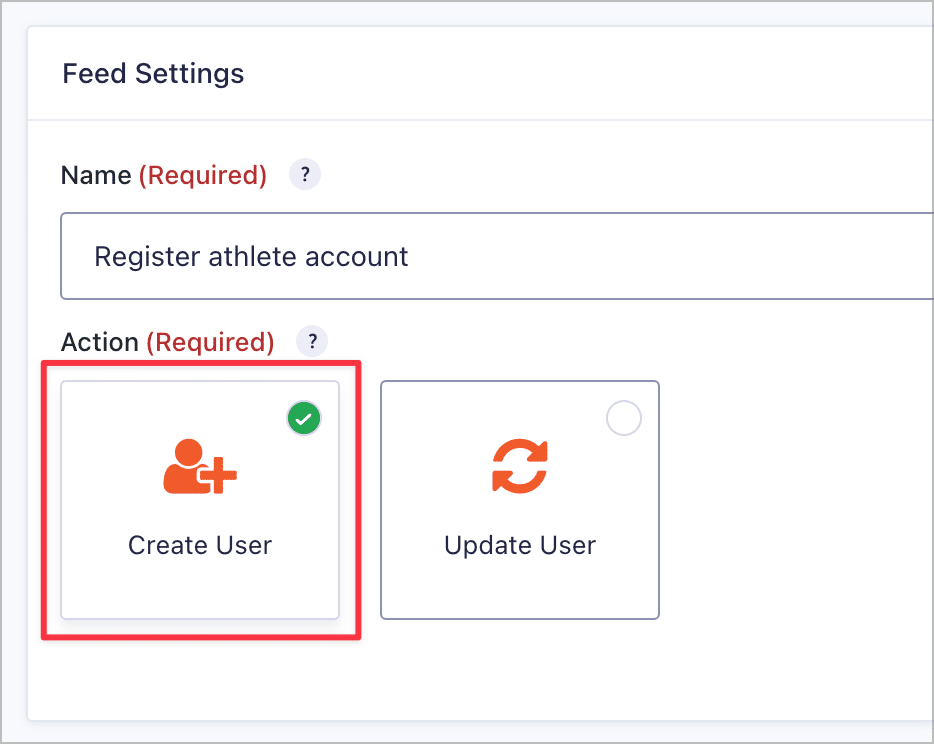
Now we can start configuring the feed settings. The first thing we need to do is select the action that the feed performs. There are two options: create a new user, or update an existing user. We want to register new users on our site, so we’ll select “Create User”.
After that, we’ll need to map the Username, Password, and Email address fields to the corresponding fields in our form, and configure the user activation settings. After configuring our feed, we’ll save it and move on to the next step!
Creating a View to display team profiles on the front end
In this step, we’re going to use GravityView to display athlete profiles on the front end. To create a new View, we’ll hover over “GravityKit” and click “New View”. After giving our View a name (“Athlete profiles”), we need to select a data source.
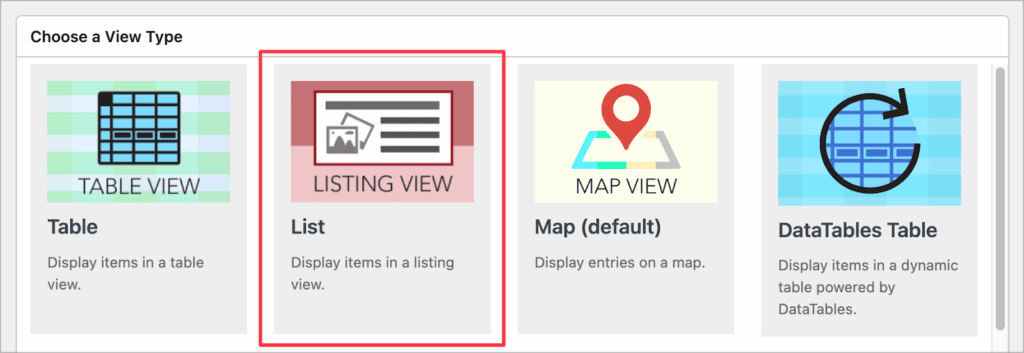
The data source for a View is a Gravity Form containing the entries we want to display. We’ll go ahead and select our “Athlete Registration” form as the data source. After that, we need to choose a View Type. Different View Types allow you to display Gravity Forms entry data using different layouts.
For this example, we’ll select the “List” View Type.
After selecting a View Type, we can start constructing our View using GravityView’s drag-and-drop builder. The List layout is perfect for creating people profiles, and there are numerous configuration options depending on the type of profiles you want to create.
Pro tipIf you just want to create a list of athletes, or a searchable database, you’re best off using the Table or DataTables layout.
For this example, we’ll build a basic layout using the profile picture, name, and team of each athlete. We can add these fields to the “Entries Fields” section of the View editor.
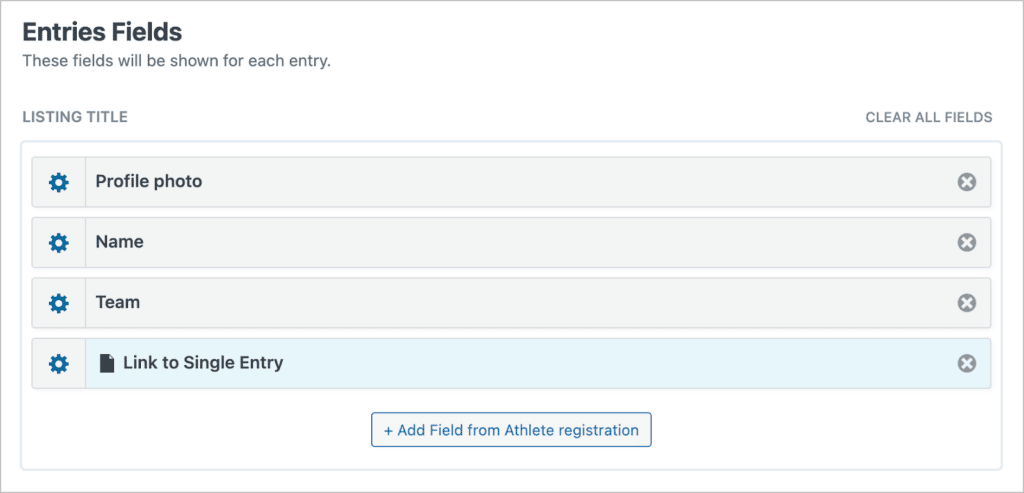
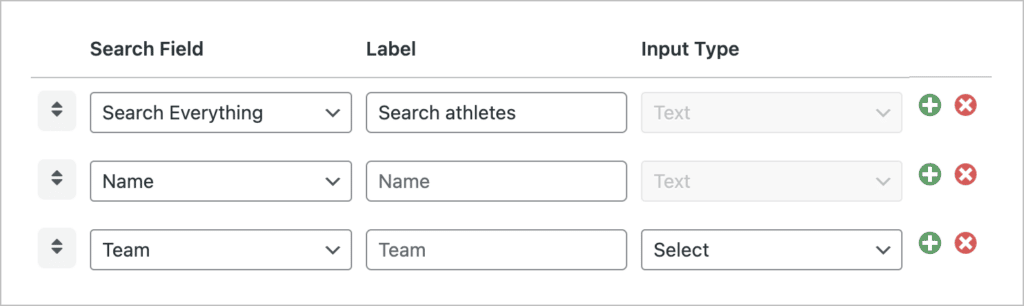
We also want a way for managers to search for athletes, so we’ll add a Search Bar widget to the “Top Widgets” area. By clicking on the gear icon, we can configure the search settings and add additional search input fields. We’ll add search fields allowing managers to search by keyword, name or team.
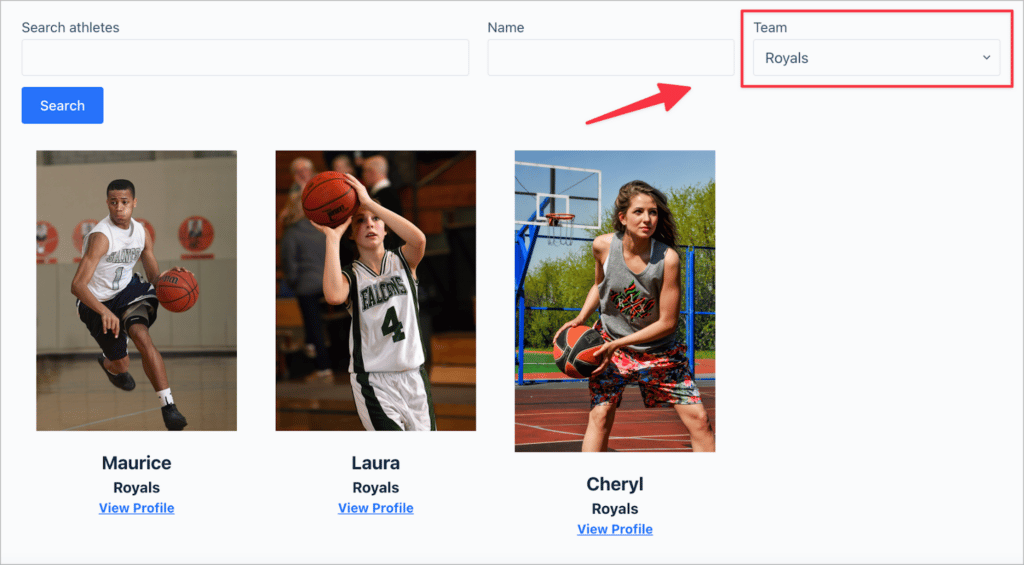
Here’s what our View looks like on the front end:
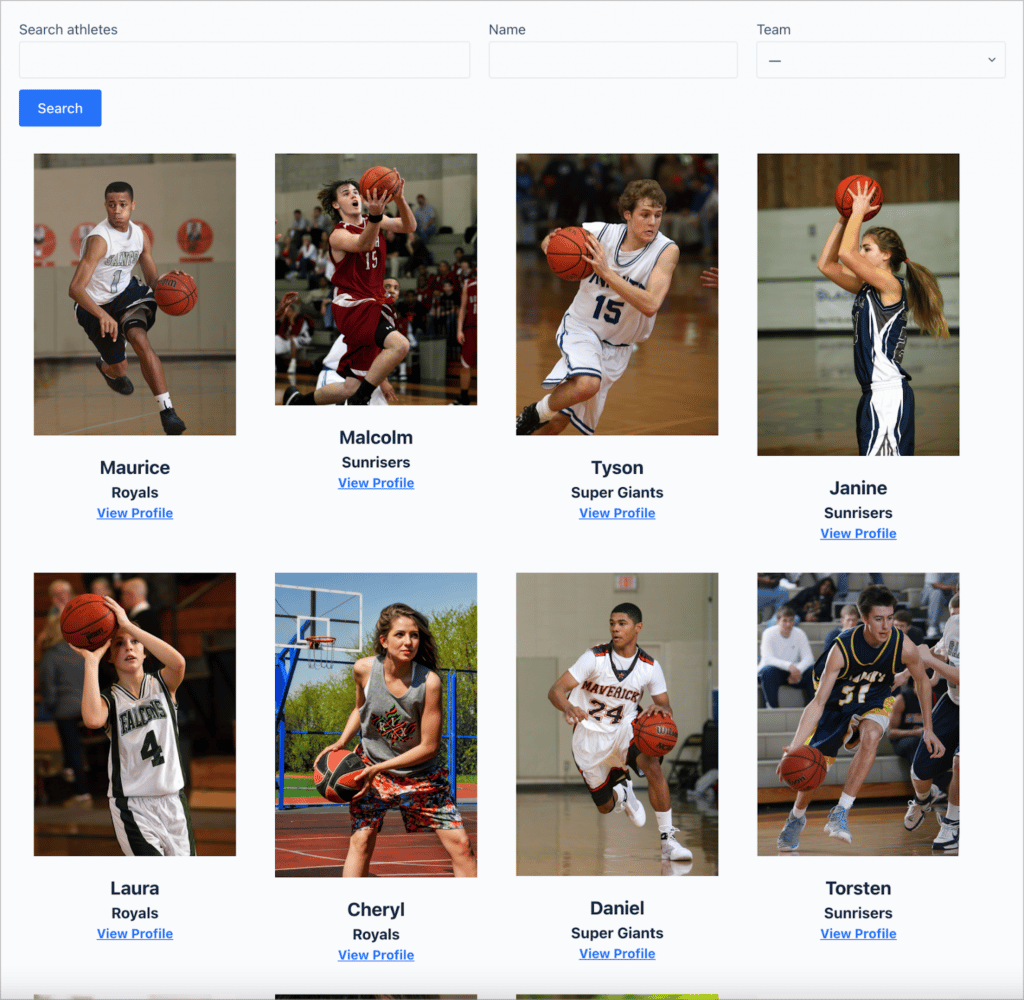
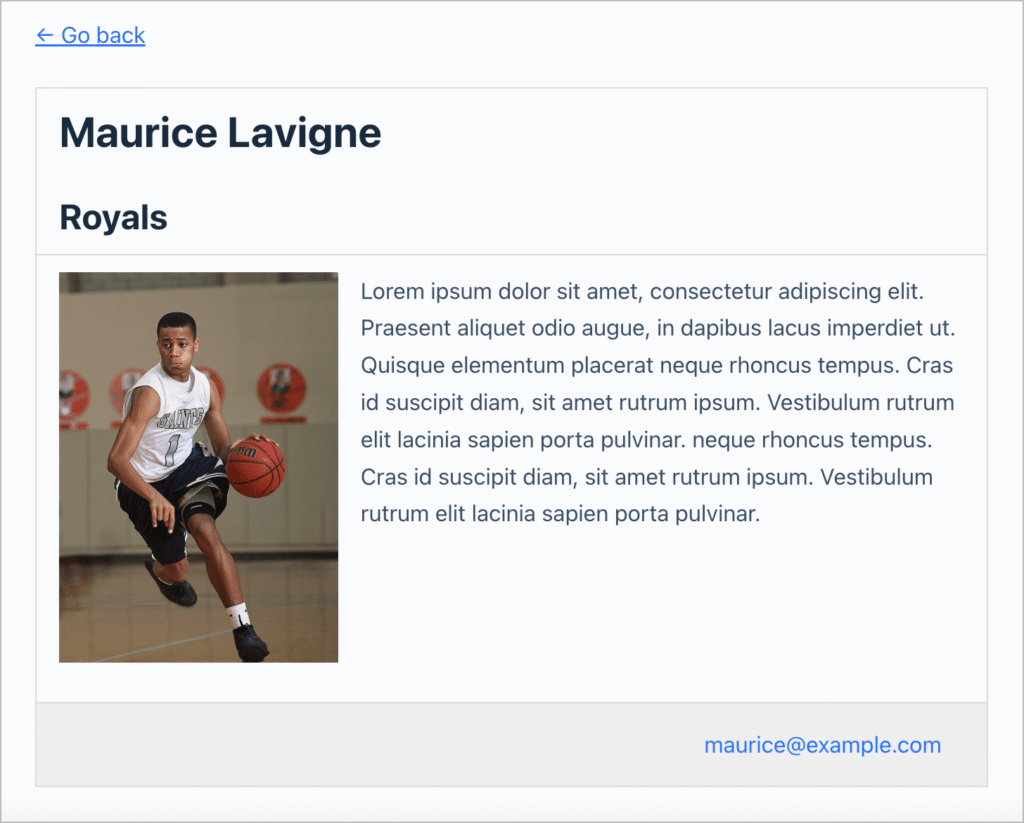
The “View Profile” link goes to the Single Entry page, where users can view the athlete’s full profile, including their bio.
Now let’s take a look at using GravityView’s Advanced Filtering extension to group athletes in the same team.
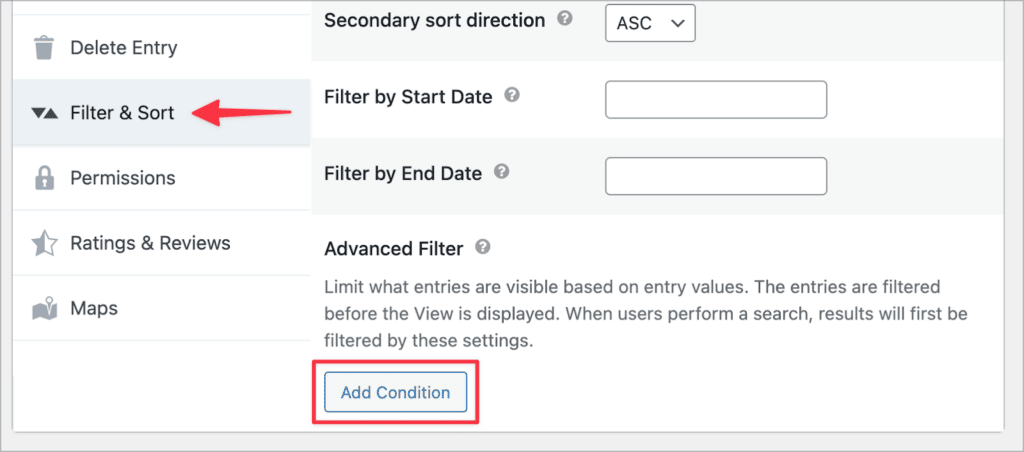
Adding an advanced filtering condition to group users who are in the same team
The GravityView Advanced Filtering extension allows you to filter entries in a View using conditional logic. We’re going to use it to only display athletes that belong to a certain team.
To add a new filtering condition, we’ll scroll down to the View Settings, click “Filter & Sort” and then “Add Condition”.
We’ll add the following filtering condition, ensuring that our View only displays athletes that play for team “Royals”.
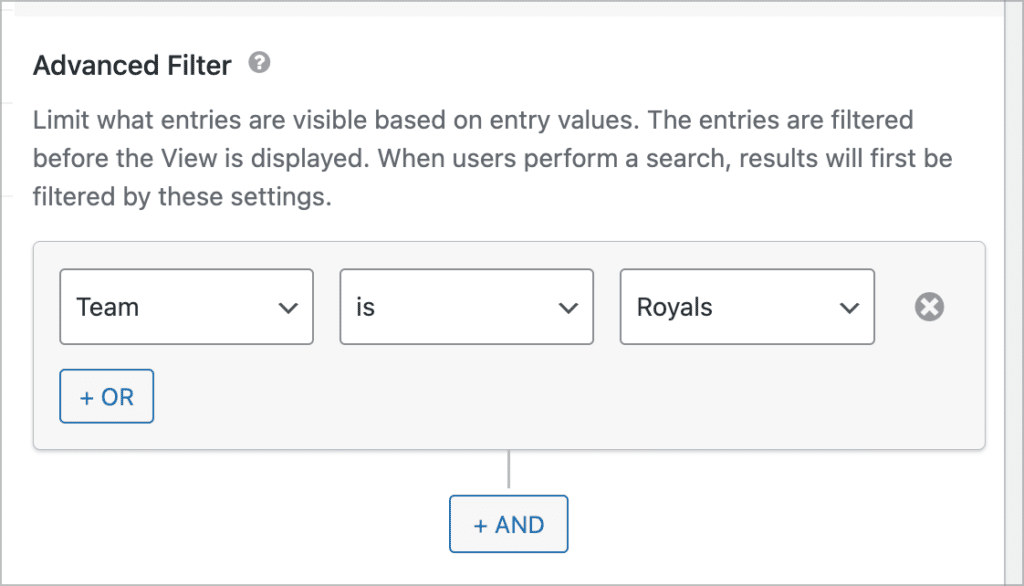
If you set a filtering condition, your View will only contain those entries that match the condition.
Displaying certain teams using the search functionality
Another way to display subsets of a View is by using the search functionality.
Different searches are accessible via URL parameters. So when you complete a search, you can copy the URL that’s generated to access that subset of the View at any time.
Embedding our team directory on the front end
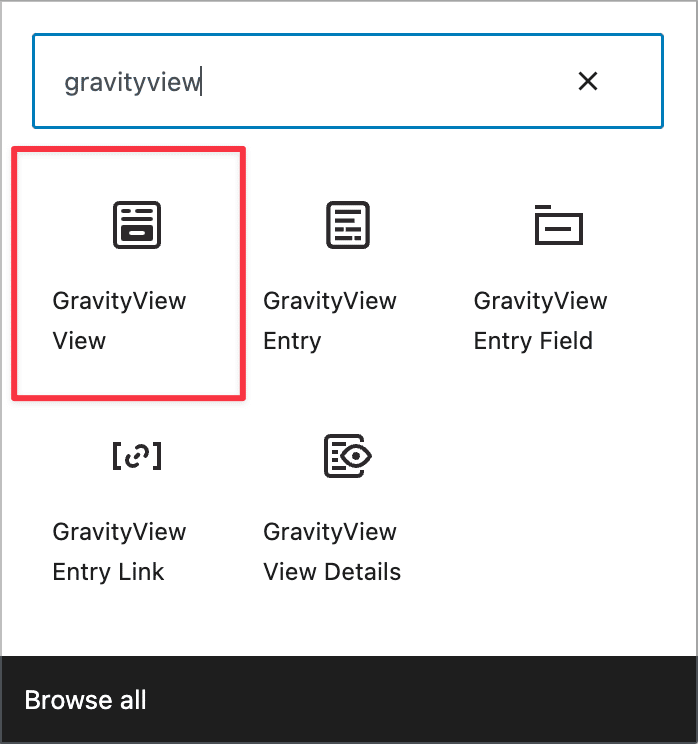
After saving our View, we can embed it on a page or post using a WordPress block. GravityView adds 5 new blocks to the WordPress editor, allowing you to easily embed Views, entries, fields and more on the front end.
To embed our View, we’ll select the “GravityView View” block.
After adding the block to our page, we need to select our View from the dropdown menu.

Pro tipYou can toggle the “Preview” option to see a preview of your View inside the WordPress editor.
Exporting team information and member profiles
You may need a way to export athlete profile information from the front end. GravityView makes this easy with its in-built export functionality! To export entries in a View to CSV, all you need to do is add /csv/ to the end of the URL!
Here’s an example:
www.yourdomain.com/view/your-view/csv/You can even use this link to create a button by adding it to an HTML anchor link, like so:
<a href=“www.yourdomain.com/view/your-view/csv/”> Export athlete information </a>Pro tipIf you want to export form entries to different formats and send reports to remote storage, you can use GravityExport, the most powerful export plugin for Gravity Forms!
Organizing sports teams using Gravity Forms and GravityView!
Nonprofits, startup founders and sports coaches all need a way to manage teams of people!
In this post, we showed you how to organize and manage teams using Gravity Forms and GravityView. First, we created a form to register new users on our site. After that, we built a View to display athlete profiles on the front end, and showed you how to group athletes into different teams using the advanced filter.
If you found this post interesting, why not give GravityView a try? You can do so risk-free thanks to our 30-day refund policy!

Helpful tips right in your inbox.
Subscribe to get the latest articles, information on releases and helpful Gravity Forms tips!
More articles

How to build a WordPress CRM without code (a contact database you own)
Build a simple WordPress CRM with GravityView. Turn the Gravity Forms entries you already collect into a no-code contact database you own, with no monthly fees.

Launch Log: Distance sorting for radius searches, DataTables search improvements, and import reliability fixes
The latest GravityKit releases add distance sorting to map searches, bring built-in search to DataTables, and fix GravityCharts and GravityImport edge cases.

WordPress page builder market share 2026: Elementor leads at 32.67%
Elementor reaches 32.7% of WordPress sites. WordPress Block Editor 20.6%, wpBakery 8.5%, Divi 5.7%. Latest HTTP Archive crawl, share-of-WordPress basis throughout.