Published
•
Updated
Creating a feedback board with Gravity Forms and GravityView
On our blog, we recently featured a case study of one of our users, Adam Cavotta, who is a Senior University Training Specialist at New Mexico State University. NMSU uses GravityView in nearly 10 different ways. In this ongoing blog series, we’ll teach you...
On our blog, we recently featured a case study of one of our users, Adam Cavotta, who is a Senior University Training Specialist at New Mexico State University. NMSU uses GravityView in nearly 10 different ways. In this ongoing blog series, we’ll teach you how to create similar applications for yourself. Want to read more about using GravityView at universities, schools, and other educational institutions? Check out our guide.
In this post, we’ll create a feedback board. Whether you’re a university, college, nonprofit organization, or other organization, you’ll likely find this guide useful. Our final application will look like this: 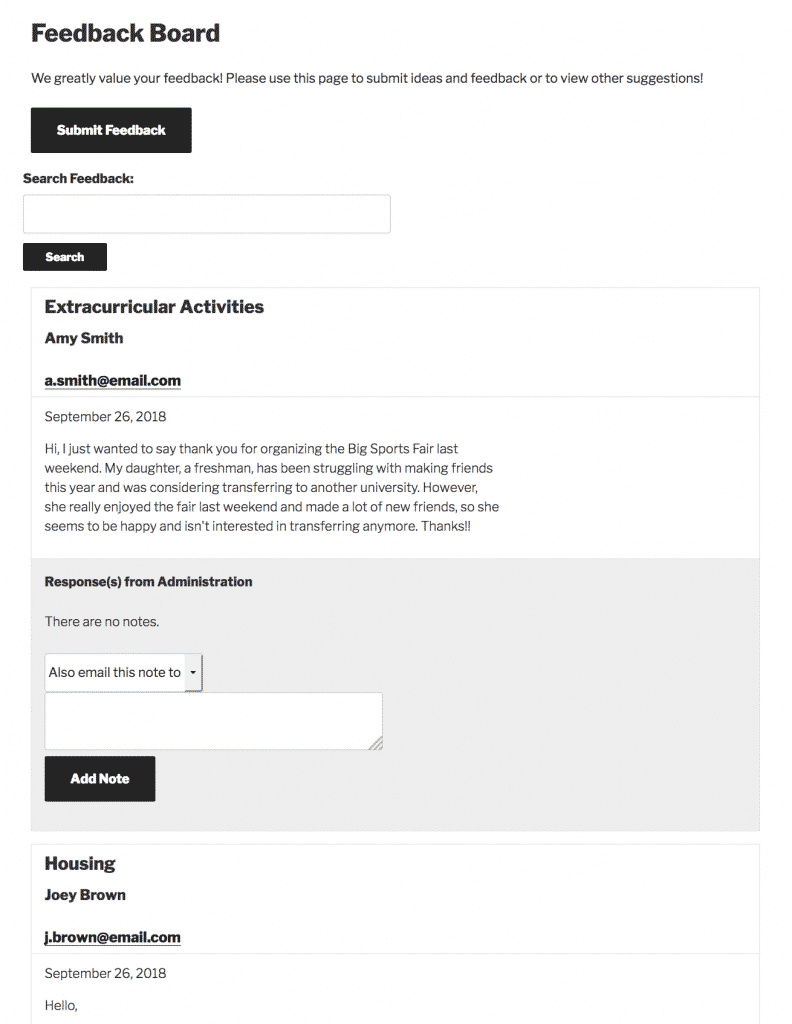 …and it will have the following functionality:
- Allows readers to submit feedback on a variety of issues and topics
- Allows administrators to comment on these issues and email the comment directly to the submitter
Let’s get started!
Step 1: Create your form
First, we’ll need to create a form. To do this, go to Forms > New Form on your WordPress sidebar.  Name your form “Feedback Submission Form.”
 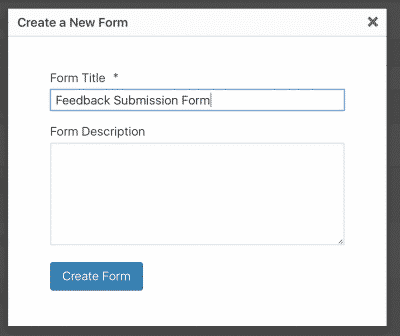 Tip: Already have a directory file of students? Not to worry. Importing it into Gravity Forms and GravityView is super simple with our Import Entries plugin. You can import large CSV files quickly. Now, we need to add some fields to our form. We want to get the following information from our readers:
- Name
- Topic: What is the feedback / idea about?
- Feedback explanation
Tip: Want to make sure all of your fields are filled out? Enable “Required” in the settings of each field. 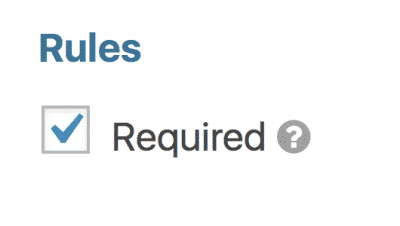 For Name, we can use the Name field, which is under Advanced Fields.
  For Email, we can use the Email field, which is also under Advanced Fields.
 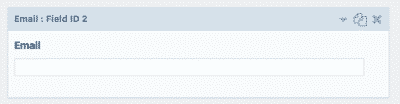 For Topic, we have a few options, depending on our particular needs.
- A Checkbox field will allow the user to select multiple topics. For example, their feedback might be about both Housing and Financial Aid.
- A Radio Button field will only let a user select one topic. This is useful if you want to categorize submissions into very narrow groups. This field also allows you to enable the “Other” choice, which lets users fill in their own answer.
- A simple Single Line Text field is the simplest option. However, it won’t let you categorize or filter your entries via this field.
For this entry, let’s go with the Radio Button field. After you add the field, don’t forget to input a description and the answer options. 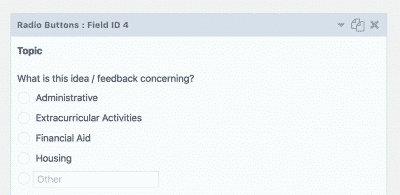 We’ll also enable the “Other choice” option. This will let users write in a separate option themselves.
  Tip: To move the Description above the choices, go to the Appearance tab and edit the Description Placement option.
 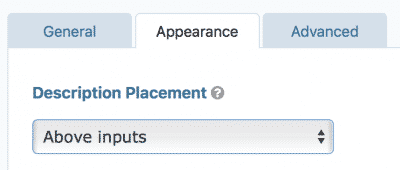 Finally, for the Feedback field, we want to use a Paragraph Text field. Be sure to rename it. If you want to make the field larger or smaller, you can do so on the Appearance tab.
  Once you’re done creating your form, press the Update button in the bottom right of the screen to save it. Now that our form is finished, let’s add it to a page. Create a new WordPress page and click the Add Form button.
 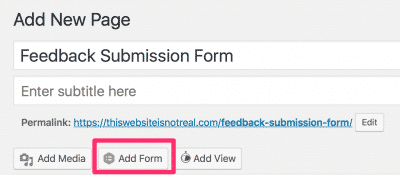 Save and view your page:
 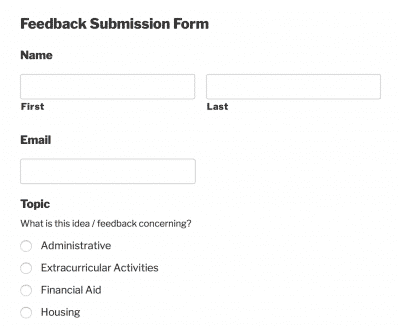 Looks good! If you want to change the post-submission message, you can do that on the Settings page of your form, on the Confirmations tab. Now let’s move on to the next step: Creating a View.
Step 2: Creating a View
Note: For this part, we’ll assume that many feedback entries have already been submitted. A View will let us display our feedback directly on the front end of the website, without having to log into the back end. In other words, it will let us display our feedback entries on a public web page. To create a View, first go to Views > New View on your WordPress sidebar. 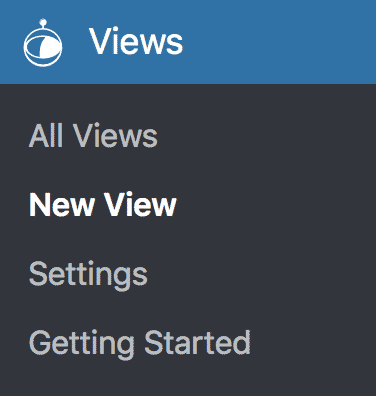 Title your View “Feedback Board” and select the form we created (“Feedback Submission Form”) as the data source.
 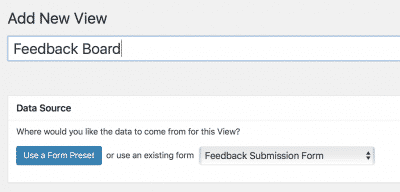 Now, we need to pick a layout. There are a few options, depending on the type of feedback board we want to create.
- We can use a Table View layout, which will display an overview of the submitted feedback on one page. However, we’ll have to click on each feedback entry in order to read the full description.
- Alternatively, we could use a Listing View layout, which will display all of entries’ fields at one time, on a single page.
Since we only have a few fields, it makes the most sense to use a Listing View layout. We’ll actually design our View to display everything on a single page – that is, the multiple entries page. 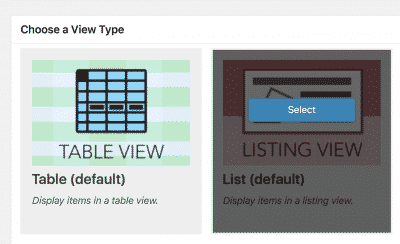 Now we’re on the View Configuration page. At the top, we can add some widgets to our Multiple Entries View context. Let’s add a Custom Content widget to the top and a Search Bar to the left.
 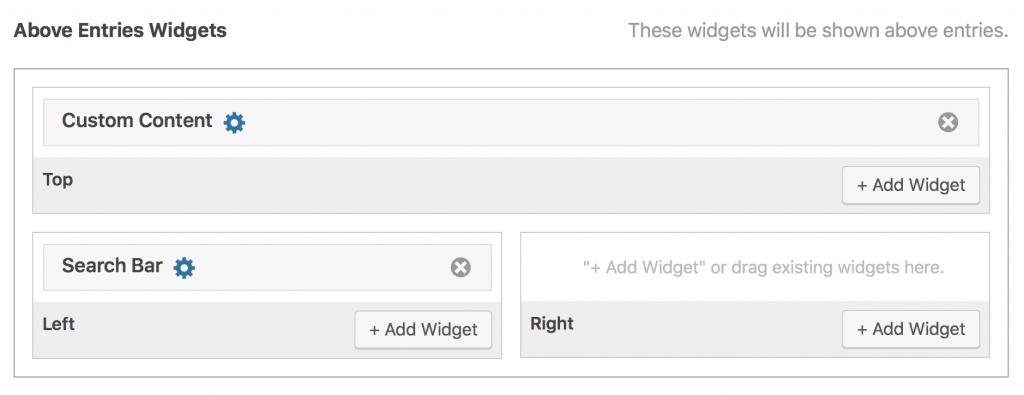 To edit the Custom Content widget, click the blue gear icon next to it. Let’s write a brief message about the purpose of this page. Replace “form.html” in this example with a link to a page containing your form. We can also add a button to our form submission page using HTML. You can style this HTML using CSS. Read more about using CSS in GravityView here.
 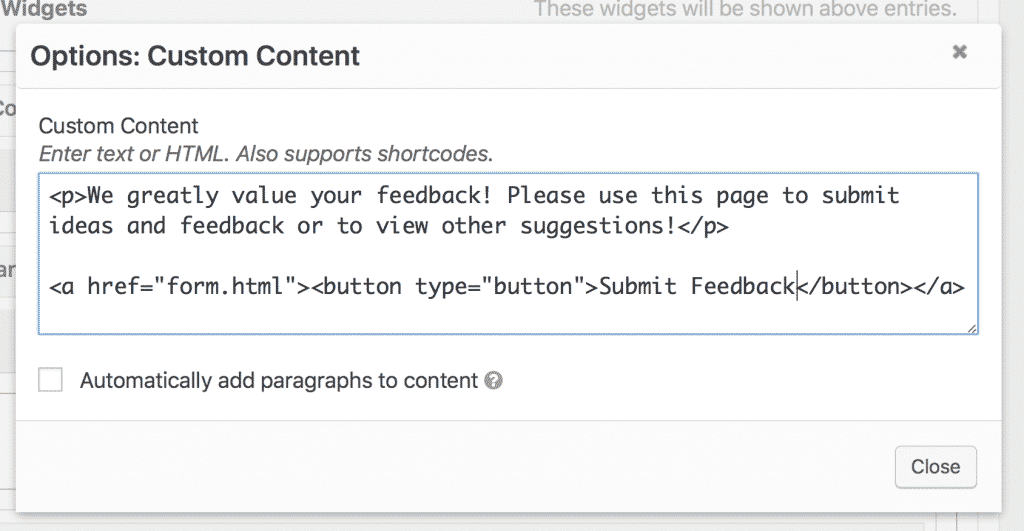 Finally, let’s also rename the Search Bar label to “Search Feedback”. To do this, click the blue gear icon again and rename the label.
  Now, scroll down to the Below Entries Widgets section. Add a Show Pagination Info widget to the left and a Page Links widget to the right.
 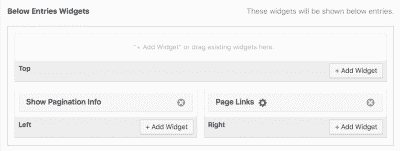 Now let’s add the entry fields themselves. Scroll back up to the Entries Fields section. This will be the main part of our entry.
- For Listing Title, add the Topic field. This will display what topic this feedback is about.
- For Subheading, add the Name field . Only add this field if you want the submitter’s name to be publicly visible. If you don’t want their name to be visible, leave this blank.
- For Other Fields, add the Entry Date field and the Feedback field. This is where the feedback message will be displayed.
- Under Footer Left, add the Entry Notes field. We’ll use this field as a place where administrators can comment on the feedback. Ergo, we’ll rename it Response(s) from Administration.
Tip: Hiding the label often makes the View look better. To do this, simply uncheck the Show Label box in the field’s settings panel. Let’s repeat this and hide the labels for each of the fields in our View except for Response(s) from Administration.  Here’s what our Entries Fields section looks like now:
 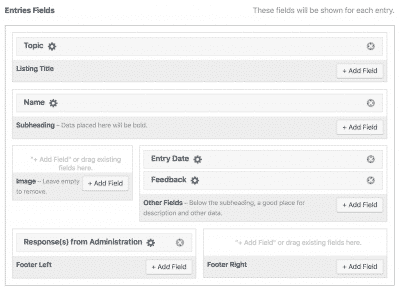 Now let’s save and preview it. Looking good! As you can see, our entire feedback board is on one page – we didn’t need to configure a single-entry View, because we don’t need to use it.
Add the View to a Page
Finally, we just need to add the View to a page. To do this, create a new WordPress page and click the Add View button. 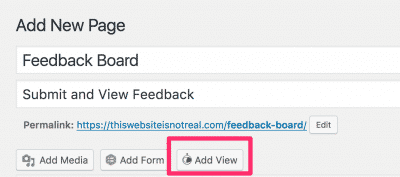
Leaving Comments
Since we added an Entry Notes field (Response(s) from Administration), we can add comments and responses to our submitted feedback. 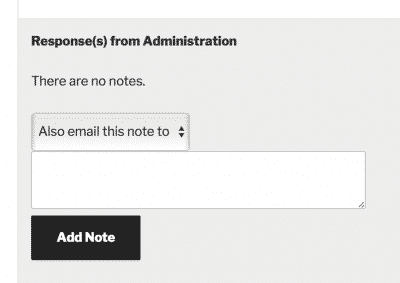 You can also send a copy of the note directly to the submitter’s email. This is useful if you want to notify the submitter that you’ve read their feedback. By default, Entry Notes will only be visible by administrators. If you want these notes to be displayed publicly, you need to enable Display notes to users who are not logged-in? in the field’s settings panel.
 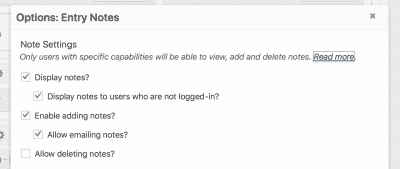 Your comments will then be publicly visible.
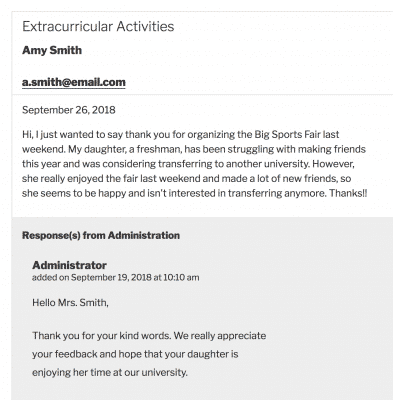
And that’s how to create a feedback system similar to New Mexico State University’s.
Have you built a similar application with GravityView? Want to learn how to configure a different layout? Check out our ultimate guide to displaying Gravity Forms Entries.

Helpful tips right in your inbox.
Subscribe to get the latest articles, information on releases and helpful Gravity Forms tips!
More articles

How to build a WordPress CRM without code (a contact database you own)
Build a simple WordPress CRM with GravityView. Turn the Gravity Forms entries you already collect into a no-code contact database you own, with no monthly fees.

Launch Log: Distance sorting for radius searches, DataTables search improvements, and import reliability fixes
The latest GravityKit releases add distance sorting to map searches, bring built-in search to DataTables, and fix GravityCharts and GravityImport edge cases.

WordPress page builder market share 2026: Elementor leads at 32.67%
Elementor reaches 32.7% of WordPress sites. WordPress Block Editor 20.6%, wpBakery 8.5%, Divi 5.7%. Latest HTTP Archive crawl, share-of-WordPress basis throughout.