Published
•
Updated
How to build a Fiverr clone (freelancer marketplace) on WordPress with no code
Build a freelancer marketplace like Fiverr or Upwork on WordPress without code. Step-by-step tutorial using Gravity Forms and GravityView with search and profile listings.
Have you ever wanted to build your own freelancer marketplace like Fiverr or Upwork?
Freelancer services sites are popular as they allow companies or individuals to outsource tasks to professionals with relevant skills. Many organizations look to outsource a wide range of services, including web development, writing, graphic design, marketing, and more.
In this post, we’re going to show you, step by step, how to build a freelancer marketplace (like Fiverr, Upwork, or Freelancer.com) using Gravity Forms and GravityView!
Let’s get started.
Sneak peek
Here’s what our finished freelancer marketplace looks like. As you can see, there is a search bar allowing users to search for the specific skills and services they need.
Freelancer profiles are listed below in a grid and there’s a preview showing an image, name, short description, and the skills/services that they offer.

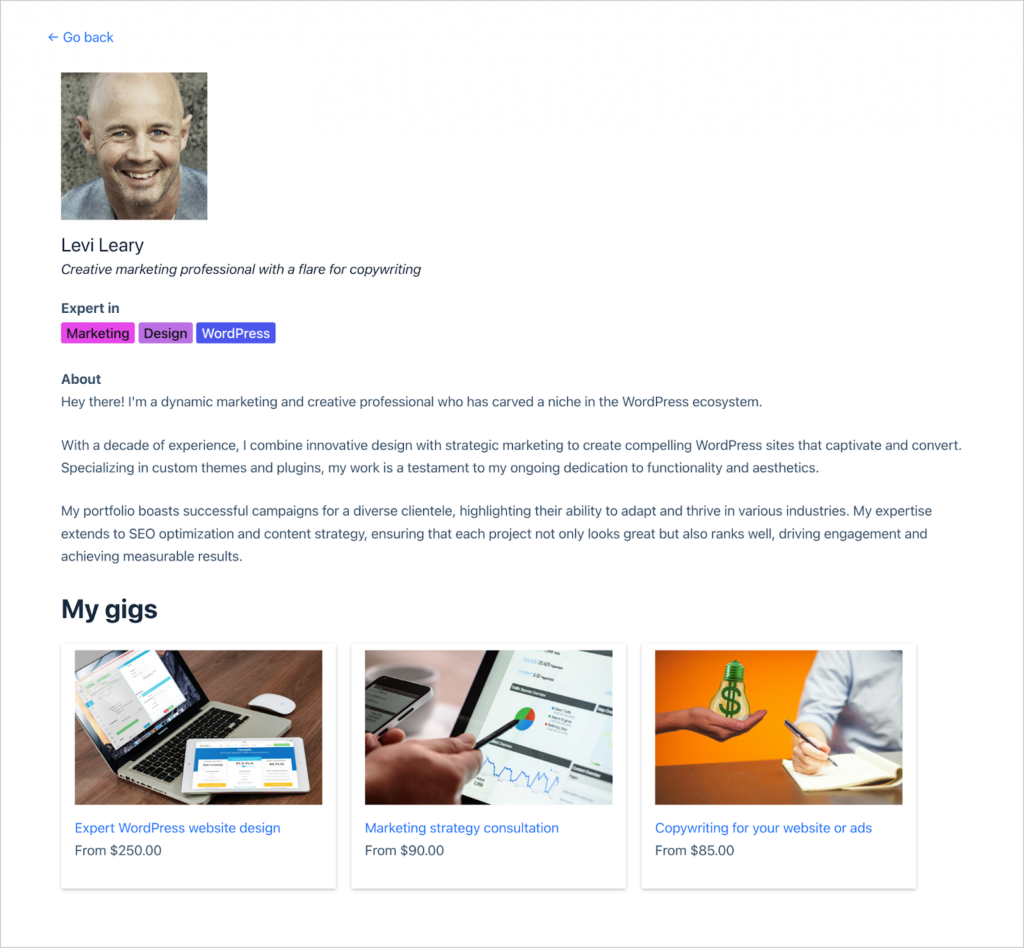
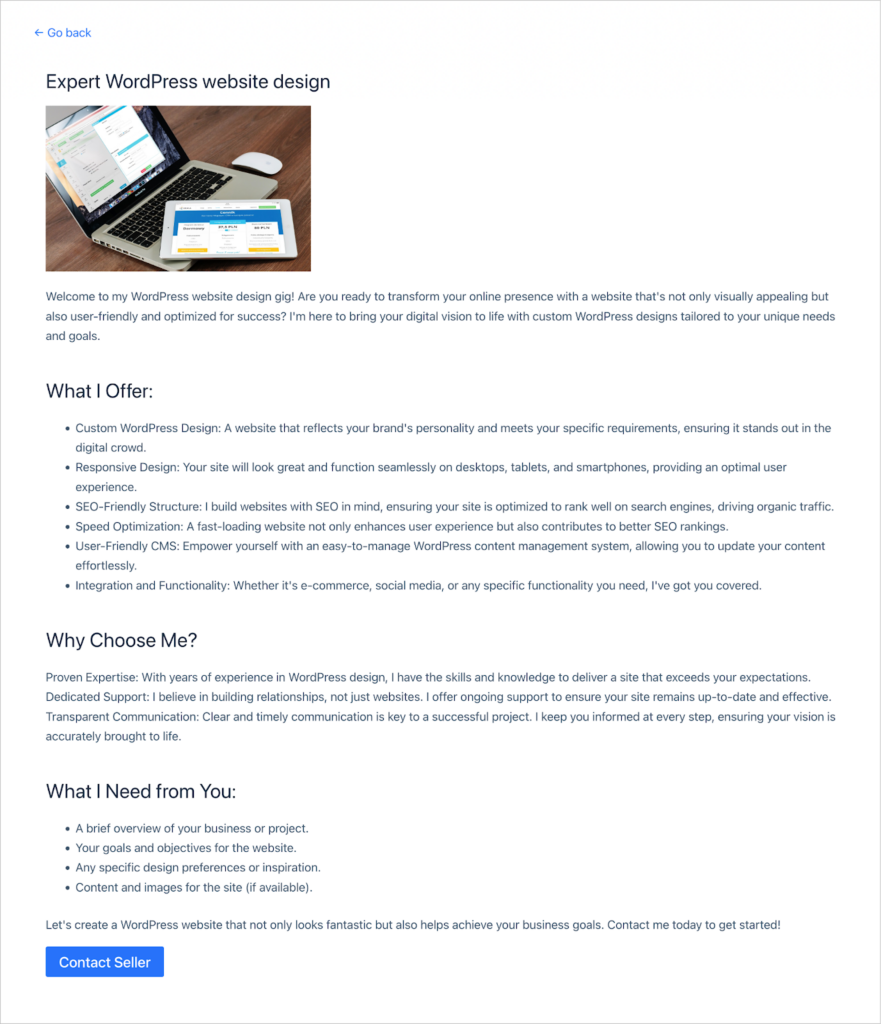
When a user clicks “View profile”, they will be able to see additional information about the freelancer, including the specific services (“gigs”) that they offer.
When clicking on a gig, users will be able to view more information about it, as well as contact the seller to request their services!

Keep reading to see exactly how we built it.
Wanna try it?
Spin up a demo
See what you can build with GravityView — explore the live demo.

What you’ll need
Here are the plugins you will need to build a freelancer marketplace like the one in this tutorial:
- Gravity Forms (Elite license)
- GravityView Pro
- Gravity Forms Entry Tags (free!)
What is a freelancer marketplace?
A freelancer marketplace is an online platform where freelancers can offer their services and clients can hire them for various projects. Fiverr and Upwork are both good examples of popular freelancer marketplaces used by thousands of people every day!
These platforms facilitate the connection between freelancers with specific skills and clients needing those skills, covering a wide range of services like writing, design, programming, marketing, and more.
Main features
Let’s take a look at some of the main features of a freelancer marketplace so we can be sure to include them in our own design:
- Ability to register and create a profile: Freelancers can sign-up on the platform and create a detailed profile with information about their skills, experience, location and rates.
- Search facility: Users who come to the platform have the ability to search for the specific skills and services they need.
- Ability to contact freelancers and hire them for projects: When users find a freelancer that offers the services they need, they should have the ability to contact them and hire them for a job.
- Freelancers have the ability to post “gigs” outlining the type of work they specialize in.
Building a freelancer marketplace, step by step
Now let’s start building our own, custom freelancer marketplace on WordPress using Gravity Forms and GravityView! Here are the steps we’re going to follow:
- First, we’ll create forms for freelancers to register on our platform and fill out their profile.
- Next, we’ll create a form that allows freelancers to post “gigs” outlining the services that they offer.
- Finally, we’ll create two Views to showcase freelancer profiles and the gigs that they offer. The View will be searchable so that site visitors can easily find (and contact) freelancers with the skills and services they need.
Let’s get started!
Creating the freelancer registration form
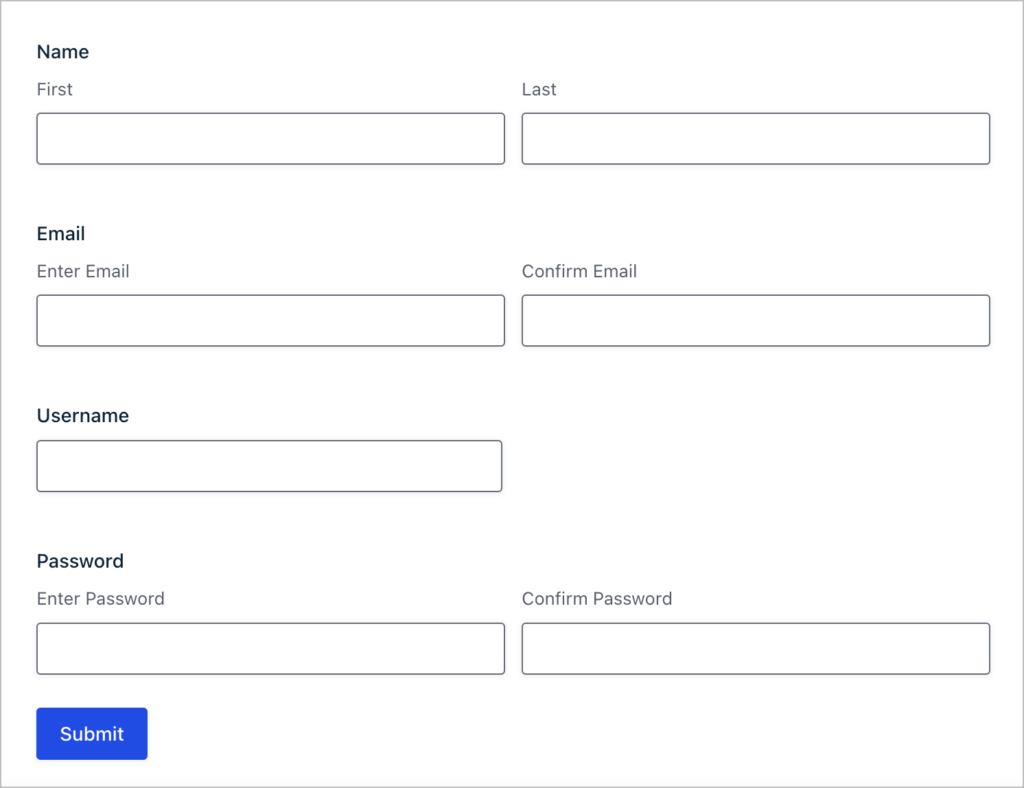
The first thing we’re going to do is create the registration form that allows freelancers to sign up on our platform. Gravity Forms makes this easy as they already have a “User Registration” form template.

The template includes fields for the name, email, username, and password. That’s all we need, so we can go ahead and save the form without making any changes to it!
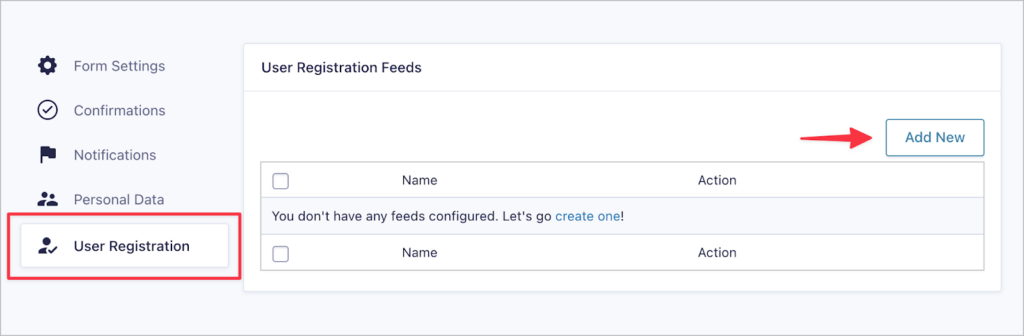
After saving our form, we need to create a User Registration feed. This will ensure that freelancers get an account on our site when they submit the form. To create a new feed, we’ll go to the form settings, click “User Registration” on the left, and then “Add New”
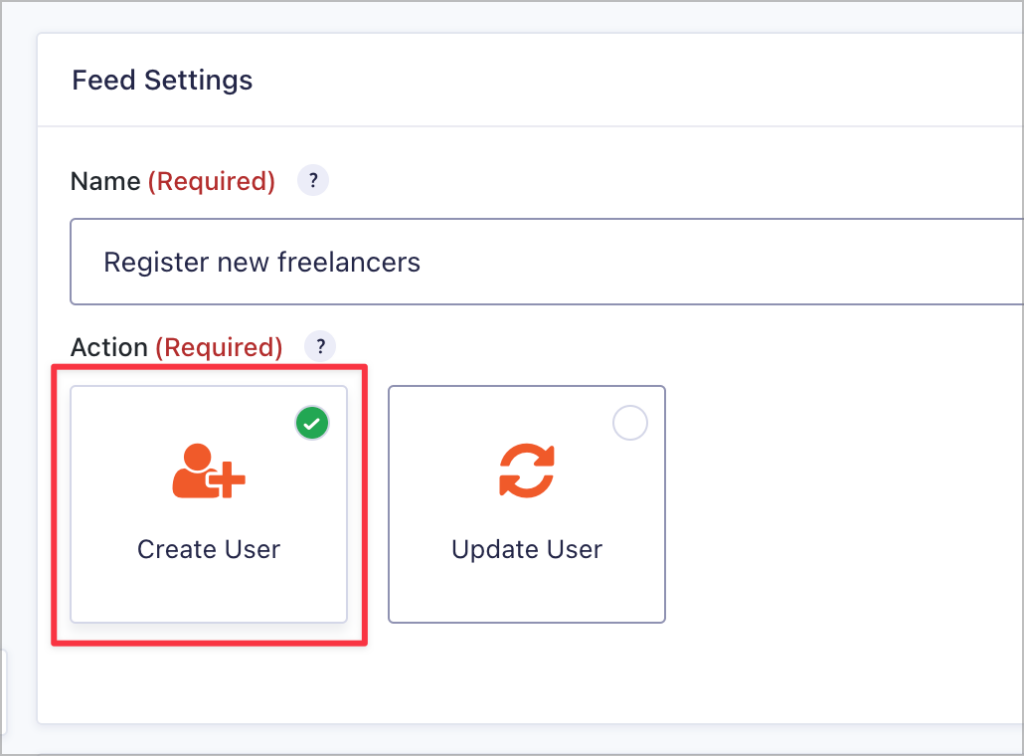
Next, we’ll give our feed a name and select “Create User” under “Action”. This will ensure that a new user account is created when freelancers submit the form.
After configuring the remaining feed settings, we’ll save the feed, and embed our form on a new page. Here’s what it looks like on the front end:
Creating the freelancer profile form
Now that we have a way to register new freelancers on our platform, we’re going to add a new form that allows them to fill out their profile.
We’ll create a new form by hovering over “Forms” and clicking “New Form”. This time, we’ll start from a blank canvas instead of selecting a pre-made template. We can use the Gravity Forms visual editor to easily add fields to our form.
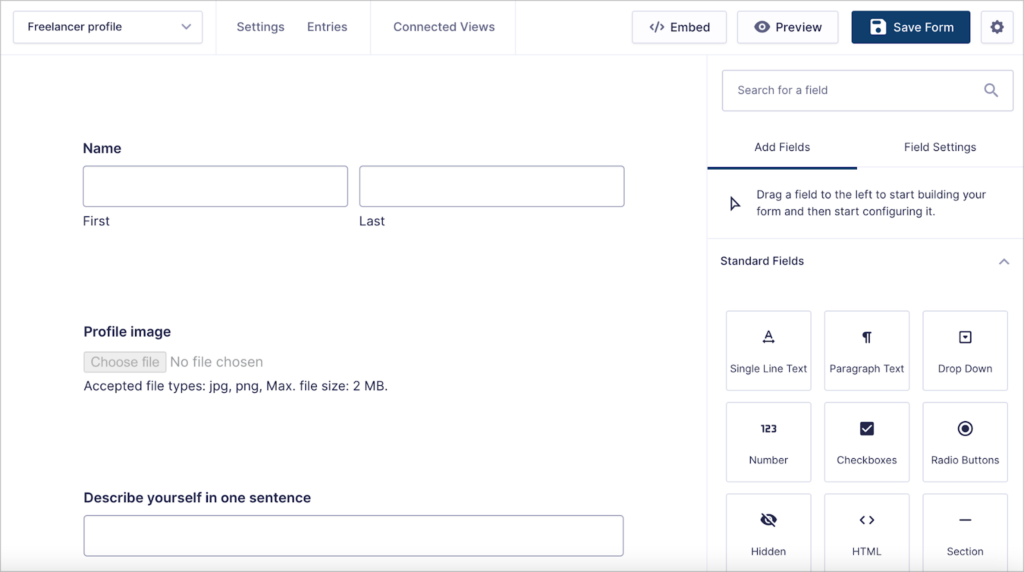
We’ll create a form with the following fields:
- Name (“Name” field)
- Profile image (“File Upload” field)
- Describe yourself (“Single Line Text” field)
- About you (“Paragraph Text” field)
- Skills and services (“Entry Tags” field)
The “Entry Tags” field (added by the free Gravity Forms Entry Tags add-on) will allow freelancers to add searchable tags to their profiles, describing the skills and services that they offer.

Pro tipThe Entry Tags field is a free add-on for Gravity Forms that you can download from our site.
After creating the profile form, we’ll embed it on a new page.
Creating the freelancer gig form
Finally, after filling out their profile, freelancers will be able to add “gigs” describing the kind of services that they offer. And yes, you guessed it—we’ll need another form for this!
For this form, we’ll keep things simple by adding the following fields.
- Title (“Single Line Text” field)
- Image (“File Upload” field)
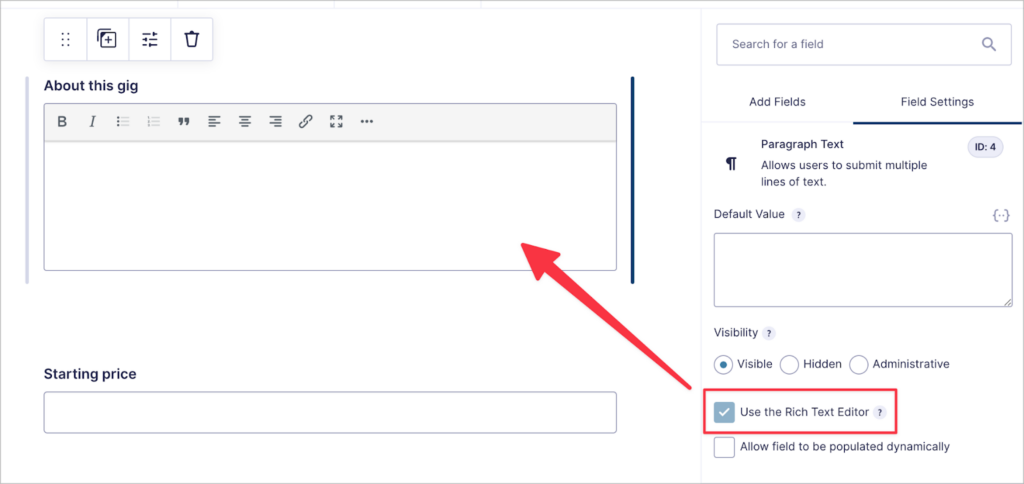
- About this gig (“Paragraph Text” field)
- Starting price (“Number” field)
After adding the “About this gig” field, we’ll open the field settings and enable the Rich Text editor.
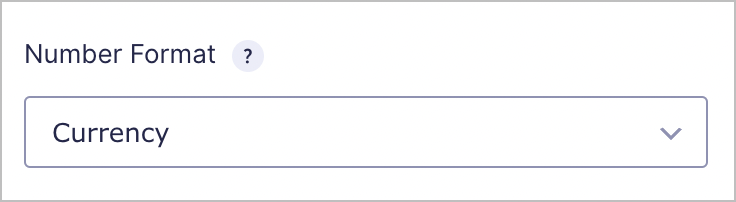
For the “Starting price” field, we’ll set the “Number Format” to “Currency”.
Depending on the kind of marketplace you’re building, feel free to add any other fields here that you feel are necessary.
That’s it. Now freelancers can add gigs for each service that they offer! Now that we have forms for collecting all the information we need, let’s turn our attention to displaying that information on the front end.
Displaying freelancer profiles on the front end
A feature of our marketplace is the ability for users to browse freelancer profiles and search for the skills and services they need. To implement this, we’re going to create a View that displays freelancer profiles, with a search bar at the top.
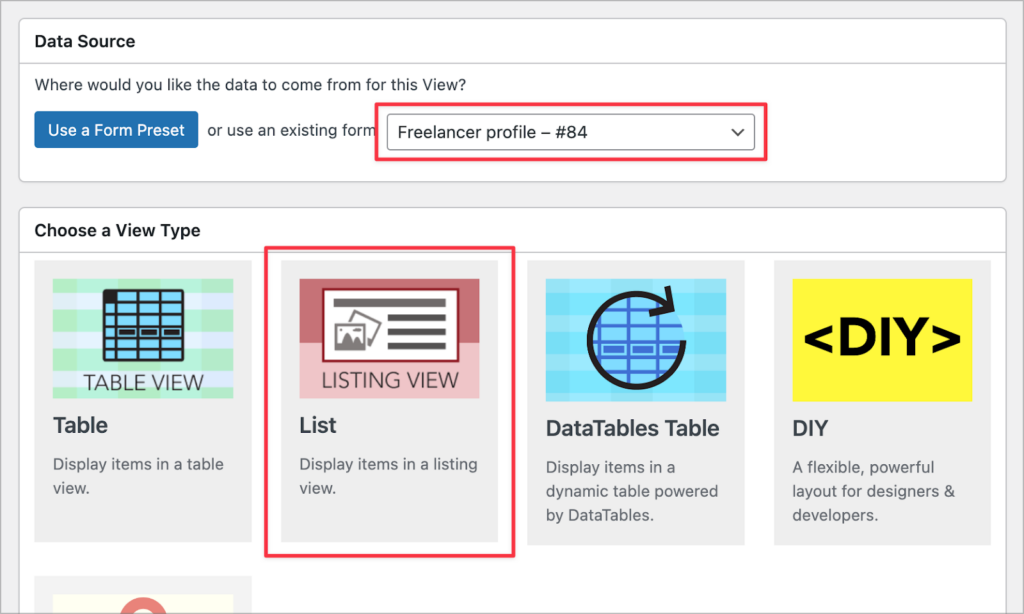
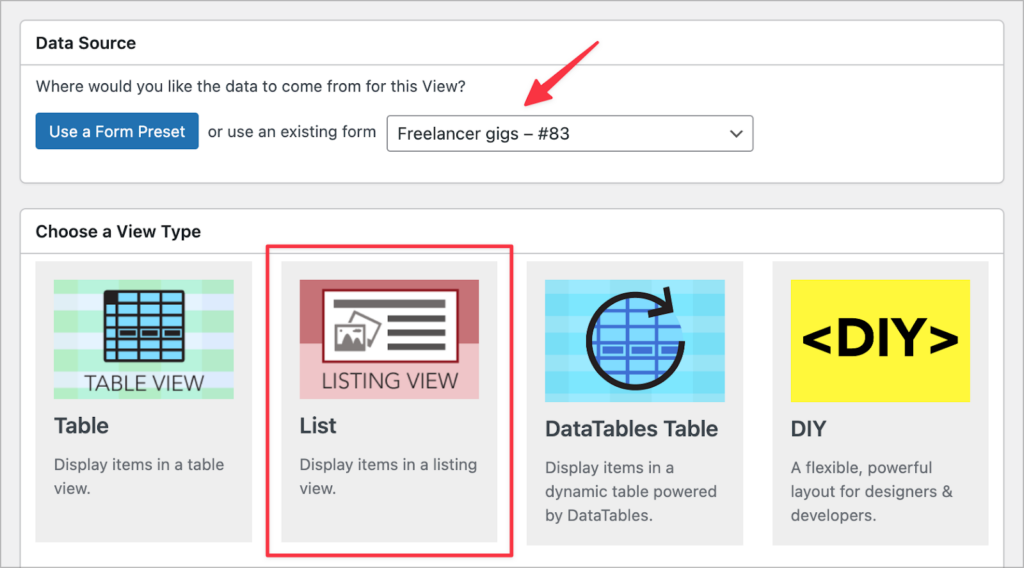
To create a new View, we’ll hover over “GravityKit” and click “New View”. After giving our View a name, we’ll select our profile form as the data source, and choose “List” as our View Type.
Now we can start configuring our View using GravityView’s drag and drop editor!
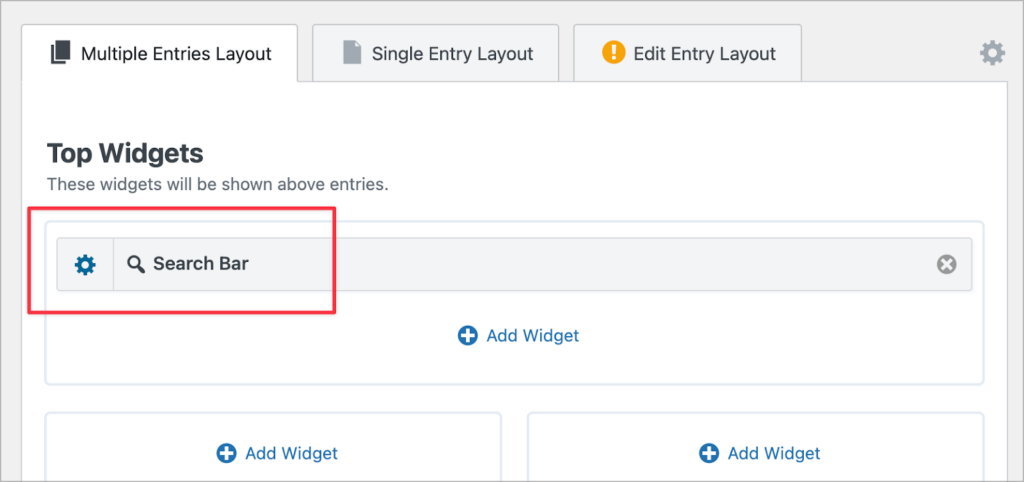
Let’s start by configuring the Multiple Entries Layout. The first thing we’re going to do is add a Search Bar widget to the “Top Widgets” area.
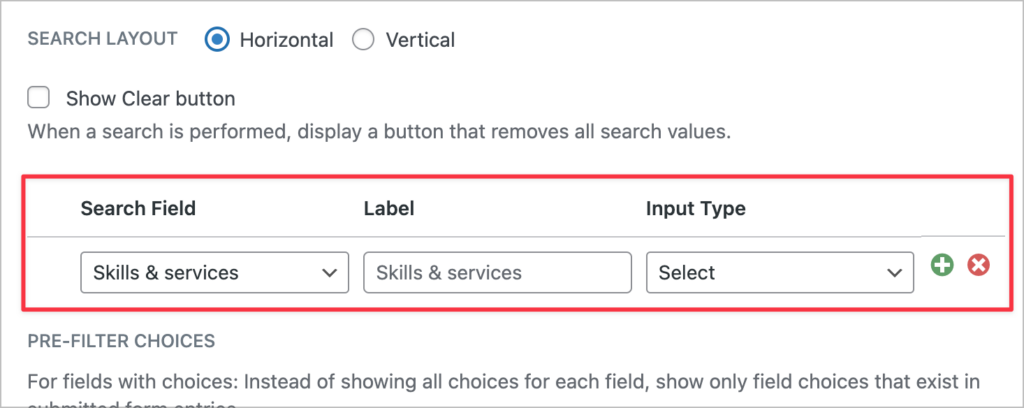
After adding the widget to our View, we’ll click on the gear icon to open the search settings and add a search input for the “Skills & services” field.
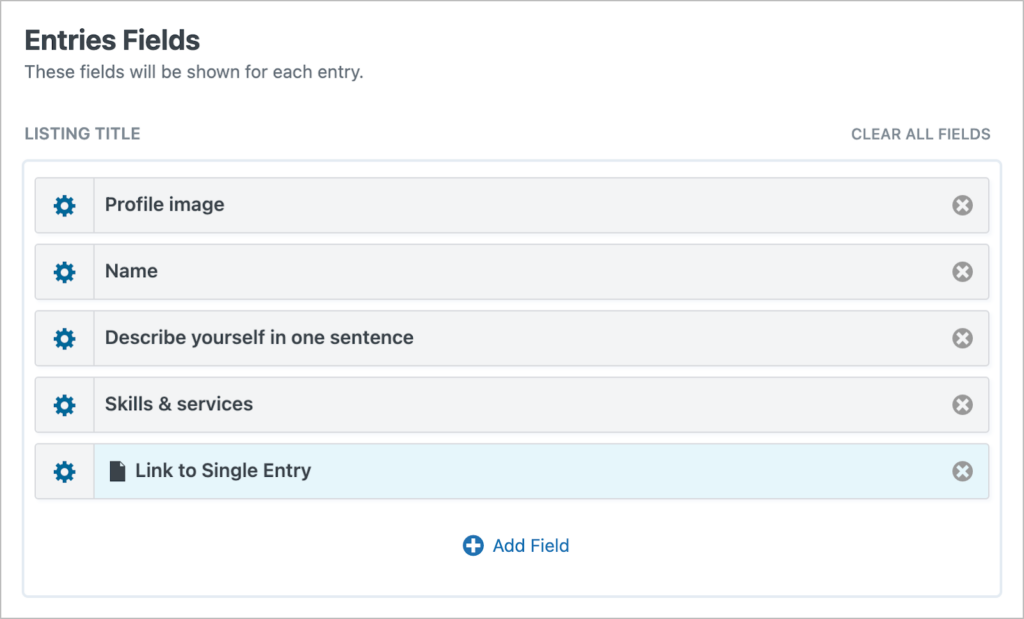
The next thing we’re going to do is add the relevant form fields to the “Entries Fields” section of the editor. We’ll add the following fields to the “Listing Title” section:
- Profile image
- Name
- Describe yourself in one sentence
- Skills & services
- Link to Single Entry
That’s it for the Multiple Entries layout. Now, let’s turn our attention to the Single Entry layout.
Configuring the Single Entry layout
The Single Entry page is where we can display additional information about a freelancer’s profile.
Here, we’re going to add the “Profile image” field to the “Listing Title” section, and the “Name” and “Describe yourself in one sentence” fields to the “Subheading” section.
Next, we’ll add the “Skills & services” field (which we renamed to “Expert in”) and the “About” field to the “Other Fields” section.
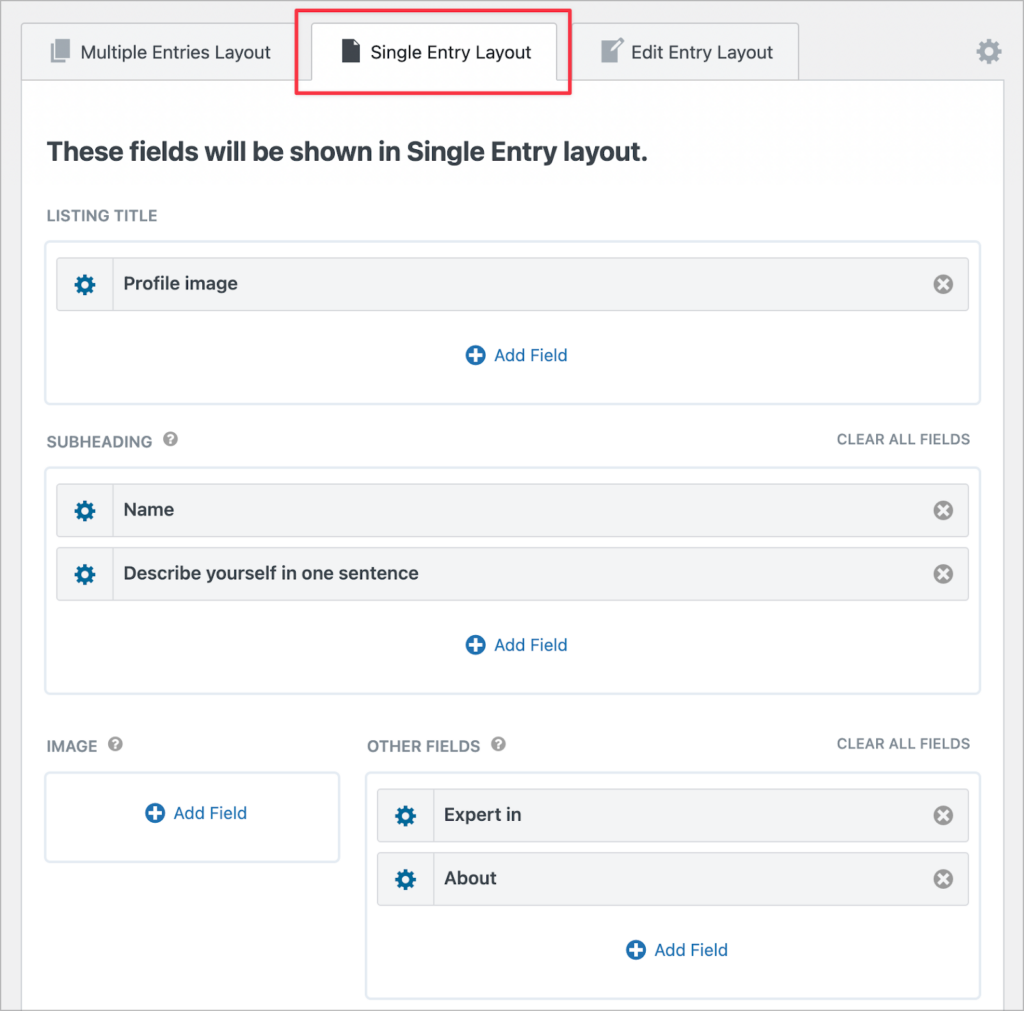
We’re also going to add all the gigs associated with the freelancer here. However, we haven’t built a View for this yet, so we’ll have to come back to add this later.
Configuring the View settings
Finally, we’re going to add a short CSS snippet to turn our list View into a grid View. To add custom code to your View, simply scroll down to the View settings, and click on the “Custom Code” panel.
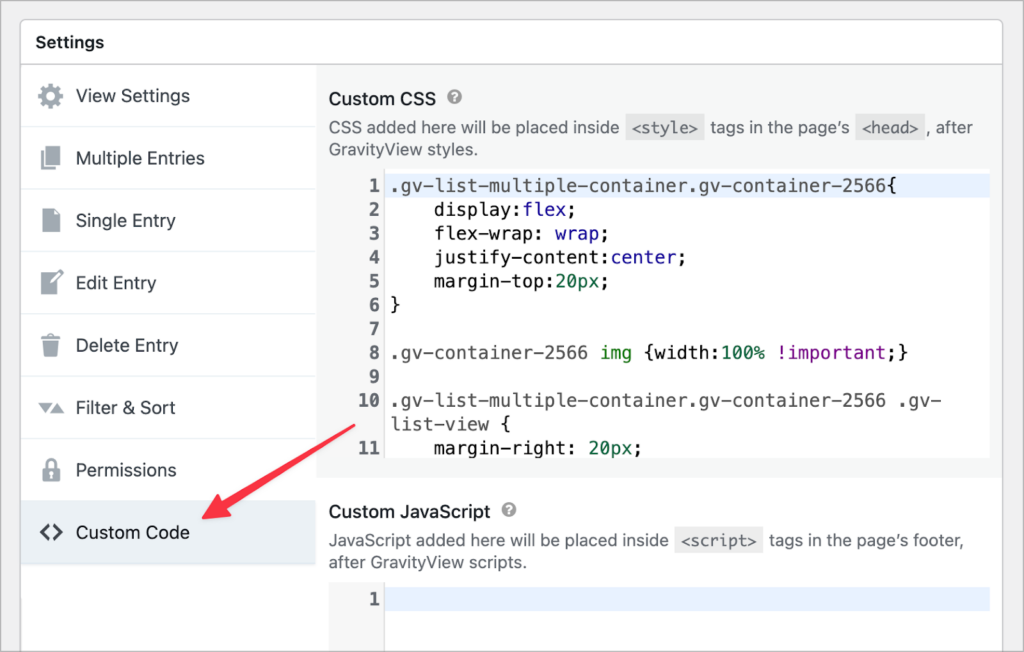
Check out this helpful doc to see the full CSS snippet.
Displaying freelancer gigs on the front end
Under each profile are the gigs offered by that freelancer. To display these, we’re going to create another View! We can then display this View inside our first profile View. That’s the beauty of GravityView—a “View” is simply a way to display data captured through a form, and Views can be embedded anywhere!
For this View, we’re also going to use the “List” type. However, this time, the data source will be our “Freelancer gigs” form.
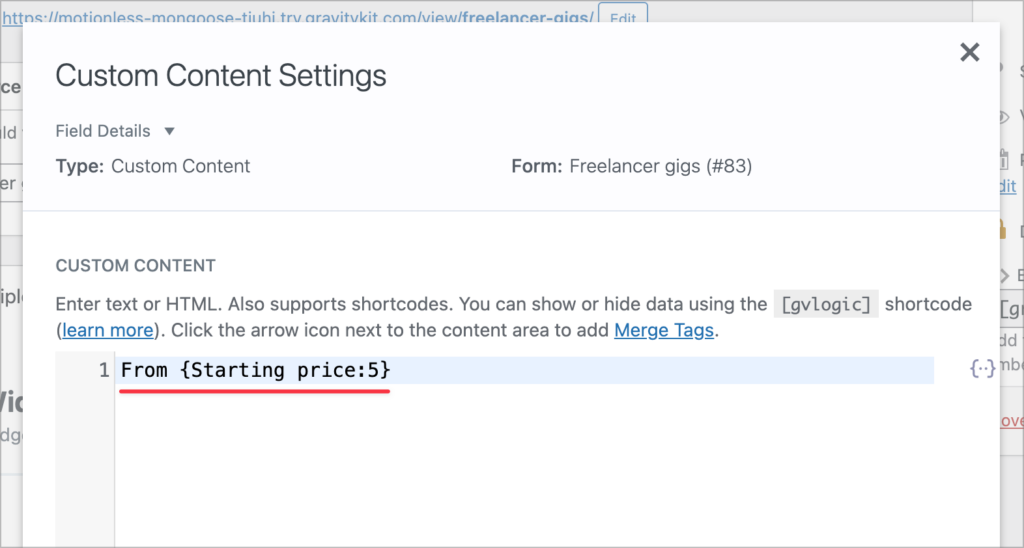
We’ll leave the widget sections blank, and add three fields to the “Listing Title” section: The featured image, title of the gig, and a Custom Content field.
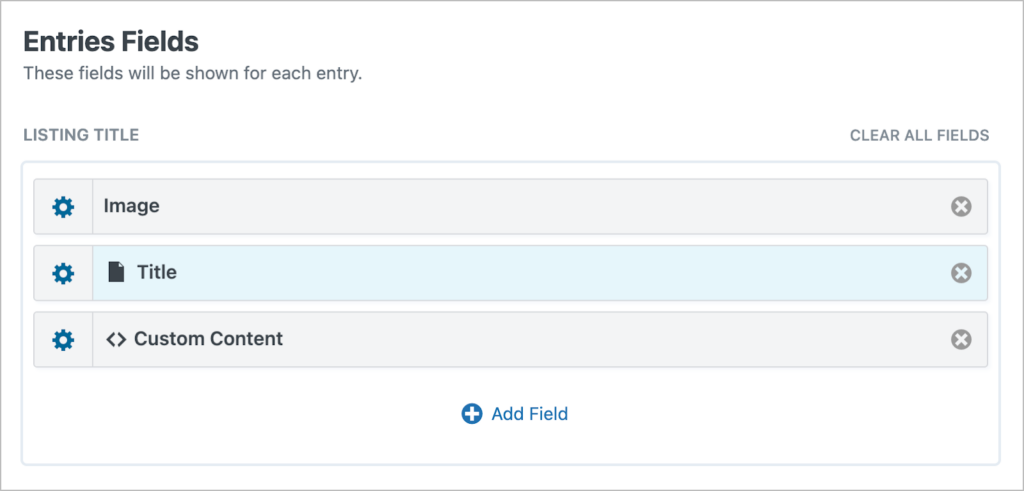
Inside the Custom Content field, we’re going to include the starting price for the gig:
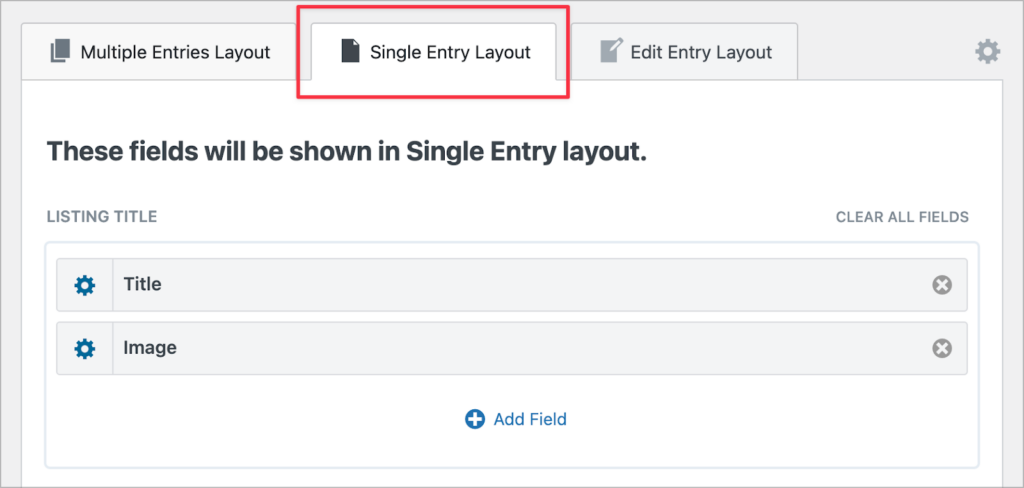
Now, let’s go over to the Single Entry layout. Here, we’re going to add the Gig Title and Image fields to the “Listing Title” section.
Next, we’ll add the “About this gig” field to the “Other Fields” section.
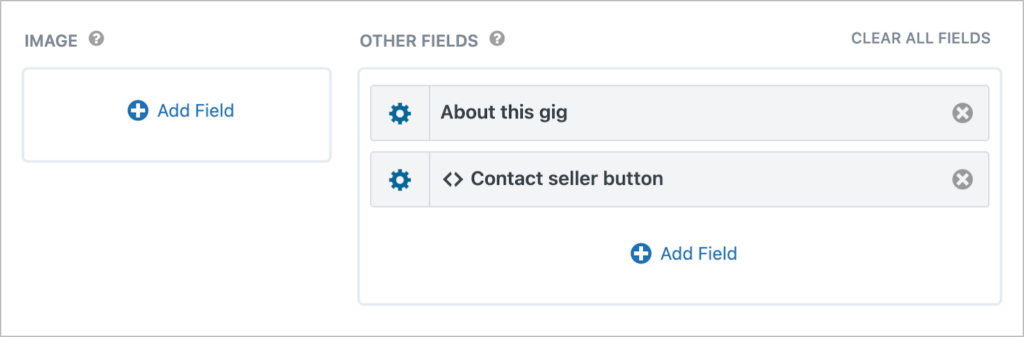
Finally, we’re going to insert a button here using a Custom Content field. This will enable users to contact sellers directly, but we’ll come back to this later!
Adding gigs to freelancer profiles
Now that we’ve created a View to display gigs, we’re going to embed it inside the profile of each freelancer, allowing users to see what services they offer!
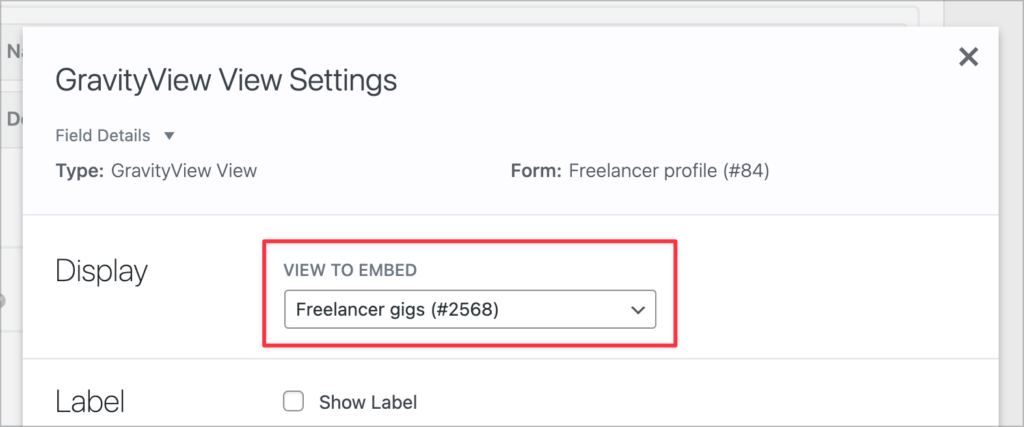
So, first we’ll edit the freelancer profile View that we created previously, then we’ll click on the “Single Entry Layout” tab at the top, scroll down to the “Other Fields” section and add a “GravityView View” field.
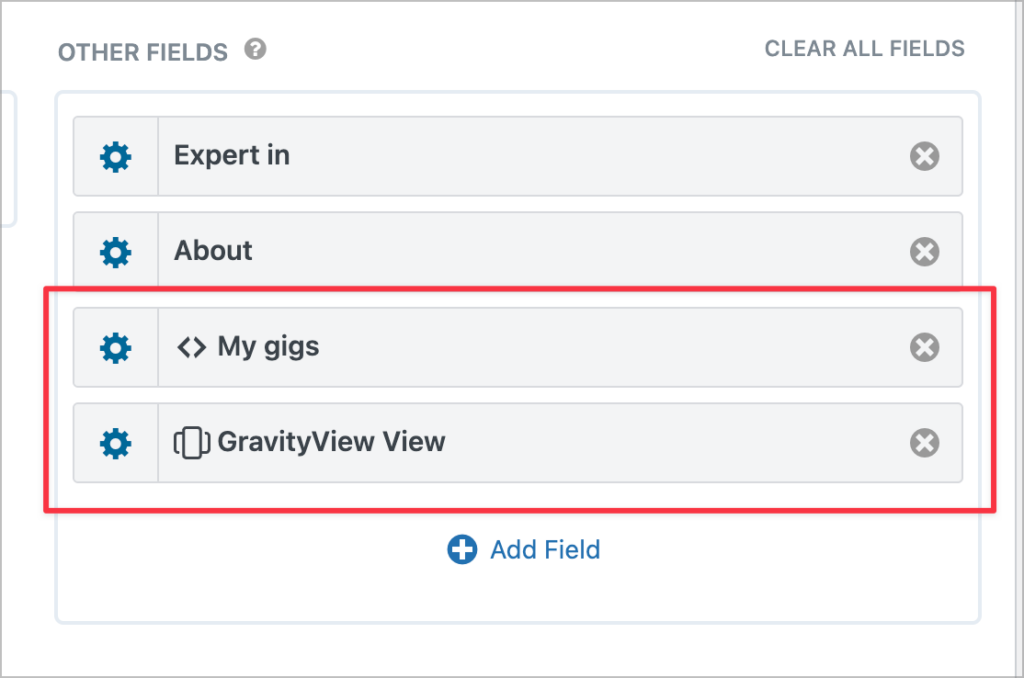
This field allows us to embed a View inside another View! After adding the field, we’ll open the field settings. The first thing we need to do is select the View we want to embed—we’ll select our “Freelancer gigs” View.
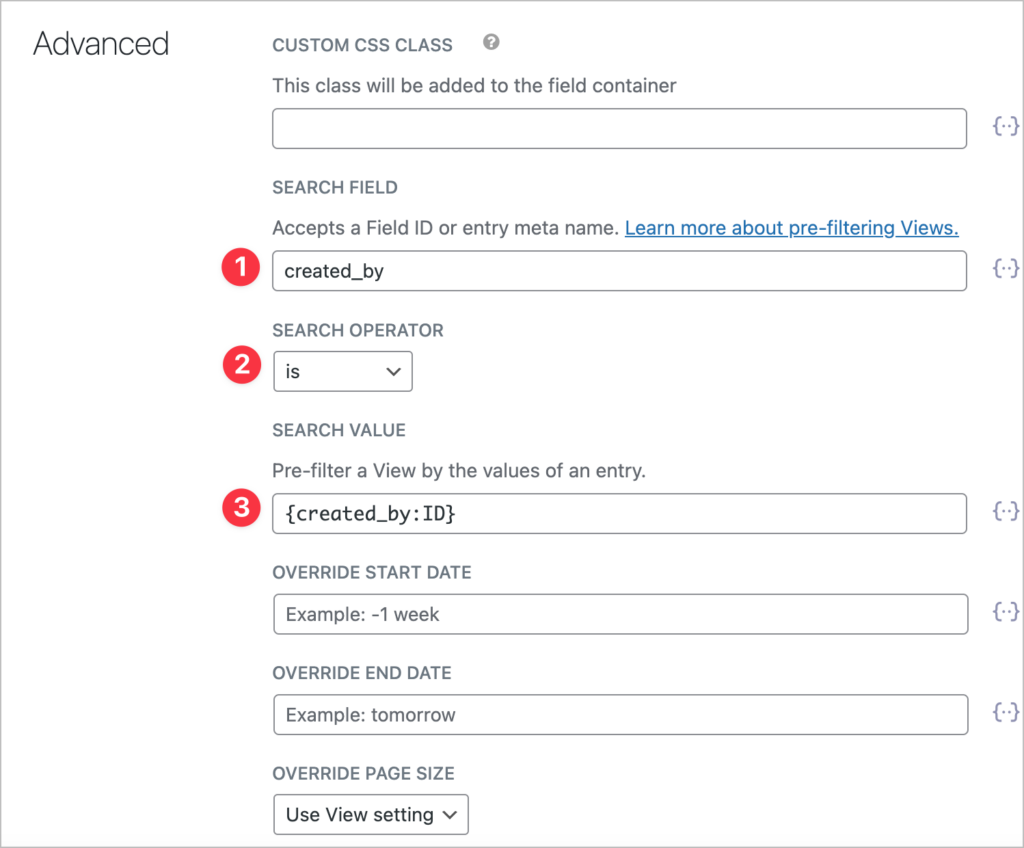
Next, we’re going to add a custom filtering condition, ensuring that the View only displays gigs submitted by the freelancer whose profile it is. We can do this by filtering on the {created_by:ID} merge tag.
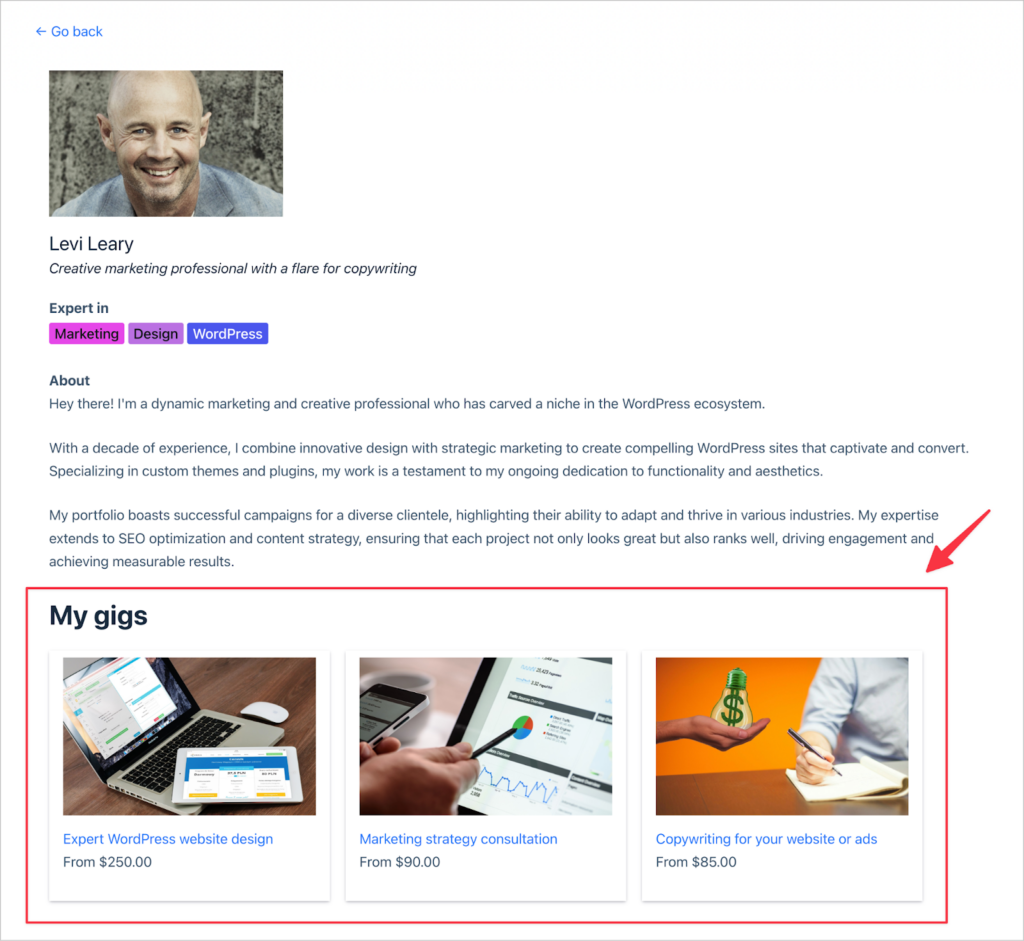
Here’s what this looks like on the front end. The grid of gigs under “My gigs” is the separate View that we just embedded:
That’s it! Everything is set up, we just have one final feature to add: A button and contact form enabling users to contact freelancers and order gigs.
Allowing users to contact sellers directly
Now we have a searchable marketplace of freelancers with the different gigs that they offer, you’re probably wondering how users can order gigs and correspond with freelancers.
The truth is that, given the flexibility and power of Gravity Forms and GravityView, there are several ways to implement this aspect of the platform! We’re going to show you one of the simpler solutions.
At the bottom of each gig page, we’ve added a button that users can click to contact a freelancer directly.

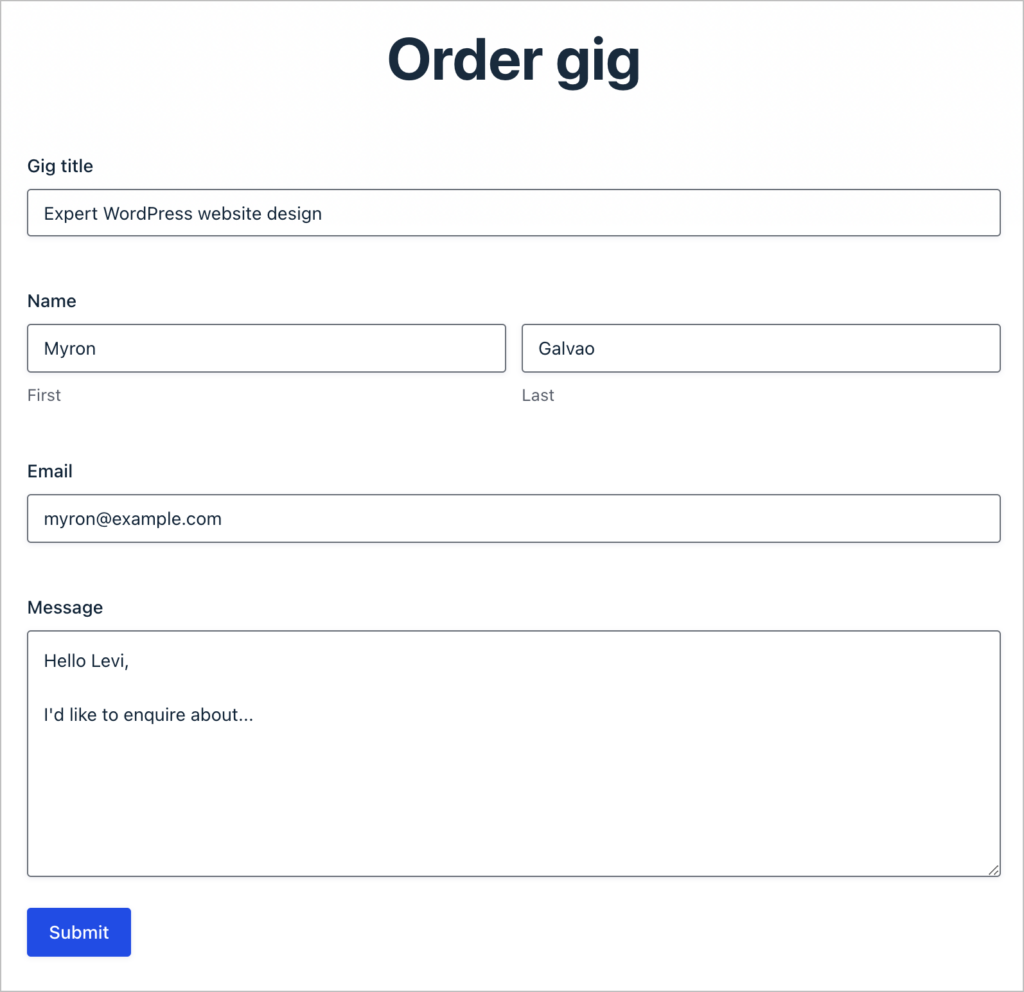
This button will take users to a form that is dynamically populated with the freelancer’s information. Users can then submit the form to send the freelancer a message and inquire about their services!

So, how do we set this up?
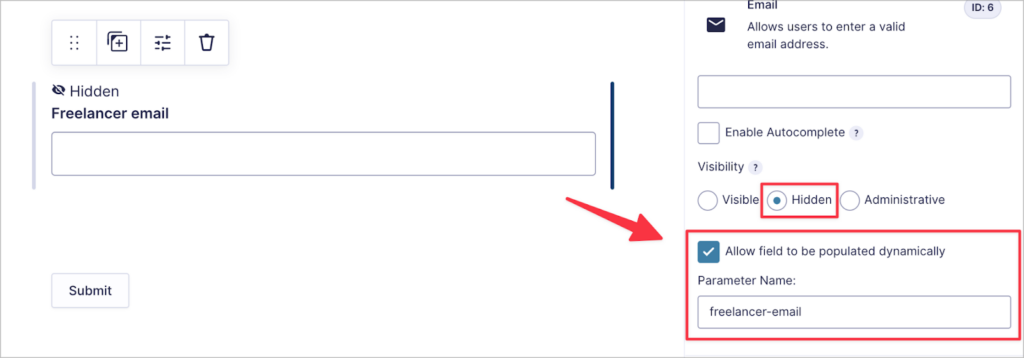
The first thing we need to do is create a new form like the one above for users to message freelancers. We’re going to include a hidden “Email” field (titled “Freelancer email”) that we can use to capture the freelancer’s email address. This will ensure that the message gets sent to the correct seller.
In order to capture the freelancer’s email address here, we’re going to enable dynamic population and input a parameter name (freelancer-email).
After adding the remaining fields, we’ll save the form and embed it on a page titled “Order gig”.
Now we can go back to our gigs View and build a button that will send the user to this form and prepopulate the freelancer’s email address. To do this, we’ll create a link to the “Order gig” page that includes the parameter name, which we’ll set equal to the {created_by:user_email} merge tag.
Here’s the full link:
https://yourdomain.com/order-gig/?freelancer-email={created_by:user_email}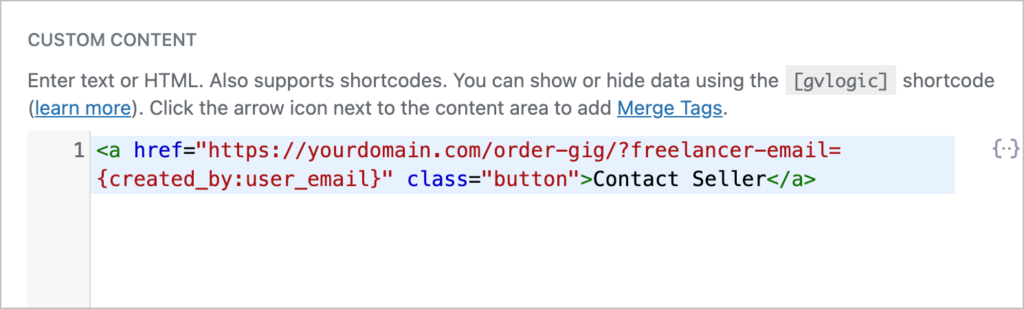
Now, when users click on the “Contact Seller” button, they will be taken to the form, with the freelancer’s email address prepopulated. All we need to do now is configure the notification email that sends to the freelancer when the form is submitted.
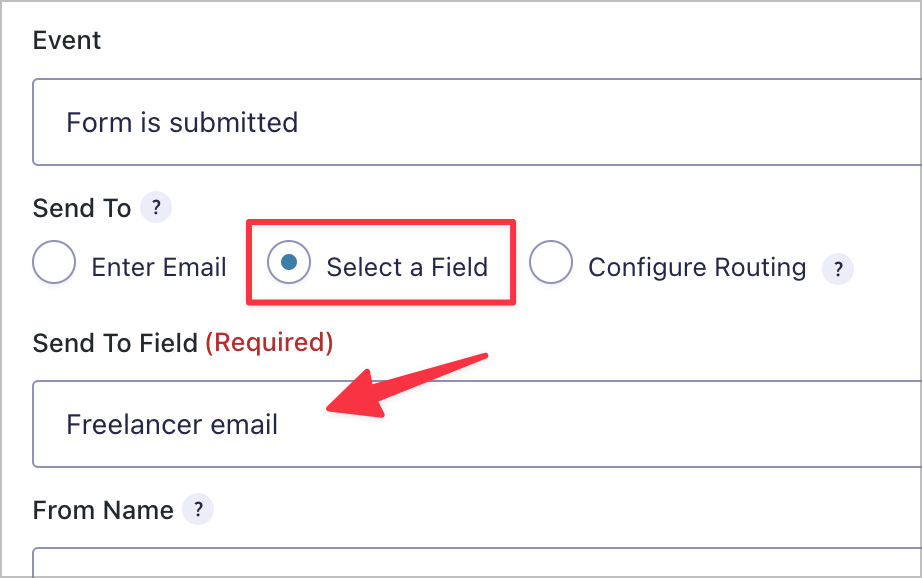
To create a new notification, we’ll go to the form settings and then click on “Notifications” on the left. After giving our notification a name, we’ll check “Select a Field” under “Send To” and select the “Freelancer email” field as the “Send To Field”.
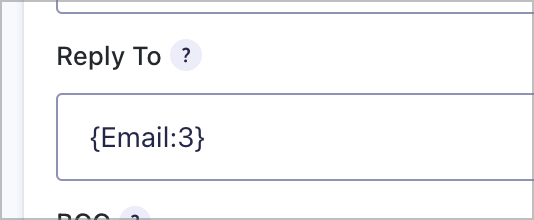
Next, we’ll ensure that the “Reply To” field is the user’s email address. This ensures that when freelancers reply to a message, it will be sent directly to the interested user.
Finally, we’ll configure the message. Here, we can use merge tags to customize the email body.
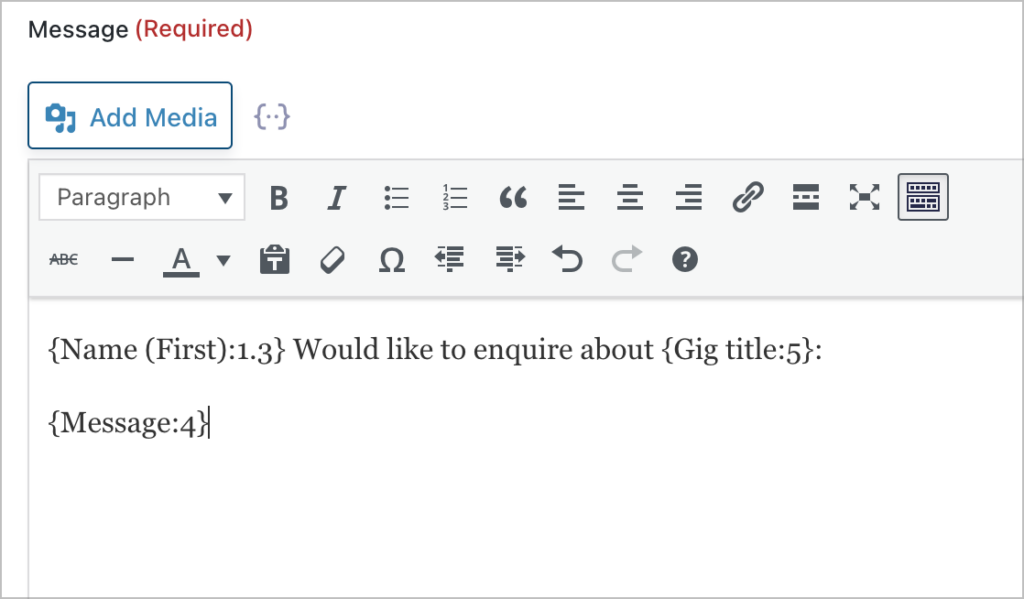
That’s it!
Final result
Let’s take a look at our final freelancer marketplace. It starts with an overview page showing freelancer profiles, with a search bar at the top.

When a user clicks “View profile”, they will be able to see additional information about the freelancer, including the specific services (“gigs”) that they offer.

When clicking on a gig, users will be able to see all the relevant information about the gig, including what the freelancer requires, what’s included in their services, and more.
When users have decided they want to work with a given freelancer, they can contact them directly by clicking the “Contact Seller” button.

This takes them to a form where they can write a message to the freelancer, order a gig, or simply ask additional questions about the offering.
So far, we’ve shown you how to create a fully functioning freelancer marketplace without any code, using just Gravity Forms and GravityView. However, you may want to add extra features.
Adding more features to your freelancer marketplace
GravityView Pro includes a range of Extensions and Layouts that enable you to add additional features to the platform:
- Ratings and Reviews: Allow users to rate and review freelancers or gigs.
- Social Sharing & SEO: Add social sharing buttons on gig pages and freelancer profiles; improve SEO and search performance.
- Featured Entries: Move certain profiles or gigs to the top of the page by marking them as “featured”.
Build your Fiverr clone today!
Thousands of individuals and organizations around the world use freelancer marketplaces to outsource important business tasks. From web development and design to copywriting and video editing, freelancer marketplaces offer a wide array of services.
In this post, we built a freelancer marketplace on WordPress using Gravity Forms and GravityView. If you found this tutorial useful, subscribe to our blog below so we can notify you when we publish new content!

Helpful tips right in your inbox.
Subscribe to get the latest articles, information on releases and helpful Gravity Forms tips!
More articles

Launch Log: theme template editing in Block MCP, Shield silentCAPTCHA for Zero Spam, and GravityView fixes
Block MCP adds safe theme template editing, Gravity Forms Zero Spam gains Shield silentCAPTCHA support, and GravityView fixes lightbox and notice bugs.

GravityKit turns 12: a year in review, and 30% off Lifetime All Access
GravityKit turns 12. A look back at a year of GravityView 3.0, GravitySearch, and AI-assisted building, plus a birthday sale on the Lifetime All Access Pass.

Launch Log: Row headers for screen readers, smarter conditional logic, and multi-View fixes
GravityView 3.1 adds row headers for screen readers, plus smarter conditional logic in GravityCalendar and fixes for DataTables, Maps, and Dynamic Lookup.
