Published
•
Updated
Creating a PDF resume builder using GravityView and Gravity PDF’s “PDF for GravityView”
Build a PDF resume builder on WordPress using GravityView and Gravity PDF. Collect resume data with Gravity Forms, then let users export a formatted PDF document with one click.
In this tutorial, we will explore the features and capabilities of the PDF for GravityView Extension developed by Gravity PDF. Our objective is to create a resume builder with the ability to export resumes as PDF documents. This project aims to inspire your creativity and showcase the potential of this new add-on!
Creating a professional resume is a crucial step in the job search process. However, designing and formatting a resume can be a daunting task, especially for those who aren’t tech-savvy.
Read on to see how you can create your own PDF resume builder on WordPress using the powerful GravityView and Gravity PDF plugins!
Check out our live demo applications and get your own free trial site preloaded with all GravityKit add-ons!
Sneak peek
Here’s a quick preview of our resume builder, showcasing the powerful PDF export functionality made possible with “PDF for GravityView” by Gravity PDF.
What you’ll need
Here are the plugins/extensions you’ll need to create a resume builder like the one in this tutorial:
- Gravity Forms
- GravityView
- Gravity PDF
- PDF for GravityView add-on (created by Gravity PDF)
What is a resume builder?
An online resume builder is a web-based application that allows users to create professional resumes easily and quickly. It eliminates the need for users to manually format their resumes, as it provides pre-designed templates that are easy to customize.
With an online resume builder, users can input their personal information, work history, education, skills, and other relevant details, and the application will automatically format the data into a clean and polished resume. This kind of tool is especially useful for job seekers who want to create multiple resumes for different job applications or those who lack graphic design skills!
Why create a resume builder?
Creating your own online resume builder on WordPress using GravityView and Gravity PDF has several advantages. First, it allows you to have complete control over the resume-building process and ensures that the builder is tailored to your specific needs. Second, it enables you to create a seamless user experience that aligns with your brand and design preferences.
Third, having a custom resume builder can be a powerful marketing tool that sets you apart from your competitors and showcases your expertise in your field. Finally, an online resume builder can save you and your clients a significant amount of time and effort by automating the resume creation process.
Introducing the “PDF for GravityView” add-on by Gravity PDF
Gravity PDF (another Gravity Forms Certified Developer), recently launched a new add-on, “PDF for GravityView” which adds PDF export functionality to the GravityView Single Entry layout!
After installing the add-on, you’ll be able to add a “Link to Single Entry PDF” field to your View, allowing users to download a PDF file that matches the Single Entry configuration.
This powerful new add-on makes it easy to add enhanced functionality to your Views and create web apps with powerful export capabilities. This tutorial showcases one use-case for this add-on, but the possibilities are endless!
Building the resume form
The first step is to create a form that allows users to fill out the information they want in their resume.
To create a new form in Gravity Forms, we’ll hover over “Forms” and click “New Form”. After giving our form a name, we can start adding fields using the visual, drag-and-drop form builder.
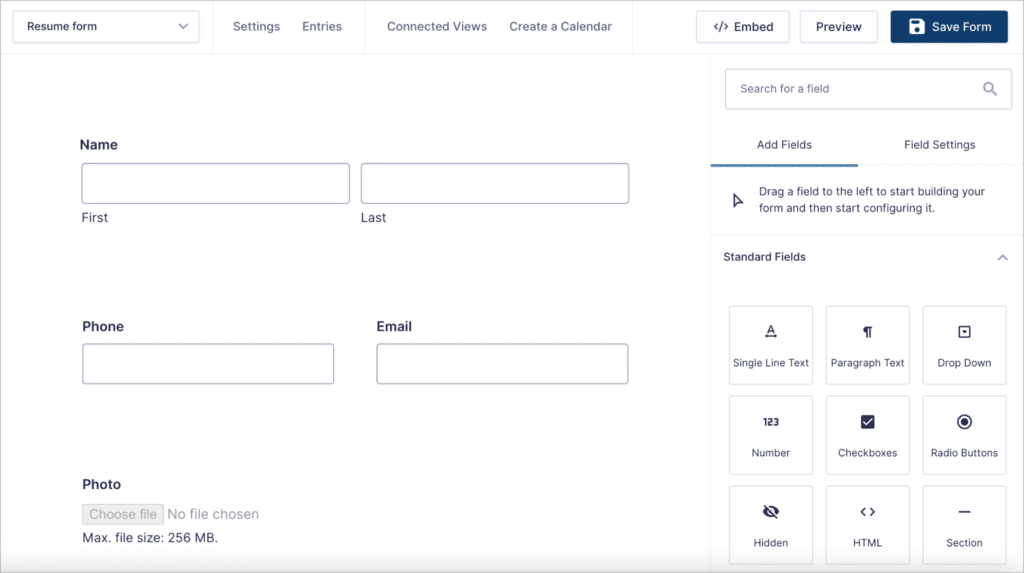
You can add any fields here that you feel are necessary. We’ll keep things simple for this example by adding the following fields:
- Name (“Name” field)
- Phone (“Phone” field)
- Email (“Email” field)
- Photo (“File Upload” field)
- Experience (rich text “Paragraph” field)
- Education (rich text “Paragraph” field)
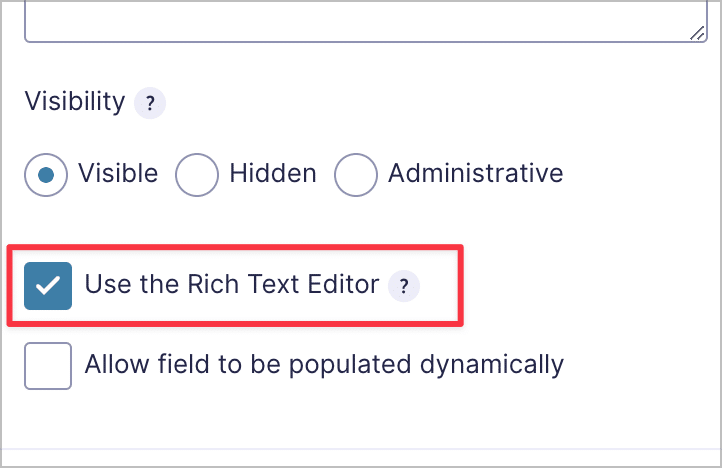
The last two fields, “Experience” and “Education” Are both “Paragraph” fields. However, we’ve also enabled the rich text editor, allowing users to add basic formatting to their input text. This includes use of headings, lists, bold text, and more.
To enable this option, we’ll click on the Paragraph field to open the field settings, open the “Advanced” tab and check the box that says “Use the Rich Text Editor”.
That’s it! After configuring our form, we’ll embed it on a page by using the “Gravity Forms” WordPress block. Here’s what our form looks like on the front end:
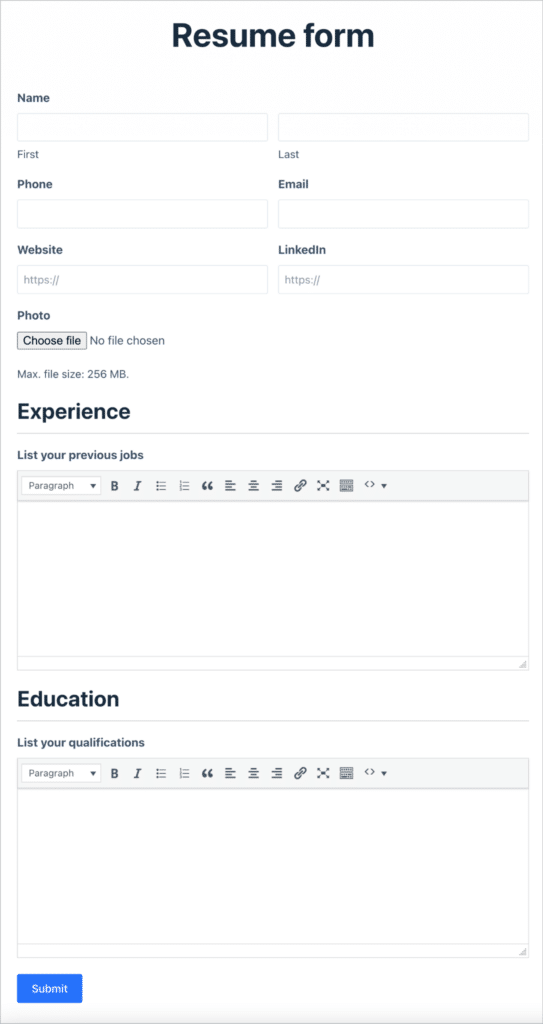
The next step is for us to create a View to display resumes on the front end.
Creating the resume View
Using GravityView we can display Gravity Forms entries on the front end using custom layouts. To create a new View, we’ll hover over “GravityKit” and click “New View”.
After giving our View a name, we’ll need to select a data source. The data source refers to the form in Gravity Forms that contains the entries we want to display.
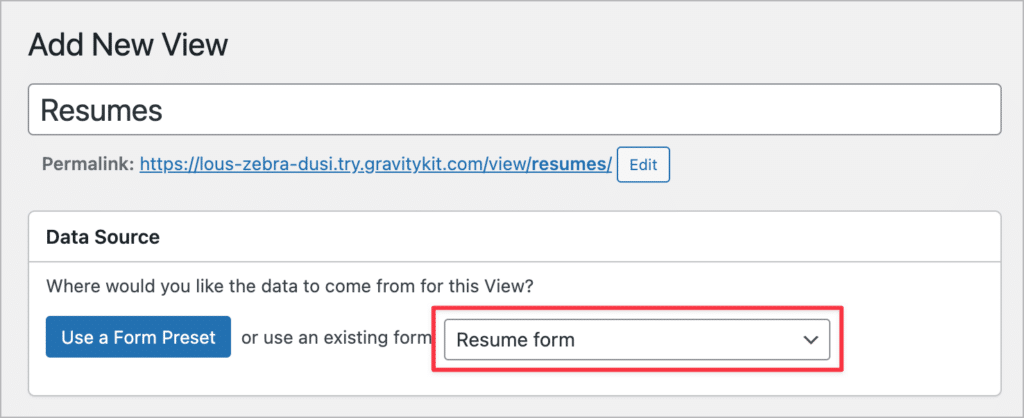
After selecting our resume form as the data source, we’ll need to choose View Type. GravityView supports several View Types, allowing us to display data using different layouts.
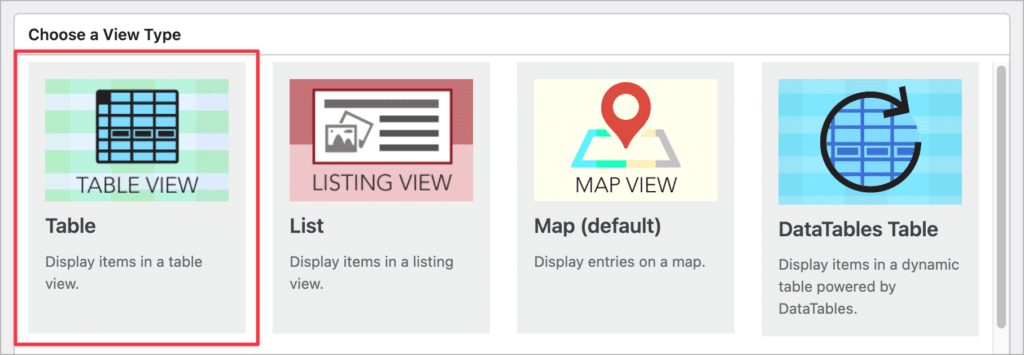
For this example, we’ll go ahead and select the “Table” layout. Now we can start constructing our View by adding fields and widgets.
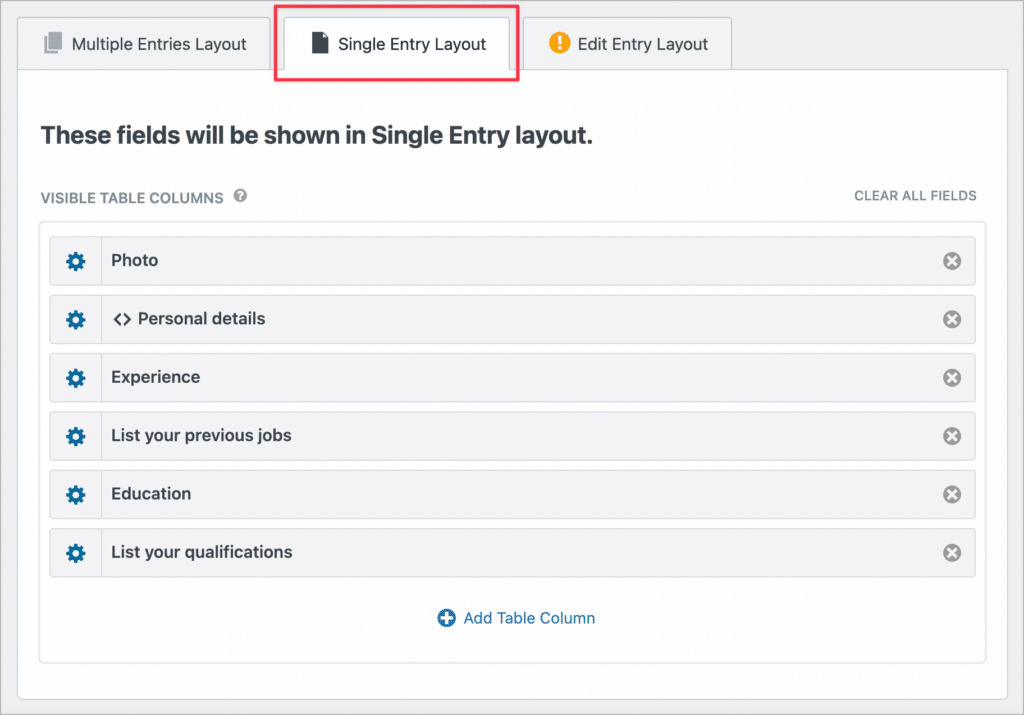
Let’s skip the Multiple Entries layout for now and concentrate on the Single Entry layout. Here, we’re going to add the fields from our form that we want to display on our PDF resumes.
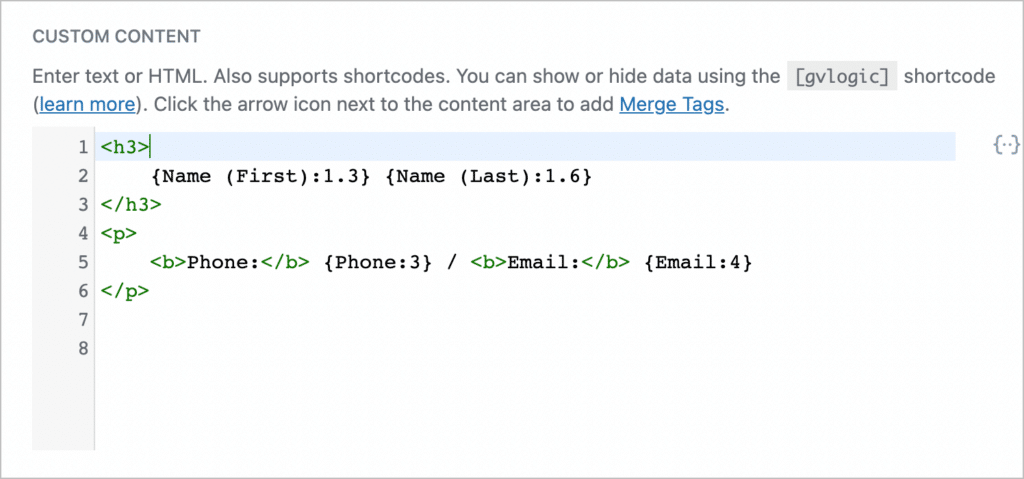
Let’s add the “Photo” at the top. Next, we’ll add the name and contact information inside a Custom Content field, as this gives us finer control over the layout by allowing us to add our own custom HTML!
After adding the field to our View, we’ll click on the gear icon to open the text editor and add the “Name”, “Phone” and “Email” fields inside using merge tags. We’ll also use a few basic HTML tags to create a more compact layout.
To finish off the Single Entry configuration, we’ll need to add the PDF download link.
Adding PDF export functionality
After installing the “PDF for GravityView” add-on, we will have access to two more fields in the GravityView View editor. The first is “Link to Single Entry PDF”, and the second is “Share Single Entry PDF”.

Here’s a quick overview of each field:
- Link to Single Entry PDF: This field adds a link that when clicked opens (or downloads) a PDF document of the GravityView Single Entry layout.
- Share Single Entry PDF: Adding this field to your View allows you to send a PDF document of the Single Entry layout as an email attachment.
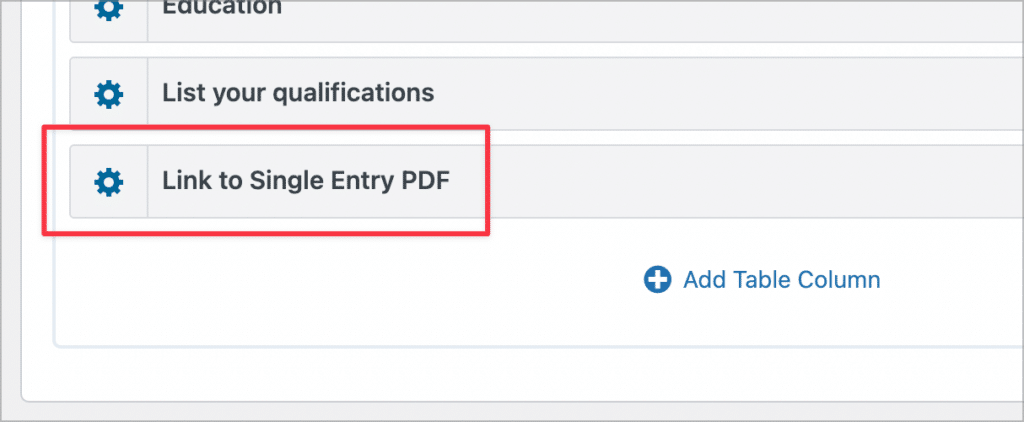
For this example, we’ll go ahead and add the “Link to Single Entry PDF” field to our View.
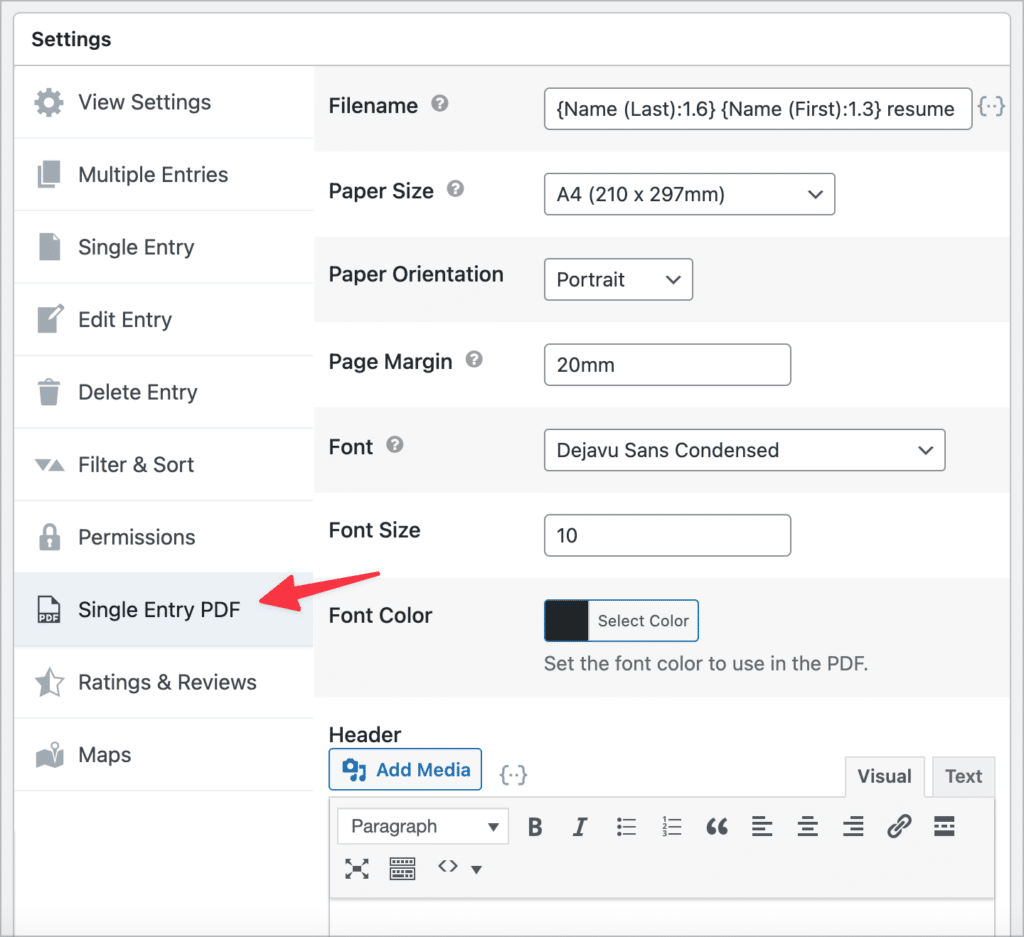
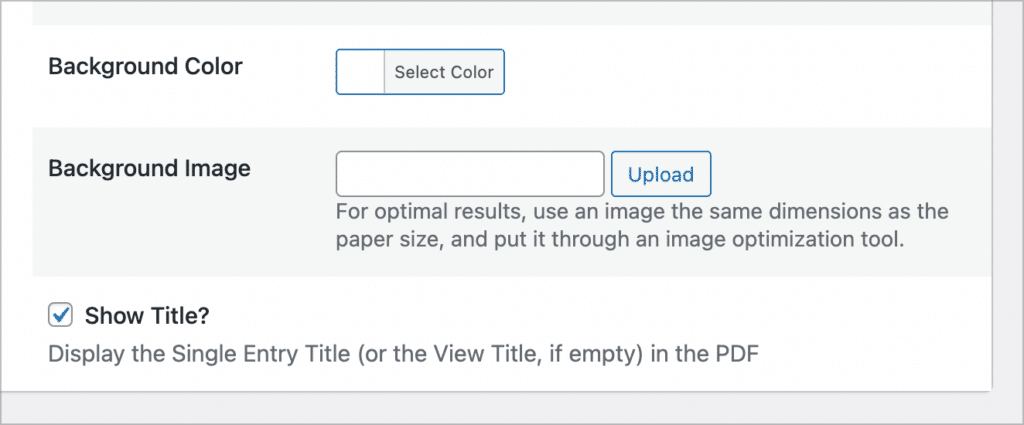
After adding the field, we can customize the PDF output from the “Single Entry PDF” settings menu. Here, we can adjust the size, orientation, margin, font, and font-size of the generated PDF document.
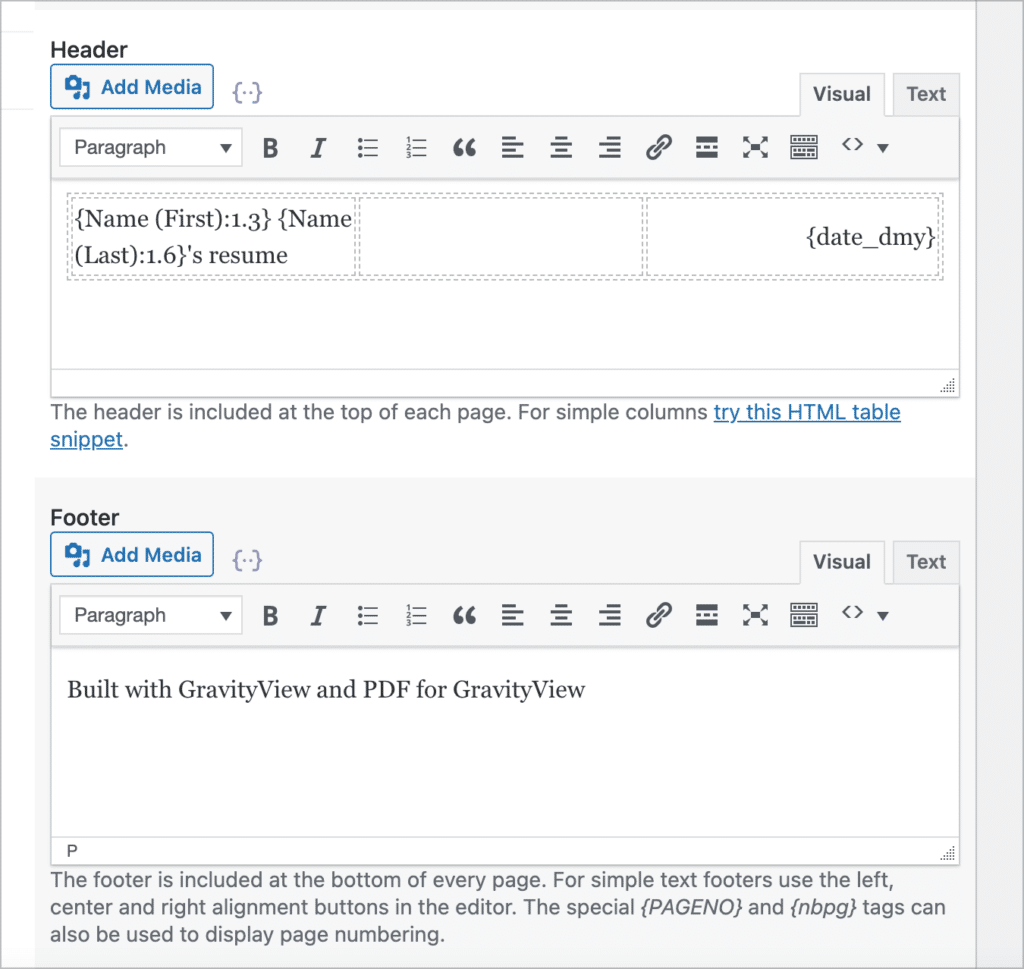
We can also add a custom header and footer to the document (HTML and merge tags are supported!). Here’s a simple example:
Finally, there is also the option to add a custom background color and image.
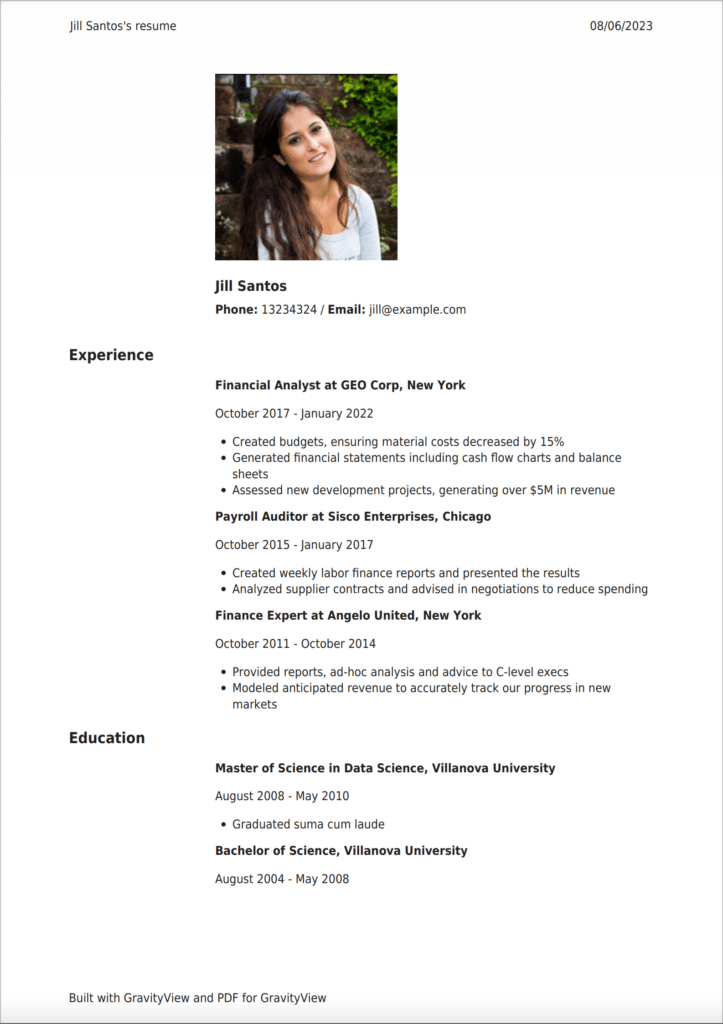
Here’s what the generated PDF resume looks like!
Here’s a quick video demo, showing how this new functionality works on the front end:
Pro tipAllow users to edit their resumes from the front end by configuring GravityView’s Edit Entry Layout.
Build powerful web apps using GravityView and PDF for GravityView by Gravity PDF!
Using GravityView in combination with PDF for GravityView allows you to enhance your Gravity Forms applications with powerful new functionality.
In this tutorial, we showed you how to create a resume builder where users can input details, edit resumes, and generate polished PDFs easily. If you enjoyed this post, learn more about GravityView, or check out the new PDF for GravityView add-on today!

Helpful tips right in your inbox.
Subscribe to get the latest articles, information on releases and helpful Gravity Forms tips!
More articles
How to build a conference website on WordPress (attendee registration + abstract submission)
Build a conference registration and abstract submission site on WordPress with GravityKit, no code: forms, an attendee directory, sessions, and PDF certificates.

How to build a WordPress CRM without code (a contact database you own)
Build a simple WordPress CRM with GravityView. Turn the Gravity Forms entries you already collect into a no-code contact database you own, with no monthly fees.

Launch Log: Distance sorting for radius searches, DataTables search improvements, and import reliability fixes
The latest GravityKit releases add distance sorting to map searches, bring built-in search to DataTables, and fix GravityCharts and GravityImport edge cases.