Published
•
Updated
How to automatically export Gravity Forms entries and send reports via email
If you rely on Gravity Forms to collect data, you probably wish there was an easier way to export submissions. By default, Gravity Forms only lets you export entries manually (and only as CSV files). What if you want to automate exports, generate Excel...

If you rely on Gravity Forms to collect data, you probably wish there was an easier way to export submissions. By default, Gravity Forms only lets you export entries manually (and only as CSV files).
What if you want to automate exports, generate Excel or PDF reports, or even attach those files to email notifications for clients or team members?
That’s where the GravityExport plugin comes in.
In this step-by-step guide, we’ll show you how to automate entry exports in Gravity Forms using GravityExport—saving time and improving your workflows.
Wanna try it?
Spin up a demo
See GravityExport in action on its live demo site.

Introducing the GravityExport add-on for Gravity Forms
GravityExport is a powerful add-on for Gravity Forms that unlocks advanced reporting features, including:
- Automatic export of entries in various formats
- Downloadable, secure URLs for each report
- Ability to attach reports to notification emails
- Send generated files to storage locations like Dropbox or SFTP
With GravityExport, you can export form entries to a range of different formats, including:
- Excel (.xlsx)
- CSV
Once installed, you’ll notice three new feed types appear in your Gravity Forms settings:
- GravityExport Lite – Set up a simple export feed (free version)
- GravityExport Filters – Create multiple reports with custom settings
- GravityExport Save – Automatically save reports to external storage
Each report you create has a unique download link associated with it. This makes it easy to share data with the people who need it.
GravityExport Lite vs GravityExport
| Feature | GravityExport Lite (free) | GravityExport (paid) |
| Export entries to CSV | ✅ | ✅ |
| Export entries to Excel (.xlsx) | ✅ | ✅ |
| Attach exports to notification emails | ✅ | ✅ |
| Export entries to PDF | ❌ | ✅ |
| Create multiple reports per form | ❌ | ✅ |
| Send reports to Dropbox or SFTP | ❌ | ✅ |
Method 1: Configuring a single entry report
If you’re just looking to create a single export per form in either Excel or CSV format, all you need is the free GravityExport Lite.
Step 1: Enable the download URL
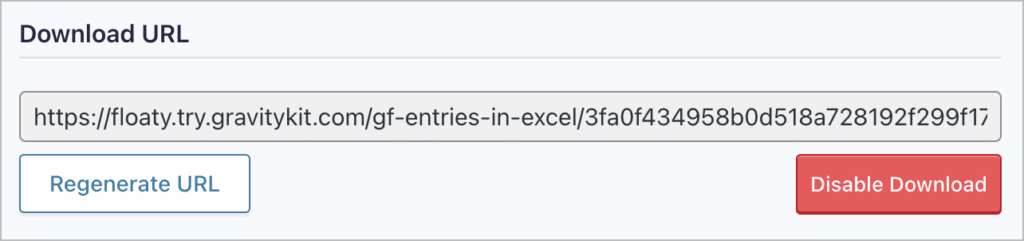
After installing the plugin, go to your form settings and click on “GravityExport Lite”. Next, click “Enable Download” to generate a secure link for the export.
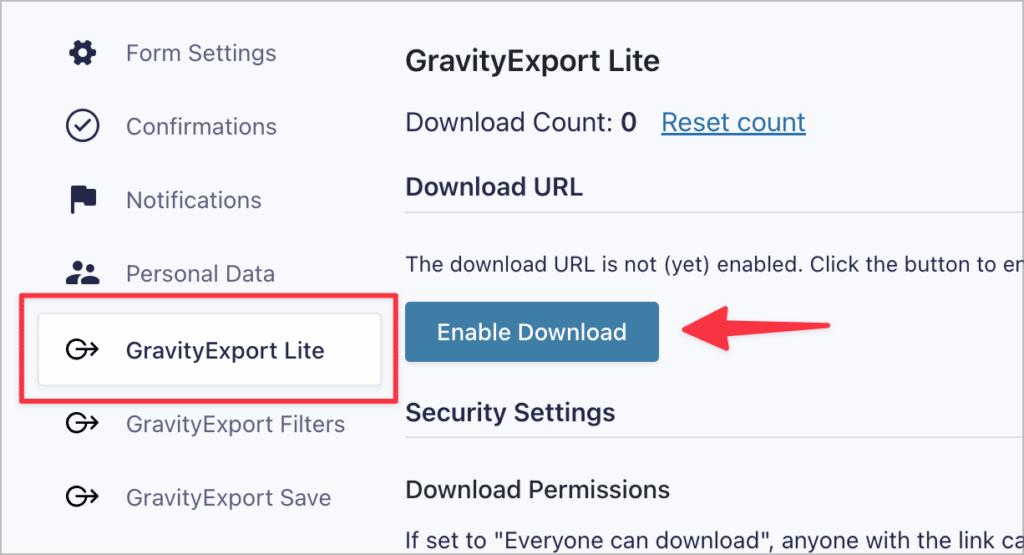
GravityExport will now generate a secure download URL for your entry report. This URL can be pasted into a browser to automatically download the report.
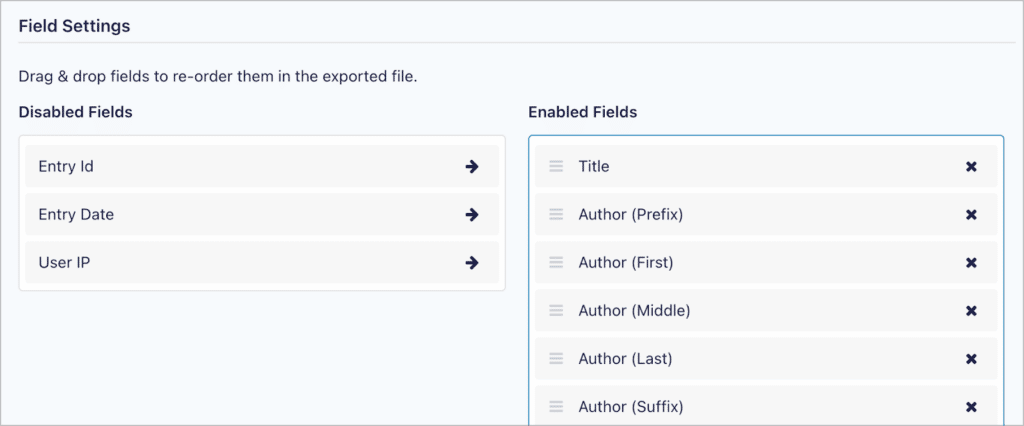
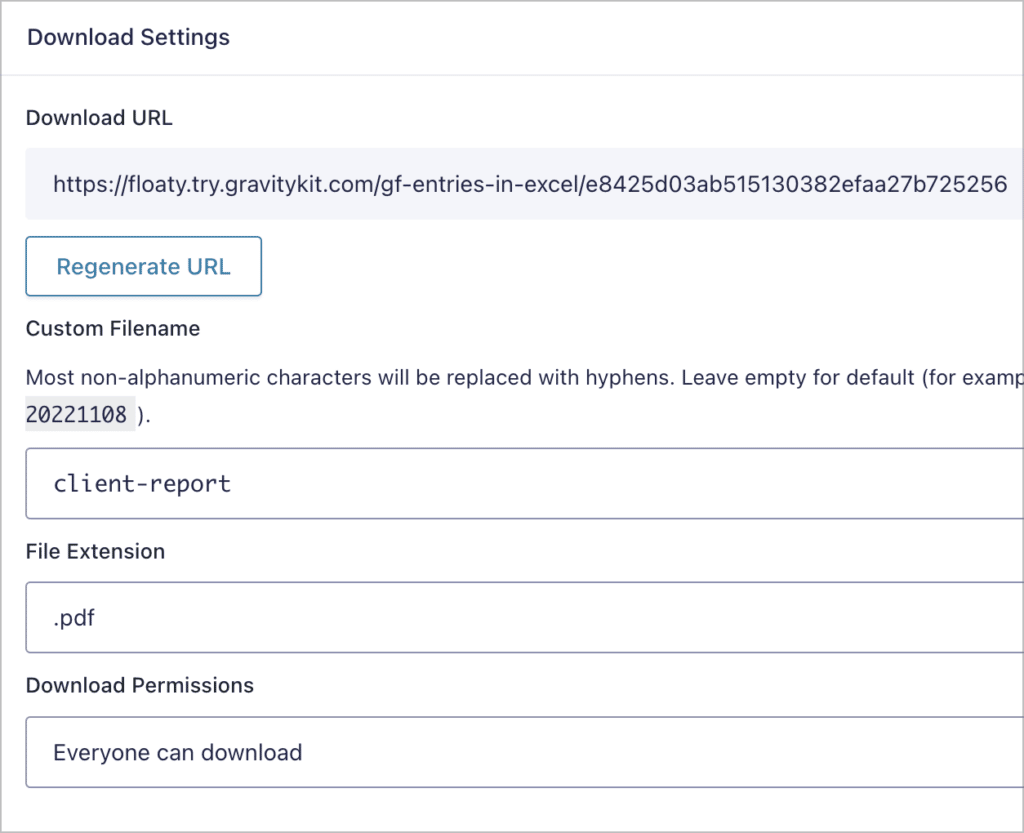
Step 2: Customize report settings
After enabling the download URL, scroll down to configure the report settings. You’ll see several options allowing you to customize the report to your liking. You can:
- Choose the file format (CSV or Excel)
- Select and order form fields for export
- Rename the output file
- Include or exclude entry meta fields
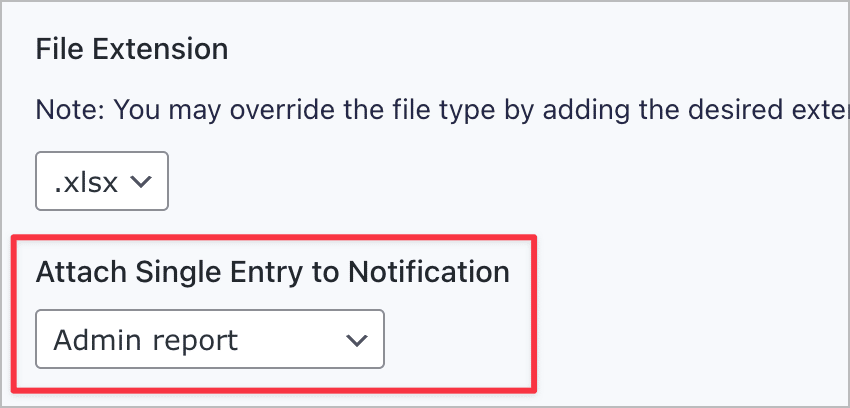
Step 3 (optional): Attach report file to email notification
Need to email entry exports as attachments? You can attach files to Gravity Forms notification emails.
Under the “File Extension” dropdown, you’ll see an option labeled “Attach Single Entry to Notification”. Click the dropdown and choose which notification should include the attachment.
When new entries are submitted, they will then be attached to the notification email as individual files.
If you don’t have a notification email set up, you can add one by clicking on the “Notifications” tab on the left.
The limitation with this feature is that it will only attach data for the most recent entry. You may want to attach reports that include all the entries. That’s also possible and we’ll show you how to do it below. But first, let’s look at how to configure multiple automatic exports for a single form.
Method 2: Configuring multiple entry reports for a single form
If you need more flexibility—multiple reports, PDFs, or different field combinations—you’ll need the paid version of GravityExport.
GravityExport includes filter feeds, allowing you to configure multiple entry exports for a single form with different settings and file formats. This is helpful if you want to have one Excel report and one PDF report, or if you want to send one report to your client and another to yourself (or your colleague).
Step 1: Add a new report under “GravityExport Filters”
Go to your “Form Settings”, select “GravityExport Filters” and click “Add New.” Next, choose your format (CSV, Excel, PDF) and select the form fields to include. You can customize:
- Report title
- File format
- Entry filters (conditional logic)
- Field order and formatting
Step 2: Add conditional logic
Only want to export certain entries (e.g., submissions from this week or entries with a specific field value)? Add conditional logic filters to include only relevant data.
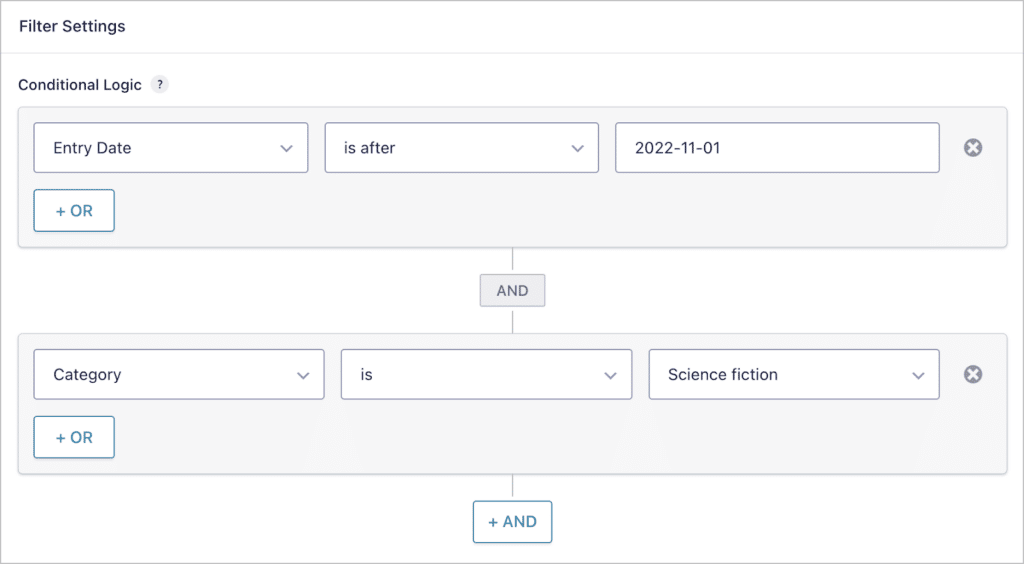
Every time a new entry is submitted, the report will update to include the new data. When you download the report, it will include all the entries for that form based on the filters you’ve set up.
Step 3: Save the feed
After saving the feed, GravityExport will generate a secure download URL. You can use this URL to download the report, share it with others, or embed it as a link inside email notifications or confirmation messages.
You can repeat this process as many times as you want to create multiple reports for a single form with different configurations.
Sharing reports via links in notification emails
While there’s no way to attach multiple entry report files to email notifications, you can include a secure download link right in your notification message.
All you need to do is copy the report download URL and then define a hyperlink using an HTML anchor tag.
<a href="https://example.com/secure-report-link">Download report</a>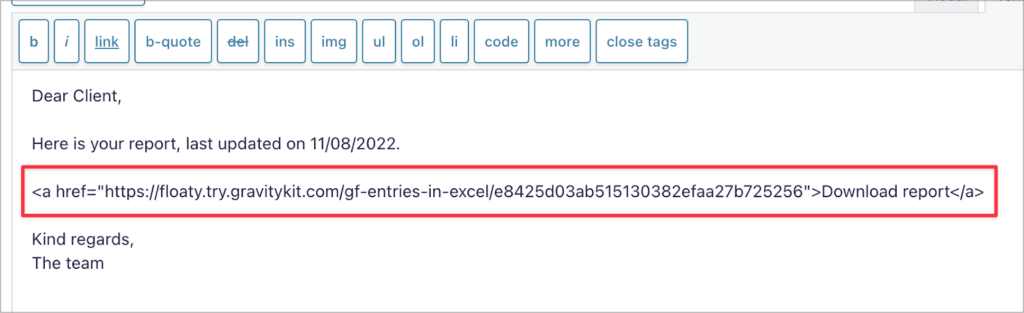
Here’s an example of what the email body would look like:
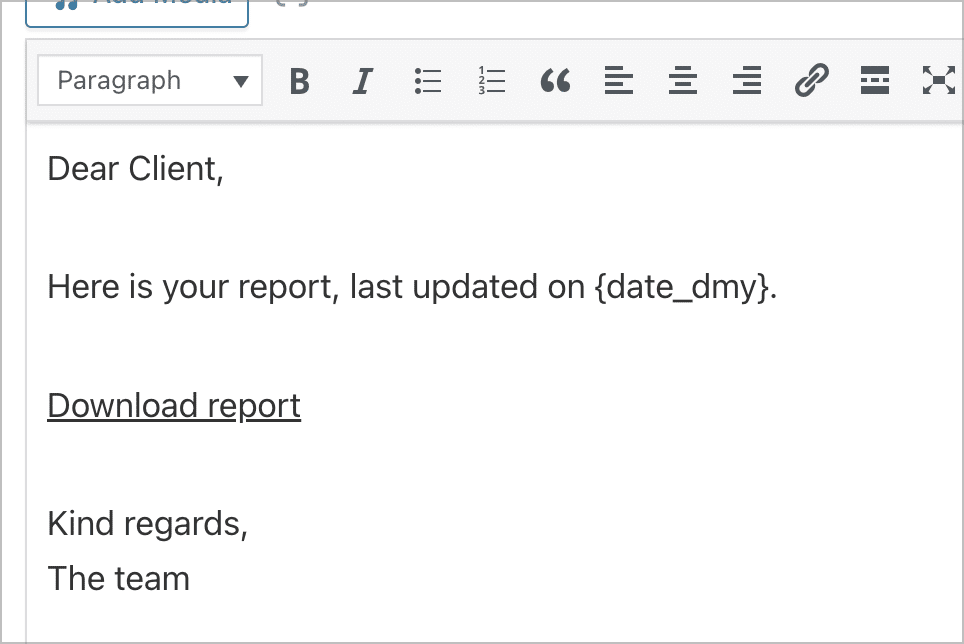
All the recipient needs to do is click on the download link and the Gravity Forms entry report will download automatically. This method can be more reliable than sending file attachments and ensures recipients can always download the latest version.
Adding a report download button to your website
To make reports available to admins or customers, you can add a download button directly to your WordPress pages.
Here’s how to do it:
- Copy the secure report URL
- In the Gutenberg editor, add a “Button” block
- Paste the report URL as the button link
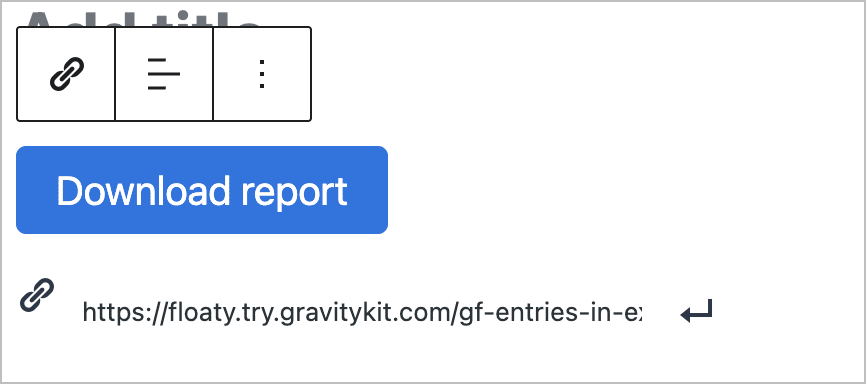
Now, when a user clicks on the button, it will automatically export the Gravity Forms entries and download them to their computer.
Pro tipUsing this method, you can also add download buttons to Gravity Forms confirmation messages!
Final thoughts: Power-up Gravity Forms with automated exports
Out of the box, Gravity Forms offers limited reporting. But with GravityExport, you can:
- Automatically generate CSV, Excel, or PDF reports
- Attach single entries or include report download links in email notifications
- Store reports on SFTP, Dropbox, or local storage
- Control formatting, filters, and conditional exports
So what are you waiting for? Get started with GravityExport today!

Helpful tips right in your inbox.
Subscribe to get the latest articles, information on releases and helpful Gravity Forms tips!
More articles

Launch Log: GravitySearch arrives, plus AI spam review and GravityView fixes
This week, releases are anchored by a brand-new product! GravitySearch joins the GravityKit suite with cross-form entry search for Gravity Forms. Alongside it, Gravity Forms Zero Spam picks up an AI-powered review step, and GravityView sees fixes for Enhanced Security, Edit Entry, and Entry…

Meet GravitySearch: advanced global search for Gravity Forms
GravitySearch adds cross-form search to Gravity Forms: find any entry from one screen, build advanced filters, and preview results without leaving the page.

Block MCP is now a free WordPress plugin (and it sets itself up)
Block MCP is now a free WordPress plugin. Connect Claude or any MCP client to your site in minutes and let AI edit your content without breaking blocks.