Are you looking to build a website similar to Crunchbase? If you’re not sure where to begin, may I suggest Gravity Forms and GravityView?
Crunchbase is the go-to resource for information on companies, startups, investors, funding rounds and more! It’s popular among sales and marketing professionals, researchers, and investors.
The power of Crunchbase lies in its data. All of the information they collect is organized, and easily accessible. The difficulty in building a Crunchbase clone is interconnecting data from different sources. Luckily, that’s where the Gravity Forms ecosystem shines!
In this post, I’m going to show you how you can set up a website with powerful data management capabilities similar to Crunchbase using Gravity Forms and GravityView. No code required.
Let’s get started!
Sneak peek
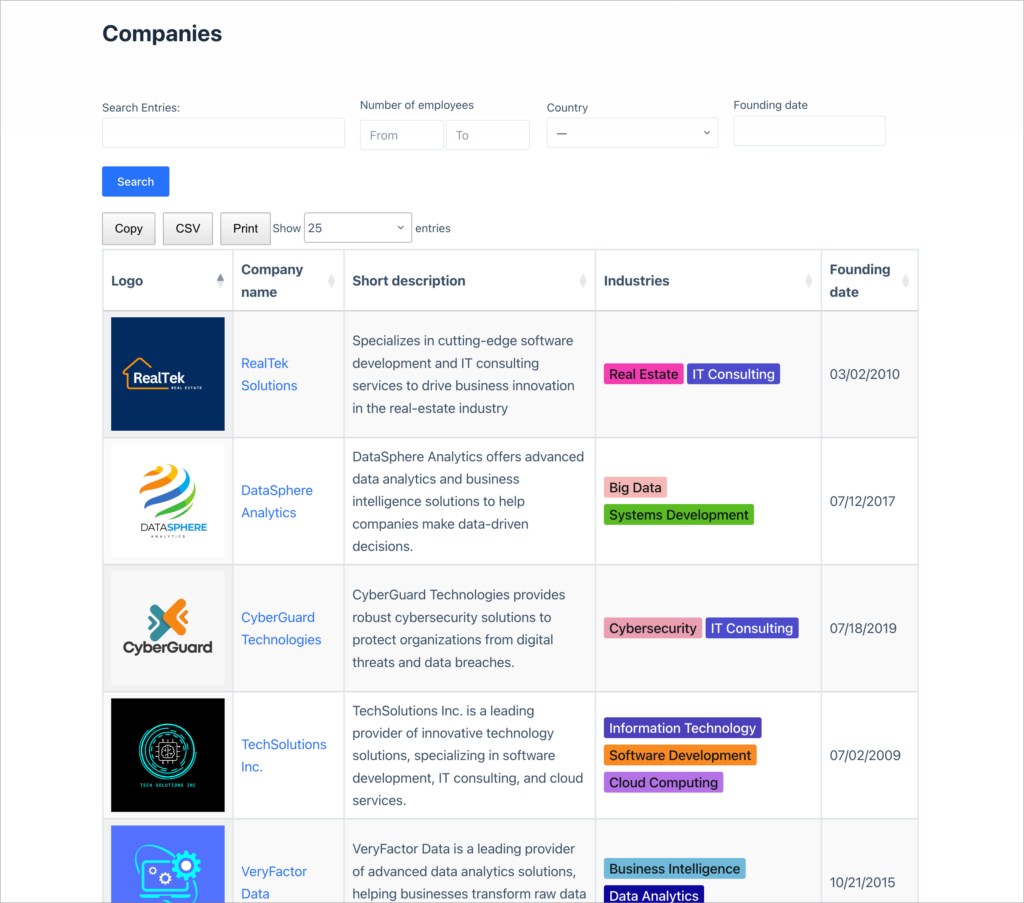
So here’s a look at the finished Crunchbase clone. Note that I didn’t pay a lot of attention to styling in this tutorial as I’m more concerned with showing off the functionality! Let’s dive in…
Here we have the main dashboard showing a list of companies in our database. As you can see we have a handy search bar at the top (easily customizable!). There are also buttons for exporting data to CSV, and Excel.
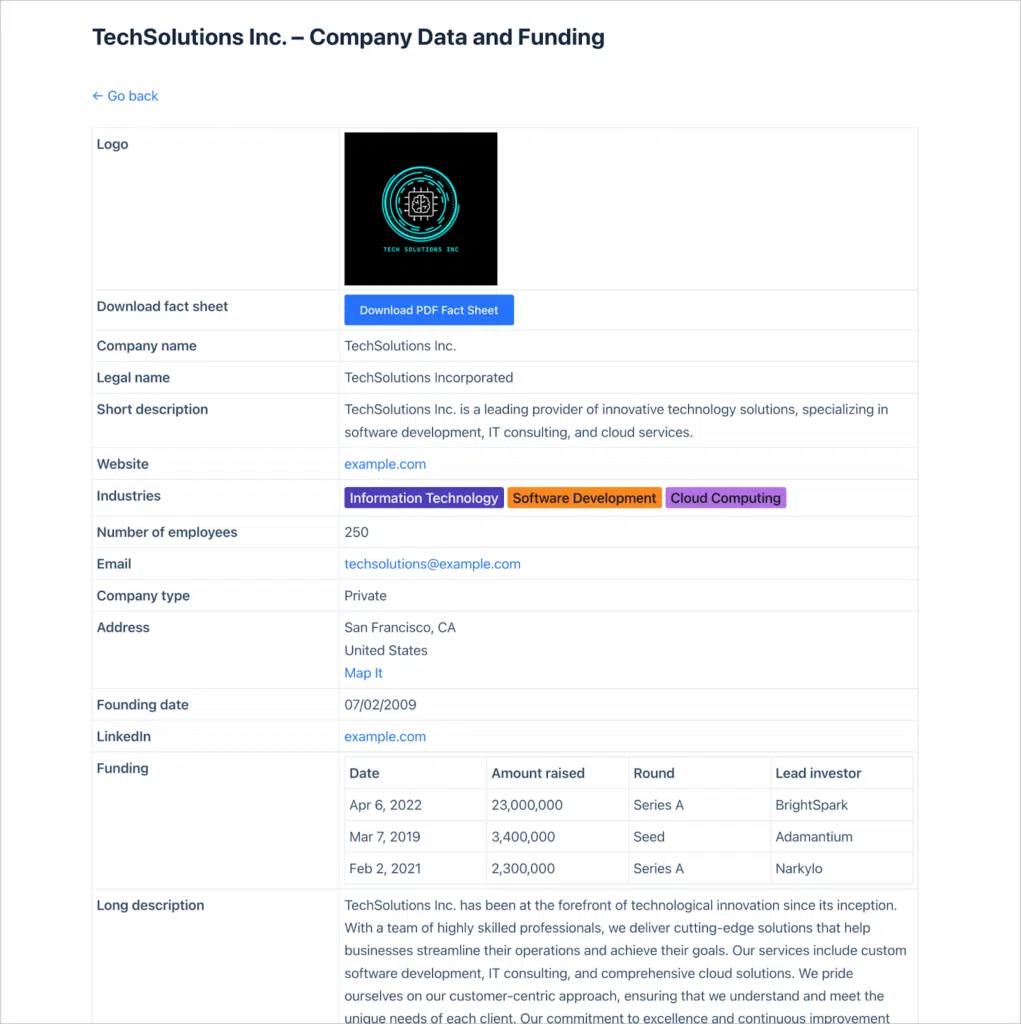
By clicking on a company name, we can see that company’s full profile. Here we have all the info you’d expect to find about a company!
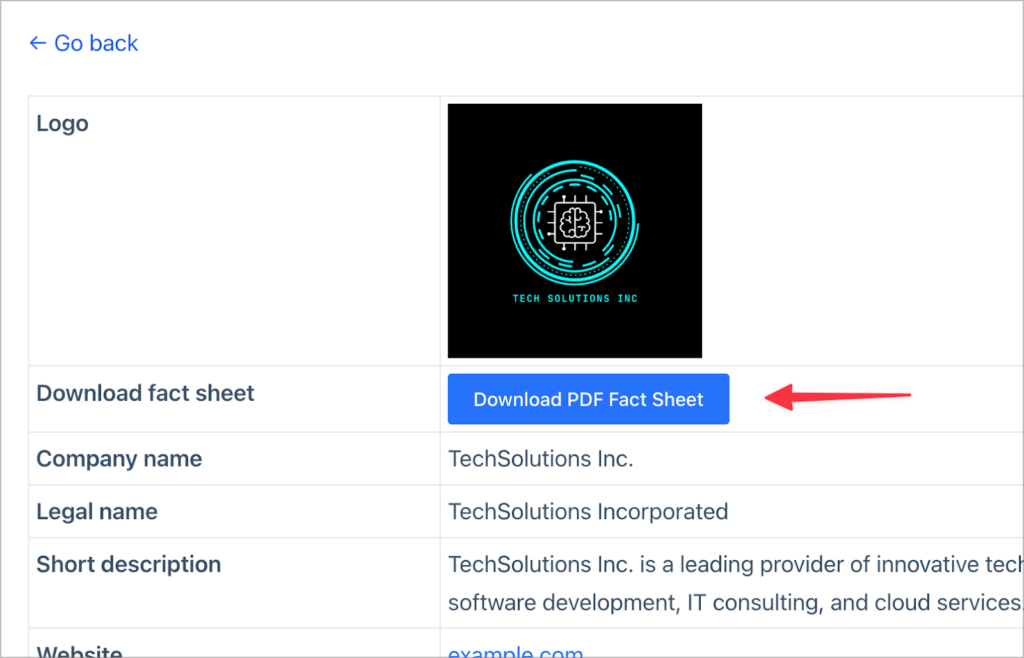
I also added a button for downloading a PDF fact sheet of the company! This was easy using the free Gravity PDF plugin.
The company profile page also includes funding data. This data is piped through a separate form, and connected to each company based on its unique ID.

This is the same with “People”. So, both “Funding” and “People” are separate Views! However they are connected to the correct company via the unique ID of that company.

The “Profile” links are also clickable

Clicking on the link will take you through to see that person’s full profile!

As you can see the system consists of multiple Views with different types of data, all connected via the company’s unique ID!
Keep reading to see how I built it.
What you’ll need
Here are the plugins you’ll need to build a Crunchbase clone on WordPress, like the one above:
- Gravity Forms
- GravityView Pro
- Gravity Perks Populate Anything OR Dynamic Lookup (free)
- GravityExport (optional)
- Gravity PDF (free / optional)
- Gravity Forms Entry Tags (free)
What is Crunchbase?
Crunchbase is essentially the LinkedIn of the startup world, but with a lot more data. It’s a comprehensive platform that provides detailed information on companies, investors, funding rounds, mergers, acquisitions, and more.
Originally born out of TechCrunch in 2007, Crunchbase started as a simple database for tracking startups and their investors. Over time, it has evolved into a go-to resource for market researchers, or anyone wanting to stay informed about the global startup ecosystem.
What makes Crunchbase so powerful is its extensive database of startup info, with hundreds of data points all interconnected. This allows for deep dives into companies, industries, and individuals.
Creating the company profile form
The first thing we need to do is create a new Gravity Form to input company data into the database. To do this, we’ll hover over “Forms”, click “New Form” and select “Blank” to start with a blank form.
We can add fields to the form from the sidebar on the right. Gravity Forms supports a range of fields for capturing any kind of data!

The fields you add here will depend on what company information you want to capture. For this example, we’ll add the following fields:
- Company name (“Single Line Text” field)
- Short description (“Single Line Text” field)
- Logo (“File Upload” field)
- Number of employees (“Number” field)
- Website (“Website” field)
- Email (“Email” field)
- Company type (“Drop Down” field)
- Address (“Address” field)
- Long description (“Paragraph Text” field)
- Industries (“Entry Tags” field)
- Founding date (“Date” field)
- Legal name (“Single Line Text” field)
- LinkedIn (“Website” field)
- FAQs (Rich Text Paragraph field)
Now that we have our form set up, we can start adding company profiles to our database!
💡 Pro tip: If you already have a CSV file of company data, you can upload entries in bulk using GravityImport.
Creating additional forms
The next step is to create additional forms for other company data that you want to collect. This is data that doesn’t fit with the basic company profile. For example, Crunchbase provides data on funding and people, which are then linked to individual companies.
The benefit of having this information in its own form (i.e., database), is that it’s easy to search and filter it on its own!
Let’s go ahead and create two new forms—one for people and one for funding data. Both of these forms will have a “Company” field, enabling us to link entries to specific companies.
However, in order for this to work, we’ll need a way to link entries across these two forms. For this, we can either use Populate Anything by Gravity Wiz, or Gravity Forms Dynamic Lookup (which is free). Both add-ons enable you to dynamically populate field choices with data from other form entries!
Here’s how to do it with “Populate Anything” offered by the fine folks over at Gravity Wiz.

First, we’ll populate the “Company” Drop Down field with Gravity Forms entry data from our Crunchbase entry form!
Next, we’ll select a value and a label for the data. We’ll choose the “Company name” field as the label, and the “Entry ID” field as the value.
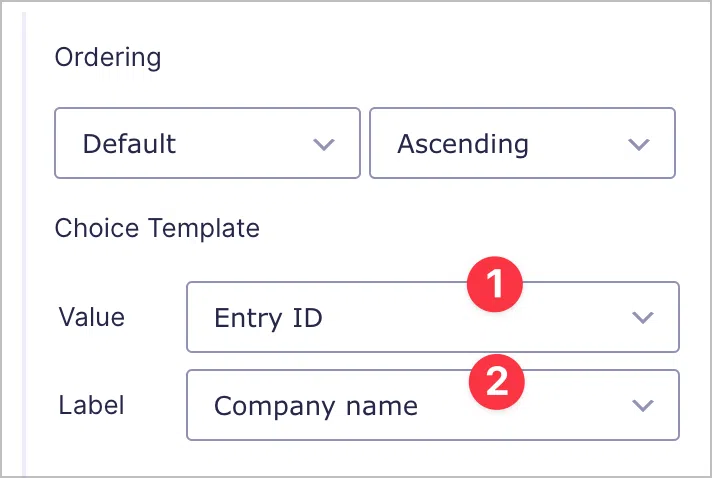
This allows us to pull in the company name and its associated entry ID so we can link people and funding rounds to specific companies and display them on the relevant company profile! You’ll see how this works soon.
And if you’re using Gravity Forms Dynamic Lookup, all you need to do is add a new “Lookup” field to your form, select “Gravity Forms” as the source and choose a source form and field.

Building the front-end interface
Now that we have all our forms set up and have gathered all our data, it’s time to focus on the exciting part—building the front-end interface! To do this, we’re going to use GravityView.
We’ll start by creating a View called “Crunchbase clone”. Then, we’ll link it to our “Crunchbase entry” form that houses all the company data. Next, we’ll select “DataTables Table” as our View Type.

Now we can start configuring our View by adding fields and widgets using GravityView’s drag-and-drop editor. Let’s start with the Multiple Entries Layout. Here, we’ll add a search bar widget to the top, and 5 fields to the “Entries Fields” section – “Logo”, “Company Name”, “Short description”, “Industries”, “Funding date”.

Now let’s turn our attention to the Single Entry layout.
Single Entry Layout
On the Single Entry page, we’re going to add all the remaining company information.

Here we’re also going to add information about funding and people. However, this information is contained within separate forms, so we’ll need to create two new Views first and then embed those Views here. Let’s do that now.
Adding data on funding and people
Now let’s create two new Views; one to display information about people, and one to display information about funding (“Crunchbase – people”, and “Crunchbase – funding”). I’m not going to go through the View creation process again as it’s relatively straightforward.
Here’s the first View, with information about people:

And here’s our second View, with information on funding:
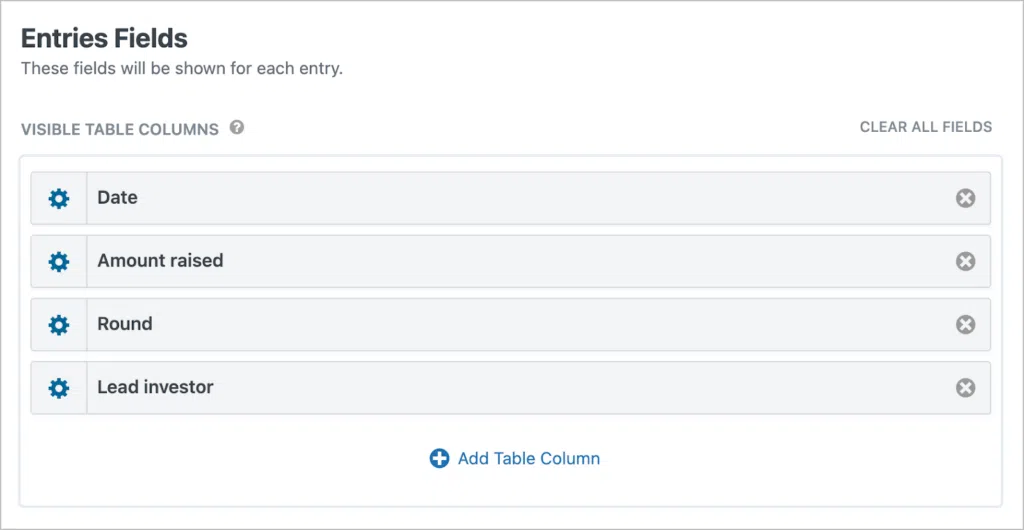
Now we can head back to our main View (“Crunchbase clone”) and embed both of these Views in the Single Entry page using the “GravityView View” field.

After adding the field to our View, we need to open the field settings and configure a few options. First, we need to select the View that we want to embed.

Next, we need to apply a filtering condition to ensure that the right people and funding data is displayed for the right company! We can do this by ensuring the field ID of the “Company” field is the same as the entry ID!

So, when we open the View on the front-end, we can a table of funding data relevant to that company, and a list of employees who work there with a link to their profiles!

Our Crunchbase clone is looking good so far. Much of the basic functionality is already there. Now, let’s add an option to export data to PDF.
Adding PDF export capabilities
If you want to add export functionality, you can do that using either GravityExport or Gravity PDF.
Gravity PDF is best for creating professional-looking PDFs of your form entries, while GravityExport is best for sending data to remote storage, or sharing reports.

💡 Pro tip: Learn more about creating PDF download links using Gravity PDF and GravityExport on our docs site.
Build your own Crunchbase clone today!
I hope that the power of the Gravity Forms ecosystem of tools is evident from this post. If there’s one thing that Gravity Forms and GravityView enable you to do really well, it’s manage data!
And when you think about it, data management is a critical component of any web application. In this post, I showed you how to build a clone of Crunchbase on WordPress without writing any code.
If you found this post interesting, learn more about the GravityKit suite of add-ons for Gravity Forms.

Helpful tips right in your inbox.
Subscribe to our weekly newsletter for tips, special offers, and more!
Helpful tips right in your inbox.
Subscribe to our weekly newsletter for tips, special offers, and more!
