Published
•
Updated
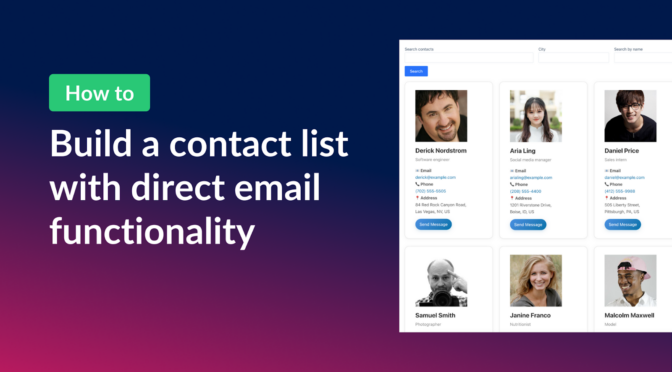
How to build a contact list with direct email functionality on WordPress without code
Need an easy way to manage contacts and reach out to people directly from your WordPress website? In this tutorial, I walk you through how to build a fully functional contact list (or address book) using Gravity Forms and GravityView. You’ll learn how to...
Need an easy way to manage contacts and reach out to people directly from your WordPress website?
In this tutorial, I walk you through how to build a fully functional contact list (or address book) using Gravity Forms and GravityView.
You’ll learn how to create a searchable directory of contacts with key details like name, job title, and phone number—plus, we’ll add a sleek “Send Message” feature so you can email contacts right from the frontend. All without code.
Let’s dive in!
Sneak peek
Here’s a sneak peek at the finished contact list (address book). As you can see, there is a search bar at the top, allowing you to filter contacts by keywords, city or name. Each contact also includes a “Send Message” button for emailing them directly.
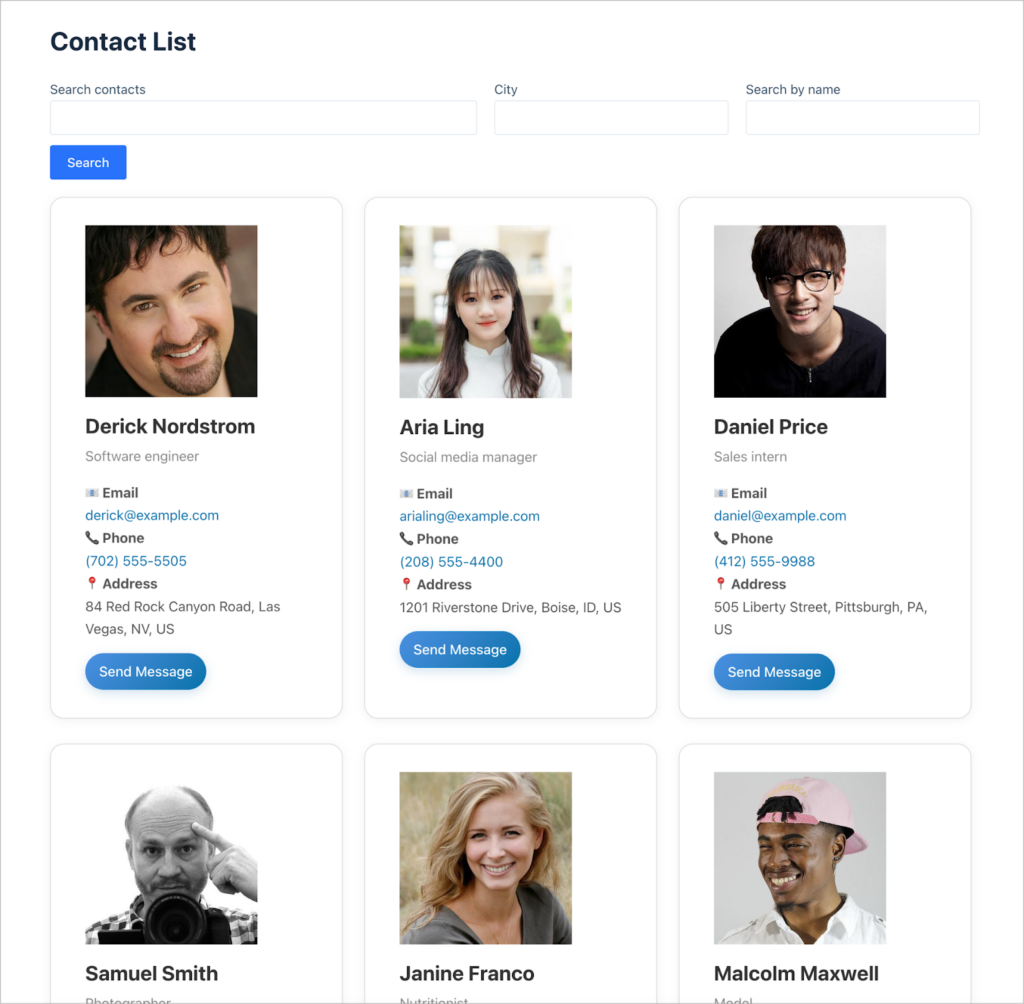
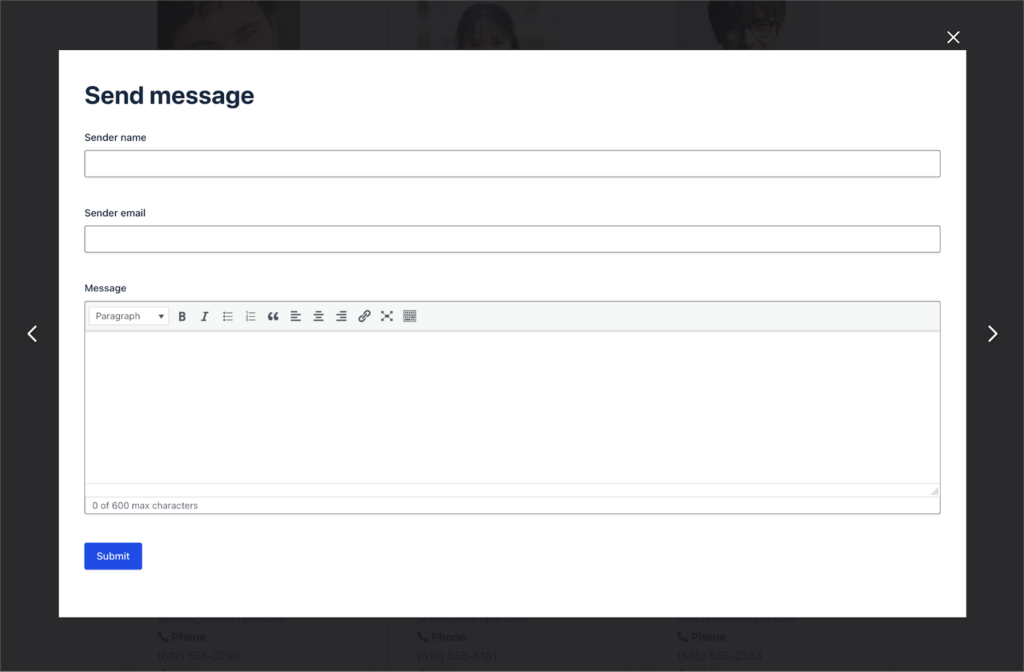
Clicking on “Send Message” opens up a modal with another form that you can use to send the user an email.

Keep reading to see how to build it!
Wanna try it?
Spin up a demo
See what you can build with GravityView — explore the live demo.

What you’ll need
Here are the plugins you’ll need to build a contact list/address book like the one in this tutorial:
Creating the contact list form
Let’s start by creating a form (“Contact list”) that we can use to create new contacts and save them to our list. To create a new form, we’ll hover over “Forms” and click “New Form”. We’ll start from a blank form and use the Gravity Forms visual builder to add the fields we need.
To keep things simple, we’ll add the following fields:
- Name (“Name” field)
- Email (“Email” field)
- Job title (“Single Line Text” field)
- Phone (“Phone” field)
- Address (“Address” field)
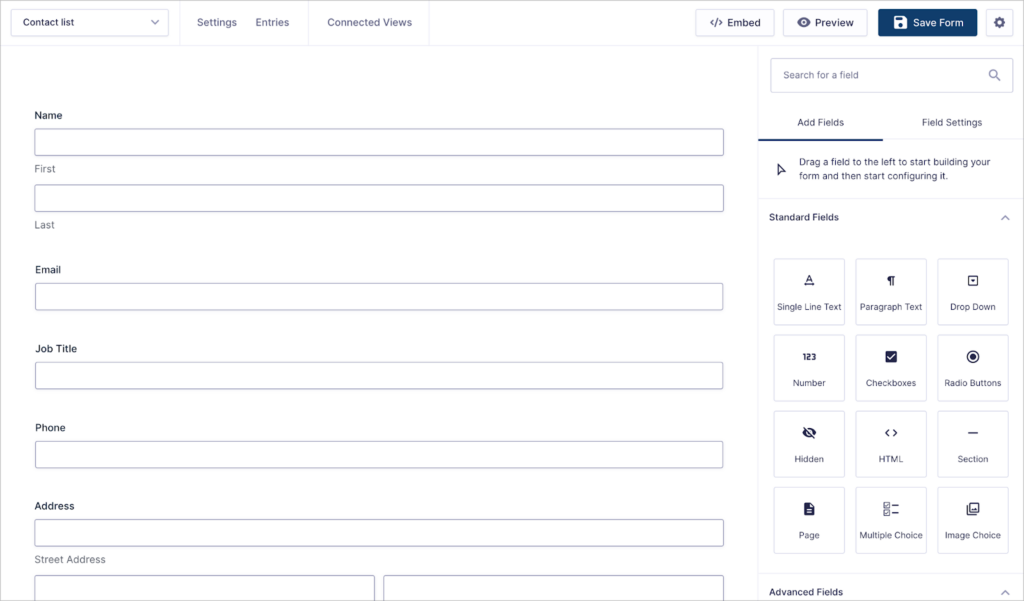
Feel free to add any additional fields that you need! After creating the form, we can embed it on a page or post.
Creating the “Send Message” form
The next step is to create a second form that will allow us to send emails to contacts directly. This form will contain the following fields:
- Sender name (“Single Line Text” field)
- Sender email (“Email” field)
- Message (“Paragraph Text” field)
- Recipient email (Administrative “Email” field)
Next, we’ll make sure to enable rich text on the “Message” field to allow for basic text formatting when composing messages.
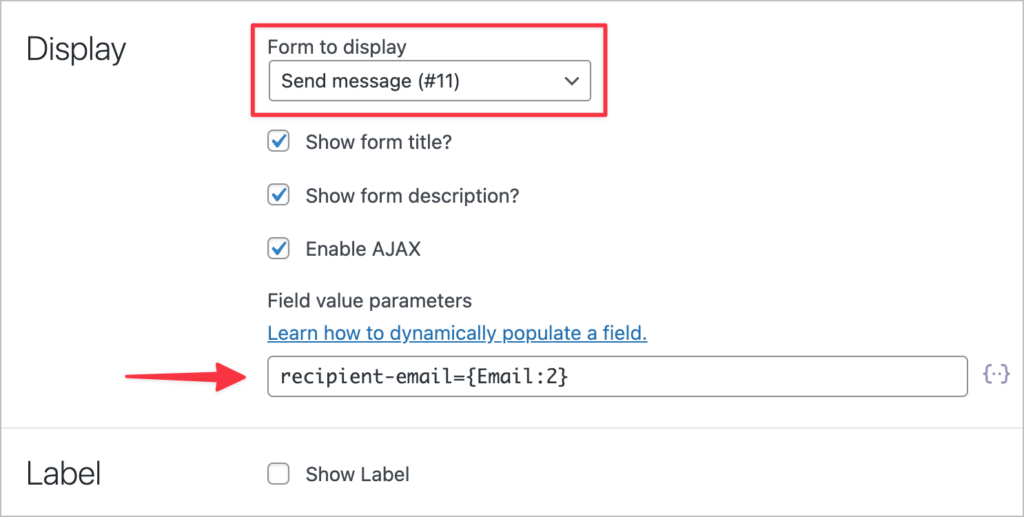
Finally, we’ll ensure that the “Recipient email” field is an administrative field so that it will be hidden from the form entirely. Next, we’ll enable dynamic population so we can dynamically populate this field with the recipient’s email address.
Capturing the recipient’s email address here will enable us to create a new email notification that gets sent to the correct contact. After enabling dynamic population, we’ll need to enter a parameter name (something like recipient-email).
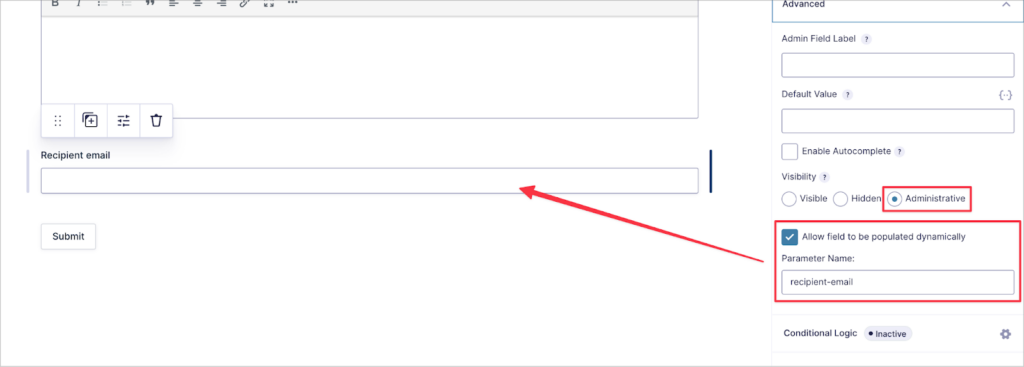
Here’s what the form looks like on the front end. As you can see, the “Recipient email” field is completely hidden!

Now let’s create and configure the email notification.
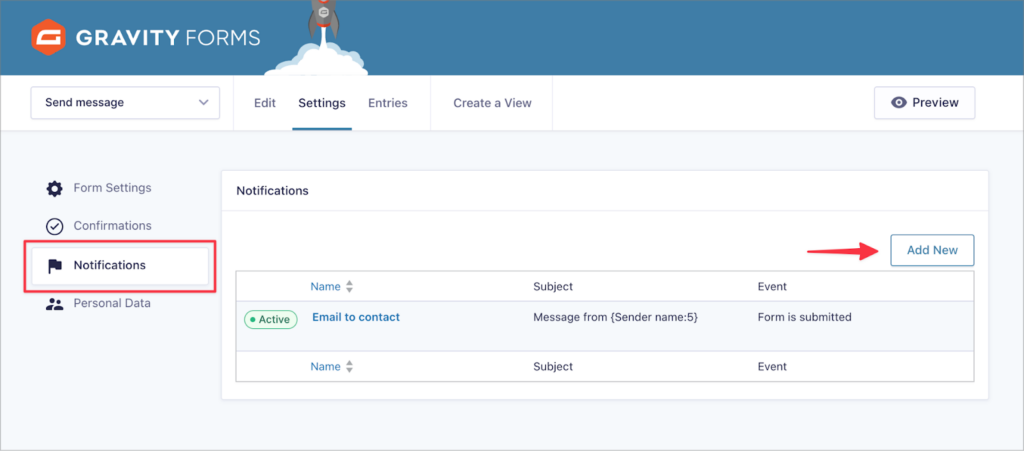
Configuring the email notification
To add a new notification, we’ll go to the form settings, click “Notifications” and then “Add New”.
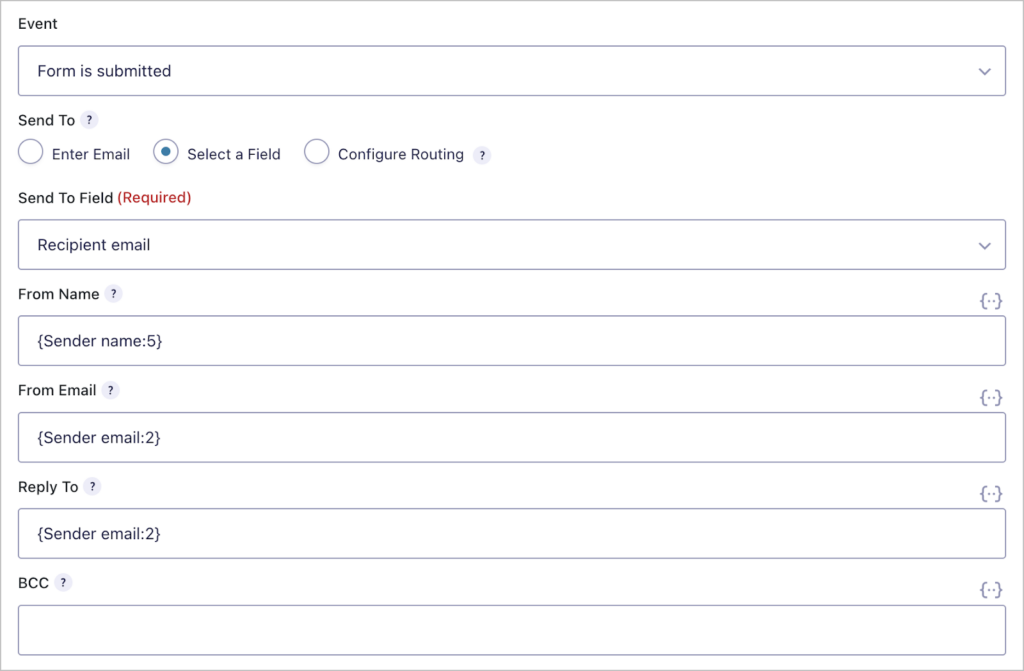
Here’s how we’re going to set it up: We’ll set the “Event” to “Form is Submitted” and set the “Send To” address to the “Recipient email” field. Next, we’ll set the “From Name” and “From Email” to the “Sender name” and “Sender email” fields respectively.
Finally, we’ll add a subject line and then configure the email message to display the contents of the “Message” field.
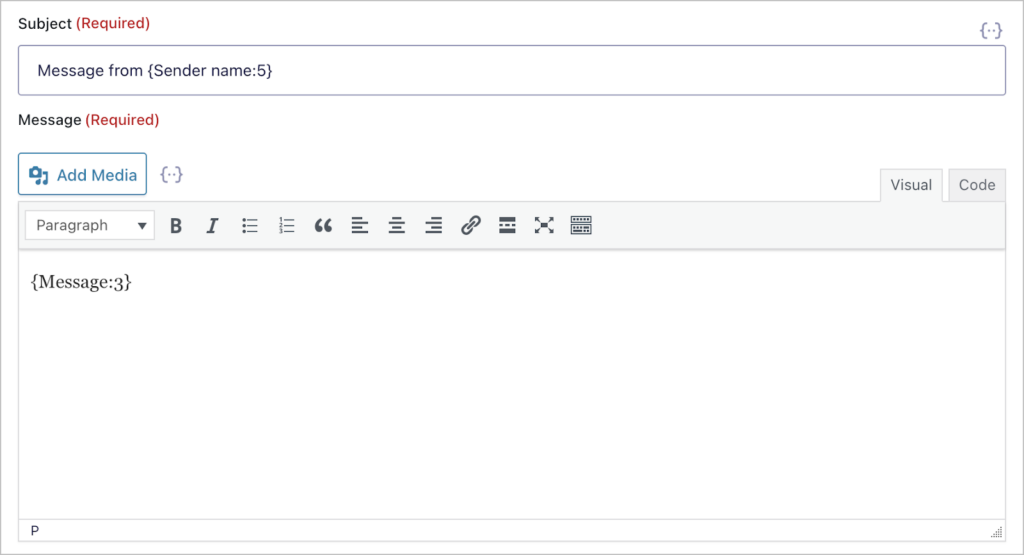
That’s it! Now the contact will receive a direct email whenever the “Send Message” form is submitted.
Now that our forms are set up, and our email notification is ready, all that’s left to do is create the contact list/address book View!
Creating the contact list View
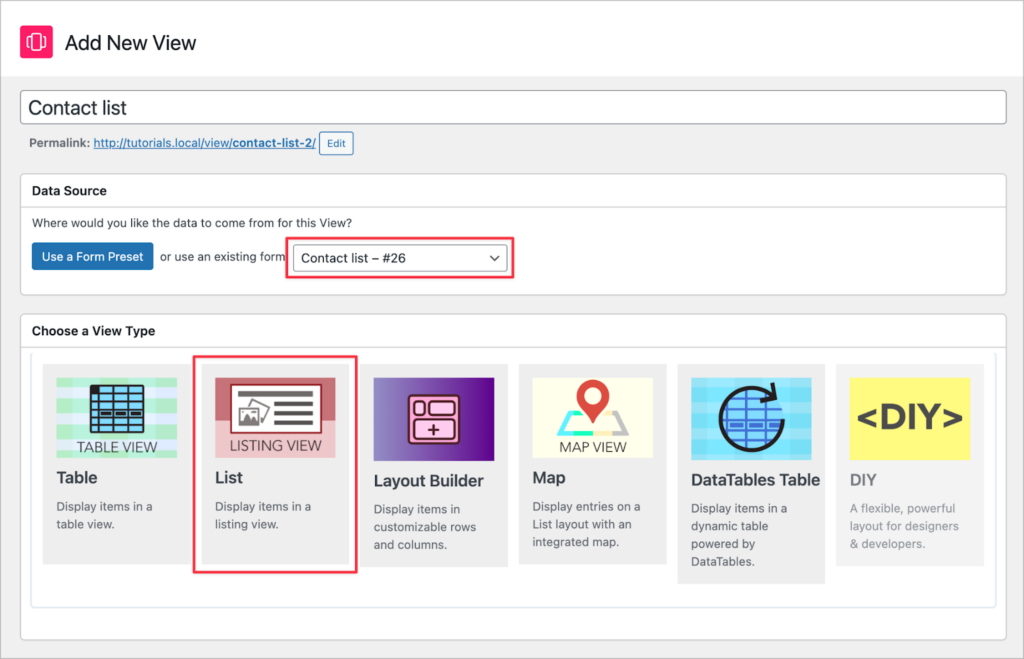
To create a new View, we’ll hover over “GravityKit” and click “New View”. We’ll select our “Contact list” form as a data source and choose “List” as our View type.
Now we can start configuring our View using GravityView’s drag-and-drop editor. Let’s start with the Multiple Entries layout—this will be the main contact list where we can see and filter all our contacts.
The first thing we’ll do is add a search bar widget to the “Top Widgets” area.
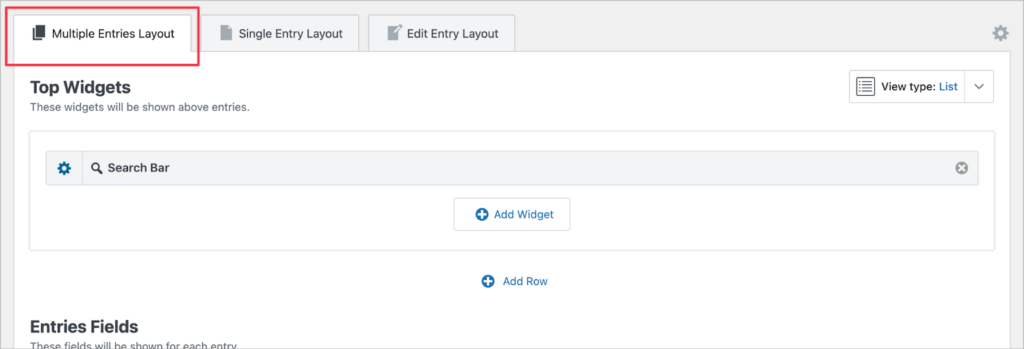
By opening the widget settings, we can configure the input fields. Let’s add three search inputs—“Search Everything”, “City” and “Name”.

Next, we’ll add three fields to the “Listing Title” section of the View editor—“Profile picture”, “Custom Content” (renamed to “Contact info”), and “Link to Single Entry”.
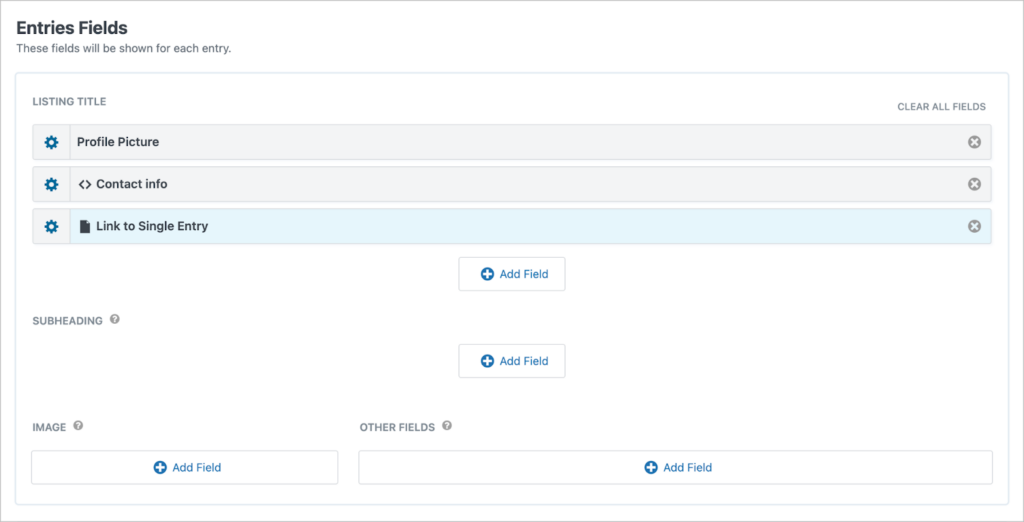
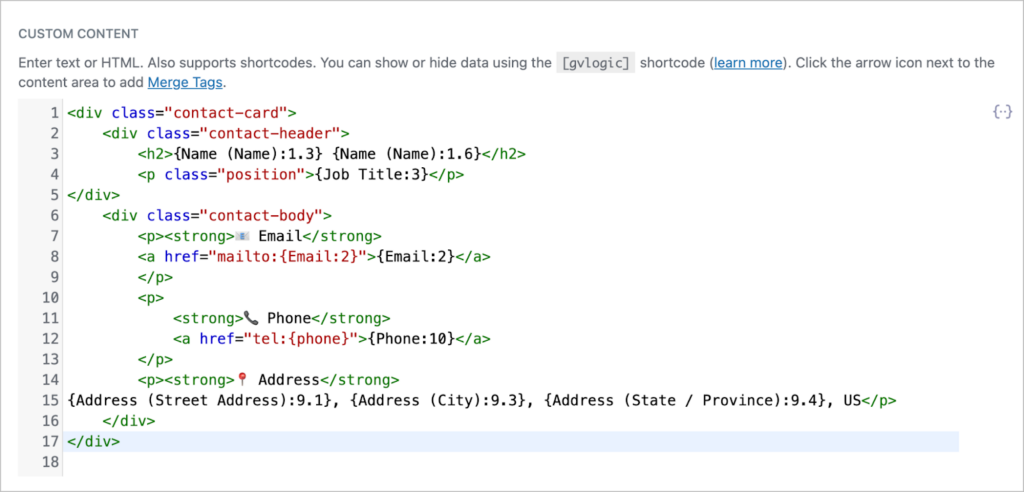
The Custom Content field will house most of the information we want to show for each of our contacts, including their name, phone number, email, job title and address.
As you can see, we can use our own HTML structure here and insert field values dynamically using merge tags. You can copy and paste the HTML/CSS we used here.
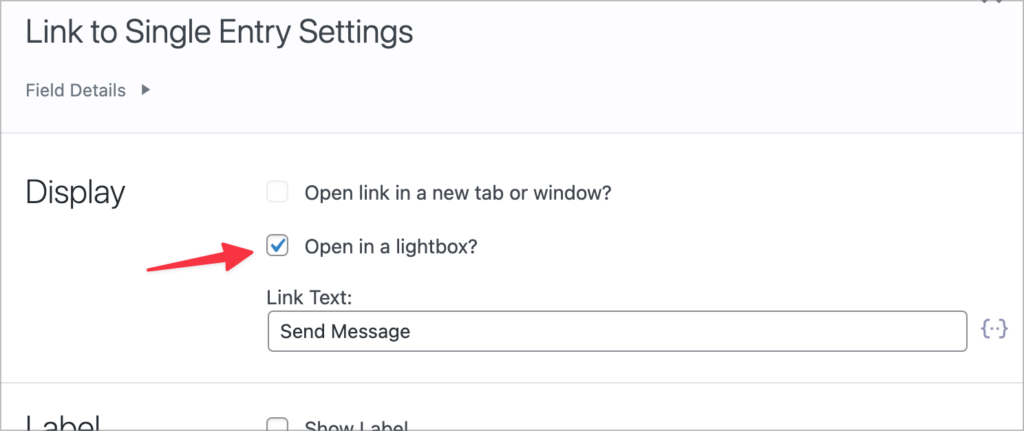
Next, we’ll open the field settings for the “Link to Single Entry” field, change the link text to “Send Message”, and check the box labeled “Open in lightbox”.
The Single Entry layout will contain our “Send message” form that we can use to send direct messages to contacts.
Configuring the Single Entry layout
On the Single Entry layout, we’ll add a single “Gravity Forms” field.
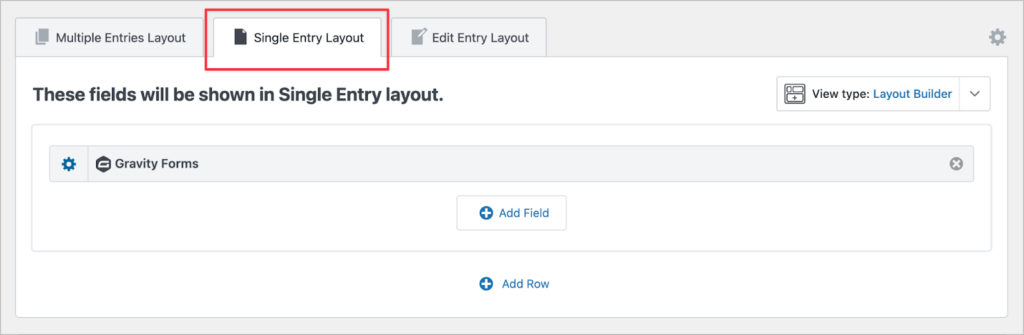
We’ll open the field settings, select our “Send message” form, and insert the following into the “Field value parameters” input box:
recipient-email={email:2}
This will dynamically populate the hidden “Recipient email” field in the form to ensure the email is sent to the correct contact.
That’s it! Here’s what our View looks like on the frontend:

Clicking the “Send Message” button opens a modal with a form enabling us to send an email directly to that particular contact!
Build your own address book today!
In this post, I showed you how to build a powerful, user-friendly contact list that not only organizes your contacts but also lets you send emails to contacts directly from your site. By combining the flexibility of Gravity Forms with the power of GravityView, you can create an interactive address book that’s easy to update, search, and use!
Ready to customize it further? Go ahead and add your own fields, filters, or styling to make it truly your own. Happy building!

Helpful tips right in your inbox.
Subscribe to get the latest articles, information on releases and helpful Gravity Forms tips!
More articles

How to build a WordPress CRM without code (a contact database you own)
Build a simple WordPress CRM with GravityView. Turn the Gravity Forms entries you already collect into a no-code contact database you own, with no monthly fees.

Launch Log: Distance sorting for radius searches, DataTables search improvements, and import reliability fixes
The latest GravityKit releases add distance sorting to map searches, bring built-in search to DataTables, and fix GravityCharts and GravityImport edge cases.

WordPress page builder market share 2026: Elementor leads at 32.67%
Elementor reaches 32.7% of WordPress sites. WordPress Block Editor 20.6%, wpBakery 8.5%, Divi 5.7%. Latest HTTP Archive crawl, share-of-WordPress basis throughout.