Published
•
Updated
How to import Contact Form 7 entries to Gravity Forms in 5 simple steps
Migrate Contact Form 7 submissions to Gravity Forms without losing data. This 5-step guide uses GravityImport and the Flamingo add-on to transfer all entries safely.

Do you need a way to import contact form 7 entries to Gravity Forms?
Contact Form 7 is a simple and effective form plugin for WordPress, but there comes a time when you need more features, more integrations, and a more intuitive user interface. Gravity Forms offers all of this and more!
With a drag and drop builder, robust accessibility features, and a wealth of powerful add-ons, Gravity Forms has cemented its spot as the number one form plugin for WordPress.
In this post, we’ll show you how to migrate your form submissions from Contact Form 7 to Gravity Forms in 5 simple steps.
Wanna try it?
Spin up a demo
See GravityImport in action on its live demo site.

What you need
Here are the plugins/add-ons you’ll need for this tutorial:
- GravityImport
- Flamingo (Free add-on for Contact Form 7)
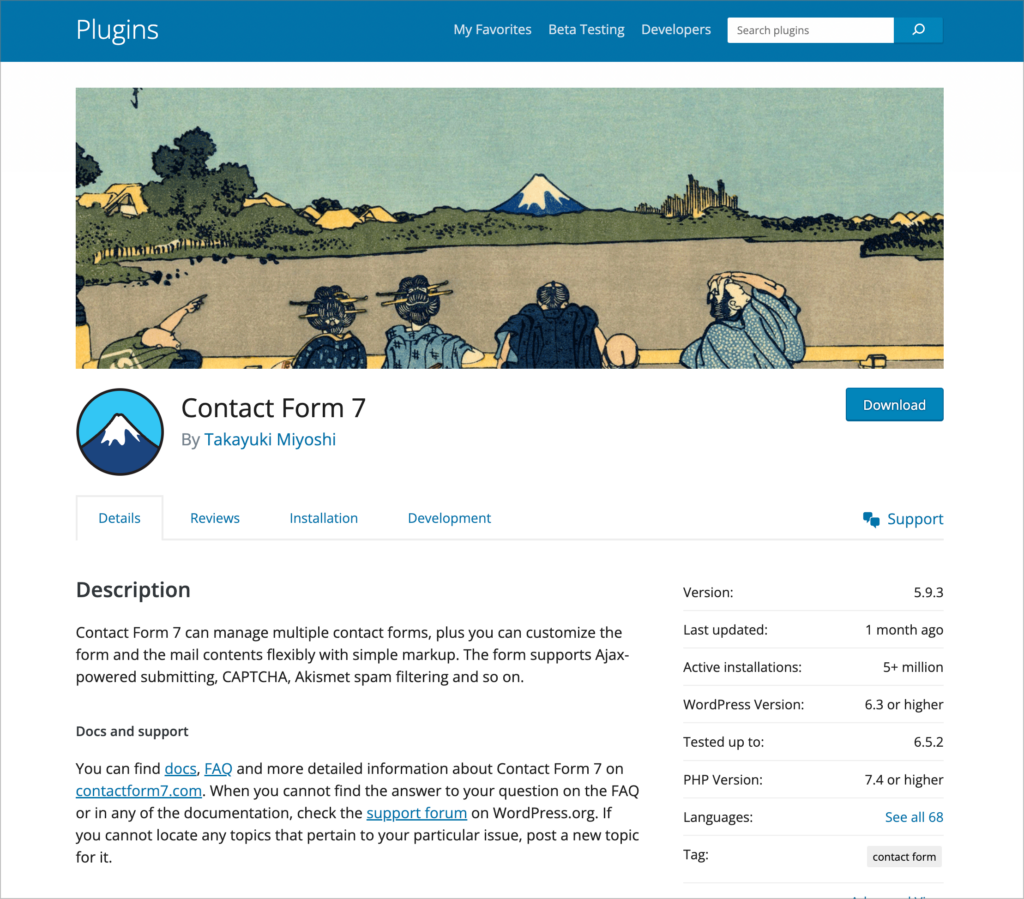
What is Contact Form 7 for WordPress?
Contact Form 7 is a form plugin for WordPress created by Takayuki Miyoshi. The plugin is one of a select few listed in the WordPress plugin directory to have over 5 million active installs!
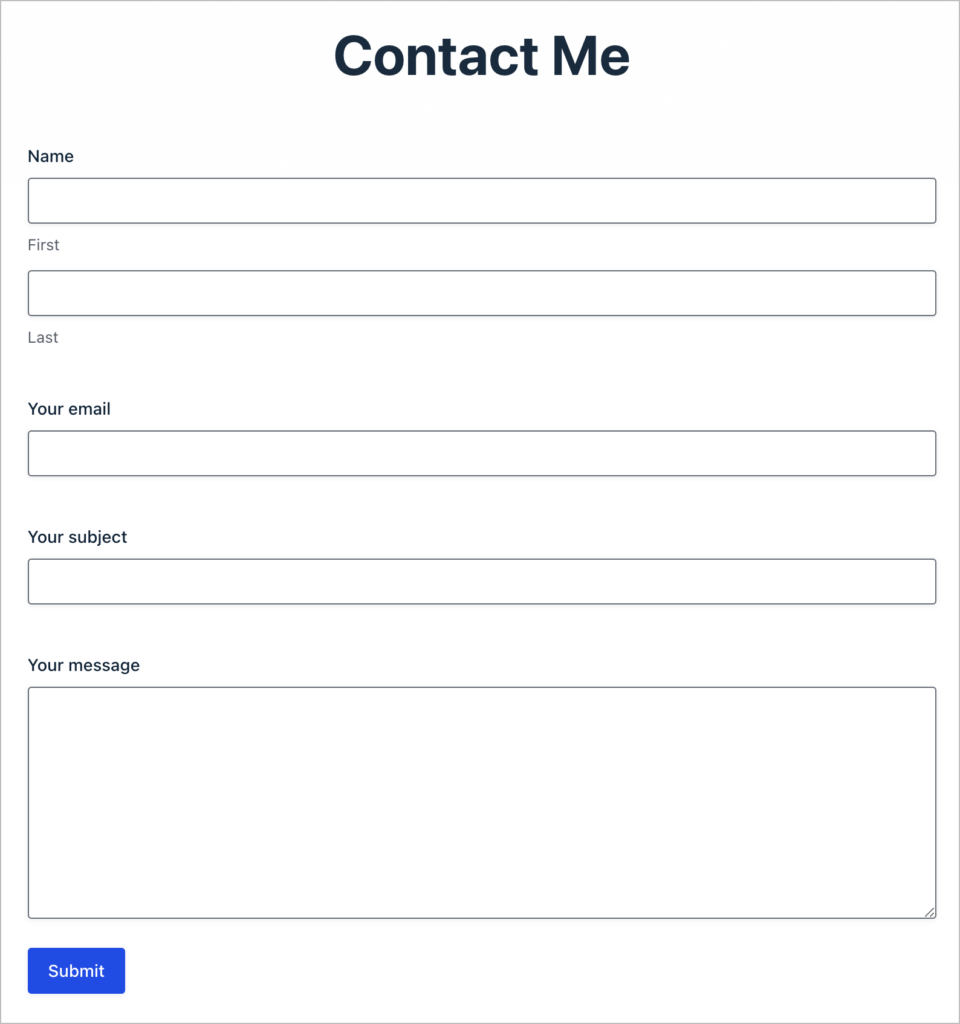
Contact Form 7 is built for simplicity, allowing you to customize a simple contact form using basic markup. After configuring your form, you can add it to a page or post using a shortcode.
Where do Contact Form 7 submissions go?
By default, Contact Form 7 does not store submitted messages anywhere on your webserver. Therefore, the only way to retrieve messages is through your mail server. If your mail server crashes or you make a mistake during configuration, you may lose important messages forever, with no way to get them back.
In order to prevent this from happening it’s best to install Flamingo, an add-on for Contact Form 7 created by the same author as the main plugin. Flamingo ensures that all of your form submissions are saved to your WordPress database.
With Flamingo, you can also search through your form entries from inside your WordPress admin and export them to a CSV file for easy migration.
Pro tipSee which is the better form builder by reading our detailed comparison of Gravity Forms and Contact Form 7!
1. Export your Contact Form 7 data as a CSV file
The first step is to export your form entries from Contact Form 7 as a CSV file. However, exporting contact form 7 entries isn’t as straightforward as you may think.
It’s important to note that by default, Contact Form 7 does not store form submissions in your WordPress database, and therefore, there is no way to export your entries unless you install an add-on.
There are several add-ons that allow you to store Contact Form 7 submissions in your database and export them to CSV. The most popular one is Flamingo and it’s free to download from WordPress.org.
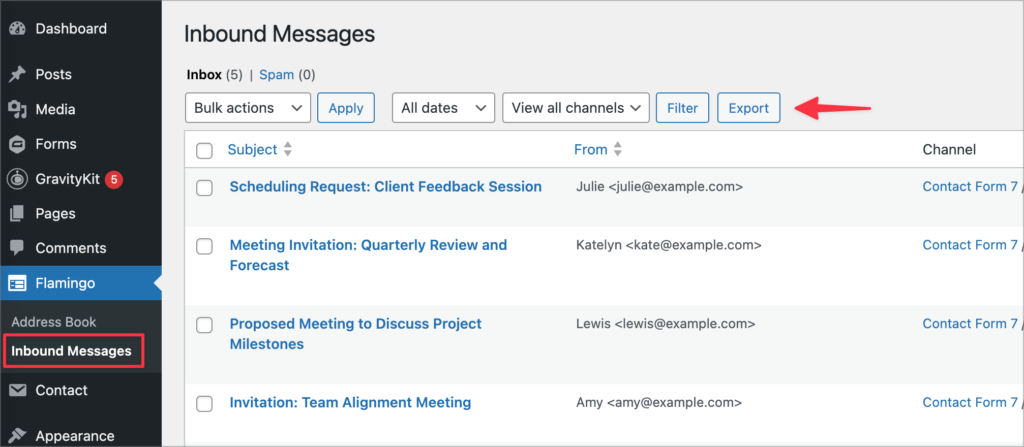
After installing and activating Flamingo, new form submissions will be saved to your WordPress database. To access these submissions, hover over “Flamingo” in the left-hand menu and click on “Inbound Messages”.
To export your entries to CSV, simply click on the “Export” button at the top.
Your form entries will now download to your computer as one single CSV file. Be sure to save this file somewhere you’ll remember.
2. Install the GravityImport plugin
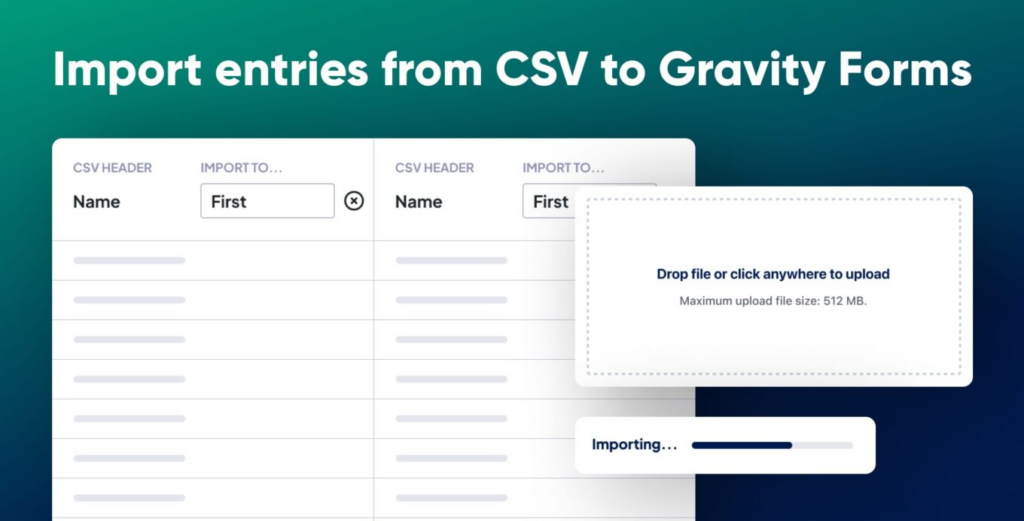
After exporting your form entries from Contact Form 7, you’ll need to install the GravityImport plugin. This will allow you to import your entries into Gravity Forms.
GravityImport allows you to migrate your forms and entries from a range of different form plugins to Gravity Forms. This includes Formidable Forms, Caldera Forms, and, of course, Contact Form 7!
To install GravityImport, follow the steps below:
- Purchase a GravityImport license from our website and download the plugin file.
- Log in to your WordPress site, hover over “Plugins” and click on “Add New Plugin”.
- Click “Upload Plugin”, select “Choose File” and select the plugin file you downloaded in the previous step.
- Click “Install now” and then “Activate”.
Now that GravityImport is active, the next step is to import your Contact Form 7 entries to Gravity Forms.
3. Upload your Contact Form 7 entries to Gravity Forms
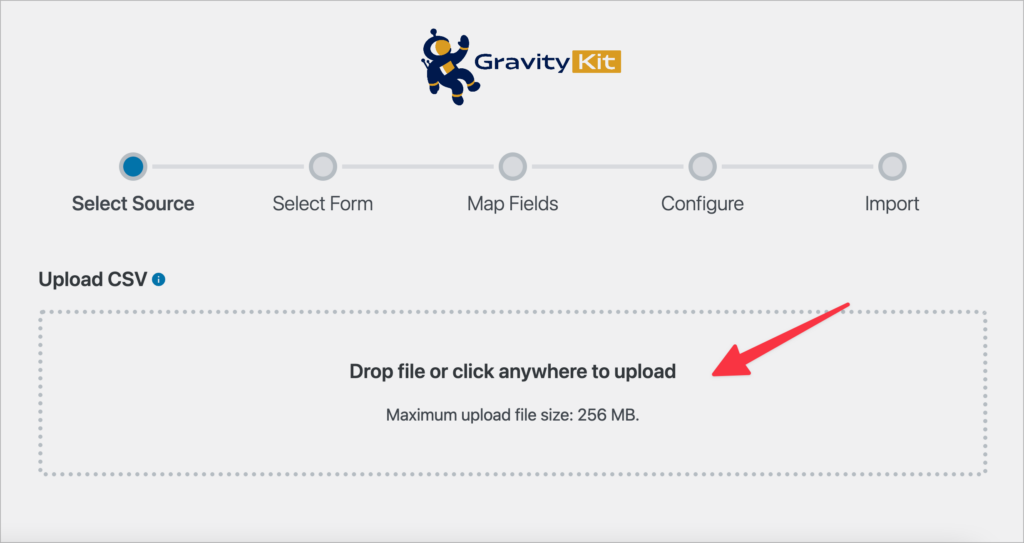
Hover over “Forms” in your WordPress admin men, click “Import/Export” and select the “Import Entries” tab on the left. You’ll now be prompted to upload a CSV file containing your form entries.
To upload your CSV, simply drag and drop it into the upload box!
After uploading your CSV file, scroll down to where it says “Where would you like to import the entries?” and choose whether you want to import your entries to an existing form or create a brand new form. By selecting “Create a New Form”, GravityImport will build a new form for you based on the entry data in your CSV file.
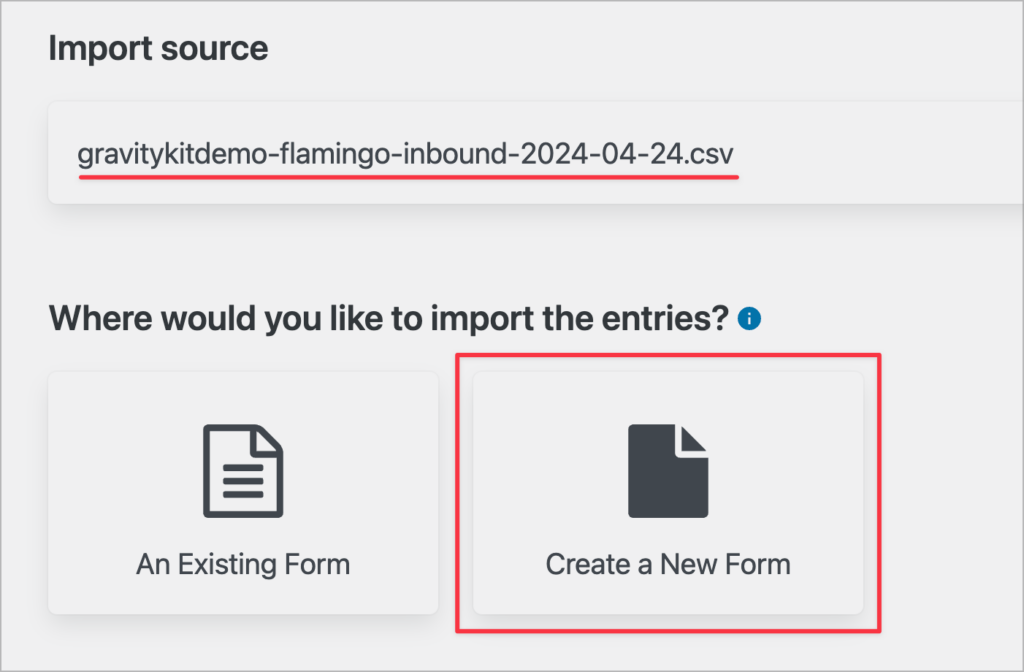
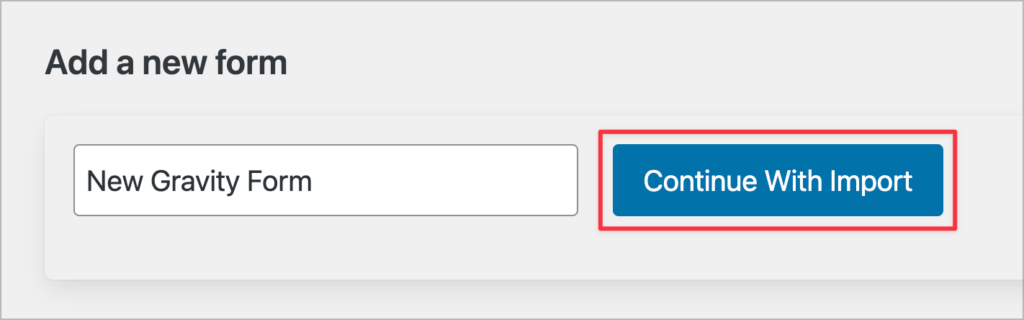
Now give your new form a name and click “Continue With Import”.
The next step is to map the columns in your CSV file to the correct field type in Gravity Forms.
4. Map your fields
Whether you’re importing your entry data to an existing form or creating a brand new form, you’ll need to map the columns in your CSV file to the correct field types in Gravity Forms.
The importer will automatically detect the different field types based on the content in your CSV file. However, you can overwrite this for any column by selecting a new field from the “Field Type” dropdown menu.

You can also change the field labels by clicking inside the “Field Label” input box and entering a new label. After mapping your fields, scroll down and click “Continue With Import”.
It’s possible that you may encounter the following error when trying to continue with the import process (“Date Not Recognized”). This means that the date format used in the CSV is not readable by Gravity Forms. To solve this, try selecting a new format from the dropdown or enter a custom date format.
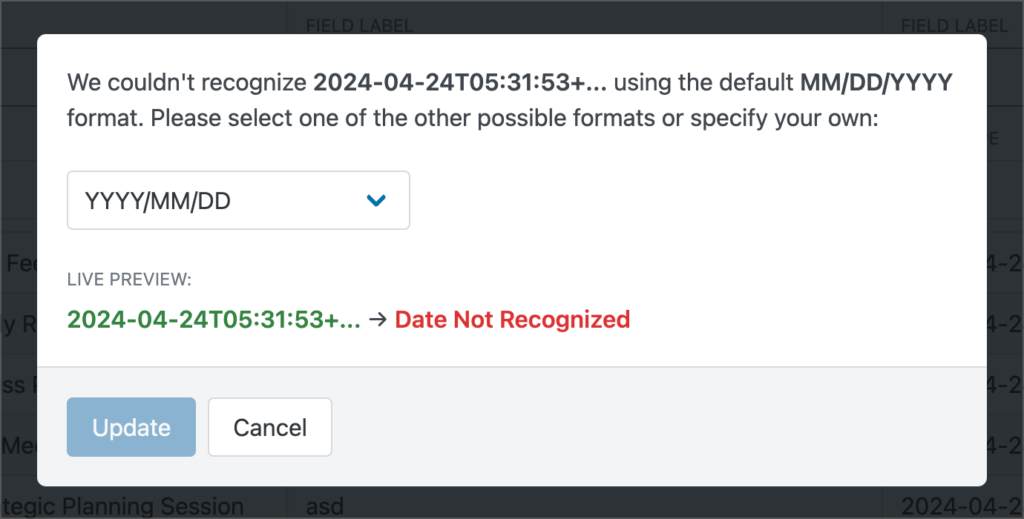
If that still doesn’t work, you’ll need to edit your CSV file and change the date format to one that is accepted by Gravity Forms.
5. Configure the import options
The final step of the import process is to configure the import options.
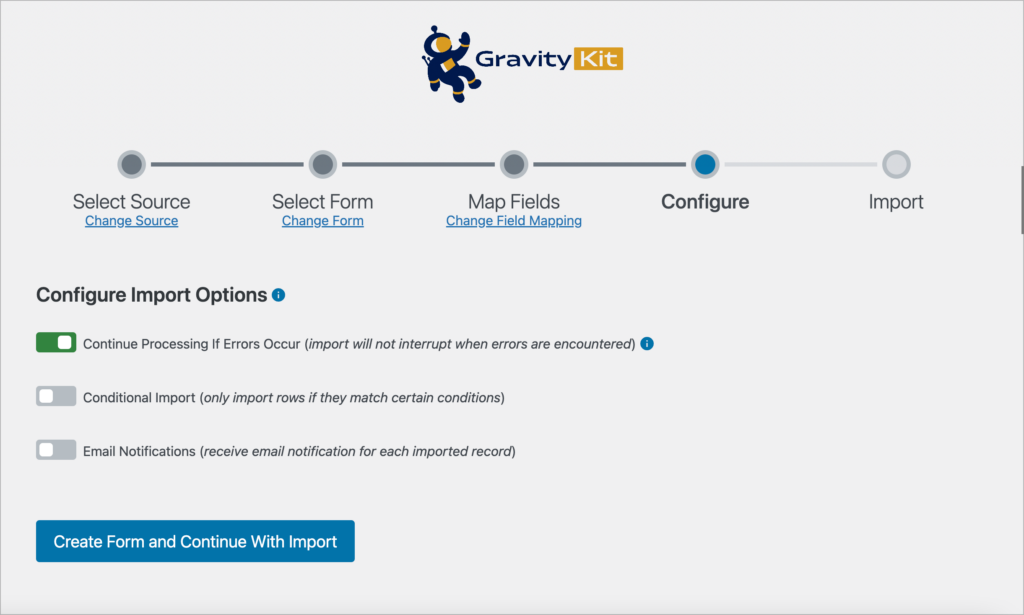
The following three options are available when importing to a new form:
- Continue Processing If Errors Occur
Keep this enabled to ensure the import continues even if errors arise.
- Conditional Import
Enabling this option allows you to use conditional logic to import entries that match certain parameters.
- Email Notifications
Enabling this option will ensure that any email notifications you have set up will send as normal when new entries are added.
After configuring the import options, click “Create Form and Continue With Import”. The importer will now import your entries to Gravity Forms and create a brand new form for you in the process!
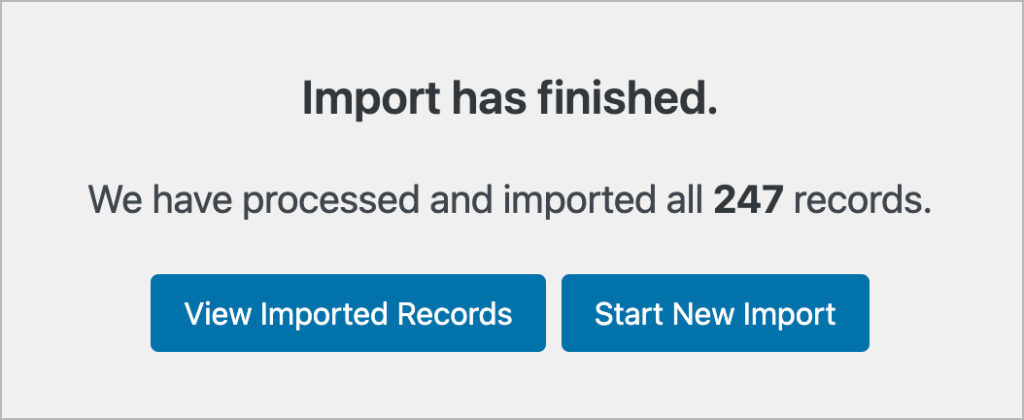
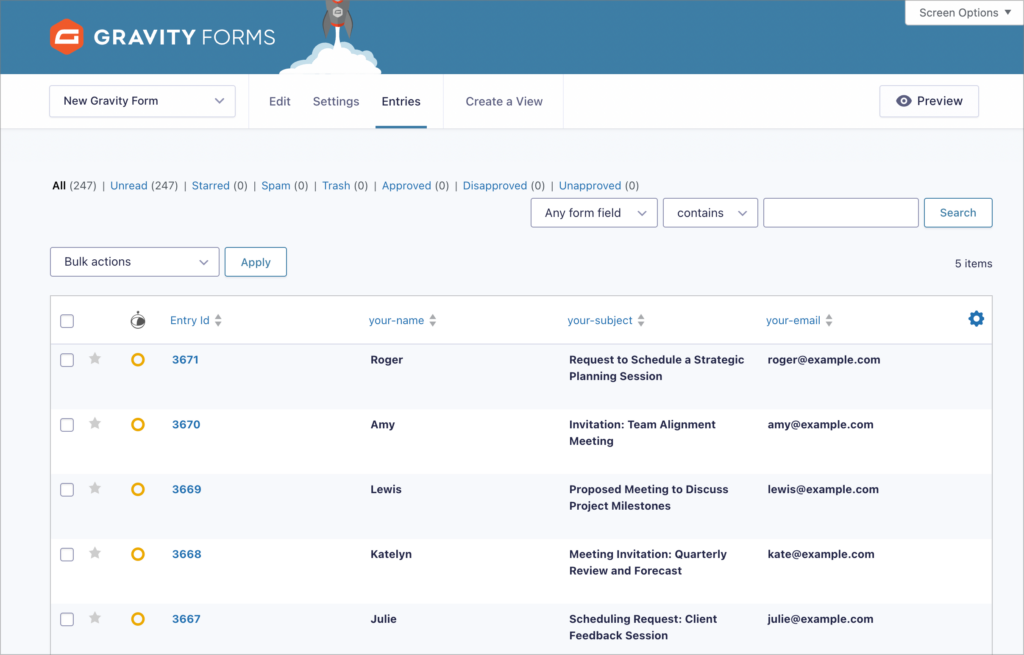
When the import has finished, click “View Imported Records” to view your new Gravity Form along with the entries attached to it.
That’s it! You have successfully imported your Contact Form 7 entries to Gravity Forms.
Optional: Replace your old Contact Form 7 with your new Gravity Form
Now that you’ve imported your form entries into Gravity Forms, you may want to replace your old Contact Form 7 form with your brand new Gravity Form.
To do this, head over to the page containing your Contact Form 7 shortcode and remove it from your layout.
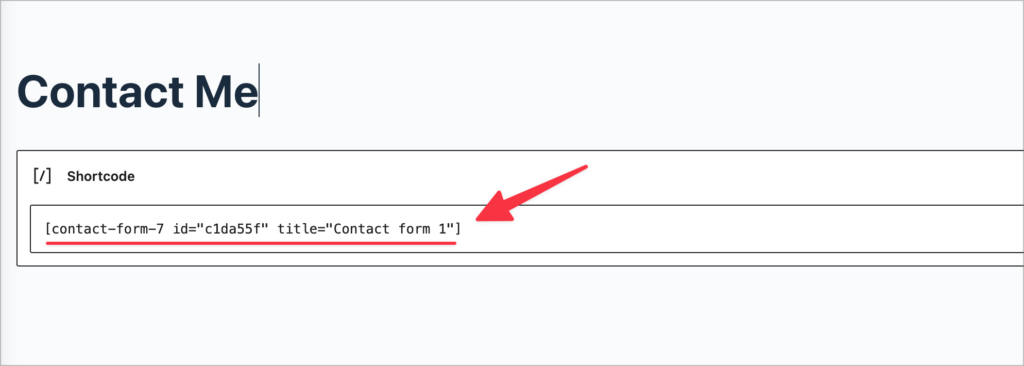
Next, click on the ‘+’ icon and search for the “Gravity Forms” block. After adding it to your page, select your newly created Gravity Form from the dropdown menu and wait for the preview to load.
Now update your page to save your changes and you’re done. Using this approach, you can easily convert Contact Form 7 forms to Gravity Forms!
Import your Contact Form 7 entries to Gravity Forms today
Contact Form 7 is one of the most popular free form plugins for WordPress. However, if you’re looking for more advanced features and a greater variety of integrations, Gravity Forms is a better bet!
To migrate your forms and submissions from Contact Forms 7 to Gravity Forms, get started with GravityImport! Using GravityImport, it’s easy to import Contact Form 7 entries to Gravity Forms. You can also create new forms during the import process, saving you time and manual effort later on.

Helpful tips right in your inbox.
Subscribe to get the latest articles, information on releases and helpful Gravity Forms tips!
More articles

Launch Log: GravitySearch arrives, plus AI spam review and GravityView fixes
This week, releases are anchored by a brand-new product! GravitySearch joins the GravityKit suite with cross-form entry search for Gravity Forms. Alongside it, Gravity Forms Zero Spam picks up an AI-powered review step, and GravityView sees fixes for Enhanced Security, Edit Entry, and Entry…

Meet GravitySearch: advanced global search for Gravity Forms
GravitySearch adds cross-form search to Gravity Forms: find any entry from one screen, build advanced filters, and preview results without leaving the page.

Block MCP is now a free WordPress plugin (and it sets itself up)
Block MCP is now a free WordPress plugin. Connect Claude or any MCP client to your site in minutes and let AI edit your content without breaking blocks.