Published
•
Updated
How to build an Autotrader clone (car dealership site) on WordPress with no code
Build a car dealership website like Autotrader on WordPress without writing code. Step-by-step tutorial using Gravity Forms and GravityView for listings, search, and contact forms.

Have you ever had the need to create a car dealership website like Autotrader using WordPress?
In this step-by-step tutorial, we’re going to show you how to build your very own Autotrader clone using the powerful duo of Gravity Forms and GravityView!
We’ll create a listing form, build a view to showcase new listings on the front end, integrate a user-friendly search bar, and even add a ‘contact seller’ form for each listing. Let’s dive in!
Check out our live demos and get your own free trial site preloaded with all GravityKit add-ons!
Download the free car dealership form template now!
Import the template into Gravity Forms and customize as necessary.
Sneak peek
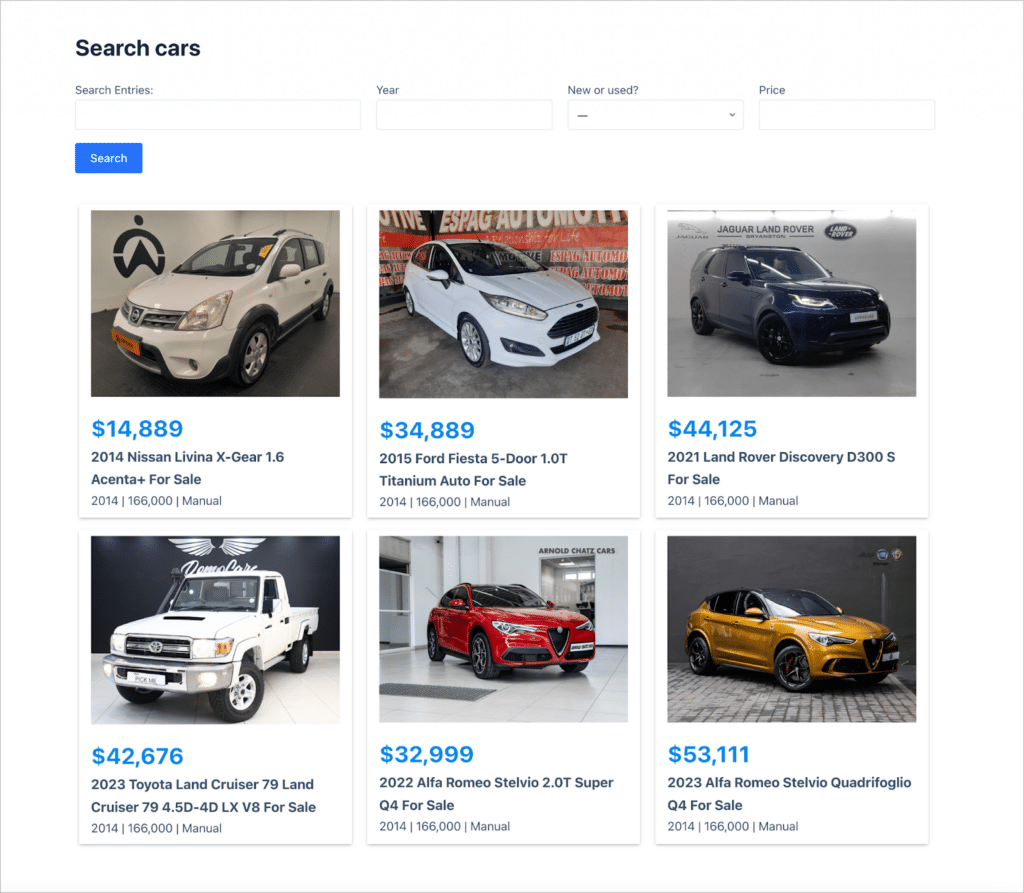
Here’s a sneak peek at the finished car dealership site that we’re going to build. As you can see, there’s a search bar at the top allowing users to search for cars based on different metrics.

Clicking on a car takes the user through to a page that shows additional information about that car, along with extra images. There’s also a contact form for buyers to contact sellers!

Keep reading to see exactly how we built it!
What you’ll need
Here are the plugins you will need to build a car dealership site like the one in this tutorial:
- Gravity Forms (any license level)
- GravityView (any license level)
What is Autotrader?
AutoTrader.com is a leading online marketplace for buying and selling new and used vehicles, including cars, trucks, and SUVs. It provides a platform for individuals and dealerships to list their vehicles for sale. Buyers can then search for vehicles based on various criteria such as make, model, price range, and location.
AutoTrader also offers research tools and resources to help consumers make informed decisions when purchasing a vehicle. This includes reviews, pricing information, and vehicle history reports. All in all, Autotrader is a go-to resource for people looking to buy or sell vehicles worldwide!
Why build a car dealership site on WordPress?
WordPress offers several benefits to those looking to create a professional and successful online presence in the automotive industry.
- Cost-effectiveness
One of the most attractive aspects of WordPress is its cost-effectiveness. It eliminates the need for expensive custom development, making it a budget-friendly choice for agencies and business owners.
- Customization capabilities
With WordPress, you can easily customize your car dealership website to meet your unique needs. Its extensive library of themes and plugins allows you to create a professional and feature-rich site that reflects your brand identity.
- Search engine optimization (SEO)
WordPress provides robust SEO capabilities and plugins, ensuring that your car dealership site ranks well in search engine results. This is essential for attracting potential buyers and increasing your site’s visibility.
- Flexibility and scalability
WordPress is a highly flexible platform that can grow with your business. Whether you’re just starting or expanding, it can accommodate your evolving needs without requiring a complete overhaul.
Now let’s take a look at some of the main features of Autotrader.com (the site we’re going to use as inspiration for our own car dealership design!).
Main features of Autotrader
Here are some of the features that make Autotrader stand out as a go-to resource for car buyers and sellers.
- Seller tools: Sellers can create detailed listings, upload photos, and reach a wide audience of potential buyers.
- Advanced search filters: Users can easily refine their search by various criteria such as make, model, price range, location, and specific features, making it simple to find the right vehicle.
- Ability to contact sellers: In addition to displaying contact details, AutoTrader.com often provides a contact form directly on the listing page. Users can fill out the form with their questions or inquiries and submit it to the seller or dealership.
- Car finance calculator: AutoTrader’s car finance calculator allows users to calculate the monthly payment on a new vehicle.
Using Gravity Forms and GravityView, we’re going to build a car dealership site with all these same features! Ours won’t include a car finance calculator, but this is possible to build (see our tutorial here: How to build a Gravity Forms mortgage calculator).
Building a car dealership site, step by step
Here are the steps we’re going to follow to create an online car dealership site on WordPress:
- First, we’ll create a submission form that allows sellers to create new listings for cars that they want to sell.
- Next, we’ll create a View to display new car listings on the front end. This will allow users to browse cars for sale.
- Finally, we’ll add a form to each listing allowing users to contact sellers directly if they’re interested in buying a car.
Let’s get started!
Creating the car listing submission form
To create a new form, we’ll hover over “Forms” and click “New Form”. Now we can start adding fields to our form using the Gravity Forms drag and drop editor.
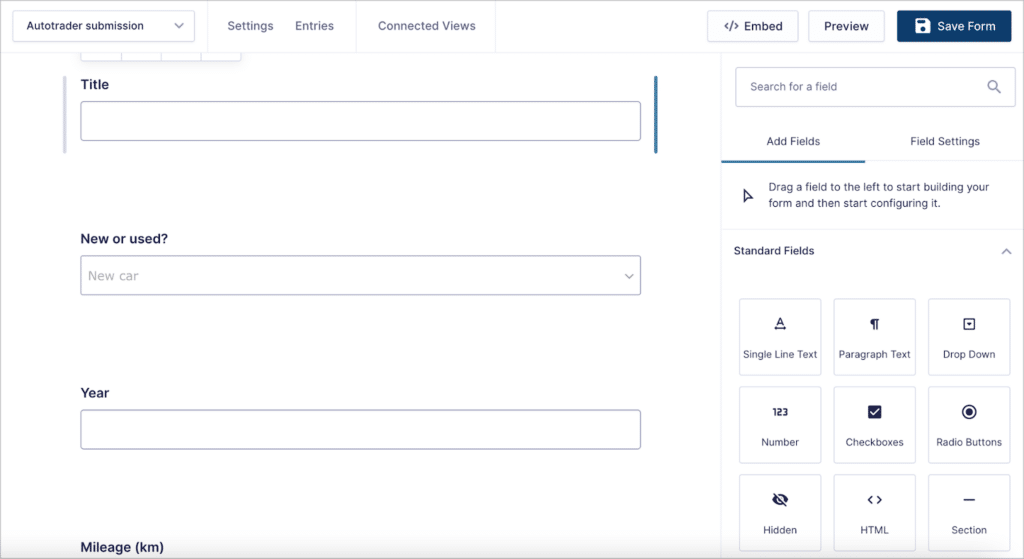
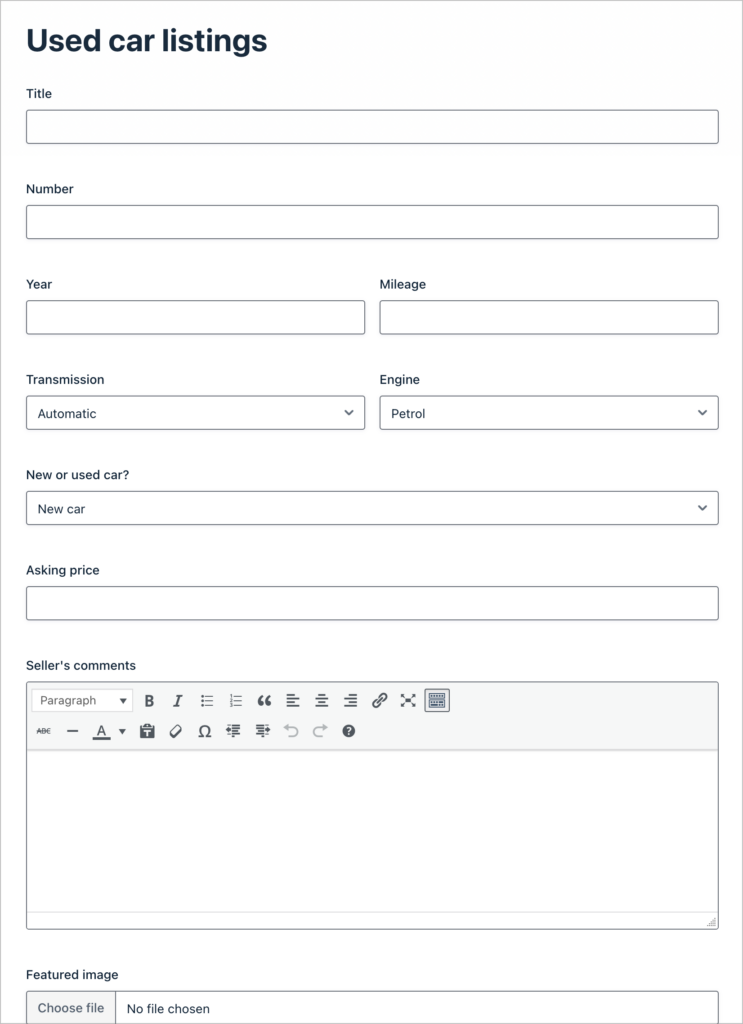
The fields you add here will depend on the type of information you want to capture. For this example, we’ll add the following fields to our form:
- Title (Single Line Text field)
- Year (Number field)
- Mileage (Number field)
- Transmission (Drop Down field)
- Engine (Drop Down field)
- Seller’s comments (Paragraph field)
- Price (Number field)
- Featured image (File Upload field)
- Color (Single Line Text field)
- Body type (Single Line Text field)
- Engine size (Single Line Text field)
- Number of seats (Number field)
- Number of doors (Number field)
- Photo gallery (Multi File Upload field)
- Seller phone (Phone field)
- Seller email (Email field)
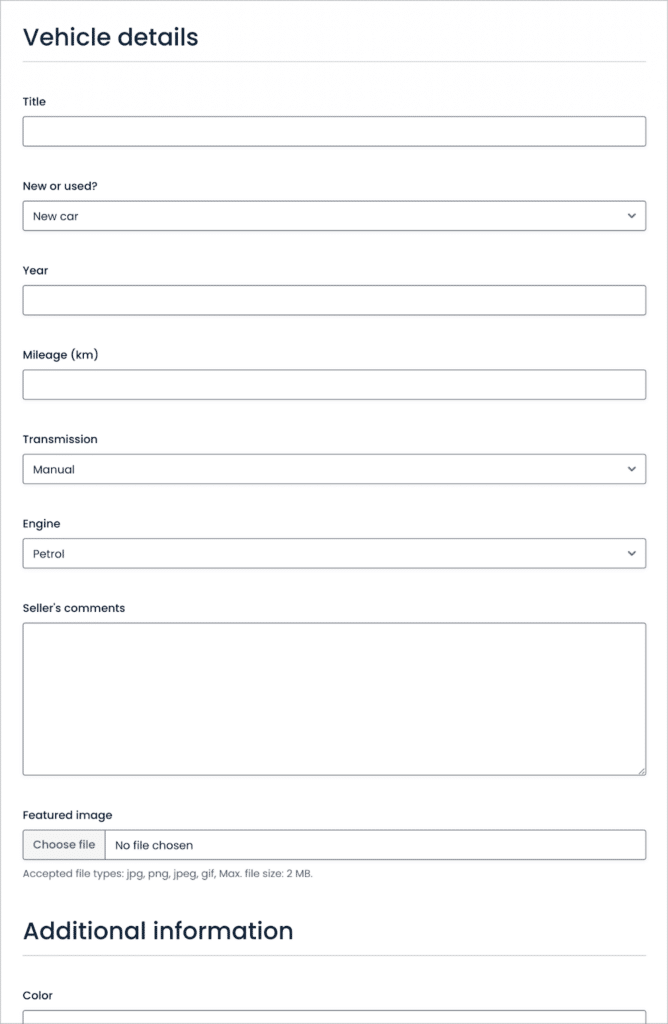
Here’s what our form looks like on the front end:
Save time by downloading our free car dealership listing form template now!
Building a View to display listings on the front end
Now that we have created the vehicle submission form, we can turn our attention to building a View to display new car listings on the front end.
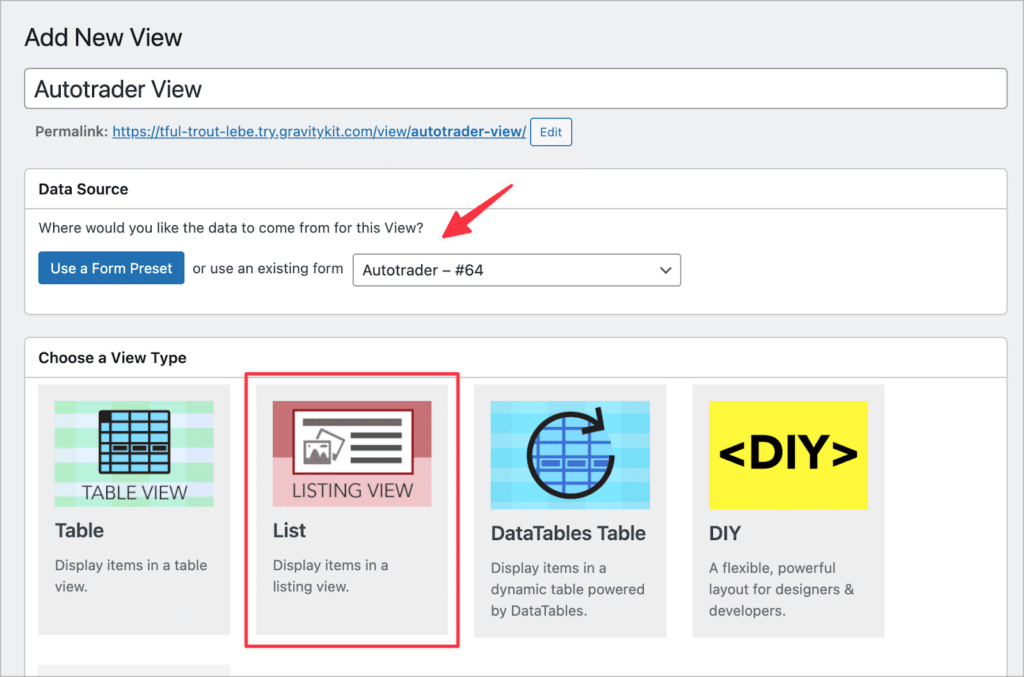
To create a new View, we’ll hover over “GravityKit” and click “New View”. After giving our View a name, we’ll select our Autotrader form as the data source and choose “List” as our View Type.
Now we can start configuring the View!
Configuring the Multiple Entries Layout
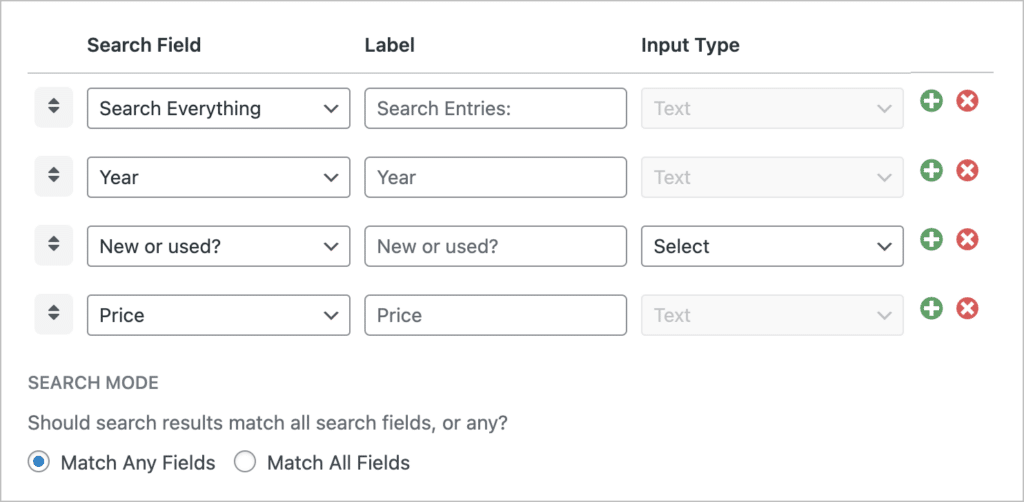
Let’s start by adding a Search Bar widget to the “Top Widgets” area. After adding the widget, we can click the gear icon to configure the search input settings. Here, we’ll add four search inputs, allowing users to search for cars by keyword, year, new or used, and price.
Now we can start adding fields to the “Entries Fields” section of the View editor. First, we’ll add the “Featured image” and the “Price” fields to the “Listing Title” section. Next, we’ll add the “Title” field to the “Subheading section”. And finally, we’ll add a Custom Content field.
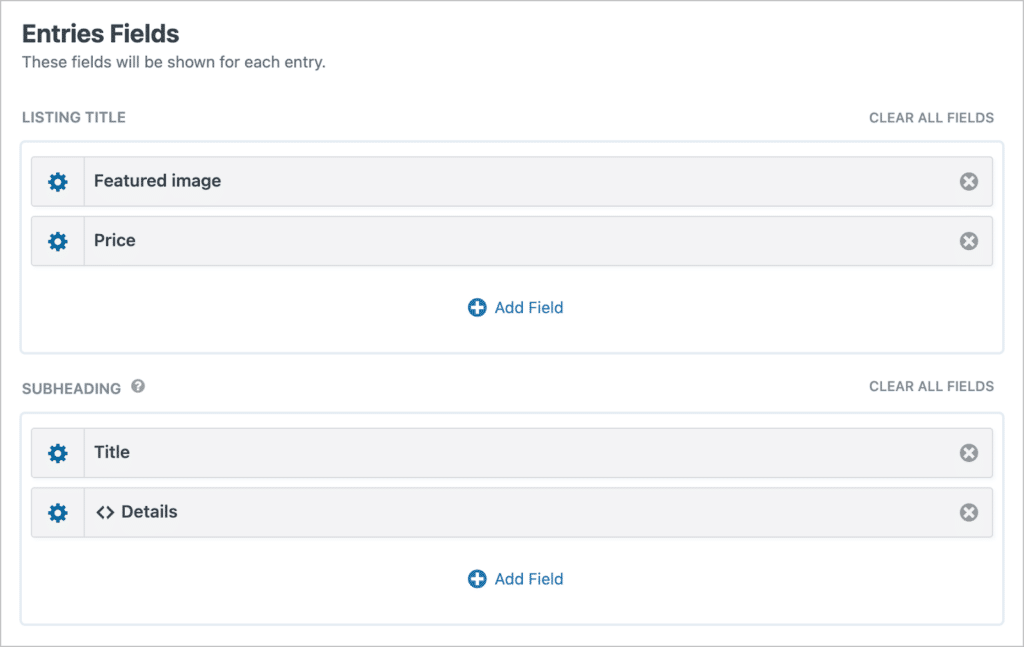
Inside the Custom Content field, we’ll use merge tags to display vehicle details (such as the year, mileage, and transmission) side by side.

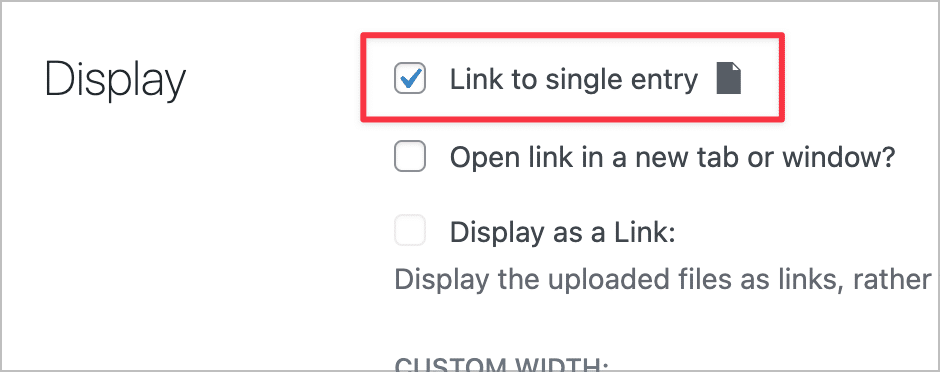
We’ll also make the featured image a link to the single entry page.
That’s it! Finally, we’re going to turn our List View into a grid layout, by adding some custom CSS code. To add custom code to our View, we’ll scroll down to the View settings, click on the “Custom Code” tab and paste it into the “Custom CSS” box.
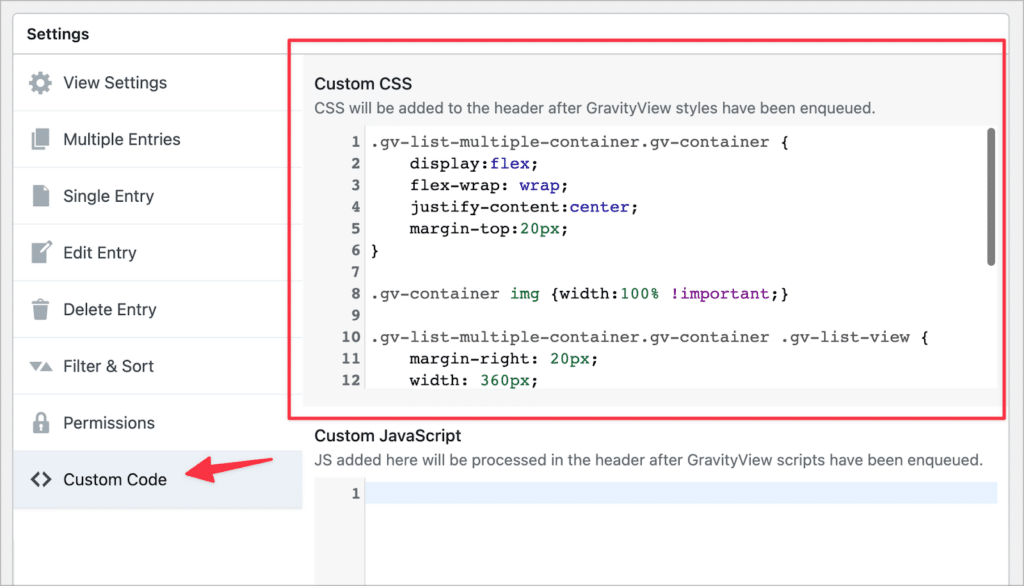
Here’s the code that we added. Note: You may need to tweak things depending on your website and theme!
.gv-list-multiple-container.gv-container{
	display:flex;
	flex-wrap: wrap;
	justify-content:center;
	margin-top:20px;
}

.gv-container img {width:100% !important;}

.gv-list-multiple-container.gv-container .gv-list-view {
        margin-right: 20px;
        width: 360px;
	box-shadow: rgba(50, 50, 93, 0.25) 0px 2px 5px -1px, rgba(0, 0, 0,  0.3) 0px 1px 3px -1px;
}
Okay, here’s what our Multiple Entries Layout looks like on the front end:
It’s looking good! Now we need to configure the Single Entry Layout.
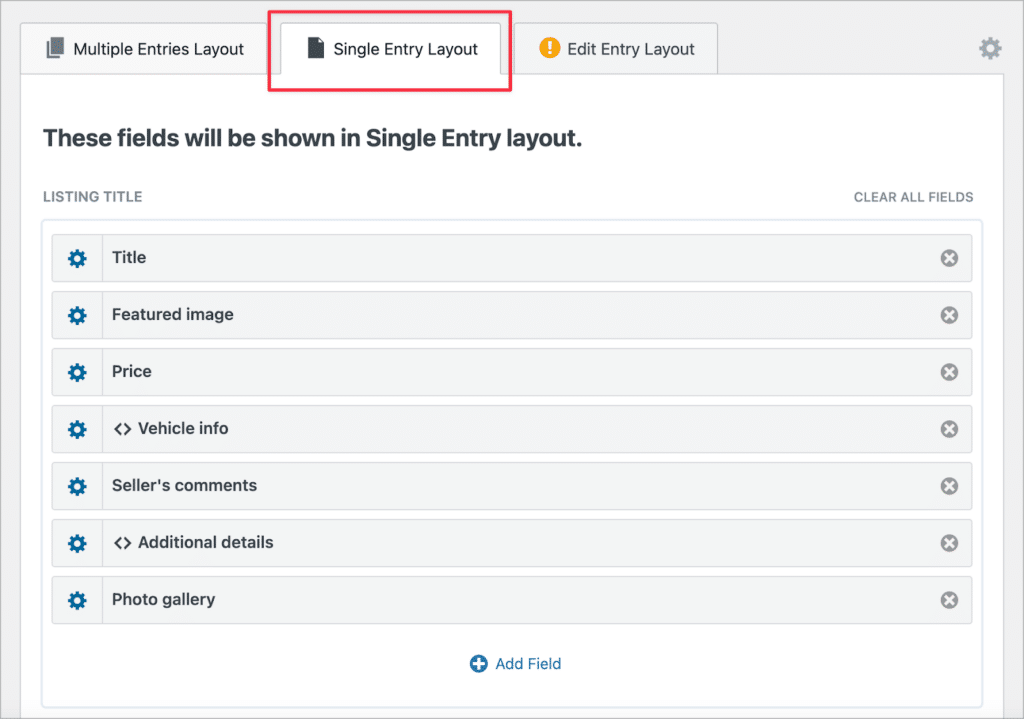
Configuring the Single Entry Layout
The Single Entry page is what users will see when they click to view more information about a specific car. To configure this page, we’ll click on the “Single Entry Layout” tab at the top of the View editor.
Let’s go ahead and add the remaining fields here.
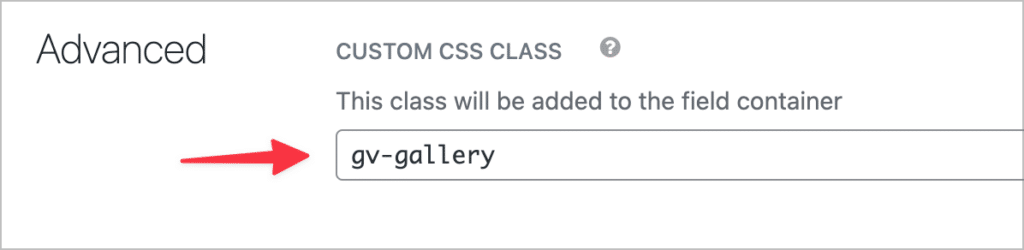
To ensure the “Photo gallery” field displays as an image gallery and not as a list of images, we’ll open the field settings and add a special CSS class called gv-gallery.
Finally, we need to add the “Contact Seller” form to the bottom of the listing.
Adding the “contact seller” form
We’re going to add a form to the bottom of each listing allowing buyers to contact sellers if they want to purchase a vehicle. To do this, we’ll need to create a new contact form in Gravity Forms.
For this example, we’ll create a simple form with the following fields:
- Name (Name field)
- Email (Email field)
- Phone (Phone field)
- Message (Paragraph field)
- Seller email (Hidden field)
The final field is a hidden field labeled “Seller email”. We need this so that we can pass the seller’s email address in the submission and use it as the sending address for the email notification that we’re going to create!
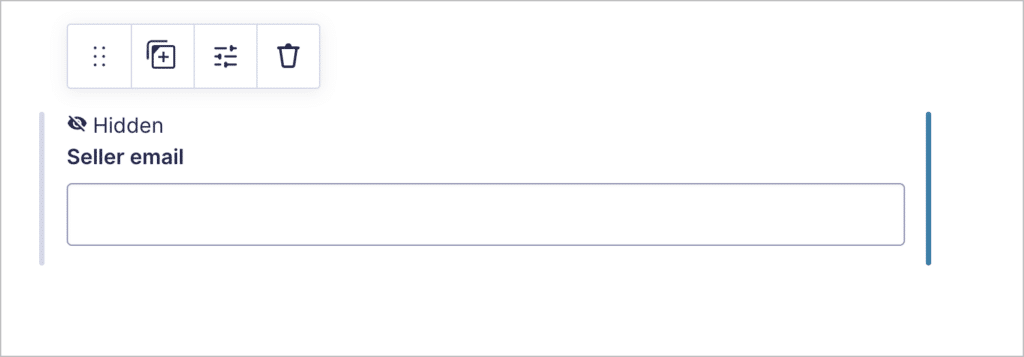
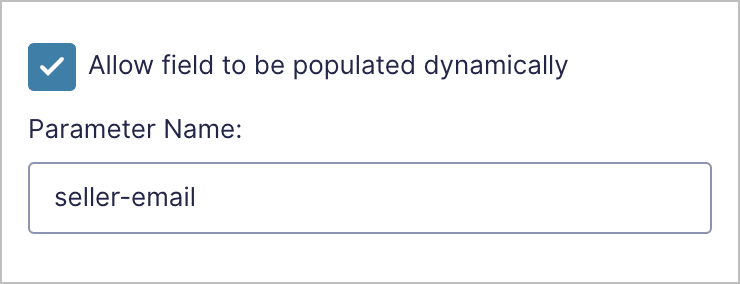
To enable dynamic population, we’ll open the field settings and check the box that says “Allow field to be populated dynamically”. We’ll also need to add a parameter name (in this case we’ll use seller-email, but this can be anything you want!).
Okay, now let’s head back to the View editor and embed our form using the “Gravity Forms” field.
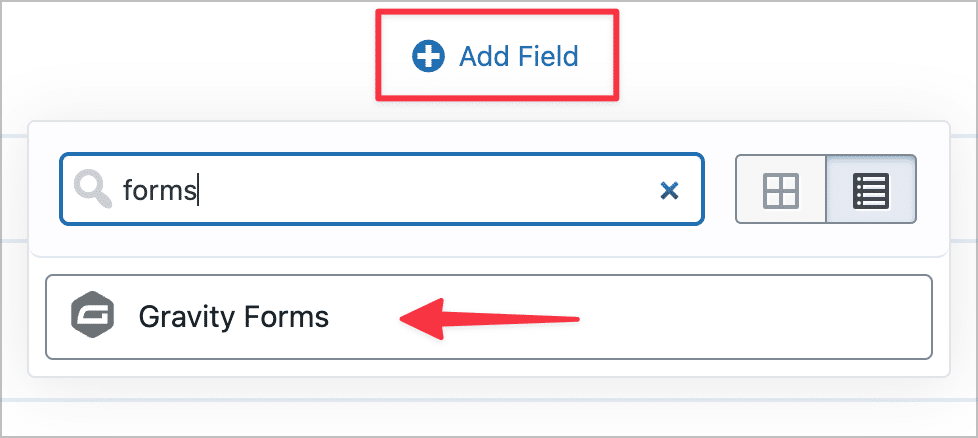
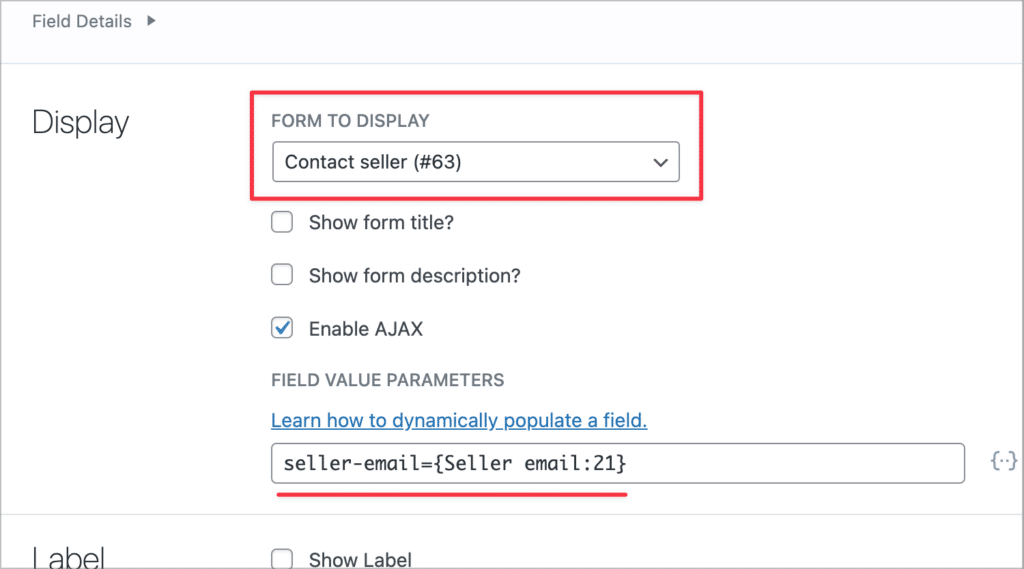
After adding the field to our View, we’ll need to open the field settings and select which form we want to embed from the drop down menu—We’ll select the “Contact seller” form that we created previously.
Here we’re also going to add field value parameters to ensure that our hidden form field is dynamically populated with the seller’s email address!
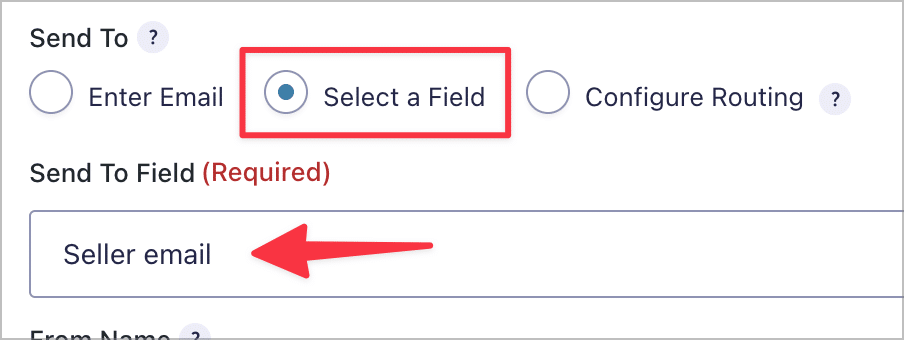
Now we can create a new form notification and set the “Send to” address to the seller’s email address. This will ensure that buyer enquiries are sent to the correct recipient! Just be sure to set the “Reply to” field to the buyer’s email address.
Pro tipTo learn more about dynamic field population in Gravity Forms, read our ultimate guide.
Here’s what the Single Entry Layout looks like on the front end:
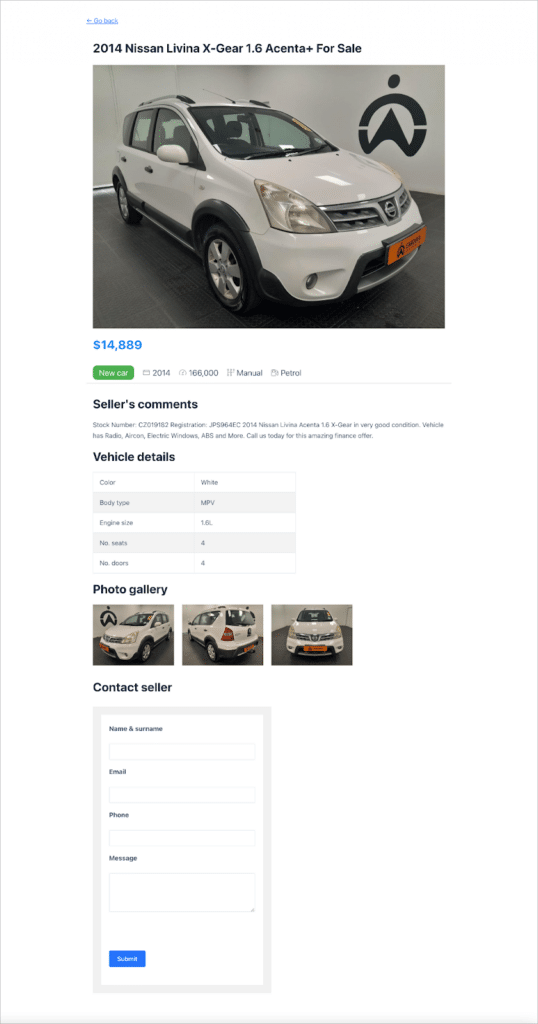
That’s it!
Build a car dealership site on WordPress with no code
AutoTrader.com is a popular online marketplace for buying and selling new and used vehicles.
In this tutorial, we showed you how to build an Autotrader clone (car dealership site) using Gravity Forms and GravityView. We started by creating a listing form. After that, we built a View to display new listings on the front end, added a search bar, and embedded a “contact seller” form on each listing page.
If you found this post helpful, check out our other tutorials showing you how to clone popular websites on WordPress using GravityView!

Helpful tips right in your inbox.
Subscribe to get the latest articles, information on releases and helpful Gravity Forms tips!
More articles

10 things you can ask AI to do with Gravity Forms (using the free GravityKit MCP)
See 10 practical things you can ask AI to do with Gravity Forms using the free GravityKit MCP: create forms, manage entries, build Views, and more.

Launch Log: theme template editing in Block MCP, Shield silentCAPTCHA for Zero Spam, and GravityView fixes
Block MCP adds safe theme template editing, Gravity Forms Zero Spam gains Shield silentCAPTCHA support, and GravityView fixes lightbox and notice bugs.

GravityKit turns 12: a year in review, and 30% off Lifetime All Access
GravityKit turns 12. A look back at a year of GravityView 3.0, GravitySearch, and AI-assisted building, plus a birthday sale on the Lifetime All Access Pass.
