Published
•
Updated
How to migrate your Gravity Forms forms AND entry data to a new site
Migrate Gravity Forms forms and entry data to a new website using GravityMigrate. Step-by-step walkthrough for moving everything in one transfer without manual workarounds.

For Gravity Forms users, moving data from one site to another has always been a daunting task. While Gravity Forms allows you to export entries and forms, there’s no way to migrate both forms and entry data from one site to another.
Transferring your data manually or using complicated workarounds requires significant time and effort, and often does not produce the desired result.
With GravityMigrate, the struggle is over! In this tutorial, we’ll guide you through the process of using GravityMigrate to move your forms and entry data from one website to another quickly and easily.
What is GravityMigrate?

GravityMigrate is a new add-on for Gravity Forms that makes it easy to migrate your forms and related data from one website to another. GravityMigrate gives you the ability to export your important Gravity Forms data and import it to a new website with no technical knowledge required!
Preserving the link between forms and entry data
You may be wondering why it’s necessary to use a third-party add-on for migrating forms and data. After all, Gravity Forms allows you to export/import forms, and you can also export entries.
However, Gravity Forms does not give you a way to import entries, and it does not allow you to import/export forms and entry data together. This is what makes GravityMigrate so powerful—it allows you to migrate all your data, exactly how it was on the old site!
So if you have dozens of forms and hundreds of entries and want to preserve that on the new site, GravityMigrate is the plugin for you!
Why migrate your forms and data to a new site?
There are many reasons why you may want to migrate your Gravity Forms forms and entry data to a new website:
- Moving to a new domain: Perhaps you are migrating your content to a new domain, or rebuilding your website entirely on a new host. In this case, having the ability to migrate your existing forms and entries will save you a lot of time and effort.
- Transferring data from a staging site: When designing a new website, it’s common to build on a staging site first before going live on production. When the time comes to go live, GravityMigrate makes it easy to move all Gravity Forms related data.
- Moving data from a demo site: We offer our users a free 30-day demo site preloaded with Gravity Forms and related add-ons. Many of our users build impressive setups on their demo site that they want to preserve and transfer to their own sites. GravityMigrate makes this easy!
When moving your data, the first thing you’ll need to do is install GravityMigrate on both your old and new websites.
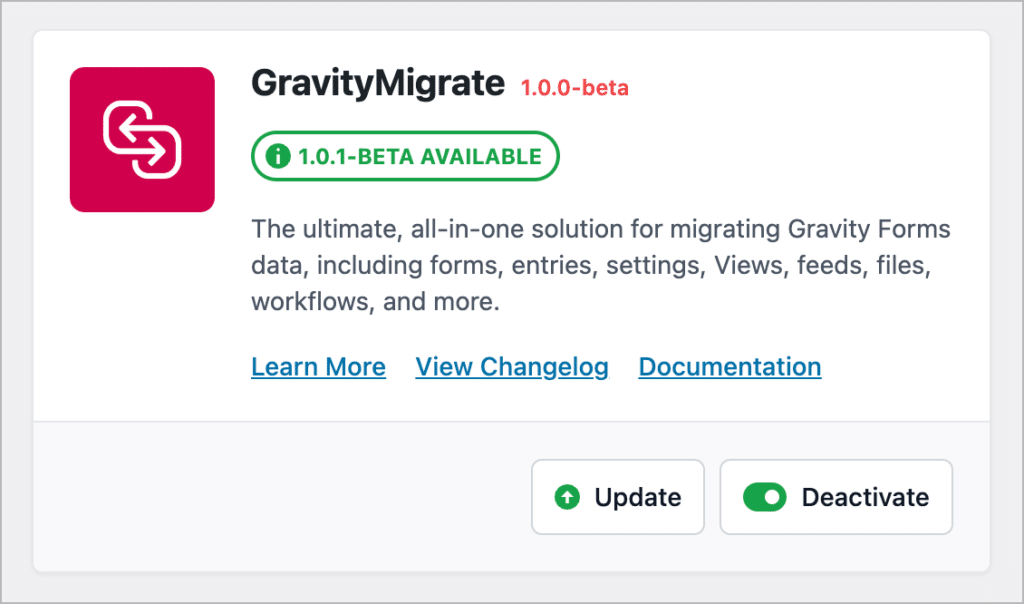
Install GravityMigrate on both sites
The GravityMigrate plugin is currently in beta and only accessible to users with a GravityKit All Access license. If you are an All Access customer, you can install GravityMigrate from the “Manage Your Kit” screen in your WordPress dashboard.
After installing and activating the GravityMigrate addon, the next step is to choose the data you want to migrate.
Select the forms and data you want to export
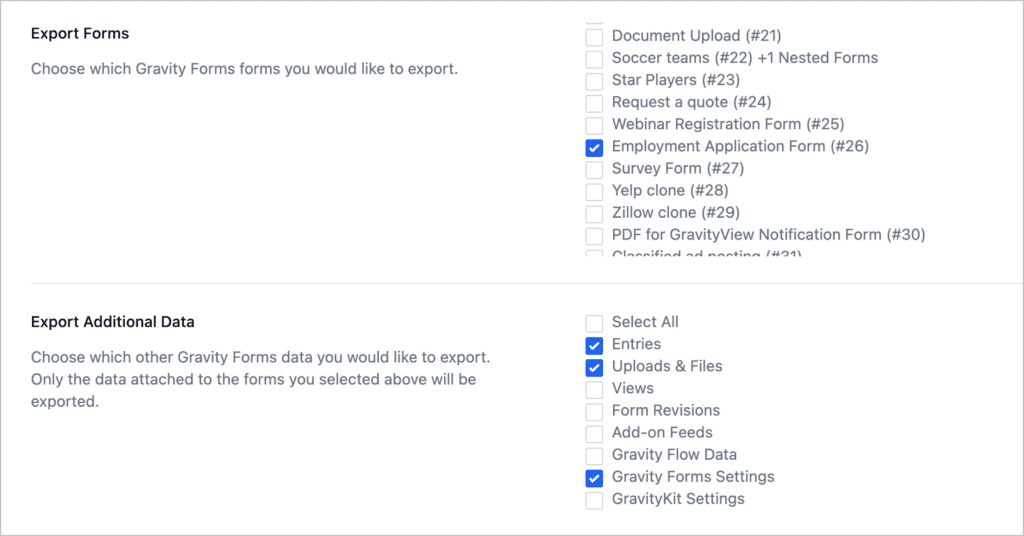
After installing GravityMigrate on your old site, hover over “GravityKit” and click “GravityMigrate”. Now scroll down to “Export” and select the forms and data you want to export.
In this example, we’ve selected our “Employment Application” form. Under “Export Additional Data” we’ve chosen to export the entries, uploads and files, and Gravity Forms settings related to our form.
Next, we’ll limit entries to those submitted within a certain date range, and set a password for the export file.
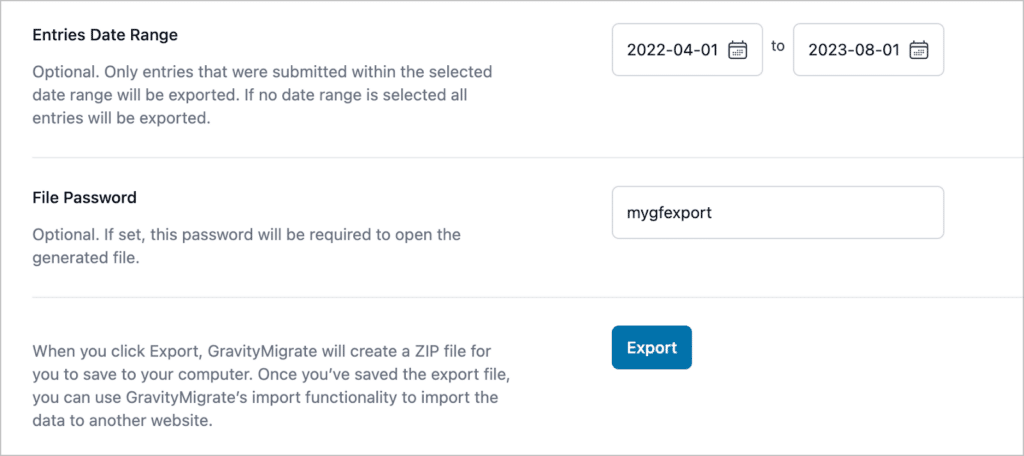
When we click “Export”, GravityMigrate will generate a ZIP file containing our chosen forms and the additional data we selected (entries, files, and settings).
Pro tipWith GravityMigrate, you can migrate all your Gravity Forms related data (not just forms and entries), including add-on data & settings, files, and more!
Import the data to the new site
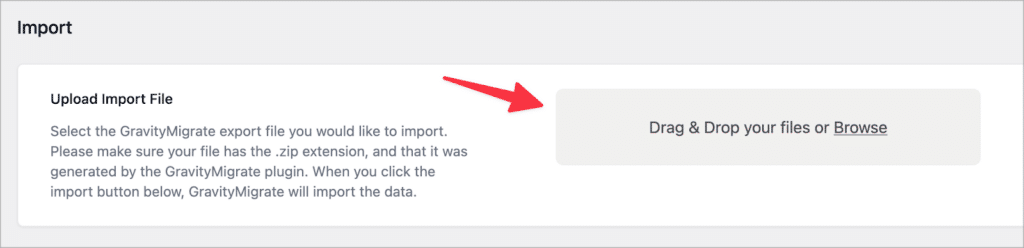
After downloading the GravityMigrate export file, the next step is to import the data to your new website.
Start by logging in to your new website, hovering over “GravityKit” and clicking “GravityMigrate”. Now drag and drop your ZIP file into the box to begin the import process.
After your file has been processed, you will need to select the data you want to import. To import everything that you exported from the old site, simply click “Select All”.
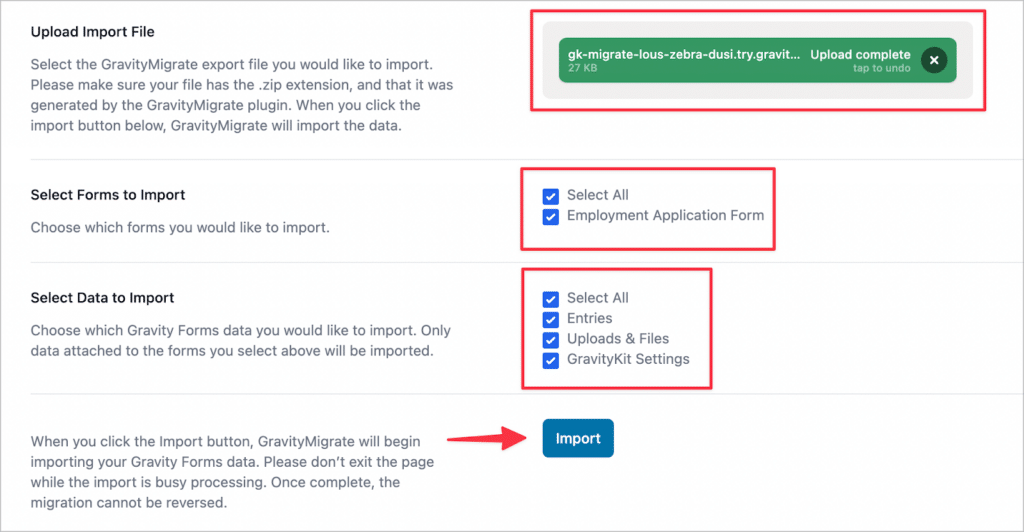
When you’re done, click “Import”. GravityMigrate will then begin importing your data. Importing can take several seconds, depending on the amount of data you have, so don’t exit the page during this process.
When the import has finished, your forms and entries will be exactly how they were on the old site. That’s it!
Check your data
Once the import process is complete, go to the “Forms” page and double check that your forms were correctly imported. Then check out the entries associated with those forms to ensure they were also correctly imported.
Migrate your Gravity Forms forms and entries to your new website
Moving Gravity Forms data from one site to another can be a complex and time-consuming task. While the Gravity Forms plugin does allow you to export forms and entries, there’s no way to migrate these to a new website.
In this post, we showed you how to migrate your Gravity Forms forms and entries to a new website using GravityMigrate. This powerful add-on is the ultimate, all-in-one migration tool for Gravity Forms, so add it to your toolkit today!

Helpful tips right in your inbox.
Subscribe to get the latest articles, information on releases and helpful Gravity Forms tips!
More articles

WordPress page builder market share 2026: Elementor leads at 32.67%
Elementor reaches 32.7% of WordPress sites. WordPress Block Editor 20.6%, wpBakery 8.5%, Divi 5.7%. Latest HTTP Archive crawl, share-of-WordPress basis throughout.

Launch Log: GravityView 3.0, plus upgrades to Block MCP and GravityKit MCP
GravityView 3.0 lands with the new Vantage theme, frontend bulk actions, and AI-assisted View creation. This launch log also covers updates to GravityKit MCP, Block MCP, and Dashboard Views.

Announcing GravityView 3.0: a fresh new look, AI View creation, and native page builder support
GravityView 3.0 is here: restyle Views with the new Vantage theme, build them with AI, embed them in any page builder, and run bulk actions on the front end.