Did you know that Gravity Forms can handle user login and registration on WordPress? Creating a user-friendly login experience is essential for any website, especially if you’re managing multiple users.
In this guide, I’m going to walk you through the process of creating a Gravity Forms login form! I’ll also show you how to register new users and create user profile pages.
Let’s dive in!
Table of contents
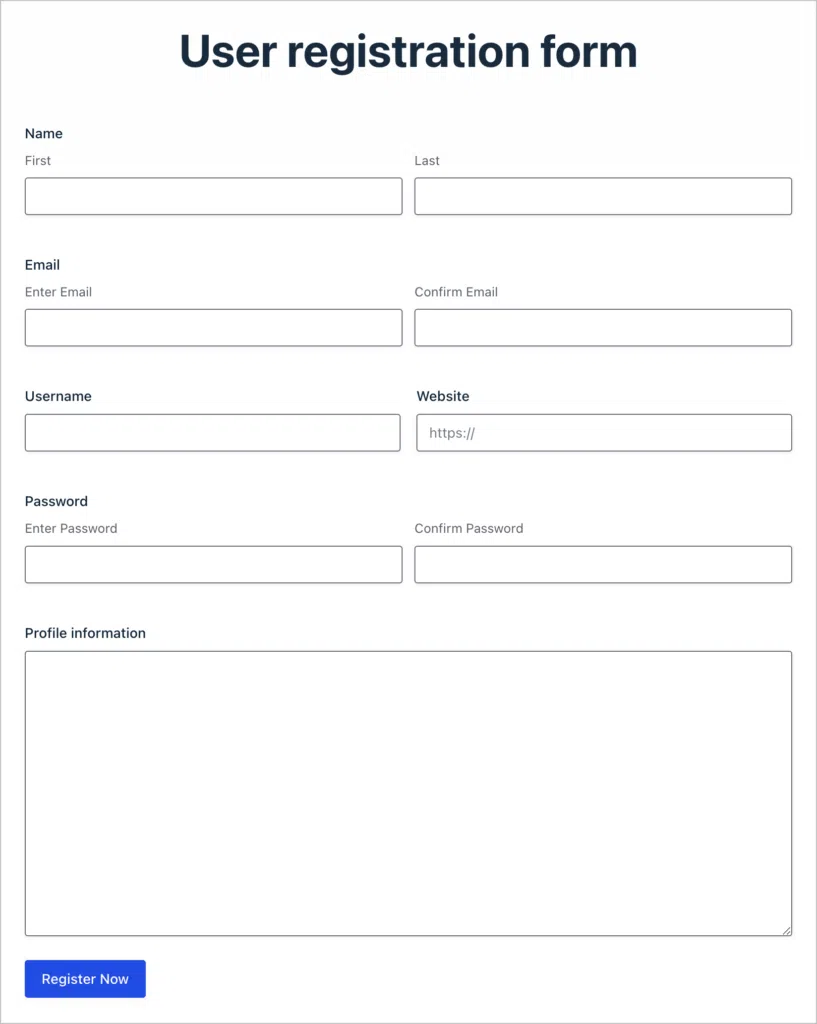
Download the free user registration form template now!
Import the template into Gravity Forms and customize as necessary.
Creating a new login form
In Gravity Forms, you can make a login form using a special shortcode. However, you’ll need to have the User Registration Add-On installed on your site first. Here are the steps to follow:
- Install and activate the Gravity Forms User Registration add-on
- Embed a login form on your site using the login form shortcode
- Create a user registration form (optional)
- Configure the shortcode parameters
Let’s go through each step in detail!
Installing the User Registration add-on
To access the User Registration add-on, you’ll need a Gravity Forms Elite license.
If you already have an elite license, log in to your WordPress site, hover over “Forms” and click “Add-Ons”. Now scroll down to the User Registration add-on, click “Install” and then “Activate”.
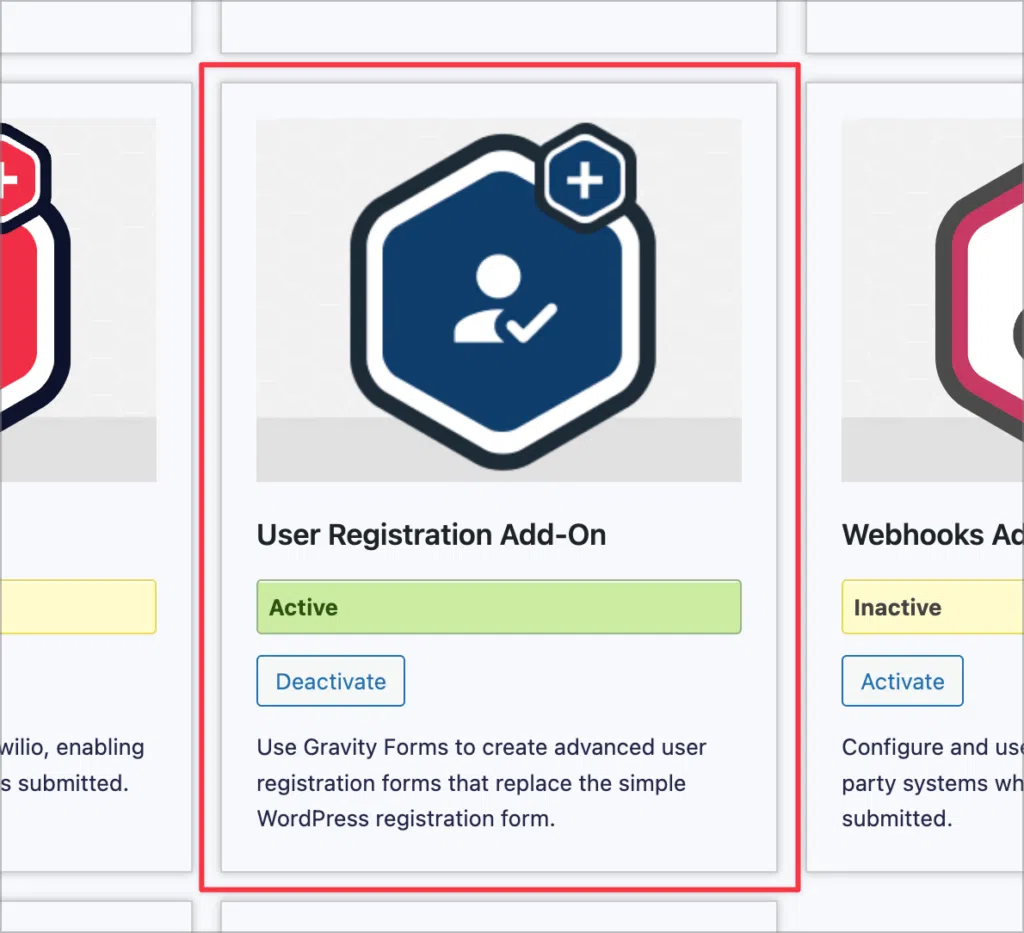
Now that you have installed the add-on, you can create forms to register new users or log in existing users!
Creating a new Gravity Forms login form
If you already have a way to register new users on your site, and you’re only looking to add a login form, then you can do so using the login form shortcode.
The Gravity Forms login form shortcode enables you to embed a login form anywhere on your site! The form includes a username and password field.
Here’s an example of a basic login shortcode:
[gravityform action="login" description="false" logged_in_message="You are already logged in"/]The shortcode accepts several parameters, allowing you to customize most aspects of the form. We’ll go through these a bit later. Here’s what the login form looks like on the front end:
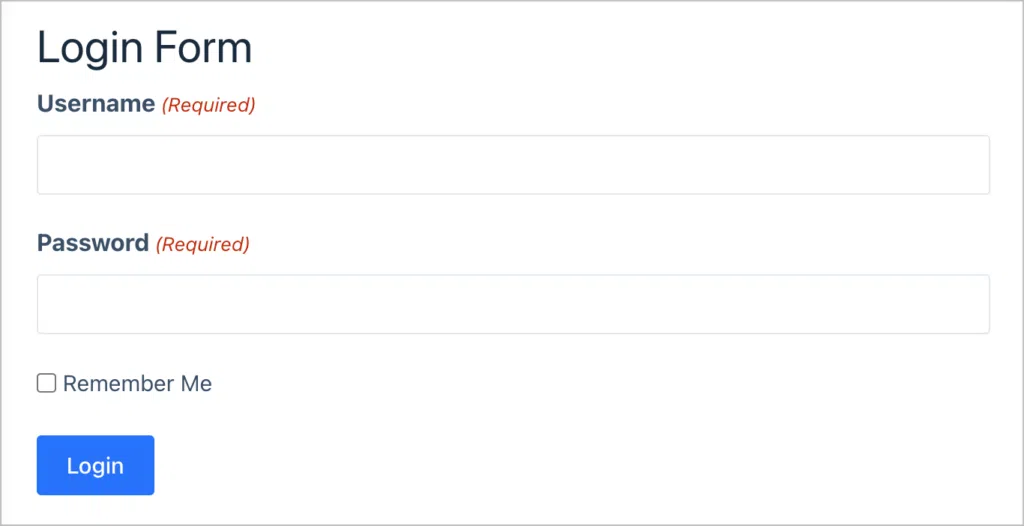
As you can see, unlike other Gravity Forms shortcodes, you do not have it pass it a form id. Instead, simply include action="login".
Redirect users after login
Using the Gravity Forms login form shortcode, you can redirect users after logging in or out. To do this, simply include the login_redirect or logout_redirect parameters with a URL of your choice.
login_redirect: The URL that the user is redirected to after they have logged in.logout_redirect: The URL that the user is redirected to after they have logged out.
Here’s an example:
[gravityform action="login" description="false" logged_in_message="You are already logged in" login_redirect="https://www.mydomain/account" logout_redirect="https://www.mydomain/home" /]In this example, users will be redirected to the account page when logging in, and they will be redirected to the home page when logging out.
💡 Pro tip: Learn more about the Gravity Forms login form shortcode and see a full list of supported parameters here.
Customizing the login form using PHP code
When I was adding a new login form to my website, I wanted to change the title of it, but I realized there was no parameter for this! The default title is always “Login Form”, and the only way to change it is to use a filter. Luckily, it’s not that complicated, even for less technical folks!
Here’s how to do it:
add_filter( 'gform_user_registration_login_form_title', 'change_title', 10, 1 );
function change_title( $login_form_title ){
    return 'This is my new title';
}
You can learn more about this filter on the Gravity Forms docs page.
If you want to customize the login form further, you’ll need to use additional PHP code. Gravity Forms has some helpful docs on this, with examples for implementing specific customizations.
Logging in with social media
Gravity Forms does not support social login. This means that users will need to log in using their username/email and password. Users will not be able to log in using their Google or Facebook accounts, for example.
Creating a registration form for new users
So now you have a way for existing users to log in through Gravity Forms, but what about new users?
To allow new users to register for an account on your site, you can create a user registration form.
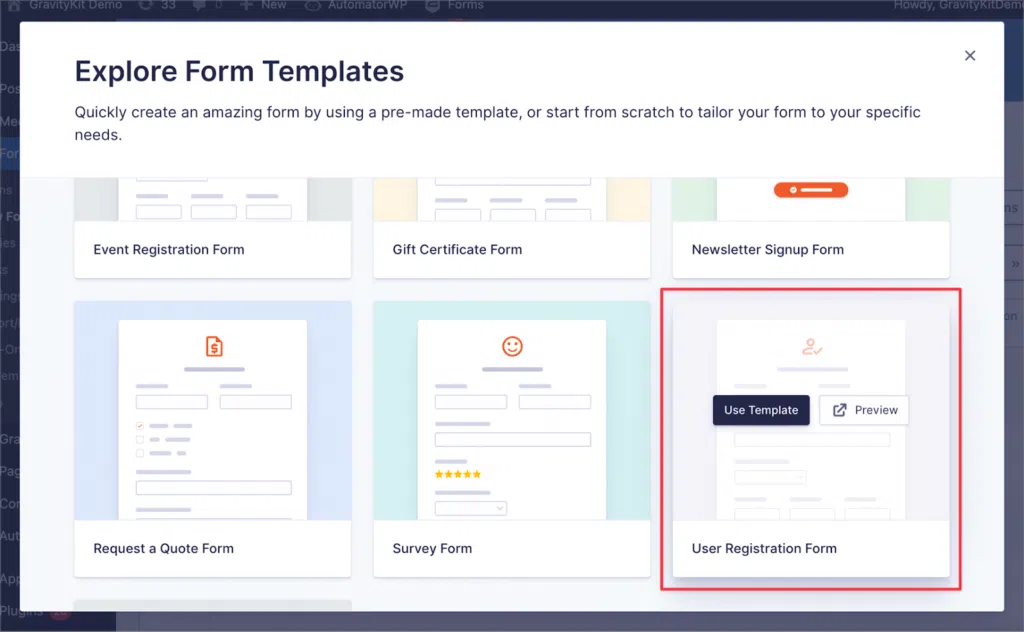
Hover over “Forms” and click “New Form”. Now you’ll see a list of preset form templates. Scroll down to the “User Registration Form” template, hover over it and click “Use Template”
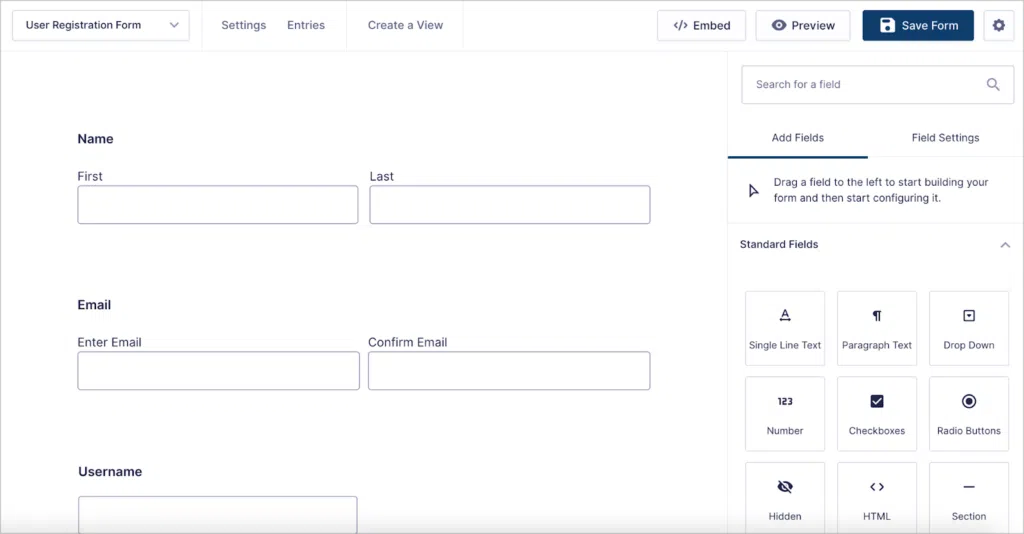
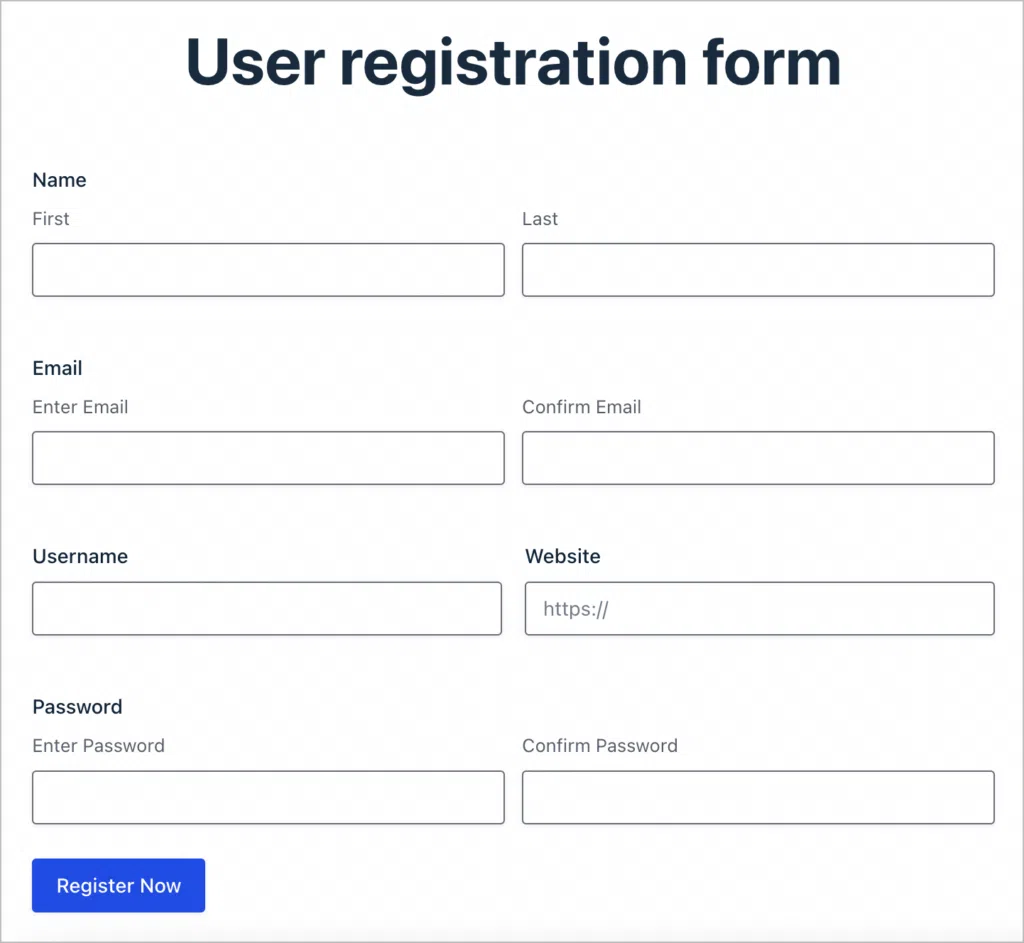
You’ll be taken to the Gravity Forms editor, where you can view the form and customize it if you wish to do so. The default user registration form template includes the following fields:
- Name
- Username
- Password
However, if you would like include additional fields, or enable payments, you can do that by adding the relevant form fields.
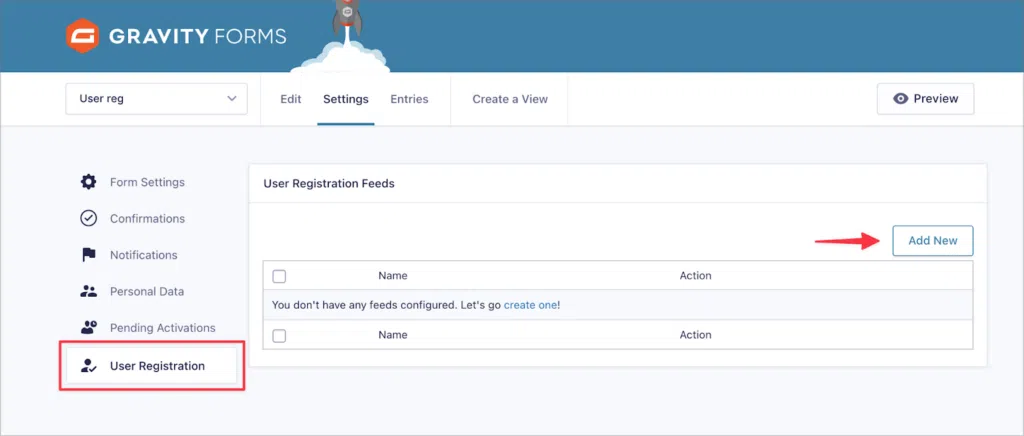
When you’re finished creating your form, you’ll need to configure the user registration feed. To do this, click on “Settings”, then “User Registration”, and then “Add New”
After adding a new User Registration feed, the next step is to select an action. This defines what happens when a user submits your form. To create a new user, select “Create User”.
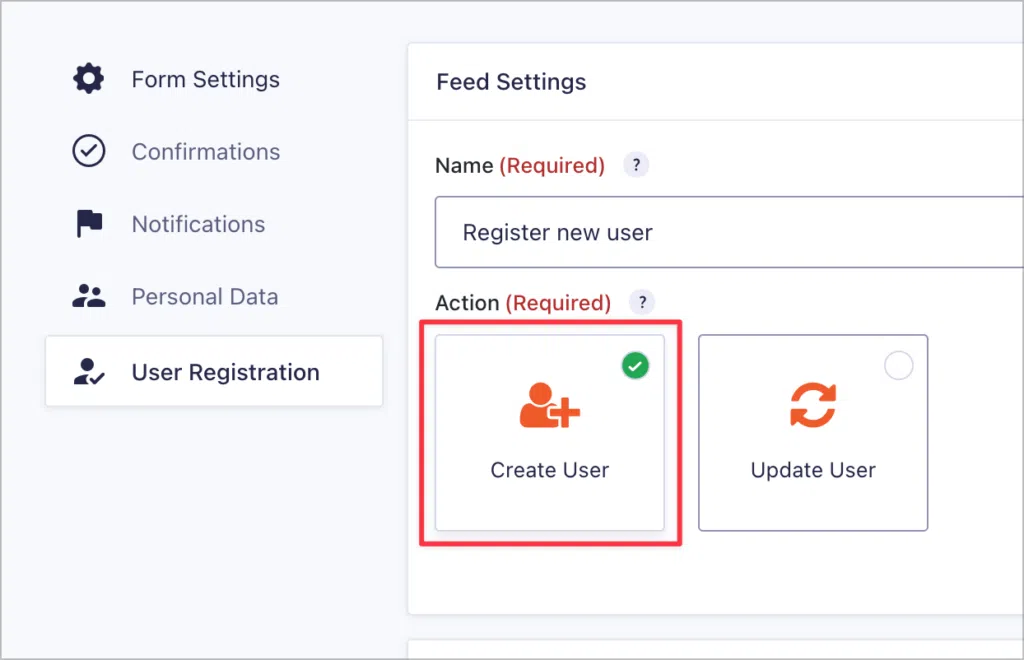
Now be sure to configure the remaining options. When you’re done, save the feed settings. As long as the feed is active, new users can register for an account on your site by submitting the form.
Here’s an example of a Gravity Forms user registration form on the front end:
Bonus: Creating and displaying user profile pages
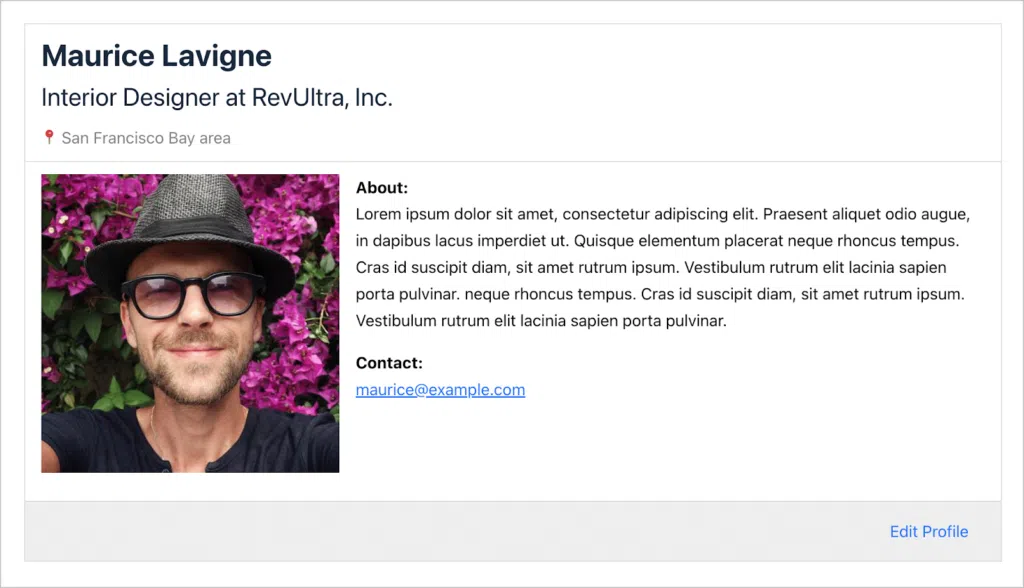
If you’re registering new users on your site using Gravity Forms, you may need a way to display user profiles. This is easy to do using GravityView!
GravityView is an add-on for Gravity Forms that enables you to display form submission data on the front end of your site. A popular use case for GravityView is creating editable user profile pages.
💡 Pro tip: Find out how you can create powerful web apps using GravityView, including directories, membership sites, job boards, and more!
Take control of user management with Gravity Forms
In this post, I showed you how to create a Gravity Forms login form using the User Registration add-on. With this powerful add-on, you can also register new users on your site and update existing users when a form is submitted.
If you want to take things further, integrate GravityView to display user profile pages, or create powerful directories and other dynamic web applications.

Helpful tips right in your inbox.
Subscribe to our weekly newsletter for tips, special offers, and more!
Helpful tips right in your inbox.
Subscribe to our weekly newsletter for tips, special offers, and more!
