Published
•
Updated
How to save your entry export settings in Gravity Forms for future exports
Stop reconfiguring Gravity Forms exports from scratch. GravityExport lets you save export settings once and rerun them on demand, saving significant time on regular data pulls.

Do you regularly have a need to export entry data from Gravity Forms? If so, you may find it cumbersome to configure the export settings every time you do so.
In this post, we’re going to show you how to save your export settings and preserve selected fields when exporting entries. This will enable you to configure an export once and then simply run it whenever you need the data—saving you time and effort!
Keep reading to find out more.
Wanna try it?
Spin up a demo
See GravityExport in action on its live demo site.

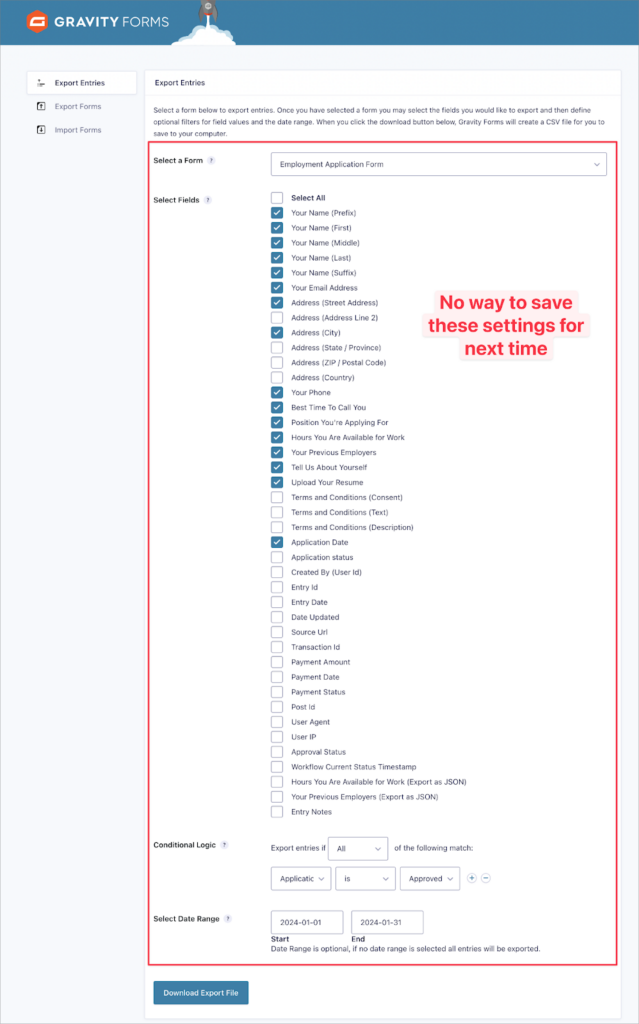
The problem: No way to save export configurations in Gravity Forms
If you’re someone who regularly needs to export entry data from Gravity Forms, you may have run into the following problem: there is no option to save your export configurations.
You need to select the form, select the fields, choose the dates, and add your conditional logic filters every single time you run an export! That’s time-consuming, and let’s be honest, it’s not a whole lot of fun.
Luckily, there is a solution to this issue, and all it takes is installing a completely free add-on that we developed!
Now there’s a solution… GravityExport!
Our free add-on, GravityExport Lite, makes it easy to create custom exports in Gravity Forms and save your configurations. Simply configure the export settings once, and export your entries whenever you need them!
Here’s how it work, step by step:
1. Install GravityExport Lite
The first step is to install GravityExport Lite on your website. The process is the same as with any free WordPress plugin.
- Log in to your WordPress site, hover over “Plugins” and click “Add New Plugin”
- Search for “GravityExport Lite”, click “Install Now”, and then “Activate”
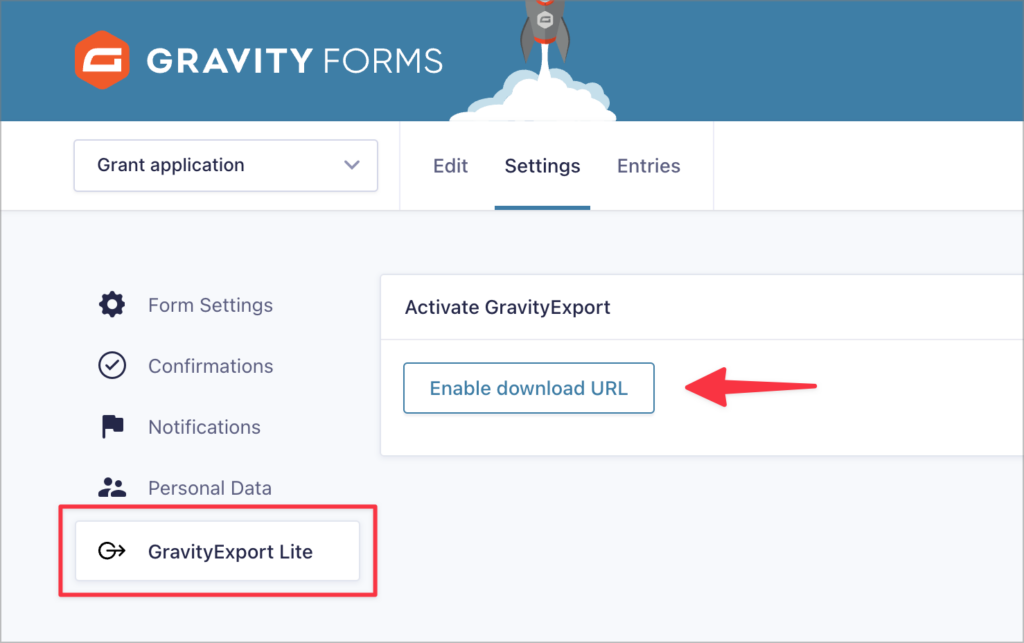
2. Enable the download URL
After installing GravityExport Lite, the next step is to configure your export. This starts with enabling the download URL.
GravityExport Lite allows you to configure exports for each of your forms with unique configurations and filters. You can then trigger the export using a unique download URL!
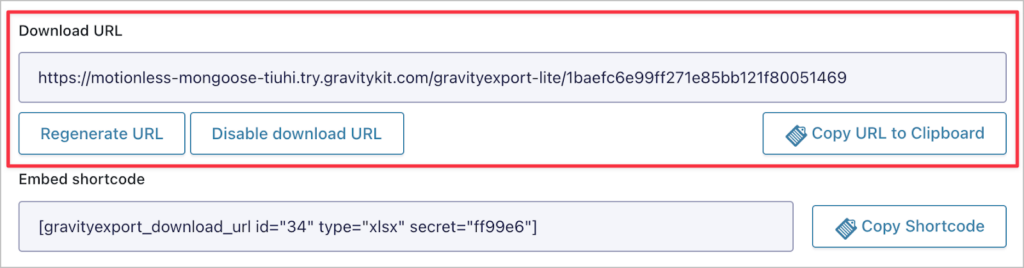
To enable the download URL, go to the form settings, click on “GravityExport Lite” and click “Enable download URL”
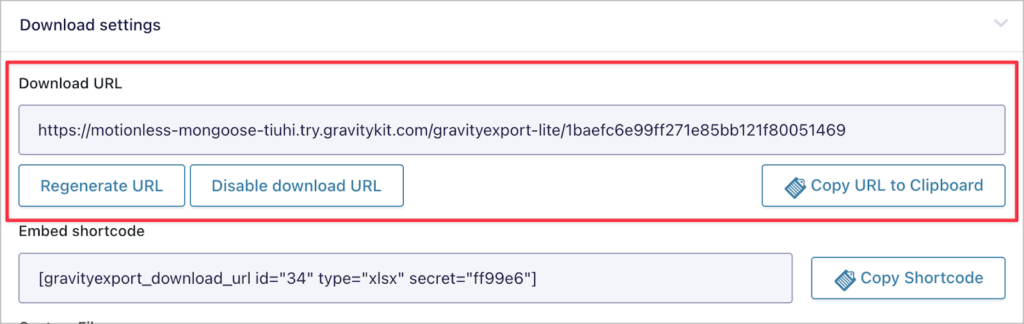
GravityExport Lite will now generate a unique URL, which you can use to download your entry data at any time! You can also use the shortcode to output a download link anywhere on your website.
The next step is to choose what kind of report to create.
3. Configure the export settings once
After activating the download URL, you can configure the export settings. These settings only need to be configured once. After configuring your report, you can download the data at any time using the unique download URL generated by GravityExport Lite!
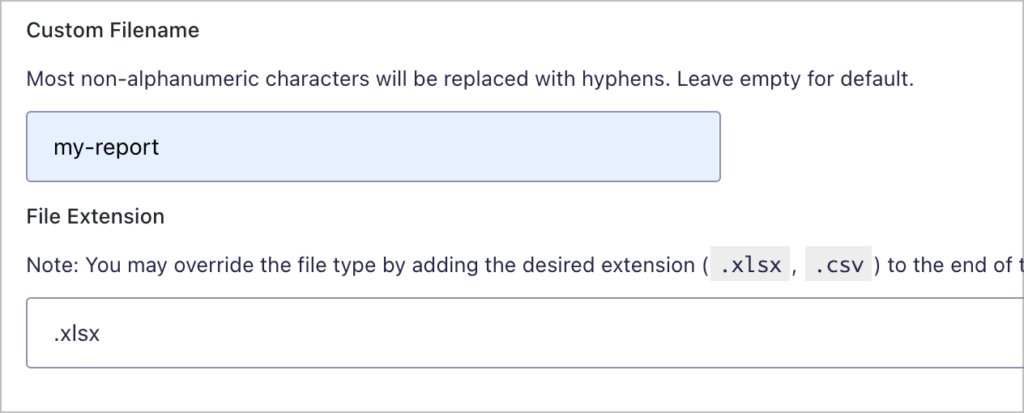
The first thing to do is choose a filename for your report. After that, you can select the file extension. GravityExport Lite can export data to CSV or Excel (.xlsx) format. To create PDF reports, you’ll need the full version of GravityExport.
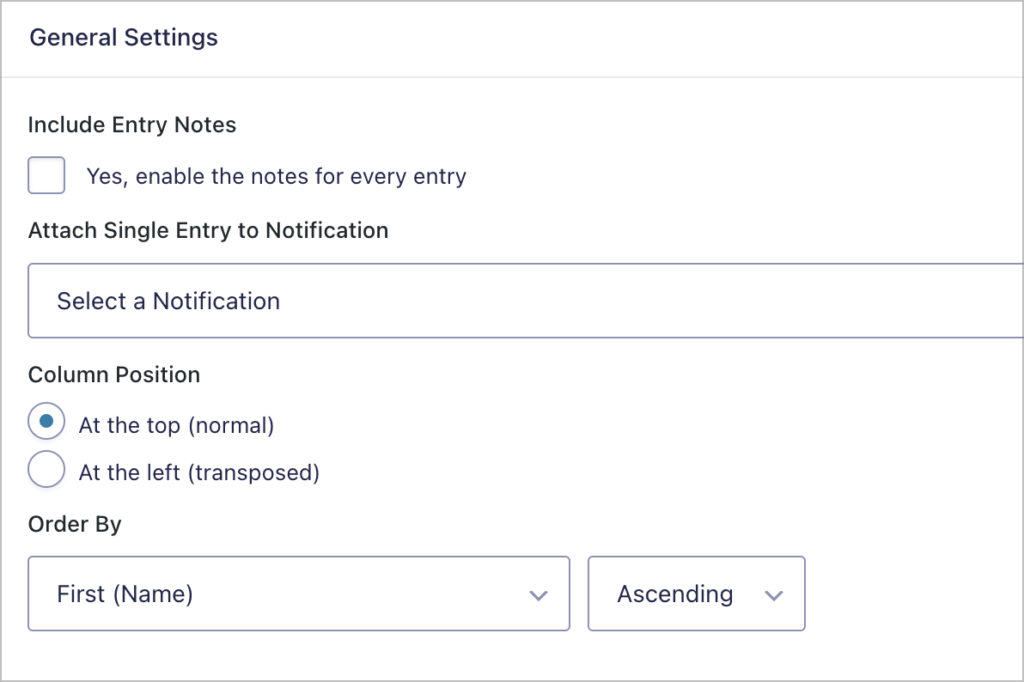
After choosing a file format for your exported data, scroll down to configure the general settings. Here, you have the option to attach entry exports to Gravity Forms notifications, change the column position, and order entries in your report by a certain field.
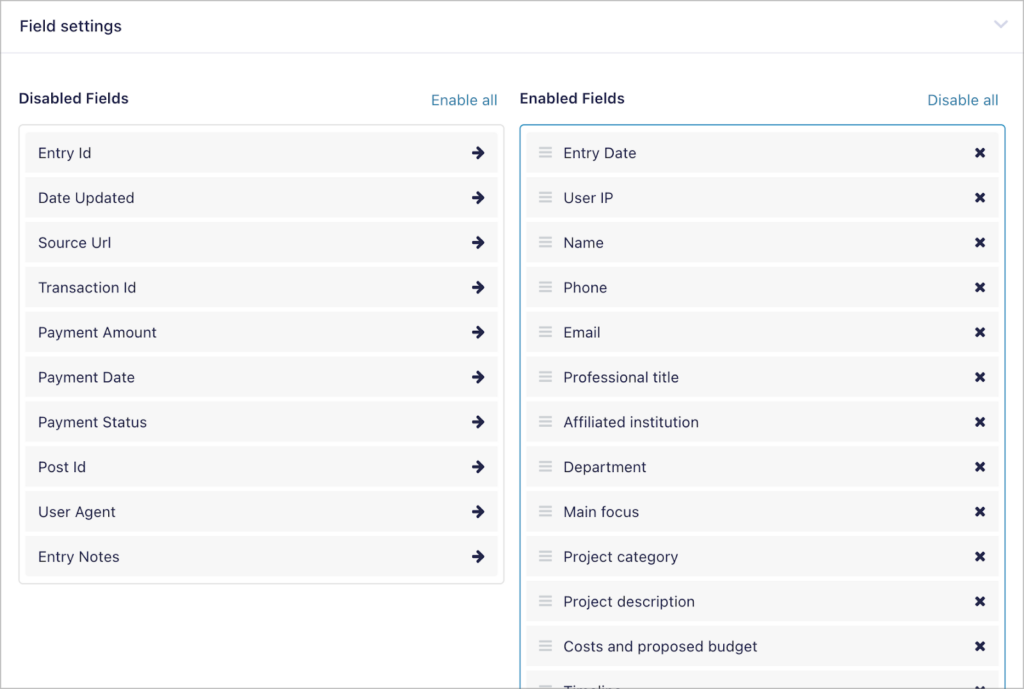
Finally, you can select which fields to include in your report. All form fields will be enabled by default. However, to exclude a field from your export file, simply move it to the “Disabled Fields” column.
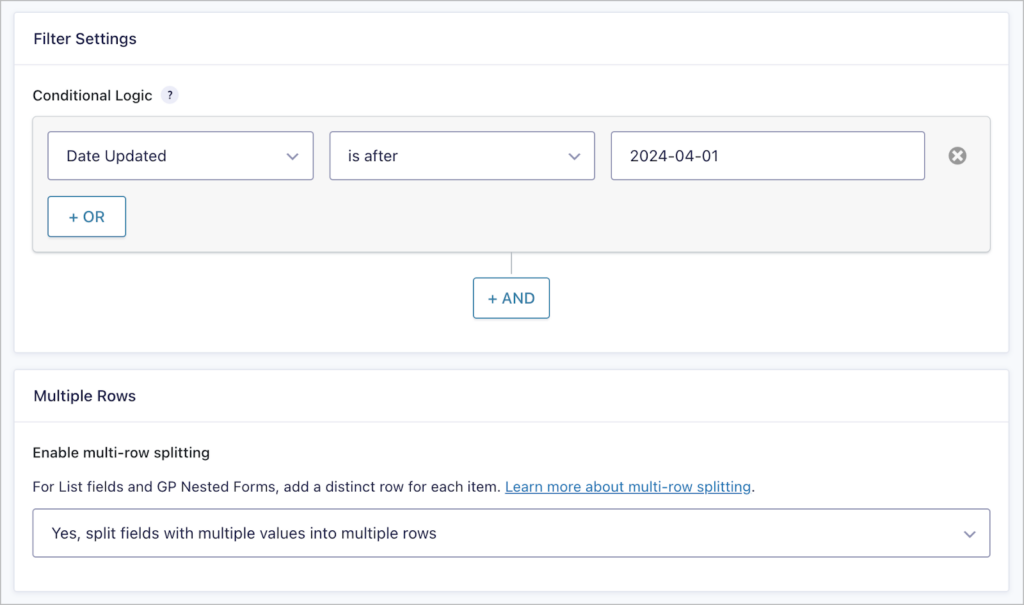
With the full version of GravityExport, you can also configure advanced conditional logic filters, and split List fields into multiple columns.
When you’re done configuring the export, make sure to save the feed.
4. Configure additional feeds
GravityExport Lite only allows you to configure one export for each of your forms. If you want to set up multiple reports, with different configurations, filters and file formats, you’ll need GravityExport.
5. Download entries with a secure URL
After setting up your exports, you can download your data using the unique URL generated by GravityExport.
Simply paste the URL in your browser to trigger the download! You can also share the URL with anyone who needs the data and they’ll be able to download it instantly.
If you would rather display a download link on your website, you can use the shortcode to output the download URL inside a link, like this:
<a class="button" href="[gravityexport_download_url id="34" type="xlsx" secret="ff99e6"]">Download Now!</a>
GravityExport: The ultimate export and reporting solution for Gravity Forms
In this guide, we showed you how to save your export settings in Gravity Forms for future exports using a free plugin (GravityExport Lite). But if you’re looking to do more with your Gravity Forms data, consider using the premium version.
GravityExport enables you to:
- Create multiple exports for each form: Set up different exports, with different configurations, formats, and more!
- Export data to different formats: With GravityExport, you can export your entry data to CSV, Excel or PDF format.
- Create PDF reports: Create stylish PDF reports that you can share with team members and customers.
- Send data to remote storage: Send entry exports to your Dropbox or a server running FTP.
- Analyze data: Take advantage of GravityExport’s configuration options to build customized, helpful data reports that are easy to parse and analyze.
Save your Gravity Forms export settings
In this post, we showed you how to save your export settings and preserve selected fields when exporting entries. This enables you to configure an export once, saving you time and effort!
While the free GravityExport Lite plugin is sufficient for this use-case, the full version of GravityExport includes additional features like PDF export, a Dropbox integration, and plenty more!

Helpful tips right in your inbox.
Subscribe to get the latest articles, information on releases and helpful Gravity Forms tips!
More articles

WordPress page builder market share 2026: Elementor leads at 32.67%
Elementor reaches 32.7% of WordPress sites. WordPress Block Editor 20.6%, wpBakery 8.5%, Divi 5.7%. Latest HTTP Archive crawl, share-of-WordPress basis throughout.

Launch Log: GravityView 3.0, plus upgrades to Block MCP and GravityKit MCP
GravityView 3.0 lands with the new Vantage theme, frontend bulk actions, and AI-assisted View creation. This launch log also covers updates to GravityKit MCP, Block MCP, and Dashboard Views.

Announcing GravityView 3.0: a fresh new look, AI View creation, and native page builder support
GravityView 3.0 is here: restyle Views with the new Vantage theme, build them with AI, embed them in any page builder, and run bulk actions on the front end.