I take an in-depth look at the Gravity Forms conditional shortcode, which enables you to show/hide content based on user-inputs and create dynamic confirmation messages and notification emails.
The conditional shortcode is different from the regular Gravity Forms shortcode for embedding forms on pages or posts. In fact, many users don’t even know it exists! But if you find yourself needing to create more personalized confirmations and notifications, the conditional shortcode is vital.
Table of contents
- What is the Gravity Forms conditional shortcode?
- Where can you use the Gravity Forms conditional shortcode?
- Gravity Forms conditional shortcode parameters
- Practical examples for using the shortcode
- Nesting conditional shortcodes
- Gravity Forms conditional shortcode not working?
- Taking things further with GravityView’s [gvlogic] shortcode
- Start sxperimenting with conditional logic!
What is the Gravity Forms conditional shortcode?
If you’re familiar with conditional logic, you won’t have any trouble understanding the conditional shortcode. But in case you’re not, here’s a quick refresher.
Conditional logic refers to a way of making decisions based on certain parameters. A typical conditional logic statement would be something like “If {user_value} is A, then display B”.
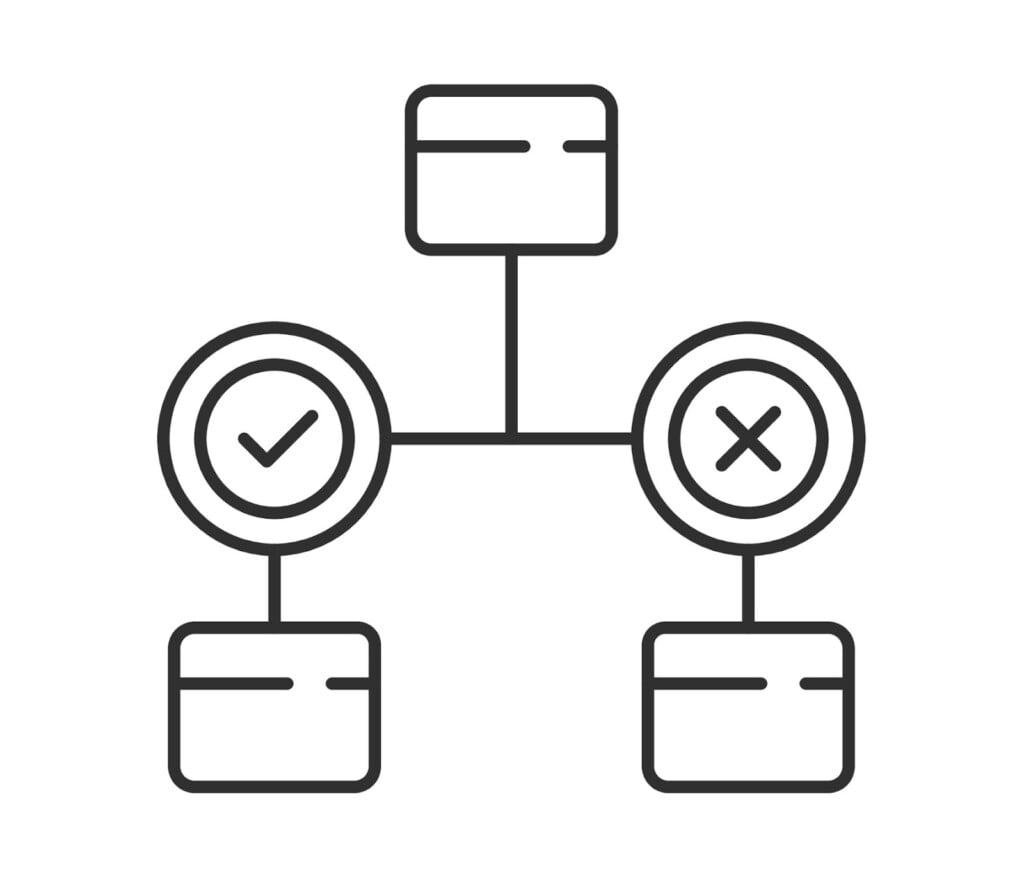
Here’s an image to help you visualize the decision-making process. As you can see, we begin with a value. Then we assess that value against a certain condition. If the value matches our condition, then we do something (i.e. display certain content). If the value fails to match our condition, then we do something else (i.e. display different content).

Now that you know the basics of conditiona logic, here’s an example of what the conditional shortcode looks like:
[gravityforms action=“conditional” merge_tag=“{merge tag:1}” condition=“is”  value=“user value”]

Content to display if condition is met

[/gravityforms]
Where can you use the Gravity Forms conditional shortcode?
The Gravity Forms Conditional shortcode relies on user values, so you’re restricted as to where you can use it:
- Confirmation Messages
Use the conditional shortcode to display custom messages after the user submits your form. We’ll demonstrate this in our example below.
- Notification emails
You can use the conditional shortcode to customize the notification emails that get sent to admins or users after a user fills out your form.
Before we take a look at some practical examples, here’s an overview of the different parameters that the shortcode supports.
Gravity Forms conditional shortcode parameters
The conditional shortcode has four required parameters:
action
The action you want to perform. For the conditional shortcode set this to “conditional”.
merge_tag
The merge tag of the field you want to evaluate.
condition
The condition you want to use to test the content of the merge tag against the specified value. Accepted values are:isnot,is,greater_than,less_than,contains,starts_with,ends_with
value
The value against which you want to compare the merge tag based on the condition you set.
Practical examples for using the shortcode
To customize your Gravity Forms confirmations or notifications, simply edit your form, click on “Settings” and select either the “Confirmations” or “Notifications” tab on the left.

Here are some specific examples covering popular use-cases.
Example #1 – Personalized form confirmation messages
Let’s start off with a fairly simple use-case. We’ve got a form on our website that asks the user what type of coffee they like to drink in the morning. There are three choices: Cappuccino, Café Latte or Americano.

Depending on which option the user chooses, we want to change the confirmation message that they see after submitting the form. This is easy to do using the conditional shortcode!
First off, we’ll create a new confirmation and select “Text” as the confirmation type.

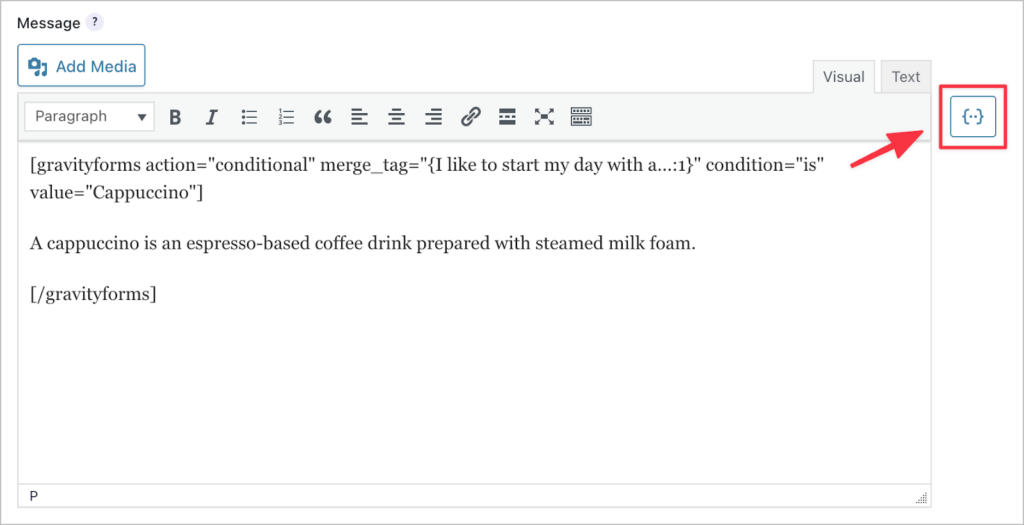
Inside the text editor, we’ll add the conditional shortcode.

[gravityforms action="conditional" merge_tag="{I like to start my day with a...:1}" condition="is" value="Cappuccino"]

A cappuccino is an espresso-based coffee drink prepared with steamed milk foam.

[/gravityforms]
Now, when a user selects “Cappuccino” and submits the forms, they’ll see the following message:

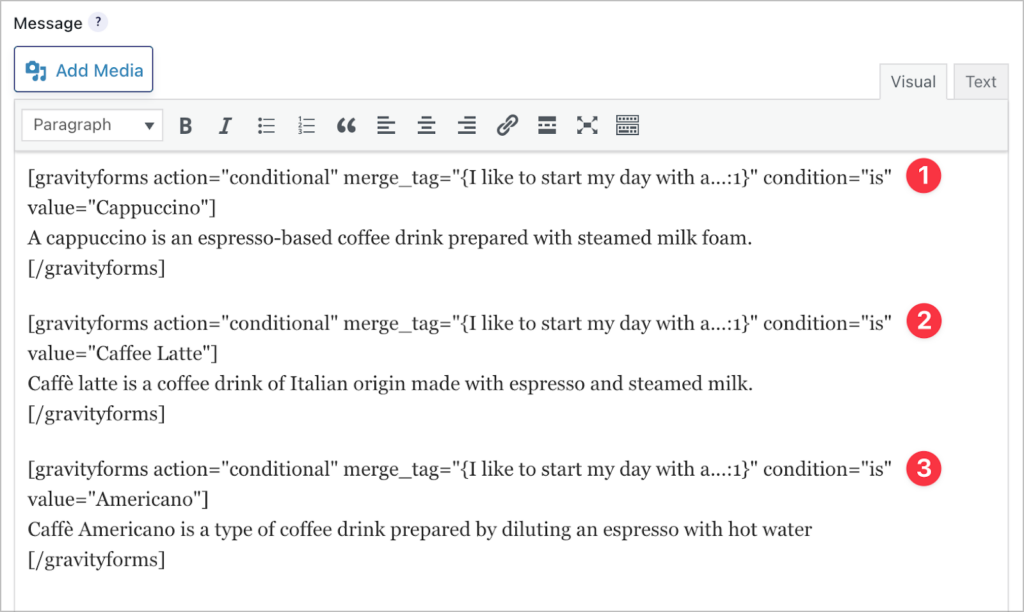
But what about if they select “Cafe Latte” or “Americano”? We don’t have a condition for that yet, but we can easily add one.

As you can see, by using three conditional shortcodes, we can have three separate messages that display based on three separate conditions!
Example #2 – Show content if a value exists
Not all form fields are required. Using the conditional shortcode, you can display specific content based on whether a field value exists or not.
[gravityforms action="conditional" merge_tag="{My Field:1}" condition="isnot" value=""]

My Field Label: {My Field:1}

[/gravityforms]
Example #3 – Show content if a value is greater or less than a certain threshold
The conditional shortcode also allows you to show content based on whether a user-inputted value is greater or less than a certain amount.
Let’s go back to our coffee example. Let’s say we decide to poll our users by asking them how many cups of coffee they typically drink per day.

Now we want to display a custom confirmation message telling them whether or not the amount of coffee they drink is above or below average (3 cups).
[gravityforms action="conditional" merge_tag="{Cups of coffee per day:1}" condition="greater_than" value="3"]

Wow! Your coffee consumption is above the average of 3 cups per day!

[/gravityforms]
If a user submits a value greater than 3, they’ll see this message:

[gravityforms action="conditional" merge_tag="{Cups of coffee per day:1}" condition="less_than" value="3"]

You drink less coffee than the average coffee drinker in the United States.

[/gravityforms]
If a user submits a value less than 3, they’ll see this message:

Example #4 – Display different links depending on the value of the user’s submission
In this final example, we have a form on our site with a drop down field, allowing users to request different kinds of information. In the confirmation message, we’ve written a shortcode that checks for the kind of information that the user requested.
[gravityforms action="conditional" merge_tag="{Information requested:6}" condition="is" value="Support"]

Here’s a <a href=”https://www.gravitykit.com/support”>link to our support form</a>.

[/gravityforms]
So if the user requested support, then they’ll see a confirmation message with a link to our support page!

Nesting conditional shortcodes
You can nest conditional shortcodes to check multiple conditions. To do this, you’ll need to use both the plural [gravityforms] and the singular [gravityform] shortcodes.
Here’s an example:
[gravityforms action="conditional" merge_tag="{favorite coffee:1}" condition="is" value="Cappuccino"]

[gravityform action="conditional" merge_tag="{cups:3}" condition="greater_than" value="2"]

You drink more than two cappuccinos a day!

[/gravityform]

[/gravityforms]
In this example, we’re using nested shortcodes to check for two conditions. So if the user chooses “Cappuccino” as their favorite coffee drink AND drinks more than two cups per day, they’ll see the following confirmation message:
“You drink more than two cappuccinos a day!”If none or only one of those conditions match, the message won’t display.
Gravity Forms conditional shortcode not working?
If you find that your conditional shortcode isn’t working, here are a few common issues to help you troubleshoot the problem.
Check for typos
Check to see if you’ve made any typos. You might have used the wrong merge tag, misspelled a certain value or left out a bracket or a quote somewhere!
Look for spacing issues
Spacing issues are really common. Having too many or too few spaces in between parameters can cause problems with your shortcode. Spacing issues can be hard to spot, so make sure to check your code carefully.
Check for any formatting issues
The most common issue with shortcodes is formatting them incorrectly. For example, each parameter value should be wrapped in double quotes, and each shortcode should be closed by using a forward slash, i.e., [/gravityforms].
Forgetting to do this will cause your conditional shortcode not to work properly.
Using conditional shortcodes in the wrong place on your site
Another reason you could be experiencing issues is because you’re trying to use the conditional shortcode in the wrong place on your website. For example, the conditional shortcode won’t work on pages or posts. The only place you can use the Gravity Forms conditional shortcode is in confirmations or notification emails.
Taking things further with GravityView’s [gvlogic] shortcode
The Gravity Forms conditional shortcode is an effective way to display content in confirmation messages and notification emails based on certain conditions. However, the shortcode is not without its limits.
For example, the GF conditional shortcode
- Does not support “OR” logic
- Does not support “AND” logic
- Supports the “contains” condition but not “not_contains”
- Can only be used inside Gravity Forms Confirmations and Notifications
If you’re looking for more advanced functionality, you’ll need GravityView’s [gvlogic] shortcode! It’s packed full of powerful features and you can use it anywhere on your website.
Gravity Forms conditional shortcode vs GravityView [gvlogic]
Here’s a handy table comparing the Gravity Forms conditional shortcode to GravityView’s more advanced [gvlogic] shortcode.
| Functionality | GF Conditional Shortcode | GravityView gvlogic Shortcode |
| Can display information based on conditions you set | ✅ | ✅ |
| Supports “AND” logic | ❌ | ✅ |
| Supports “OR” logic | ❌ | ✅ |
| Can use it anywhere on your website | ❌ | ✅ |
| Can show/hide content depending on whether a user is logged in or not | ❌ | ✅ |
| Integrates with GravityView | ❌ | ✅ |
| Supports the “in” condition | ❌ | ✅ |
| Supports the “not_in” condition | ❌ | ✅ |
| Supports the “greater_than_or_is” condition | ❌ | ✅ |
| Supports the “less_than_or_is” condition | ❌ | ✅ |
| Supports the “not_contains” condition | ❌ | ✅ |
💡 Pro tip: Learn more about GravityView’s [gvlogic] shortcode.
Start sxperimenting with conditional logic!
The Gravity Forms conditional shortcode allows you to show/hide content based on user inputs. Using the shortcode you can create personalized confirmation messages and email notifications.
In this post, we introduced you to the Gravity Forms conditional shortcode by showing you how it works, the different parameters it requires and where to use it on your site. We also compared it to GravityView’s more advanced [gvlogic] shortcode.
To learn more about conditional logic in Gravity Forms, read Gravity Forms Conditional Logic: The Ultimate Guide.

Helpful tips right in your inbox.
Subscribe to our weekly newsletter for tips, special offers, and more!
Helpful tips right in your inbox.
Subscribe to our weekly newsletter for tips, special offers, and more!
