Published
•
Updated
How to Migrate From Formstack to Gravity Forms
Are you wondering how to migrate your forms and submissions from Formstack to Gravity Forms? Well, Google no more because we’ve got the answer! Although Formstack offers a powerful form builder for small to large businesses, it’s not the best solution for WordPress websites....
Are you wondering how to migrate your forms and submissions from Formstack to Gravity Forms? Well, Google no more because we’ve got the answer!
Although Formstack offers a powerful form builder for small to large businesses, it’s not the best solution for WordPress websites. Nope, that title belongs to Gravity Forms.
In this post, we’ll show you how to move your existing Formstack forms (and their attached submissions) to Gravity Forms in 5 simple steps!
Wanna try it?
Spin up a demo
See GravityImport in action on its live demo site.

What is Formstack?
Formstack offers a suite of productivity tools for businesses. One of their tools is an online, no-code form builder.
With Formstack, you can create forms using a drag-and-drop interface, configure conditional logic settings and set up workflows for reviewing, editing or collaborating on customer data.
Forms created with Formstack are hosted on Formstack’s SaaS platform but you also have the option to embed them into your own website.
Why move from Formstack to Gravity Forms?
So why should you consider migrating from Formstack to Gravity Forms? There are several reasons to do so!
First, let’s take a look at what the users have to say. A quick search on g2.com (a popular software review website) reveals that Gravity Forms has a rating of 4.7 stars out of 5 while Formstack is down at 4.4 stars.
Both Formstack and Gravity Forms integrate with a wide variety of third-party apps. However, where Gravity Forms shines is its seamless integration with WordPress.
Built for WordPress
Gravity Forms has been a mainstay in the WordPress world for many years.
And if you run a WordPress website, it makes sense to choose a form builder that’s built specifically for WordPress, right?
With Gravity Forms, you can build complex forms for a variety of use-cases, all without leaving your WordPress dashboard.
Full control over your forms and entries
One of the key differences between Formstack and Gravity Forms is that Formstack is a SaaS platform while Gravity Forms is a WordPress plugin.
SaaS stands for “Software as a Service“, a popular method for software delivery and licensing. The downside to SaaS is that the software itself, as well as your data, remain on the provider’s servers.
That means every form you create and every submission you receive remains on Formstack’s servers.
With Gravity Forms, you maintain full control over your own data because the plugin itself is installed locally on your website, not hosted by some third-party. And when you receive a new submission, it’s saved directly to your WordPress database.
Access to a thriving community
Gravity Forms is known for its enthusiastic community, made up of both users and developers. There are also several Gravity Forms Certified Developers that build and maintain a range of powerful add-ons and extensions!
Tapping into the wider Gravity Forms ecosystem allows you to create powerful web apps on WordPress.
Migrating your forms and submissions using GravityImport
Here’s how to migrate your forms and entries from Formstack to Gravity Forms in five simple steps 👇
1. Install the GravityImport add-on
Gravity Forms does not include an import function, so to start off you’ll need to download and install the GravityImport add-on. If you’re a GravityView All Access license holder, you can install the add-on free of charge from the “Manage Add-Ons” page in WordPress.
Alternatively, you can grab GravityImport as a standalone plugin from our website.
- Download the plugin file from your Account page
- Go to the Plugins page in WordPress and click Add New
- Click Choose file and select the plugin file you downloaded in the previous step
- Click Install Now. When the plugin has finished installing, click Activate
After installing GravityImport, you’re ready to move on to the next step!
Pro tipLearn more about importing data to Gravity forms by reading Importing Entries to Gravity Forms: The Ultimate Guide or check out more guides showing you how to migrate your forms and entries from popular WordPress form plugins to Gravity Forms.
2. Export your form submissions from Formstack
The next step is to export your existing form entries from Formstack.
First, log in to your Formstack account and click on Forms. Here you’ll see a list of all your Formstack forms.

Next, click on the form that you want to migrate over to Gravity Forms and navigate to the Submissions tab. Here you’ll see a list of your form entries.
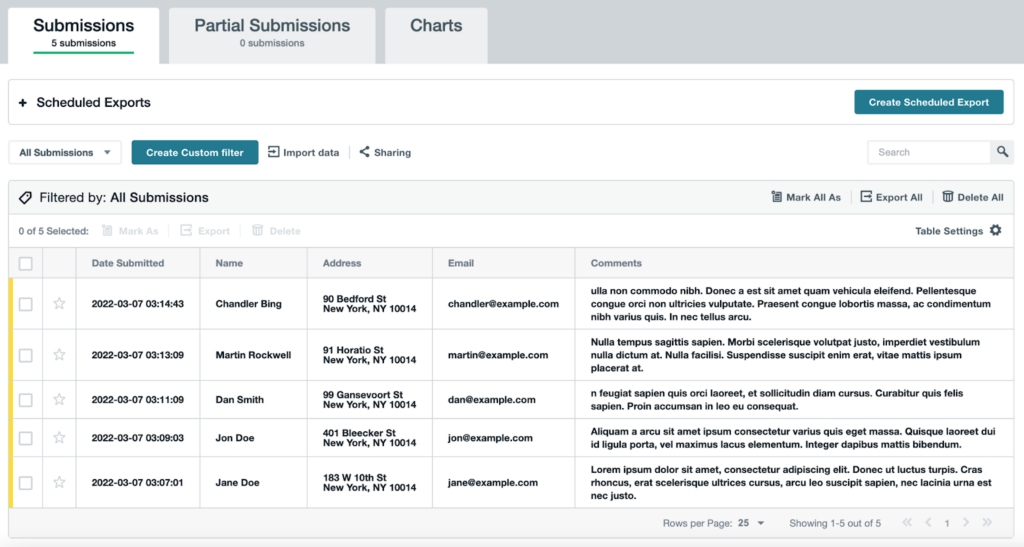
Now click on the link that says “Export All”, above your form entries on the right. You’ll see a list of options allowing you to export your entries to PDF, CSV, Excel or RTF. Choose CSV.

Finally, download your entries by clicking Download Report.

Your Formstack entries will now download to your computer as a CSV file.

The next step is to import your form entries to Gravity Forms.
3. Import the CSV containing your Formstack submissions
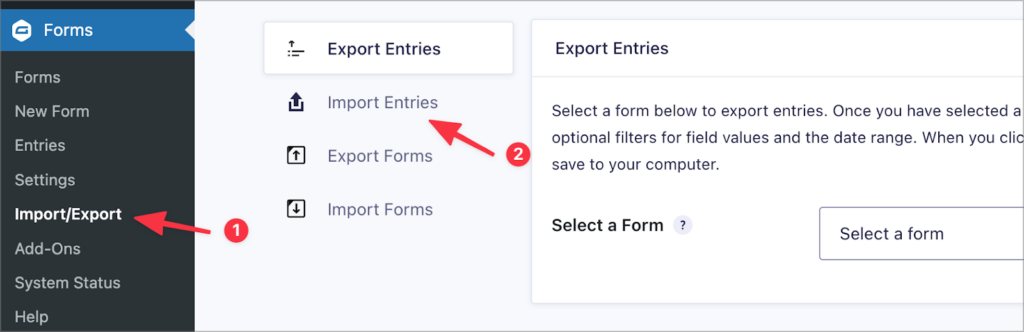
Head back to your WordPress dashboard, hover over Forms and click Import/Export. Now click on the Import Entries tab on the left.
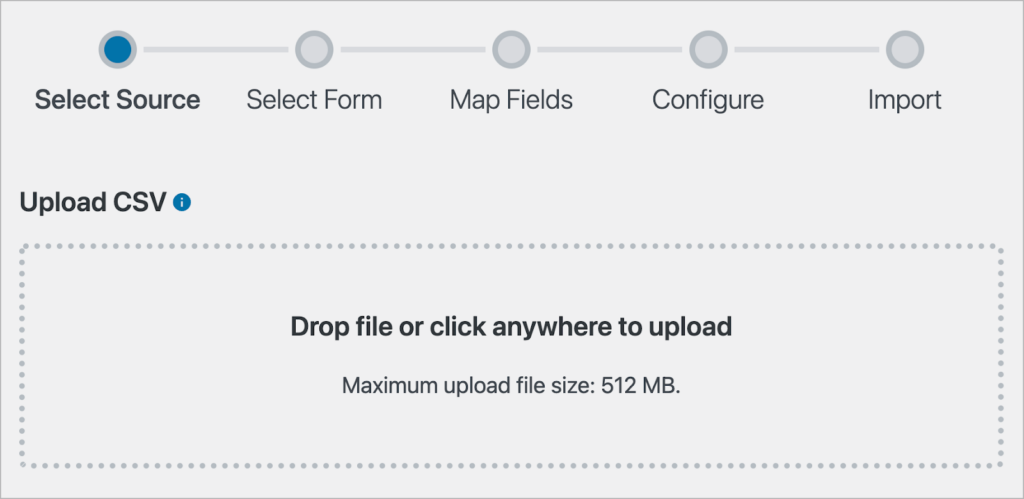
You’ll see a page prompting you to upload a CSV file. There’s also a progress bar at the top showing you the different steps involved in the import process.
Next, click to upload your CSV file or drag and drop it into the upload box.
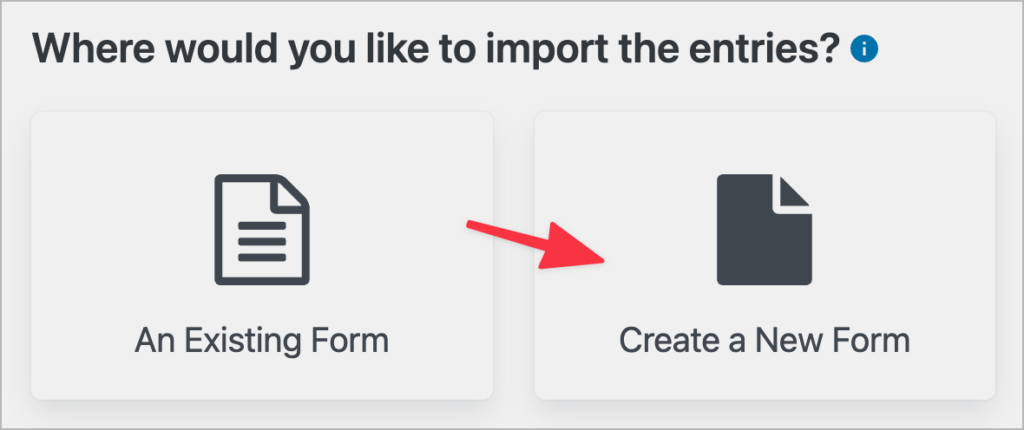
Now GravityImport will give you the option to import your form submissions to an existing form in Gravity Forms or create a new form automatically during the import process. Select Create a New Form.
Almost there!
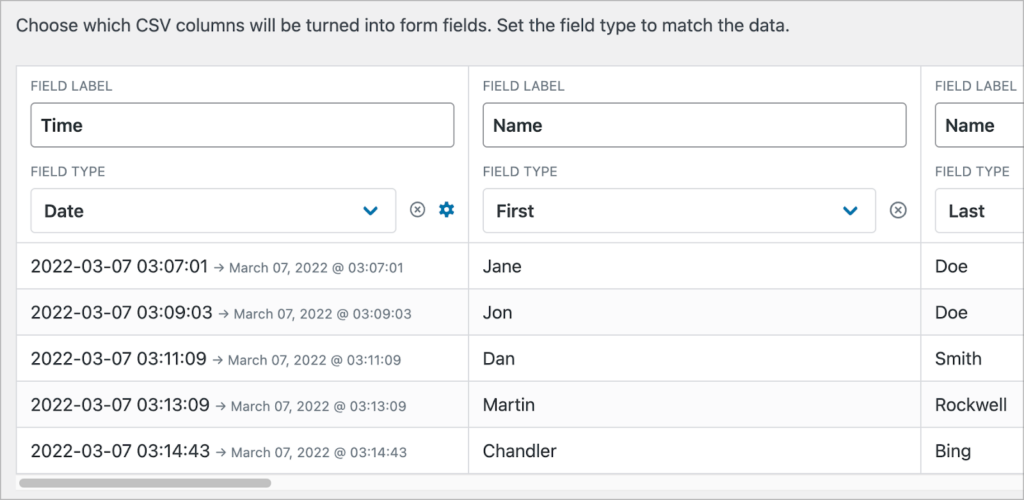
4. Map your fields
The next step is to map the columns in your CSV file to the correct field types in Gravity Forms. GravityImport will attempt to detect the correct field types but you can override this by manually selecting a new field type from the drop down menu.
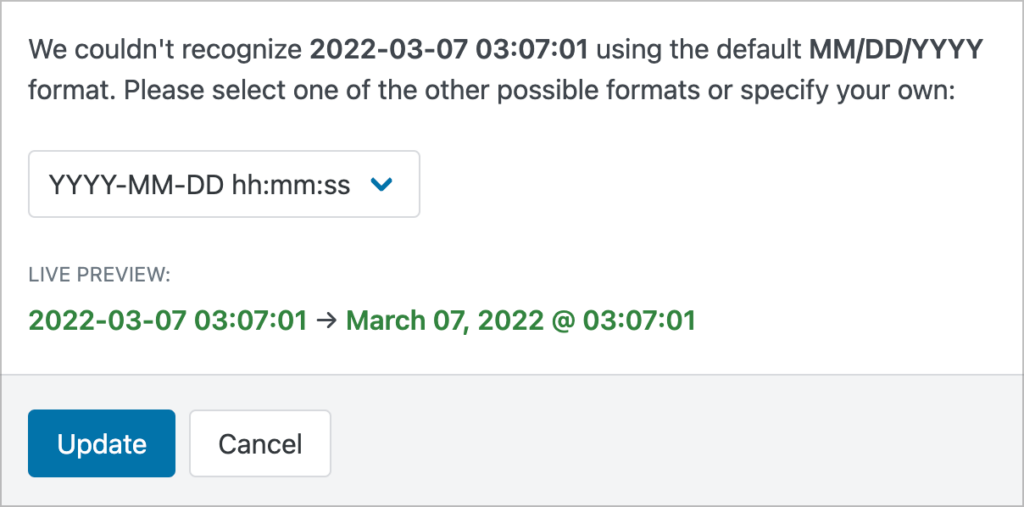
When importing data from Formstack, sometimes there are issues with the date and time format used for the entries. You may need to manually alter the date and time format if GravityImport doesn’t recognize it the first time.
To do this, click on the gear icon next to the Field Type drop down menu and select the correct format from the list.
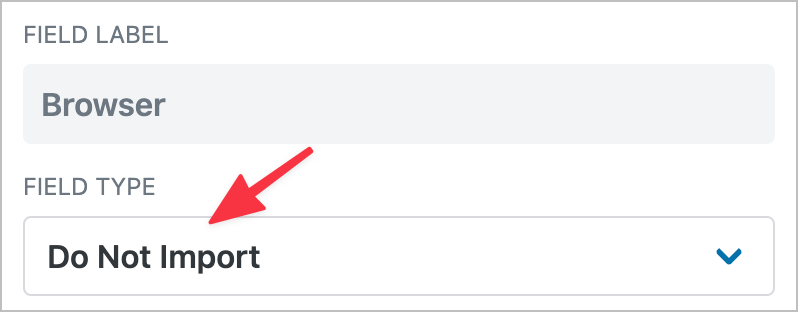
Formstack also records a lot of metadata for each submission, including the user’s IP address, the internet browser they were using and their location. To ignore these fields during the import, simply click on the ‘x’ icon next to the Field Type drop down menu.
When you’re done, scroll down and click Continue With Import.
5. Configure the import options
The final step of the import process is to configure the import options. When importing data to a new form, you’ll see the following three options:
- Continue Processing If Errors Occur
Enabling this option will ensure that your import continues even if errors occur.
- Conditional Import
This allows you to import entries based on conditional logic.
- Email Notifications
Enabling this option ensures that your email notifications will trigger for each imported entry.
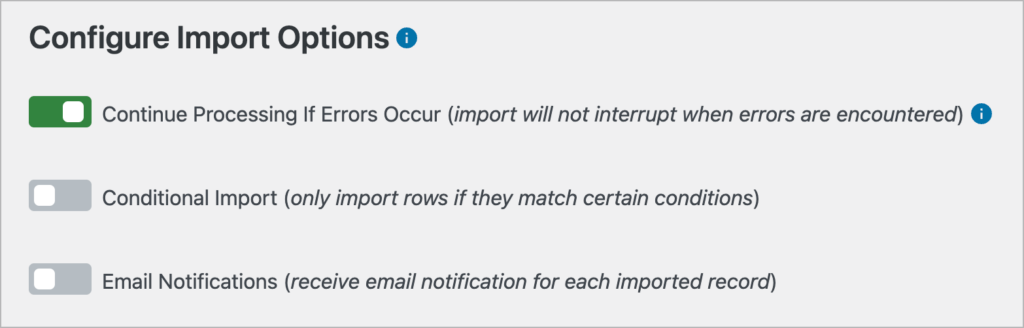
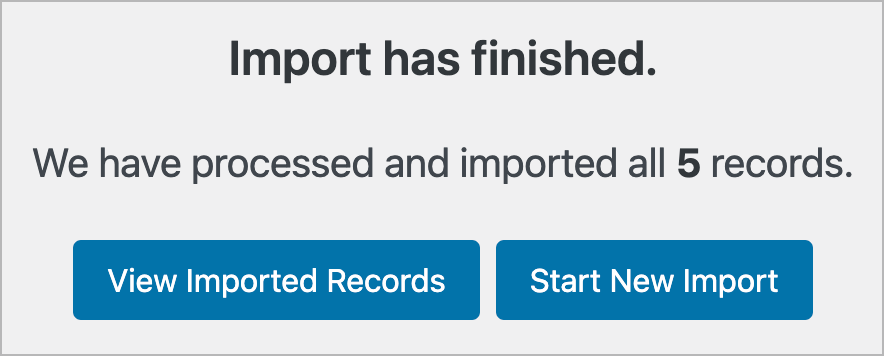
After configuring the import options, scroll down and click Create Form and Continue With Import. The import process will now begin! When it’s finished, you’ll see a success message with the option to either view your imported records or start a new import.
That’s it! You’ve successfully migrated your form data from Formstack to Gravity Forms 😎
How to replace your Formstack form with your new Gravity Forms form
Now that you’ve moved your form entries to Gravity Forms and created a new form in the process, you may be wondering how to replace your old Formstack form with your new Gravity Form.
Don’t worry, it’s easy.
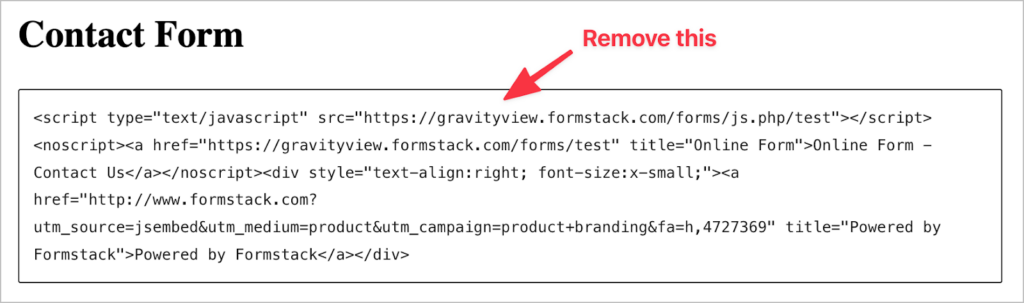
First, head over to the page on your website where your old form is embedded and remove the Formstack embed code.
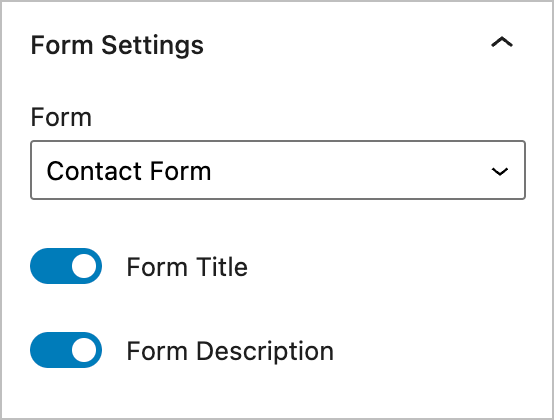
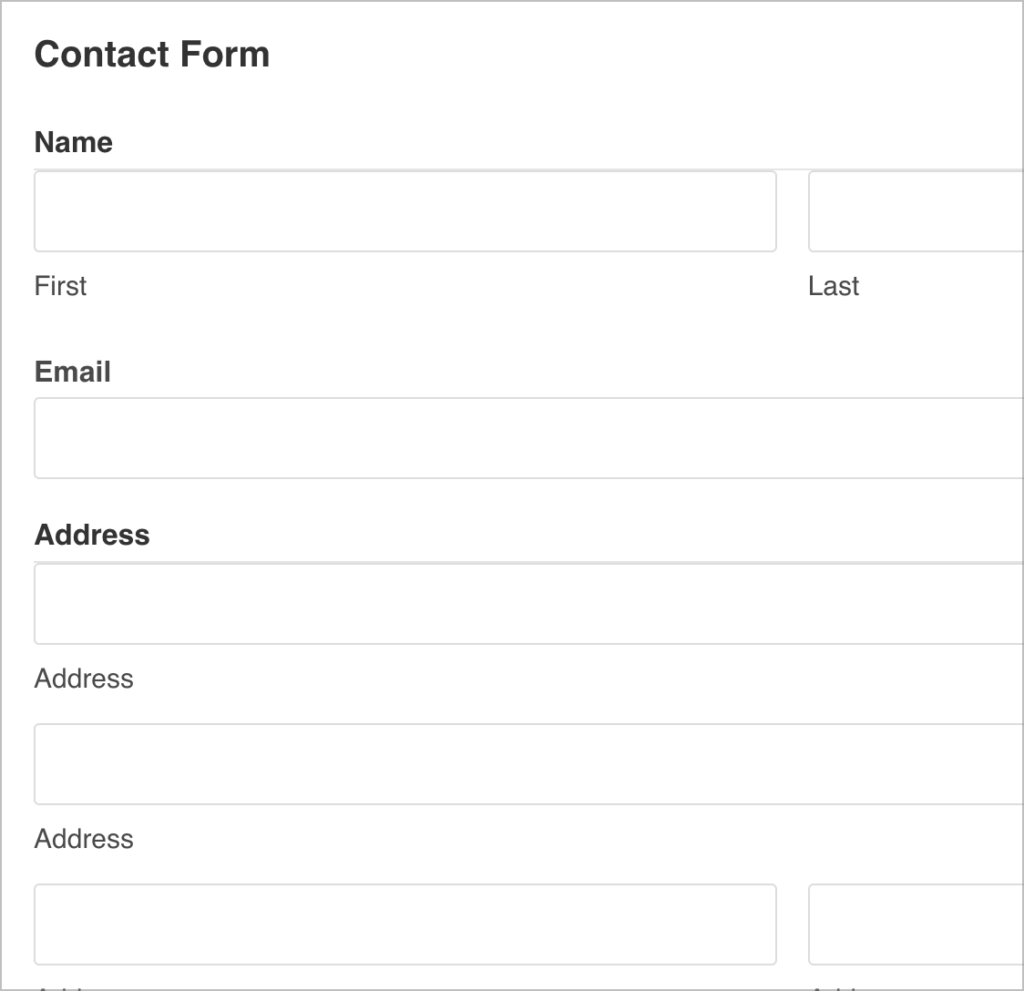
To embed your new Gravity Form, click on the ‘+’ icon to add a new block to your page and search for “Gravity Forms”. After adding the block, select your new form from the dropdown menu.

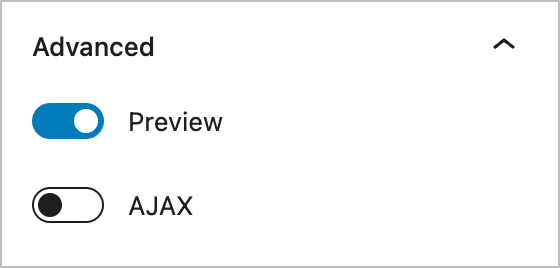
Now open up the Form Settings tab on the right. Here you can show/hide the form title and description.
There are more options under the Advanced tab, allowing you to enable/disable the preview option and enable/disable AJAX.
Finally, update your page and check out your new form on the front end.
You can repeat this process for all of your Formstack forms!
Move from Formstack to Gravity Forms today
Formstack is a SaaS tool that allows you to build web forms for a variety of use-cases. Although Formstack is a powerful form builder, Gravity Forms is the ideal choice for WordPress users.
Being a WordPress plugin, rather than a SaaS platform, Gravity Forms gives you full control over your form data. Gravity Forms also boasts a range of third-party integrations and a thriving developer community.
In this post, we showed you how to migrate your forms and entries from Formstack to Gravity Forms. If you found this tutorial helpful, check out our blog for more Gravity Forms content!

Helpful tips right in your inbox.
Subscribe to get the latest articles, information on releases and helpful Gravity Forms tips!
More articles

Announcing GravityView 3.0: a fresh new look, AI View creation, and native page builder support
GravityView 3.0 is here: restyle Views with the new Vantage theme, build them with AI, embed them in any page builder, and run bulk actions on the front end.

Launch Log: GravitySearch arrives, plus AI spam review and GravityView fixes
This week, releases are anchored by a brand-new product! GravitySearch joins the GravityKit suite with cross-form entry search for Gravity Forms. Alongside it, Gravity Forms Zero Spam picks up an AI-powered review step, and GravityView sees fixes for Enhanced Security, Edit Entry, and Entry…

Meet GravitySearch: advanced global search for Gravity Forms
GravitySearch adds cross-form search to Gravity Forms: find any entry from one screen, build advanced filters, and preview results without leaving the page.