We’re stoked to announce that WP Webhooks Pro now integrates with GravityKit, allowing you to build automated, codeless workflows for your GravityView web apps!
Thanks to this new integration, you can now connect GravityView with dozens of other WordPress plugins and apps. This enables you to create sophisticated workflows, saving you time, energy and resources.
What Is WP Webhooks?
WP Webhooks is a WordPress plugin that “helps to put your website on autopilot while you can focus on what’s important to grow your business”. Using WP Webhooks, you can connect dozens of different plugins and apps and create powerful automations – all from inside your WordPress dashboard!
Without writing any code, you can create “Flows” that cause certain activities on your site to trigger other activities. The new GravityKit integration is included in WP Webhooks Pro.
Automate Your GravityView Workflows
After installing WP Webhooks Pro, you can start automating your workflows by creating new “Flows”.
WP Webhooks defines a “Flow” as a feature that “allows you to create automated tasks that are executed in a consecutive order, based on a given event”. The Event is also called the “Trigger”.
WP Webhooks Pro currently supports the following two GravityView triggers:
- Entry approved
- Entry rejected
Both triggers can apply to one or more forms in Gravity Forms. When the trigger is fired, you can cause other activities to happen on your site. With WP Webhooks, you can connect GravityView to over 50 different plugins and apps, including bbPress, Learndash, Zoho Flow, and Easy Digital Downloads.
📝 WP Webhooks joins Uncanny Automator as another no-code automation tool supporting a GravityKit integration!
Creating GravityKit Flows Using WP Webhooks
Hover over WP Webhooks Pro, select Automations (Flows) and then click Add New to create a new “Flow”. (A flow is an automated workflow that consists of a trigger and one or more actions). After giving your Flow a name, select the GravityKit integration to act as the trigger.
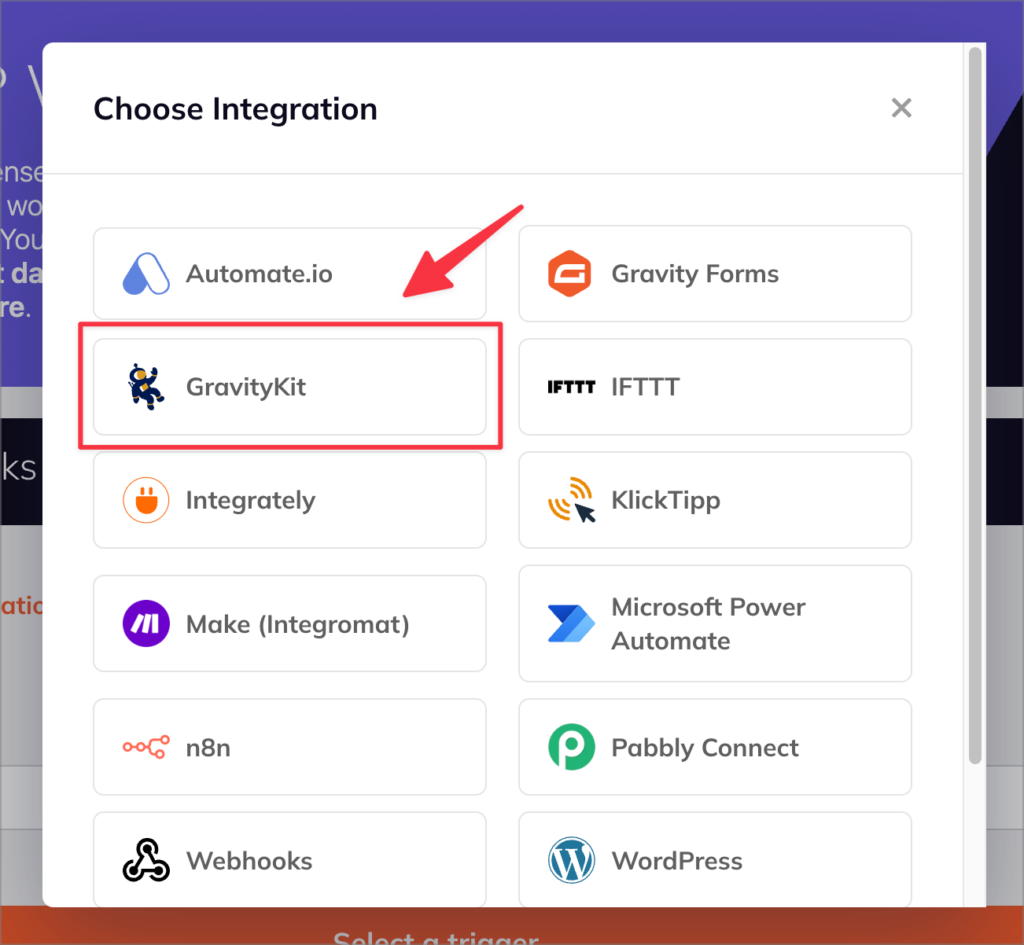
After selecting the GravityKit integration, you’ll need to define a trigger. WP Webhooks currently supports two triggers – “Entry rejected” or “Entry approved”.

After selecting your trigger from the dropdown menu, click Continue to configure the trigger settings. Here you’ll find several options, including the ability to limit the trigger to selected forms.
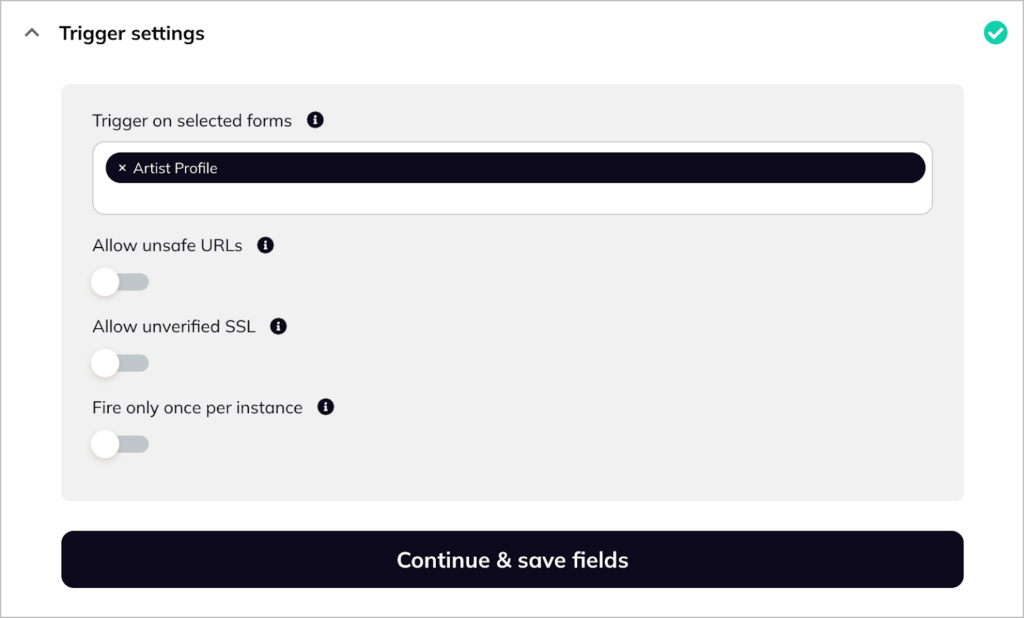
After configuring the trigger settings, test the trigger and add any desired conditionals. Once that’s complete, you can add an “Action”. The action is the activity you want to happen after the trigger is fired.
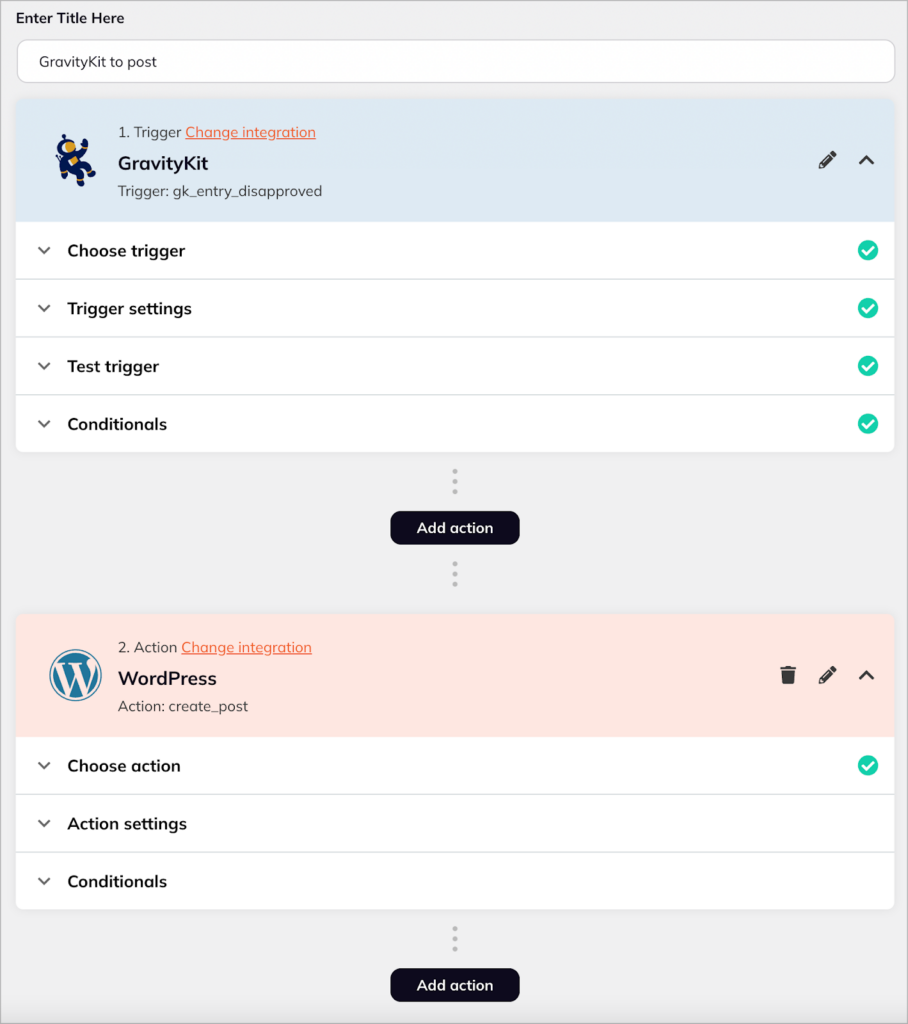
In the above example, we’ve selected WordPress as the integration and “Create post” as the Action. So, every time an entry is rejected, a new post will be created in WordPress. This is just one simple example out of many possible workflows you can set up using WP Webhooks.
Examples of Popular Connections
Here are some more examples of different connections that are now possible using this new WP Webhooks integration:
- When an entry is approved via GravityView, create a user membership via WooCommerce Memberships.
- When an entry is approved via GravityView, add a contact to a tag via FluentCRM.
- When an entry is approved via GravityView, create a subscription via Easy Digital Downloads.
- When an entry is rejected via GravityView, update an options page via Advanced Custom Fields.
- When an entry is rejected via GravityView, update a taxonomy term via WordPress.
Create Automated, Codeless Workflows for GravityKit
WP Webhooks now integrates with GravityKit! WP Webhooks is a powerful automation plugin for WordPress, enabling you to connect GravityKit with dozens of other apps and plugins.
We’re excited about this integration, as it opens up new opportunities for building automated web applications powered by your Gravity Forms forms! To stay up to date with our latest news, updates, case studies and tutorials, subscribe to our email list below!
Join Our Newsletter!📧🙌
✅ Helpful Gravity Forms content straight to your inbox
✅ Be the first to hear about new updates and releases
