Published
•
Updated
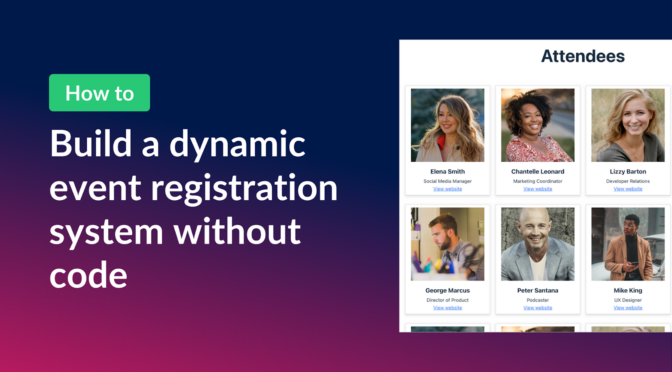
How to build a dynamic event registration system on WordPress without code
Build a complete event registration system on WordPress without code. Uses Gravity Forms and GravityView to handle session submissions, attendee browsing, and registrations.
Using Gravity Forms, GravityView, and the free Gravity Forms Dynamic Lookup add-on, you can create a seamless and automated event registration system!
In this guide, I’ll walk you through building a full event registration setup for a fictional marketing conference. We’ll start by creating a form for speakers to submit details about their planned workshops. Next, we’ll create a View to display those workshops on the front-end for users to browse.
After that, we’ll create a dynamic registration form that allows users to register for their preferred sessions, and create a page for showcasing attendee profiles! Ready? Let’s get started.
Sneak peek
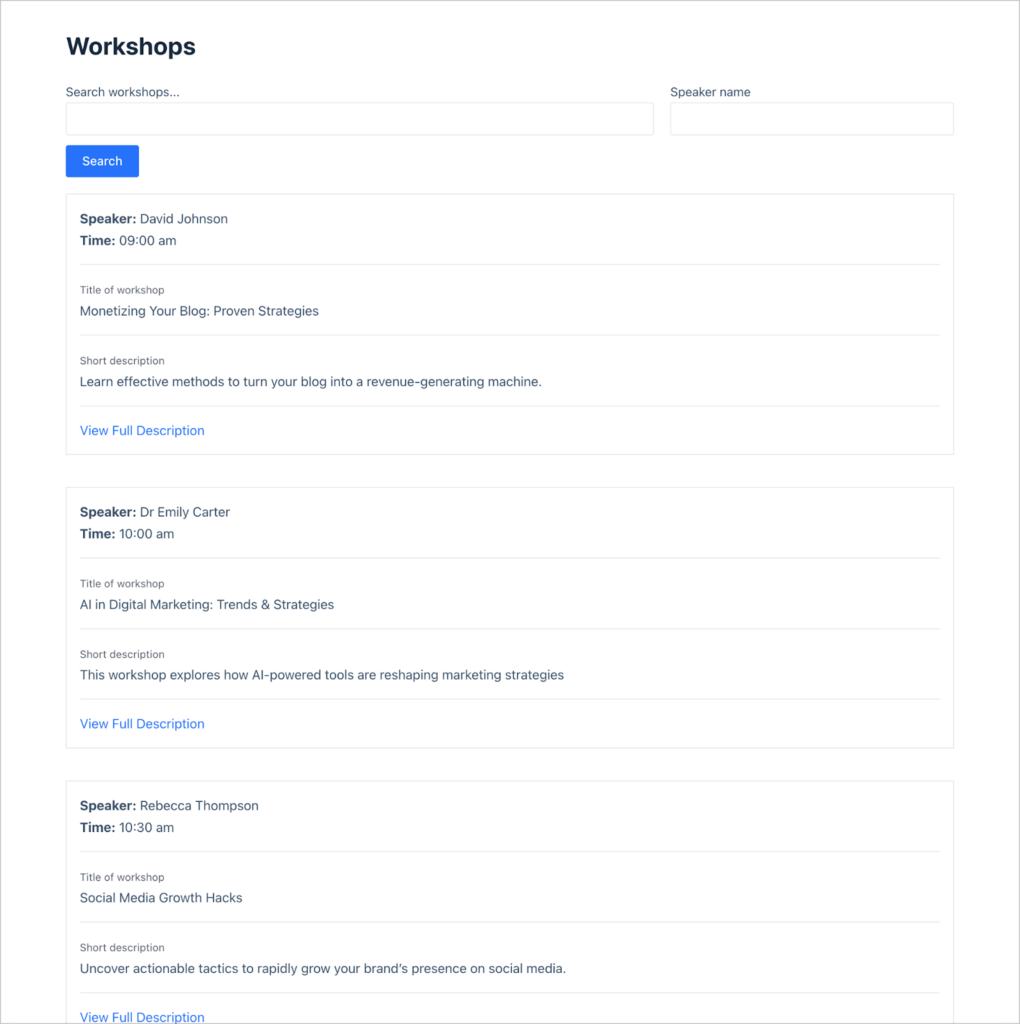
Here’s a look at our finished event registration system! First, there’s a page with all of the planned workshops for the event. Users can browse these to decide which ones they want to attend.

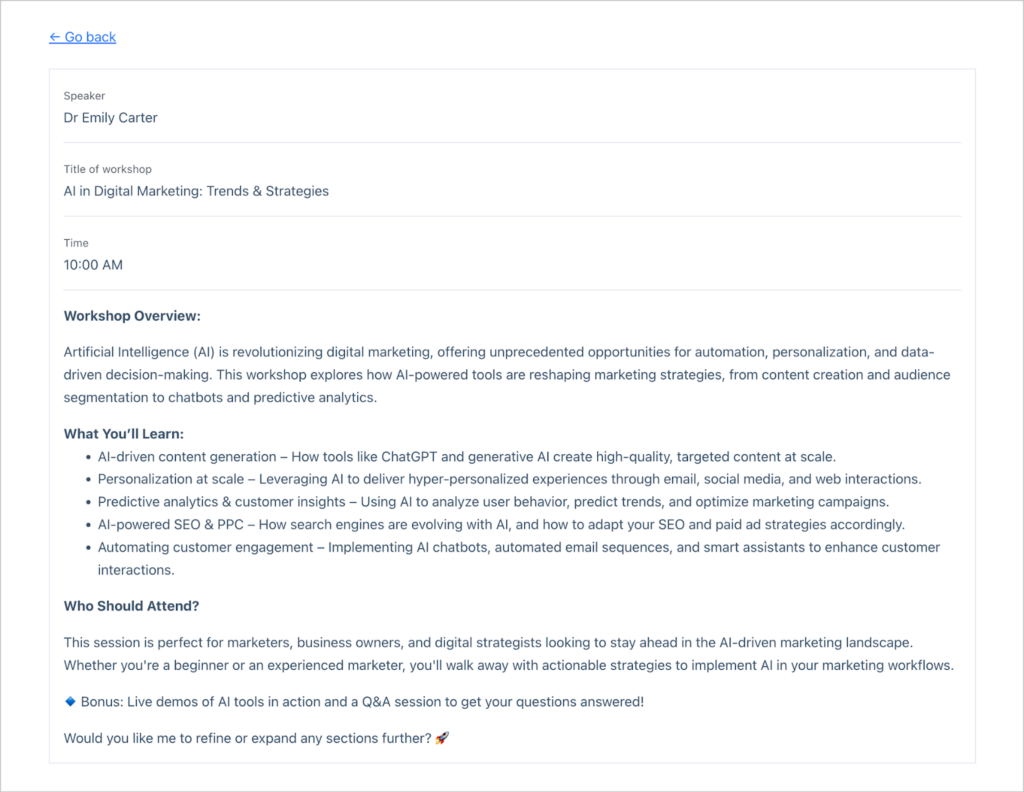
Clicking on the “View Full Description” link enables users to see more information about a particular workshop.
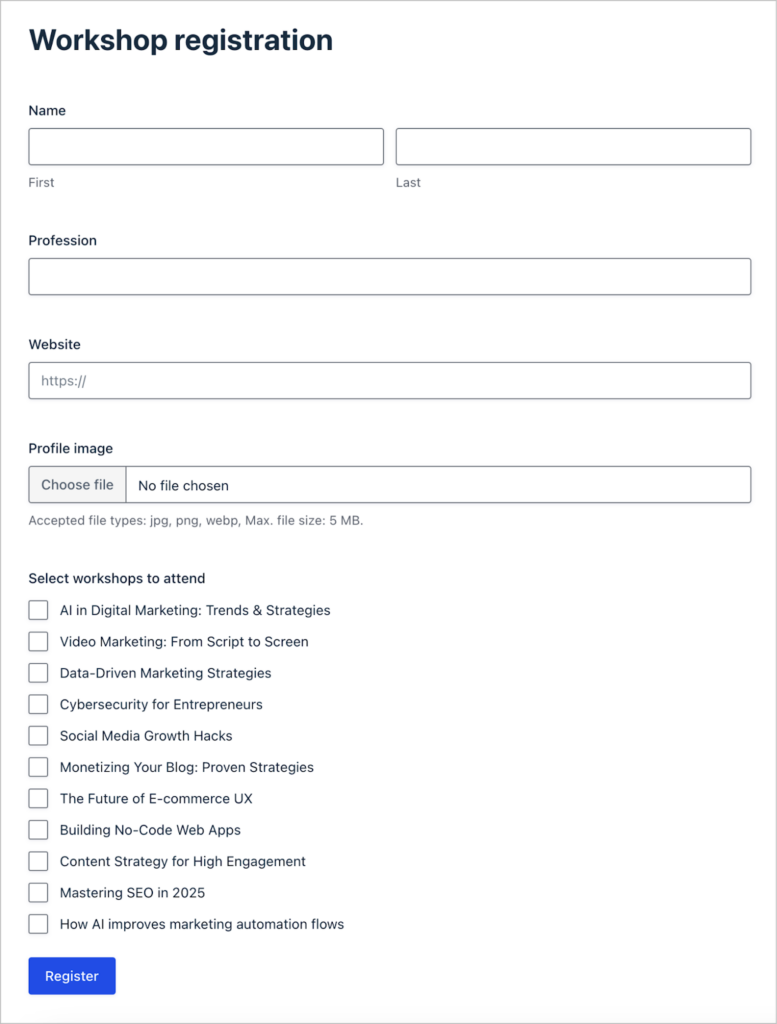
If a user decides they are going to attend the conference, they can register via a form and select which workshops they want to attend. The workshop choices are pulled in dynamically from the list of workshops on the site!
When users register for the conference, their profiles will be added to the “Attendees” page which displays their profile image, name, profession and a link to their website or social media profile.

Wanna try it?
Spin up a demo
See what you can build with GravityView — explore the live demo.

What you’ll need
Workshop submission form
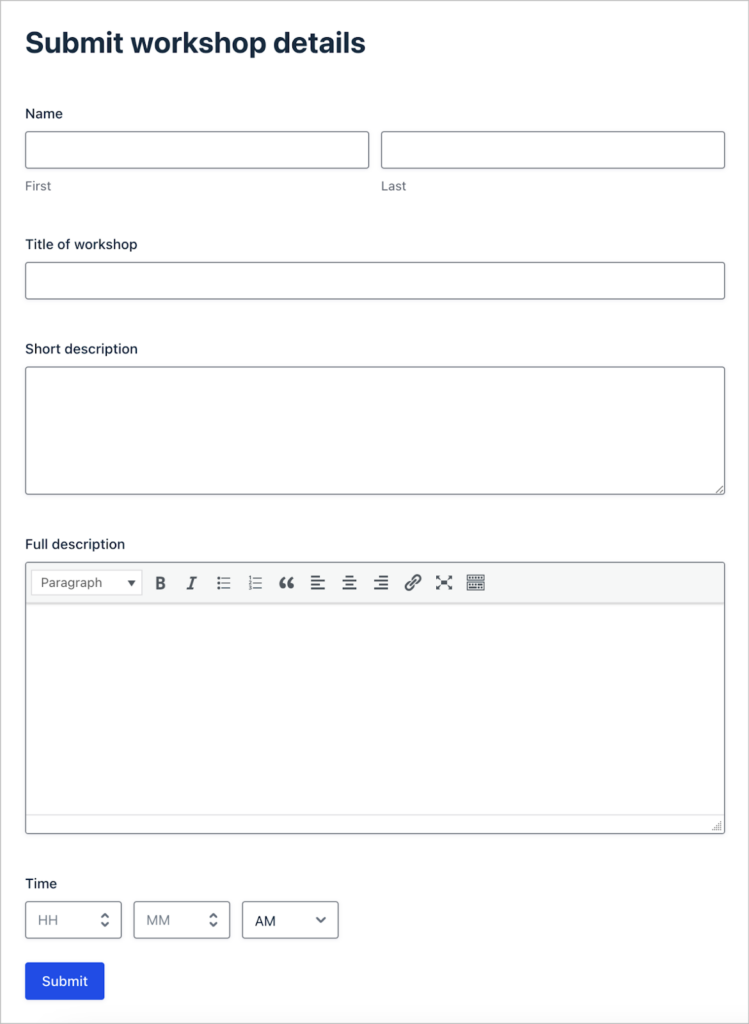
Let’s start by creating the workshop submission form. This will allow conference speakers to submit details about the workshops that they’re planning to run.
To create a new form, we’ll hover over “Forms, click “New Form” and start with a blank template. Now we can start constructing our form by dragging and dropping fields from the right-hand panel. For this example, we’ll keep things simple by adding the following fields:
- Speaker name (“Name” field)
- Title of workshop (“Single Line Text” field)
- Short description (“Paragraph Text” field)
- Full description (“Paragraph Text” field with rich text editor enabled)
- Time (“Time” field)
Depending on the type of conference or event you’re hosting, feel free to customize this form as you see fit! Here’s what our simple workshop submission form looks like on the front end:
Creating the workshops View
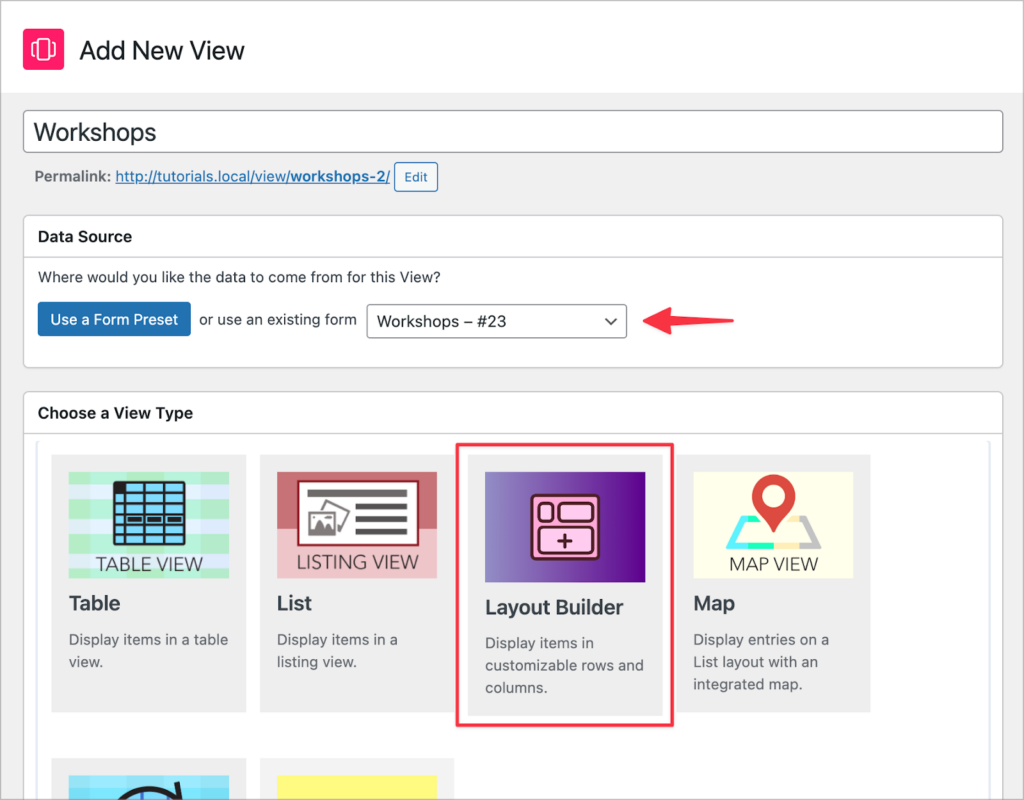
Now let’s create a View to display workshops in a list, so that users can browse and see what interesting workshops are on offer.
To create a new View, we’ll hover over “GravityKit” and click “New View”. After giving our View a name, we’ll select our Workshops form as the data source and choose “Layout Builder” as our View type.
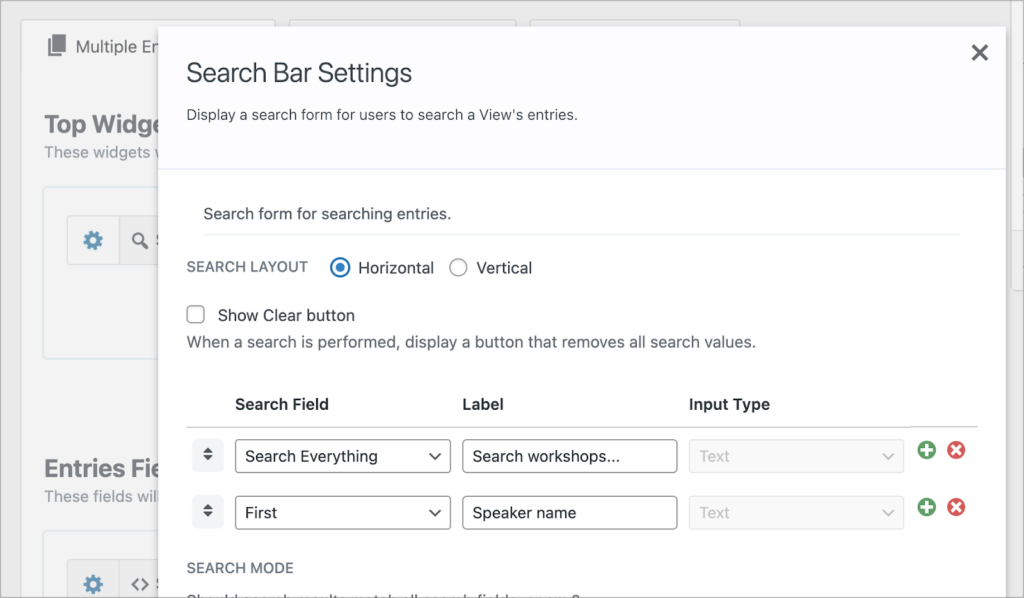
GravityView’s powerful Layout Builder enables us to construct custom layouts for our data using rows and columns. First, we’ll add a search bar widget to the “Top Widgets” area with two search inputs, enabling users to search workshops for keyword or speaker name.
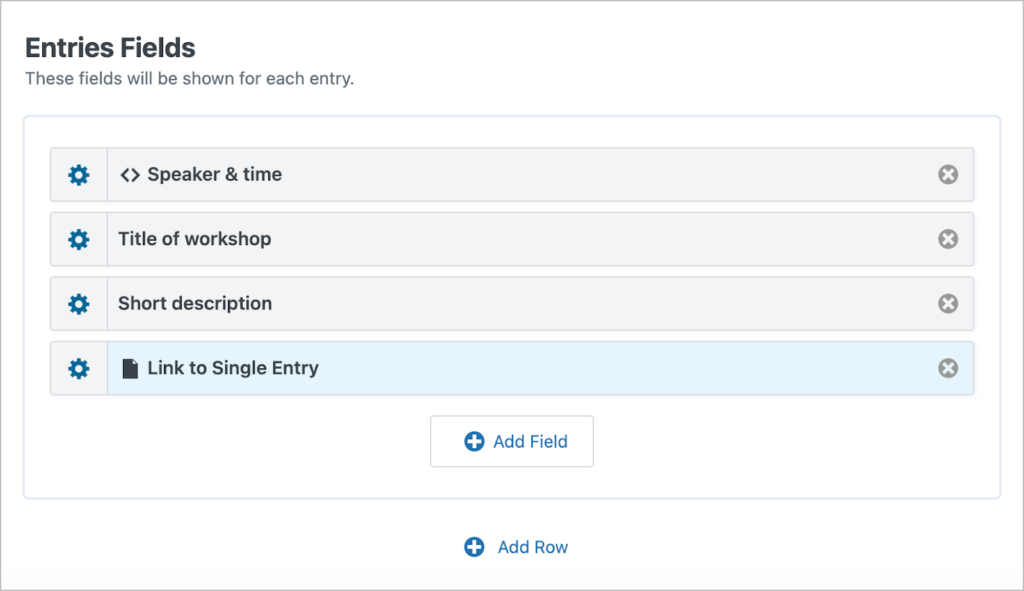
Next, we’ll scroll down to the “Entries Fields” section to add details about each workshop, including the speaker, time, title and short description. Finally, we’ll add a “Link to Single Entry” field. This will take users to the Single Entry page where they can view more information about a specific workshop.
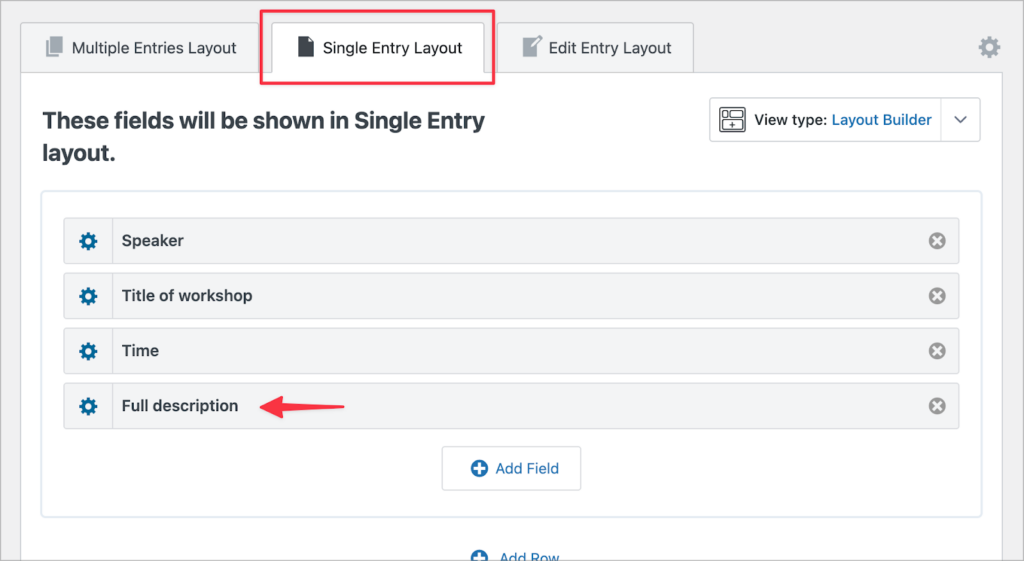
To configure the Single Entry page, we’ll click on the “Single Entry Layout” tab at the top of the View editor. Here, along with the Speaker, Title of workshop and Time fields, we’ll also add the “Full description” field.
Here’s what our workshops View looks like on the front end:
Attendee registration form
Now let’s turn our attention to the attendee registration form. This form will allow attendees to register for the conference and select which workshops they want to attend.
We’ll start by adding the following fields:
- Name (“name” field)
- Profession (“Single Line Text” field)
- Website (“Website” field)
- Profile Image (“File Upload” field)
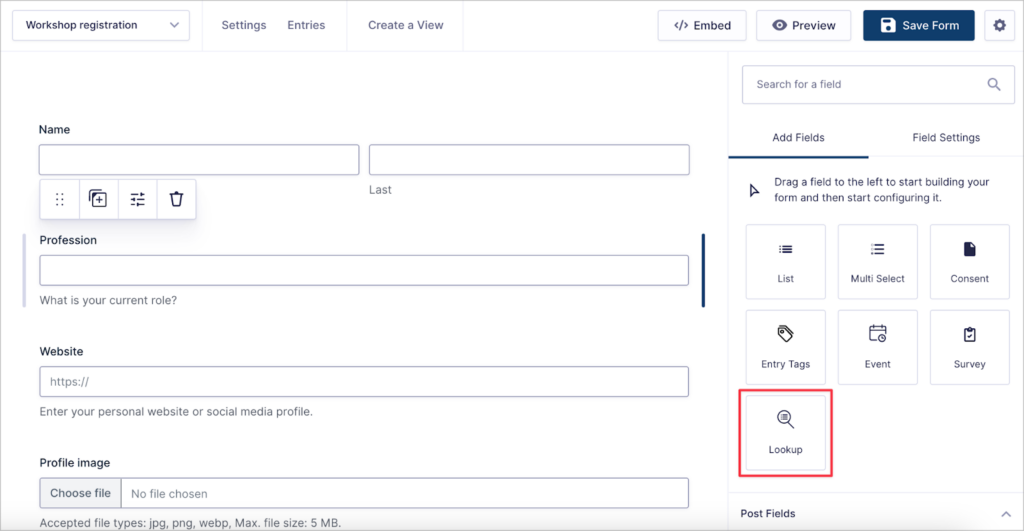
Next, we need a way for users to select which workshops they want to attend. We can do this using the Gravity Forms Dynamic Lookup add-on. This add-on adds a new “Lookup” field type that enables us to dynamically populate field choices from other Gravity Forms entries or WordPress users.
We can use the Lookup field to pull in workshop names dynamically and display them as field choices!
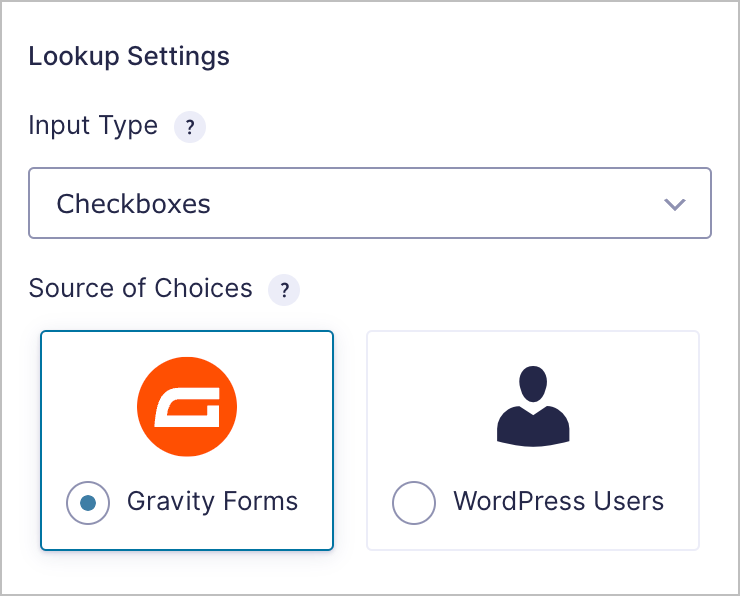
After adding the field to our form, we’ll need to configure the options in the field settings. We’ll start by selecting an input type. The Lookup field supports three input types—Drop Down, Radio Buttons and Checkboxes. We’ll select Checkboxes as the input type as we want attendees to be able to select multiple workshops if they want to.
Next, we’ll select “Gravity Forms” as the source type.
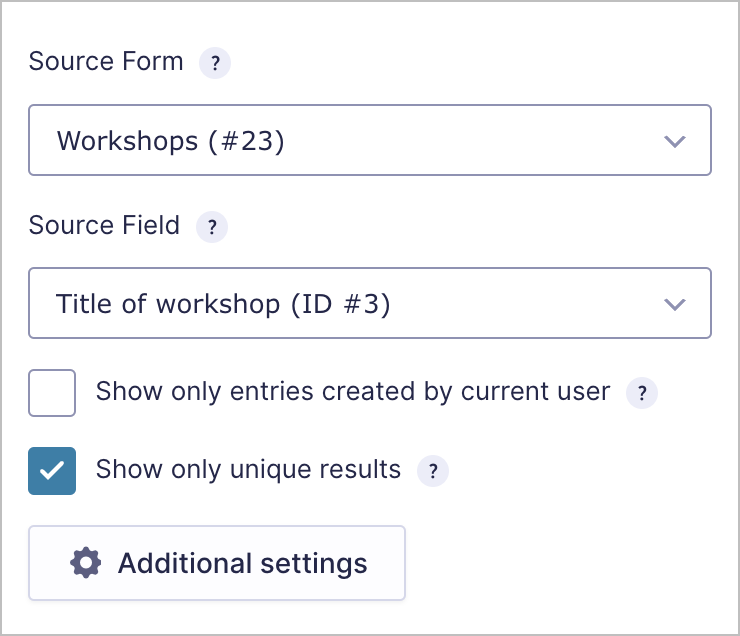
Now we need to choose a source form and field. We’ll select our Workshops form as the source form and select the “Title of workshop” as the source field. This ensures that each workshop title will show up as a checkbox choice that users can select!
Here’s what our workshop registration form looks like on the front end:

As you can see, the choices in the “Select workshops to attend” field are being dynamically populated from the workshops that speakers submitted. If new workshops are submitted, they will automatically appear here as a new choice!
💡 Pro tip: Use GravityCalendar to create an events calendar for your site that integrates with Google Calendar and iCal.
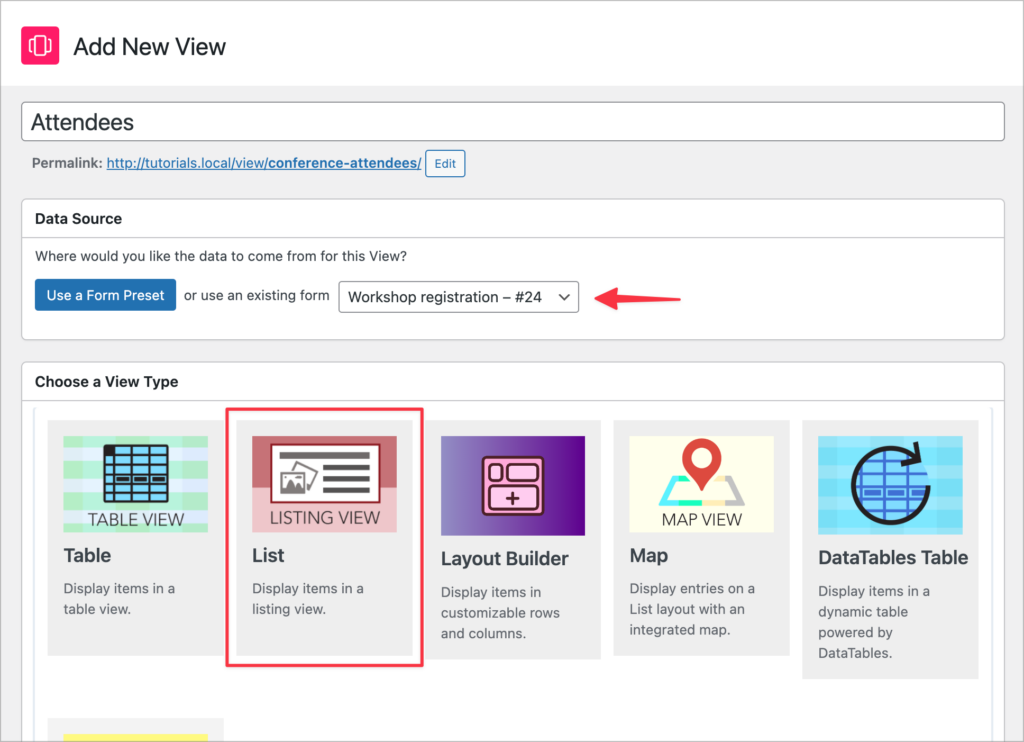
(Optional) Creating the attendees View
Many events/conferences have an “Attendees” page where users can browse who will be attending the event. We can use GravityView to create a dynamic attendees page that will update as new users register for the conference. All we need to do is create a View to showcase attendee information and embed it on a new page.
Let’s select our Workshop registration form as the data source and choose “List” as our View type.
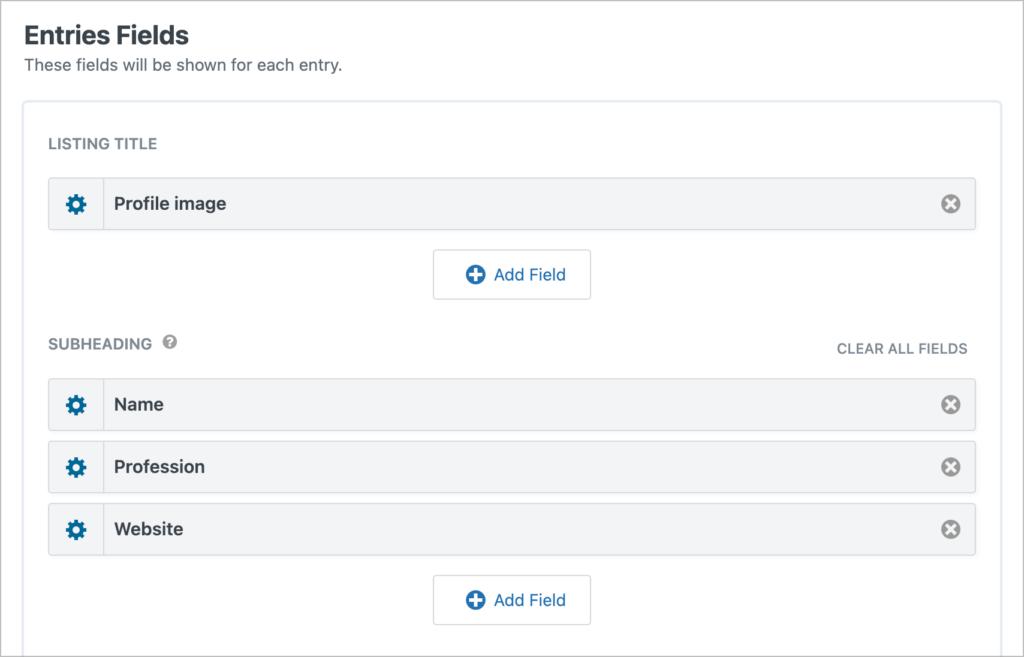
We want to display information about each of the attendees going to the conference, so first we’ll add the Profile image field to the Listing title section. Next, we’ll add the Name, Profession and Website fields to the Subheading section.
Finally, we want to display attendee profiles in a grid instead of a list so we’ll add a small CSS snippet to our View.
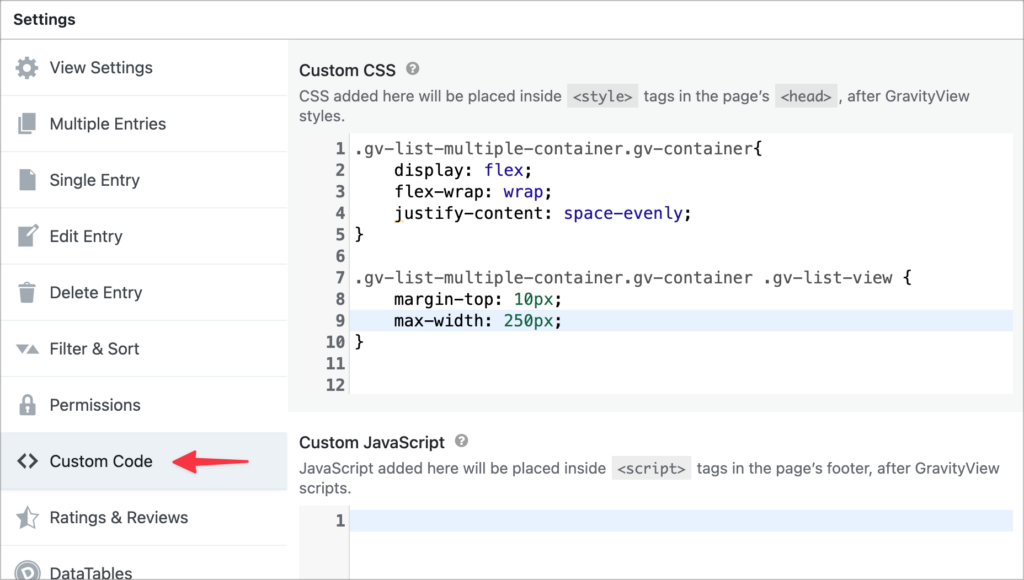
Here’s the code if you want to copy and paste it:
.gv-list-multiple-container.gv-container {
    display: flex;
    flex-wrap: wrap;
    justify-content: space-evenly;
}

.gv-list-multiple-container.gv-container .gv-list-view {
    margin-top: 10px;
    max-width: 250px;
}
And that’s it! The final step is to embed our View on a new page. Here’s what it looks like on the front-end:

Build your event registration site today!
By leveraging Gravity Forms, GravityView, and the Dynamic Lookup add-on, you can create an intuitive and automated event registration system on your WordPress site.
With a dynamic registration form and seamless data display, your event management workflow becomes more efficient and scalable. Ready to build your own? Get started with GravityView today and streamline your event registrations!

Helpful tips right in your inbox.
Subscribe to get the latest articles, information on releases and helpful Gravity Forms tips!
More articles

Launch Log: theme template editing in Block MCP, Shield silentCAPTCHA for Zero Spam, and GravityView fixes
Block MCP adds safe theme template editing, Gravity Forms Zero Spam gains Shield silentCAPTCHA support, and GravityView fixes lightbox and notice bugs.

GravityKit turns 12: a year in review, and 30% off Lifetime All Access
GravityKit turns 12. A look back at a year of GravityView 3.0, GravitySearch, and AI-assisted building, plus a birthday sale on the Lifetime All Access Pass.

Launch Log: Row headers for screen readers, smarter conditional logic, and multi-View fixes
GravityView 3.1 adds row headers for screen readers, plus smarter conditional logic in GravityCalendar and fixes for DataTables, Maps, and Dynamic Lookup.
