Published
•
Updated
How to create an ordering system for a hotel on WordPress without code
Build an automated ordering system on WordPress using Gravity Forms and GravityKit. The hotel breakfast ordering example applies to any order workflow, no code required.

Looking to create an automated ordering system on WordPress?
In this tutorial, we’ll create a breakfast ordering system for a hotel using Gravity Forms and GravityKit. Bear in mind that you can apply this to any kind of automated system that you want to build!
This is a perfect example of how Gravity Form and GravityKit work together to streamline operations and help you build powerful web apps without any code.
Let’s dive in!
Download the free breakfast order form template now!
Import the template into Gravity Forms and customize as necessary.
Sneak peek
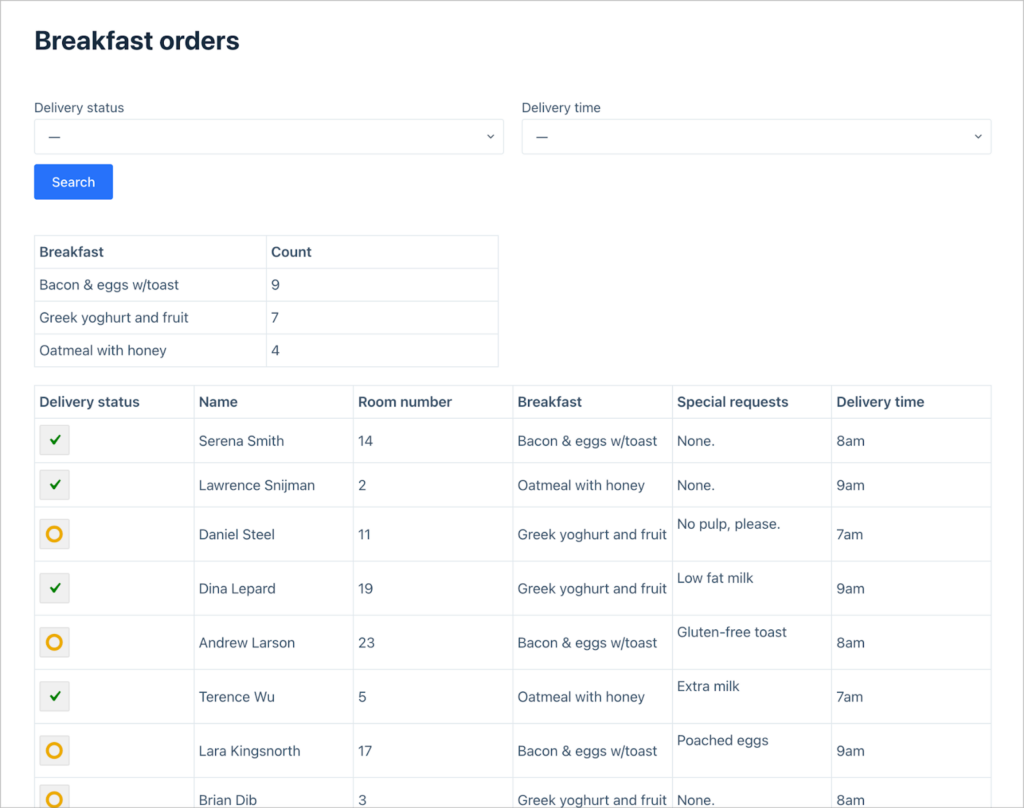
Here’s a look at what our completed order system looks like.
It starts with a form—hotel guests use this to submit their breakfast orders for the following day.
All of those orders are then displayed in dashboard that only hotel staff can access. Here, they can see the total orders of each meal, as well as information about individual orders. There is also a column for tracking delivery status and a search bar to filter orders by delivery time and status.

Keep reading to see how we built it!
Wanna try it?
Spin up a demo
See what you can build with GravityView — explore the live demo.

What you’ll need
Here are the plugins you’ll need to build an ordering system like the one in this example:
Creating the order form
Let’s start by creating an online ordering form that guests can use to order their breakfast for the following morning.
To create a new form in Gravity Forms, we’ll hover over “Forms” and click “New Form”. Now we can start creating our form by dragging and dropping fields from the right-hand panel.

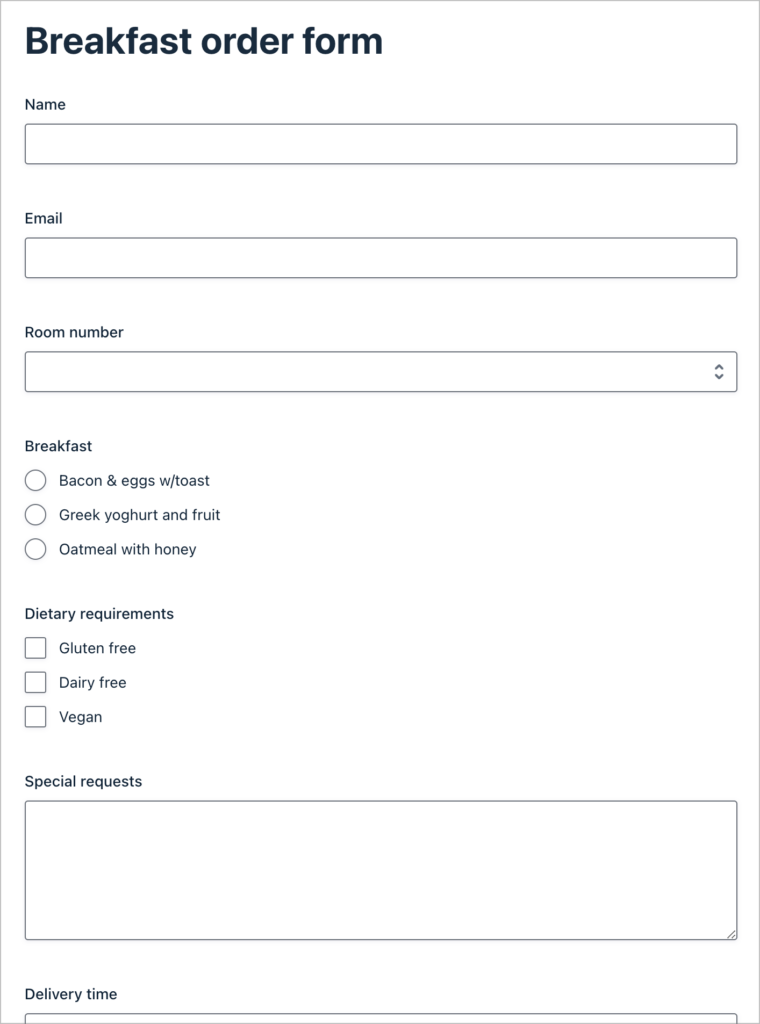
To keep things simple, we’re going to create a form with the following fields:
- Name (“Single Line Text” field)
- Room number (“Number” field)
- Breakfast (“Radio Buttons” field)
- Delivery time (“Drop Down” field)
- Special requests (“Paragraph Text” field)
Depending on the type of ordering system you’re building, feel free to add any fields that are necessary. Remember, this is just an example to show you what’s possible—you could easily extend this to more complex use-cases.
To embed this form on our site, we’ll simply create a new page and use the Gravity Forms block to insert our form. We can then send the link to guests so that they can order their breakfast for the following day!
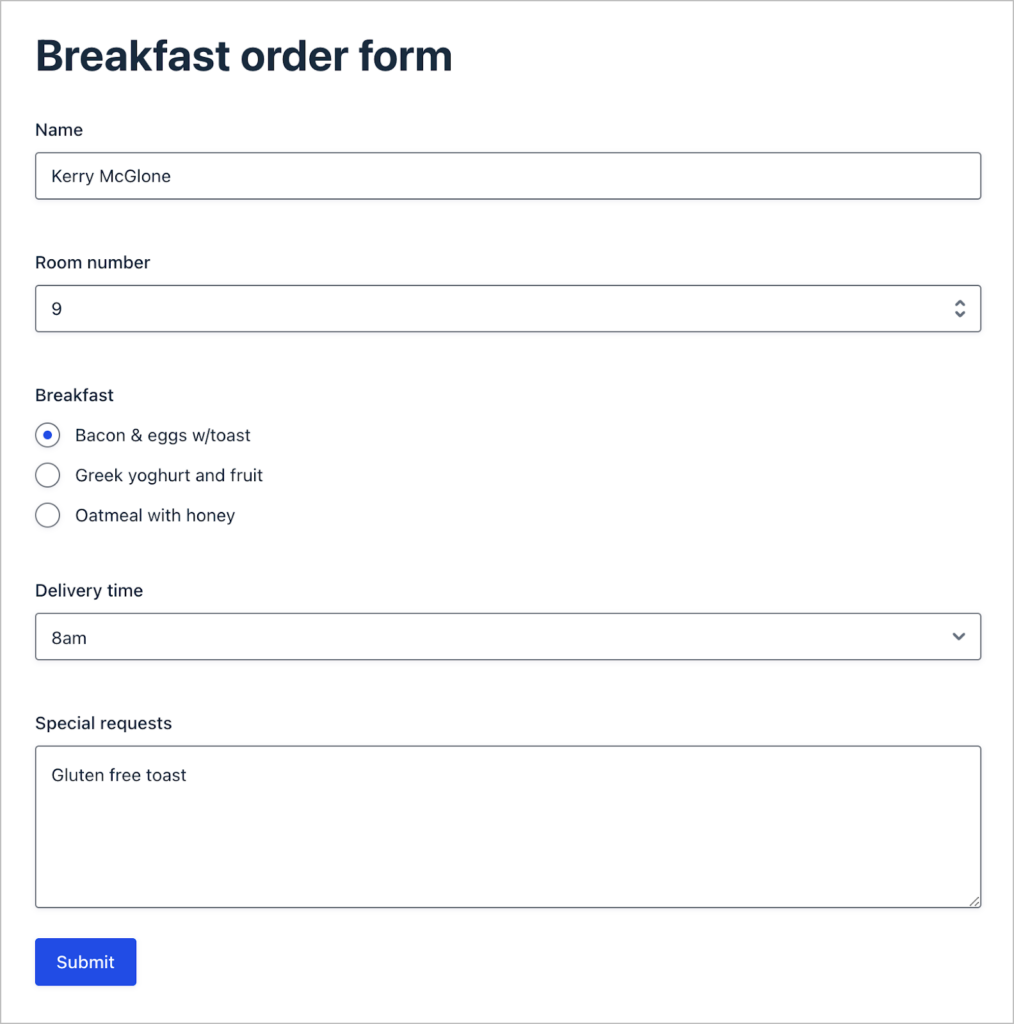
Okay, here’s what our simple breakfast order form looks like on the front end:

The next step is to create a View to tally up the orders, making it easy for the kitchen to prepare the right amount of each meal. This will also make it easier for the hotel staff to track breakfast orders and ensure all guests received the correct meal.
Creating a View to record and track orders
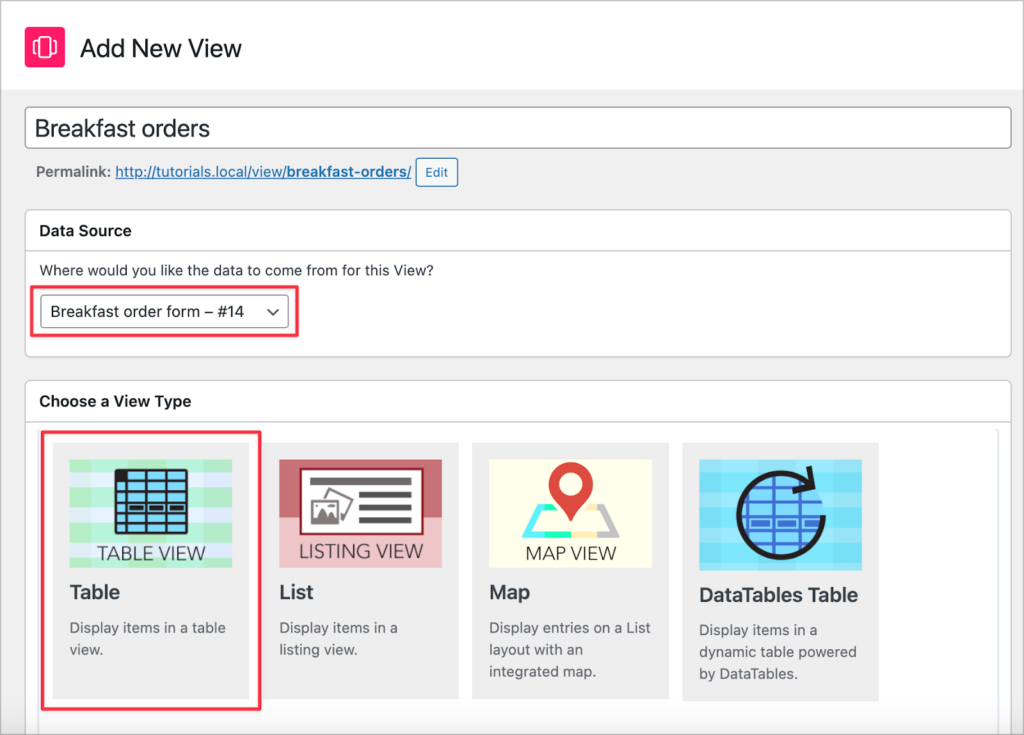
Now we’re going to use GravityView to create a dashboard where hotel staff can view orders and track their status. To create a new View, we’ll hover over “GravityKit” and click “New View”.
After giving our View a name, we’ll select our “Breakfast order form” as the data source and choose “Table” as our View type.
Now we can start constructing the View using GravityView’s simple drag and drop builder!
Adding a summary of order totals
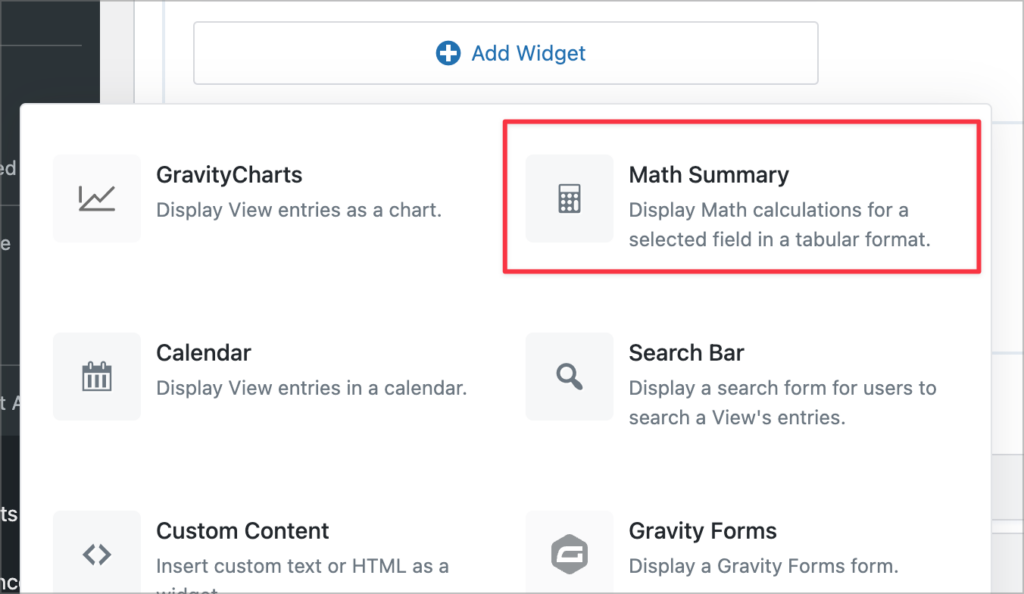
The first thing we’re going to do is add a summary of order totals. This will help the kitchen staff know how many meals of each type they need to prepare.
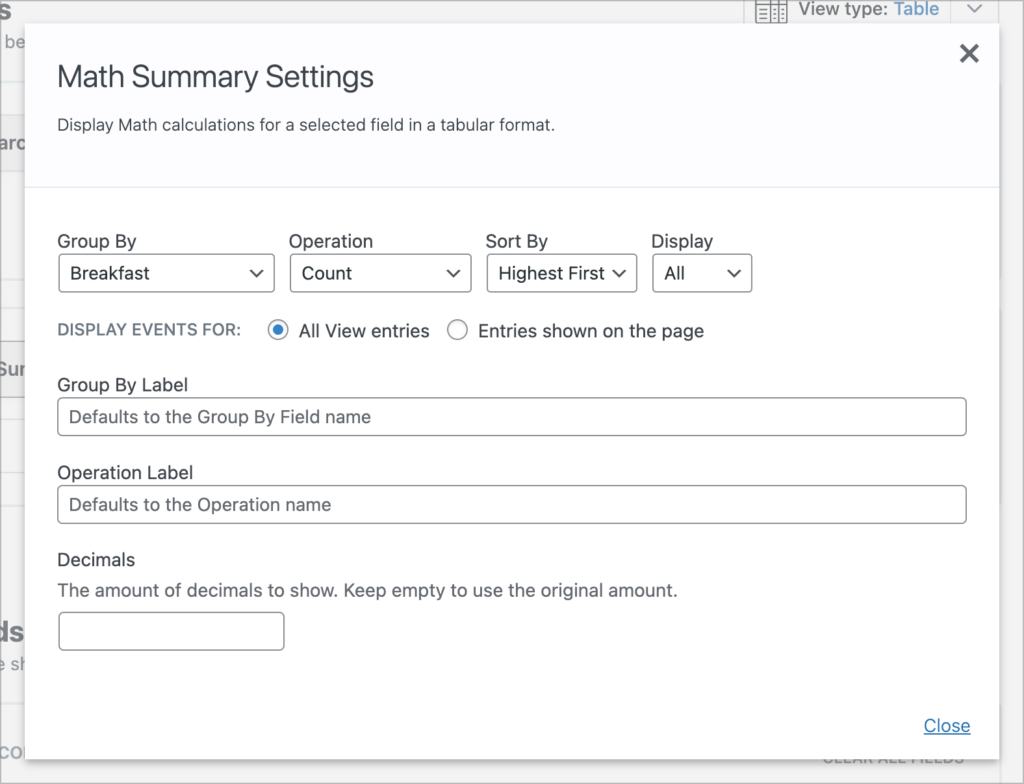
To add this, we’ll click “Add Widget” and then choose the “Math Summary” widget.
After adding the widget to our View, we’ll click on the gear icon to configure the summary report. We need to choose a field to group by, an operation to perform, and a sort direction. We’ll group by the “Breakfast” field, perform a count to get the total ordered for each option, and sort by highest to lowest.
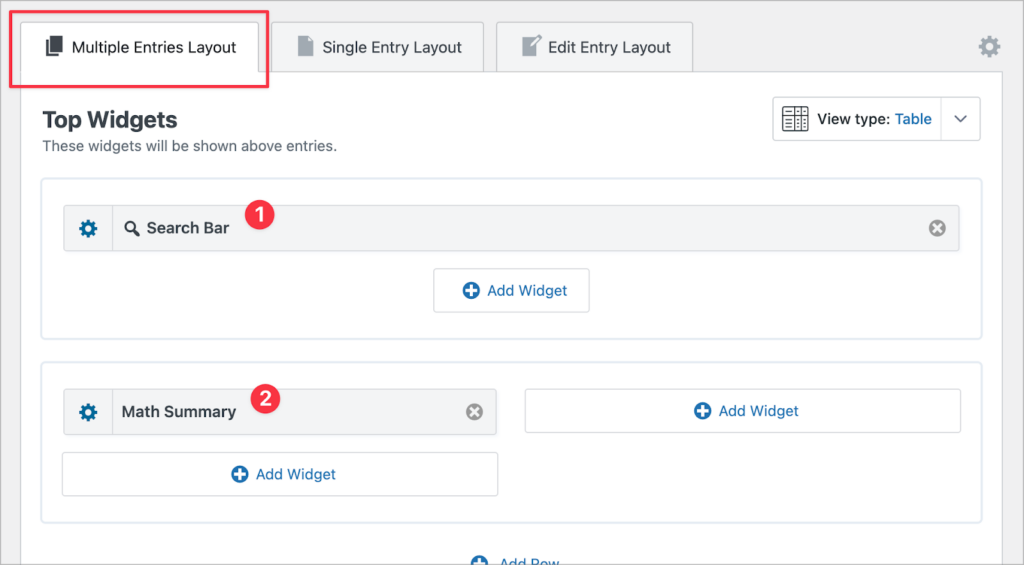
After configuring the order summary, we’ll add a search bar. This will enable hotel staff to filter orders by delivery time, status or order type! To do this, we’ll simply add a search bar widget to the top widgets area. After that, we can click on the gear icon to configure the search inputs.
Here’s what things looks like after adding our widgets:
The next step is to configure the table of orders.
Adding columns to the order table
Now, we’ll scroll down to the “Entries Fields” section of the View editor. Here we can add form fields that we want to be displayed in our table. Let’s go ahead and add the “Name”, “Room number”, “Breakfast”, “Special requests” and “Delivery time” fields.
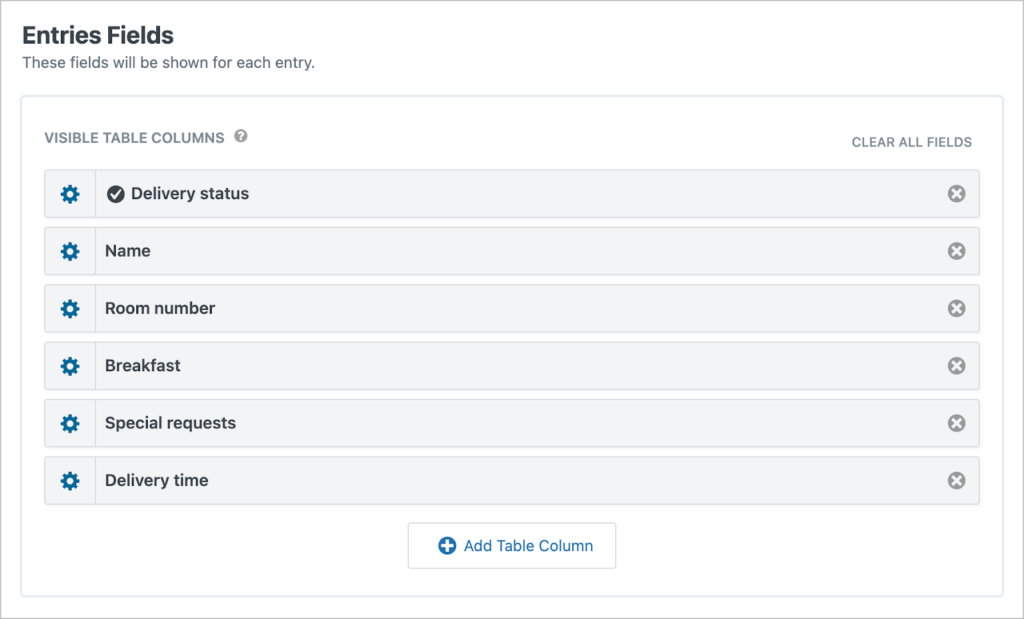
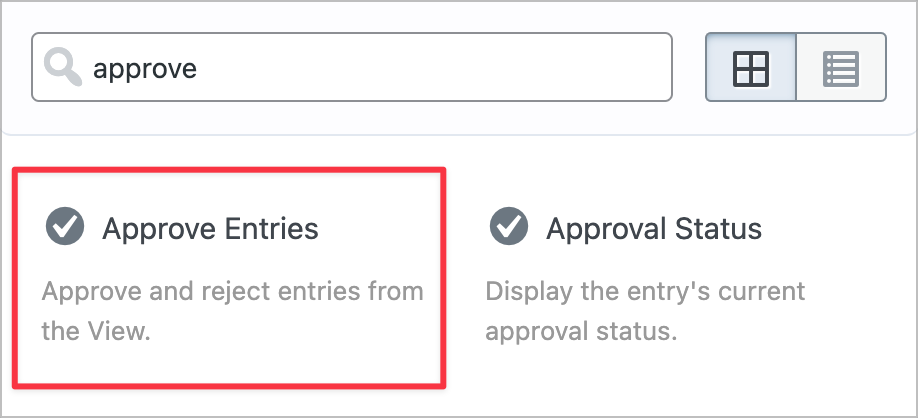
We’re also going to add the “Approve Entries” field. This is a custom field that enables you to update the status of an entry. We can use this to track the delivery status of each breakfast order!
The final step is to filter orders by date submitted, to ensure we’re only seeing the latest orders.
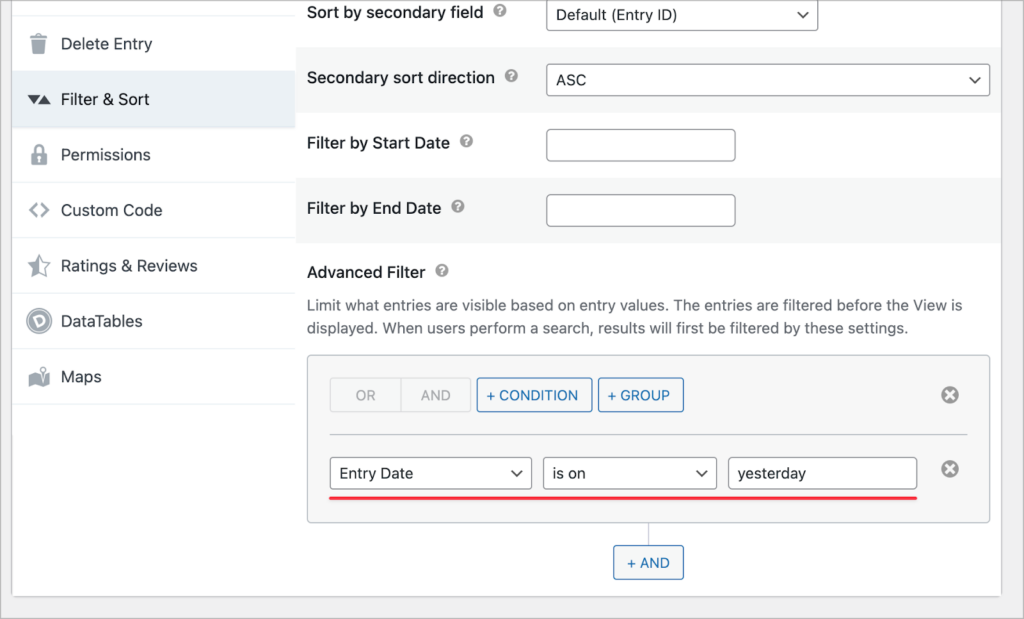
Filtering orders by date submitted
For this particular example, guests order their breakfast during the day and receive it the following morning. Therefore, we want to be sure that staff don’t see old orders that have already been made and delivered!
The easiest way to ensure this doesn’t happen is by adding an advanced filtering condition that excludes old orders.
We can do this by scrolling down to the View settings, clicking on the “Filter & Sort” tab and clicking “Add Condition”. Here we can add a condition to check that the entry was submitted the previous day and no earlier.
Pro tipWhen filtering by date, relative dates are supported! Learn more here.
Here’s what our finished ordering system looks like on the front end:
That’s it!
Build an automated ordering system today
And there you have it—a complete hotel breakfast ordering system built with Gravity Forms and GravityKit!
By combining Gravity Forms for data collection, GravityView for data presentation, and GravityMath for insights, we created a seamless solution that simplifies operations and enhances the hotel’s workflow.
Ready to elevate your website’s functionality? Get started with GravityKit today!

Helpful tips right in your inbox.
Subscribe to get the latest articles, information on releases and helpful Gravity Forms tips!
More articles

Launch Log: GravityView 3.0, plus upgrades to Block MCP and GravityKit MCP
GravityView 3.0 lands with the new Vantage theme, frontend bulk actions, and AI-assisted View creation. This launch log also covers updates to GravityKit MCP, Block MCP, and Dashboard Views.

Announcing GravityView 3.0: a fresh new look, AI View creation, and native page builder support
GravityView 3.0 is here: restyle Views with the new Vantage theme, build them with AI, embed them in any page builder, and run bulk actions on the front end.

Launch Log: GravitySearch arrives, plus AI spam review and GravityView fixes
This week, releases are anchored by a brand-new product! GravitySearch joins the GravityKit suite with cross-form entry search for Gravity Forms. Alongside it, Gravity Forms Zero Spam picks up an AI-powered review step, and GravityView sees fixes for Enhanced Security, Edit Entry, and Entry…