Published
•
Updated
5 ways to automate your GravityKit applications
Automate GravityKit applications without code using WP Webhooks, Uncanny Automator, GamiPress, Make, and Zapier. Five practical integration methods covered step by step.

Automating your GravityView applications or form-based workflows has never been easier, thanks to powerful plugins and integrations that connect GravityView with a host of other tools.
In this post, we’ll explore how you can leverage WP Webhooks, Uncanny Automator, GamiPress, Make, and Zapier to supercharge your GravityView applications. These solutions offer ways to create automated processes without writing a single line of code!
Wanna try it?
Spin up a demo
See what you can build with GravityView — explore the live demo.

1. Using WP Webhooks
The popular WordPress automation plugin, WP Webhooks, integrates with GravityView, enabling you to build codeless workflows for your form-based web apps. The integration connects GravityView to over 100 other apps and WordPress plugins!
Using WP Webhooks, you can create “Flows” on your site that cause actions to occur when a certain activity is triggered. WP Webhooks supports two GravityView triggers: Entry approved and Entry rejected.
💡 Pro tip: Learn more about GravityView’s built-in entry approval system.
Example automations
Here are some examples of how you could potentially use these triggers:
- When an entry is approved via GravityView, create a new post in WordPress.
- When an entry is approved via GravityView, create a user membership via WooCommerce Memberships.
- When an entry is approved via GravityView, add a tag to a contact in FluentCRM.
- When an entry is approved via GravityView, create a subscription in Easy Digital Downloads.
How to set it up
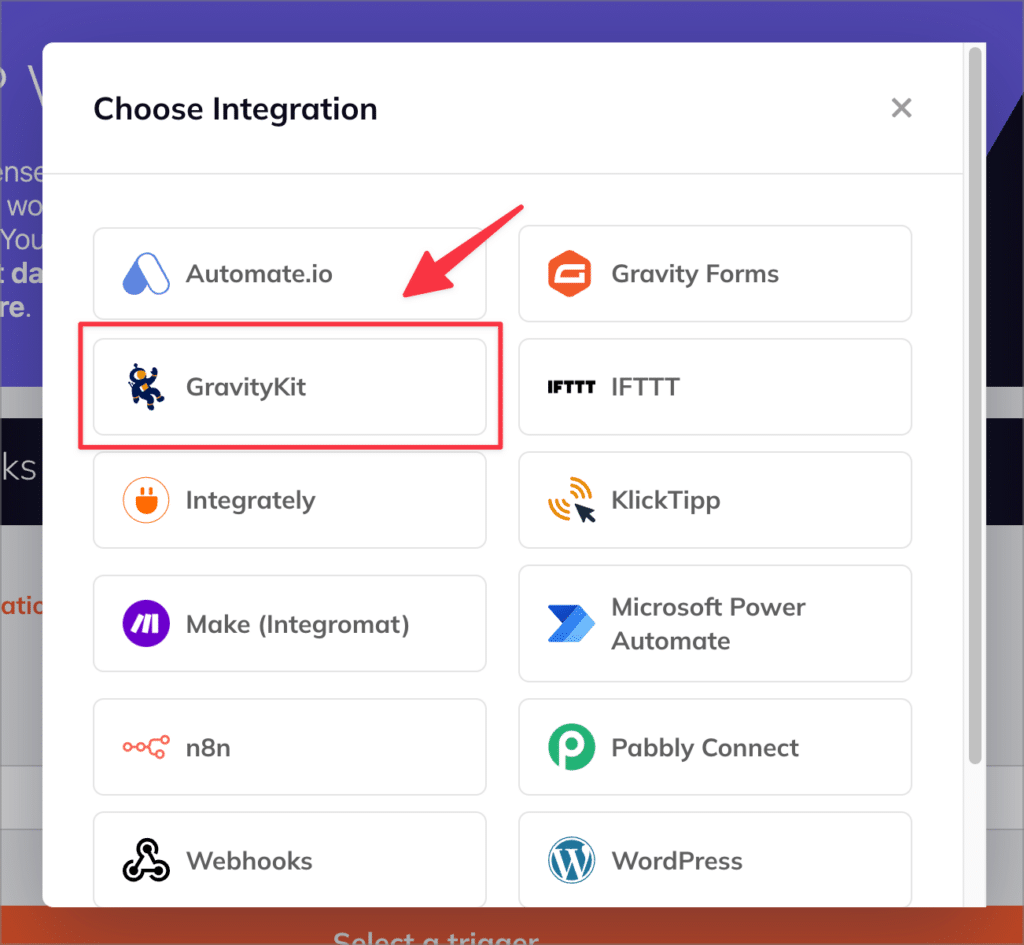
Start by installing the WP Webhooks plugin and creating a new “Flow”. Next, select the GravityKit integration as your starting point.
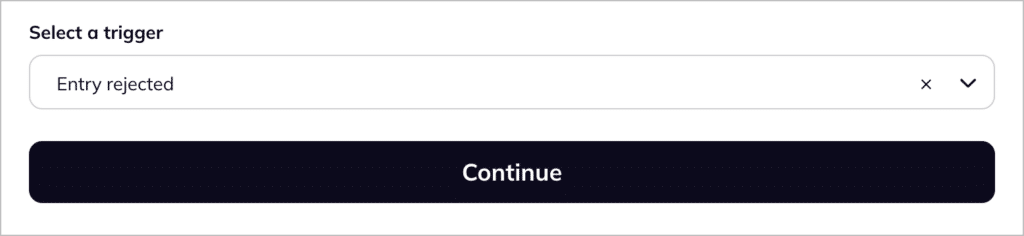
Next, choose a trigger; this is the activity that will cause the automation to occur.
After selecting a trigger, you can configure the trigger settings. For example, WP Webhooks allows you to limit the trigger to a specific form. The final step is to add an “Action”. This is the activity you want to occur after the trigger fires.
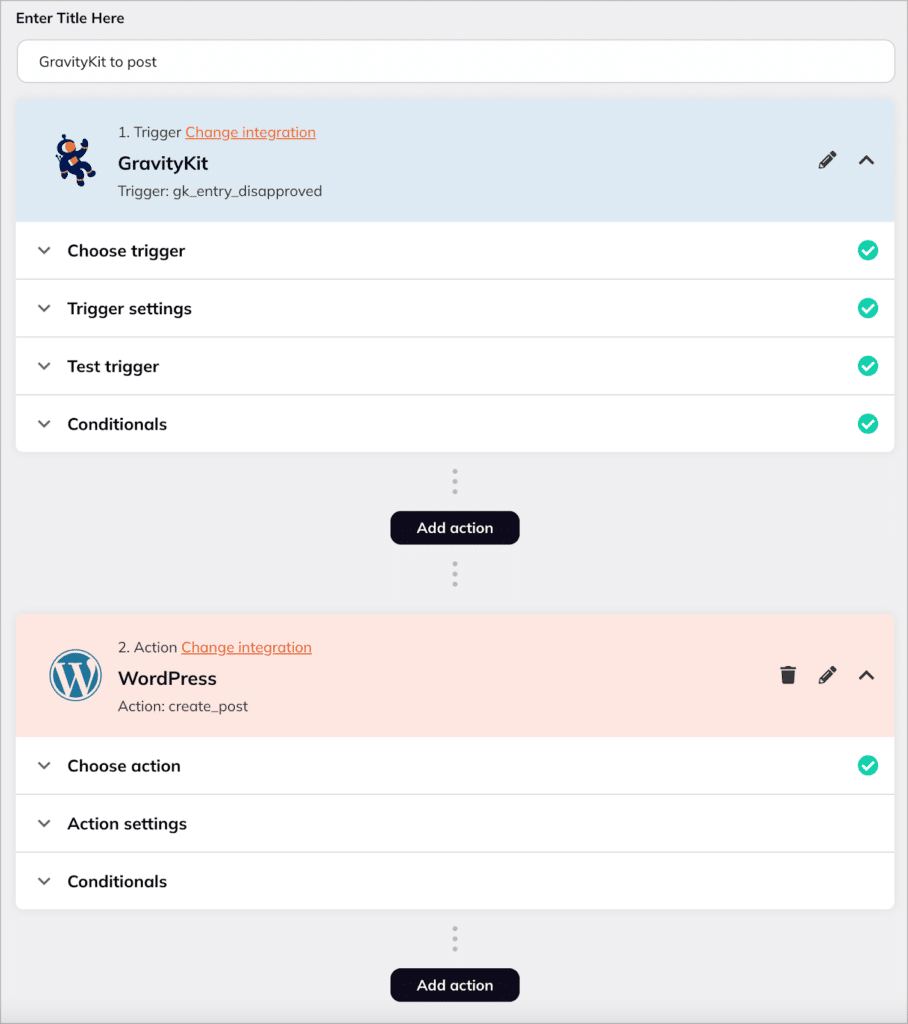
In this example flow, we set the action to “Create post”; that means that every time an entry is rejected in GravityView, a new WordPress post will be created! This is just one simple example out of many possible workflows you can set up using WP Webhooks.
2. Using Uncanny Automator
Uncanny Automator is another popular automation plugin for WordPress that enables you to create no-code workflows for your website!
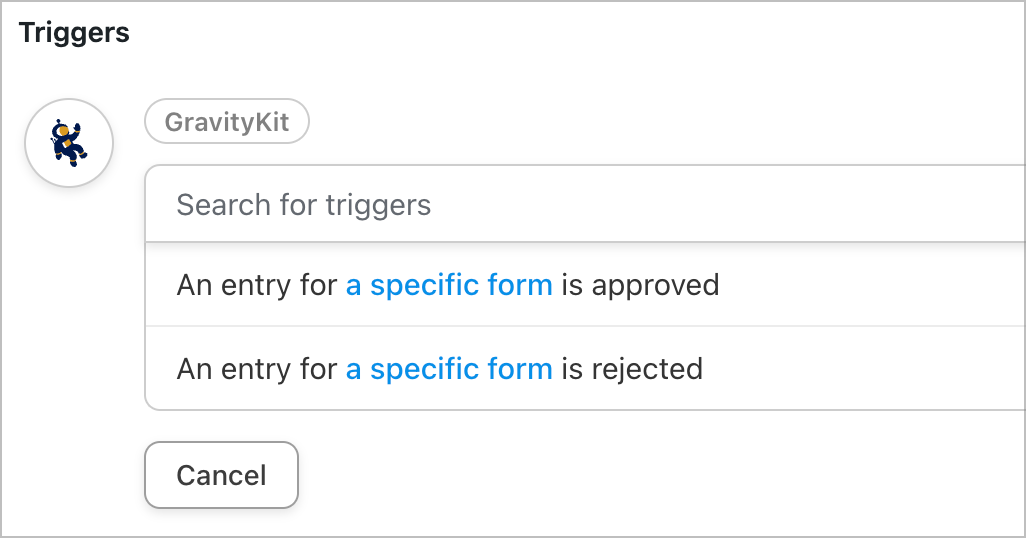
With Uncanny Automator, you can set up “Recipes” (i.e., automated workflows) that cause certain actions to occur when other activities happen. The plugin supports two GravityView triggers: An entry for a specific form is approved, and An entry for a specific form is rejected.
Using these triggers as a starting point, you can integrate GravityView with well over 100 other WordPress plugins and apps.
Example automations
Here are some more examples of different workflows that are possible using this new Uncanny Automator integration:
- When an entry for a form is rejected, notify the user via SMS message using Twilio
- When an entry for a form is approved, add a tag to the user in ActiveCampaign so they receive the correct email flow
- When a new form submission is approved, create a new row in Google Sheets
How to set it up
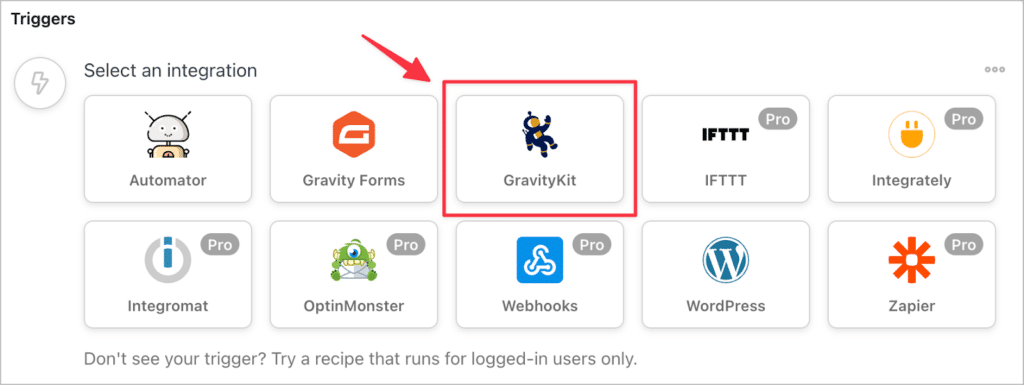
After installing the Uncanny Automator plugin, create a new recipe and choose GravityKit for the trigger.
Next, select the specific trigger you want to kick off the workflow. You’ll then need to select a specific form that the trigger applies to.
The final step is to configure an action, which determines what happens when the trigger is fired.
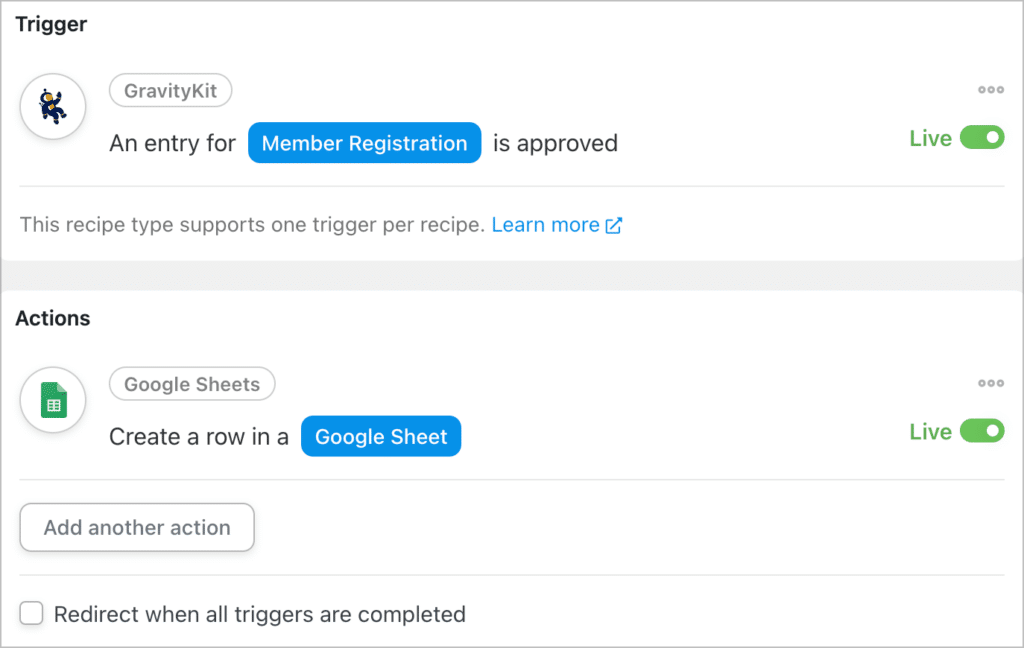
In this example, we’ve created a workflow that sends member registration details to Google Sheets once an entry has been approved in Gravity Forms!
3. Gamify your website with GamiPress
The GamiPress plugin enables you to gamify your website by awarding users with points when they perform certain actions. With the new GravityKit integration, you can award points to users based on actions they take in GravityView!
Here are all of the supported triggers in GravityView that enable users to receive points in GamiPress:
- Entry approved from any form
- Entry approved for a specific form
- Entry disapproved from any form
- Entry disapproved from a specific form
Example automations
Here are some examples of gamified automations that you can set up using the GravityKit integration for GamiPress:
- Award a user with a certain number of points when they approve an entry in Gravity Forms
- Deduct a certain number of points from a user when they disapprove an entry in Gravity Forms
How to set it up
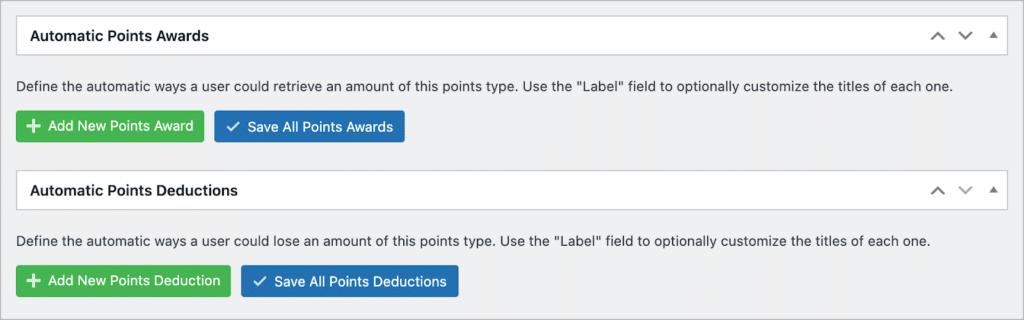
After installing the free GramiPress plugin, create a new points type and give it a name. Next, click on one of the green buttons to create a new points award or deduction.
After that, click on the dropdown labeled “When” to choose when the points award or deduction will occur. Search for “GravityKit” and select one of the supported triggers.
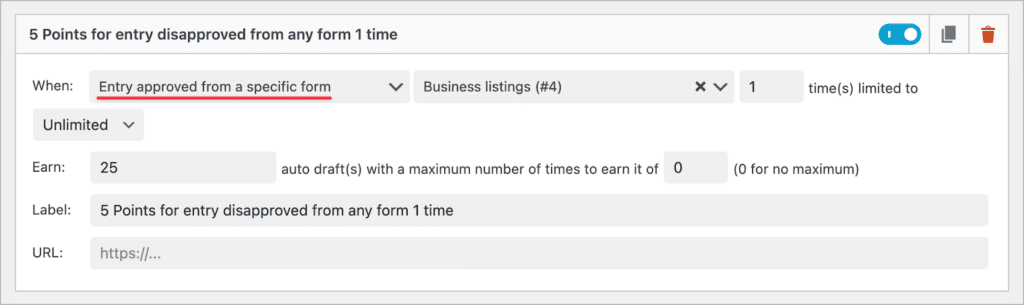
In this example, we’re awarding 25 points to a user when they approve a new entry from the “Business listings” form. Beyond points, you can also use GamiPress to award users with new achievements and ranks.
4. Automate anything with Make
Make is a popular platform for creating no-code business processes and automations. Make provides integrations with well over 1,000 different third-party apps and platforms. Connecting your GravityView applications to Make provides even more opportunities for automation.
Make does not have a WordPress plugin and they do not have a GravityKit integration. However you can connect GravityKit with Make using an intermediary, like WP Webhooks (the first plugin on this list!).
Example automations
In Make, automation workflows are called “scenarios”. Here are some examples of different scenarios you can set up by connecting GravityKit to Make:
- When an entry is rejected, send a notification on Slack
- When an entry is rejected, receive a message on Telegram
- When a new entry is approved, add a new task in Notion
How to set it up
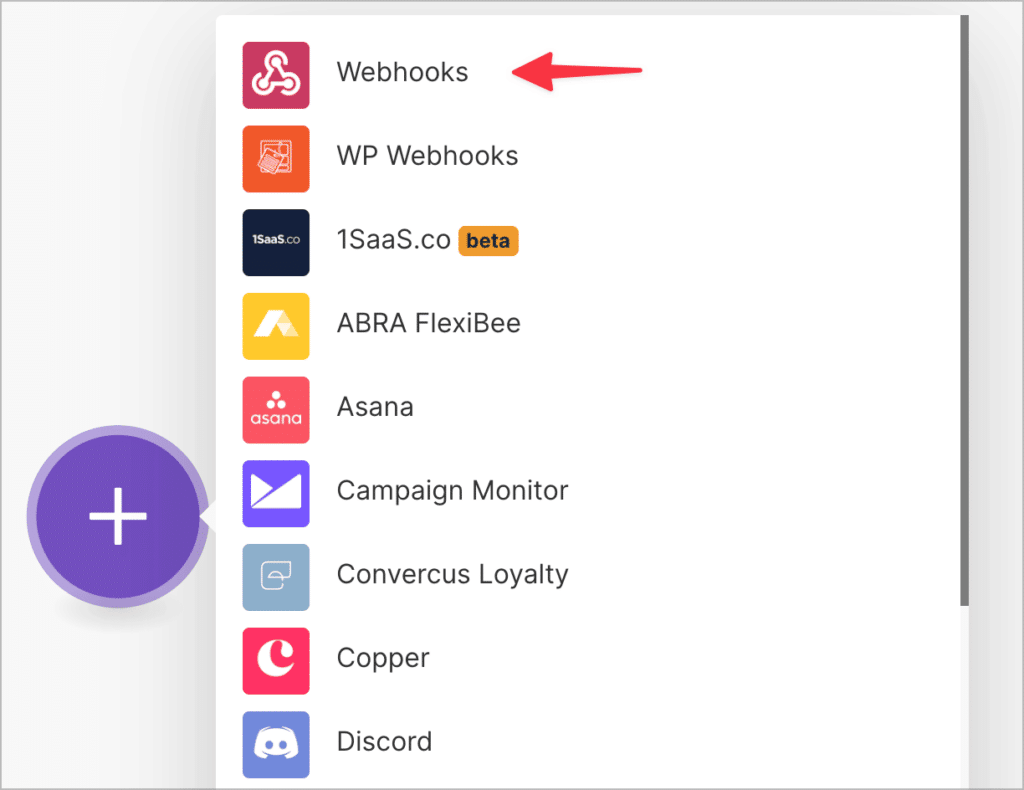
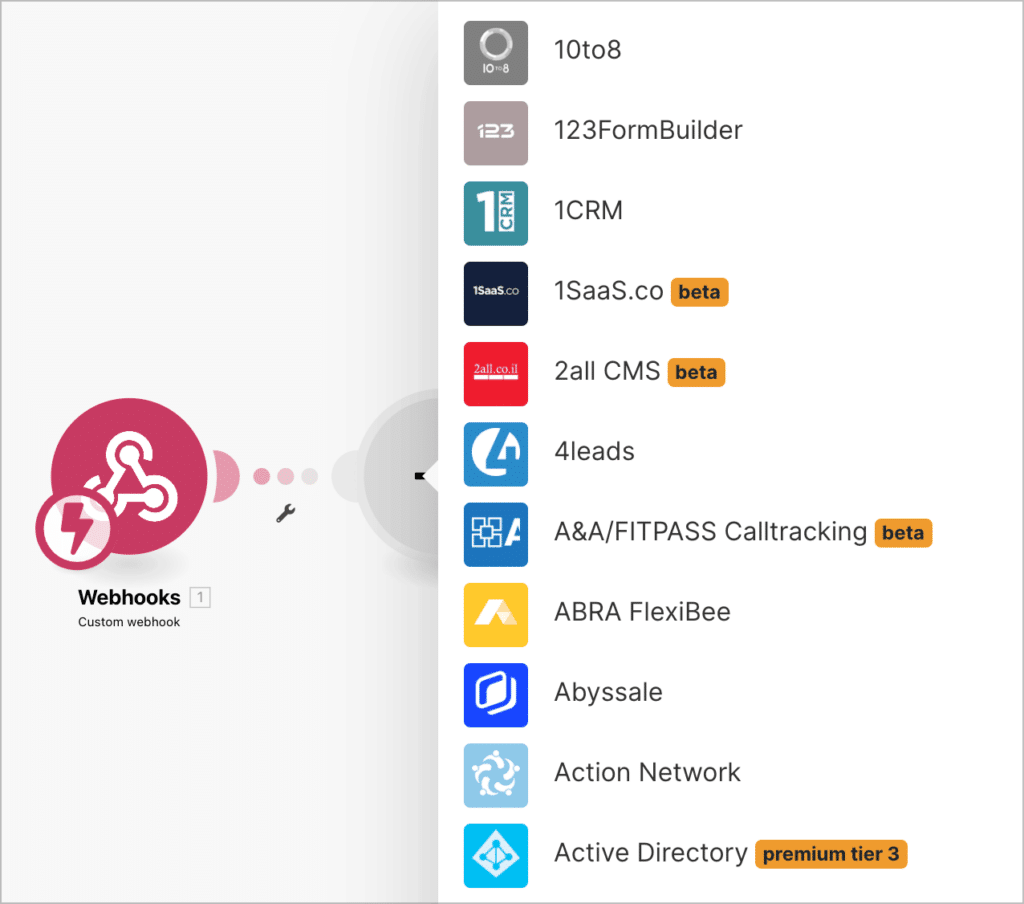
Start by signing up for a free account on Make and creating a new scenario. After that, click on the plus sign and select the “Webhooks” integration.
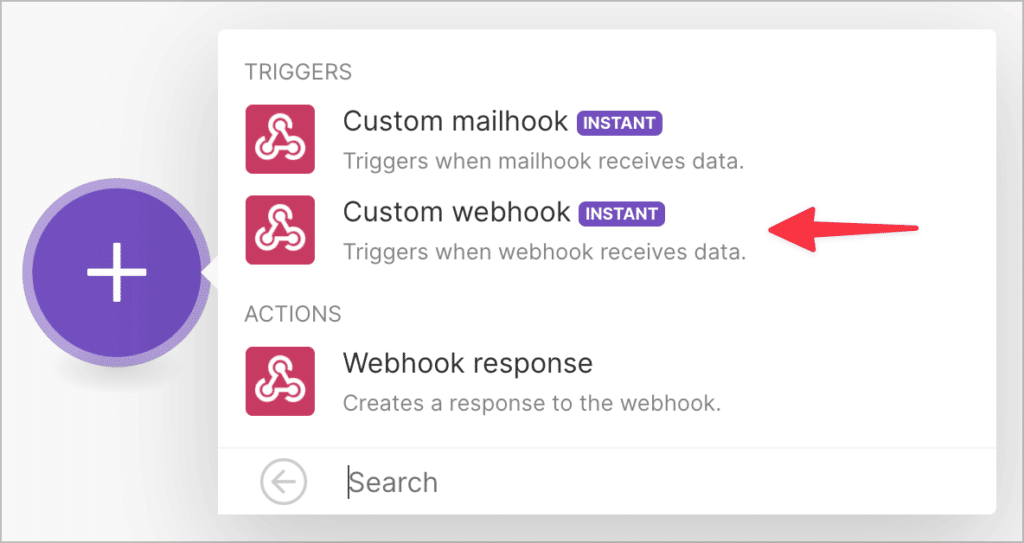
Next, you’ll need to choose a trigger; this is the activity that begins the workflow. Set the trigger to “Custom webhook”.
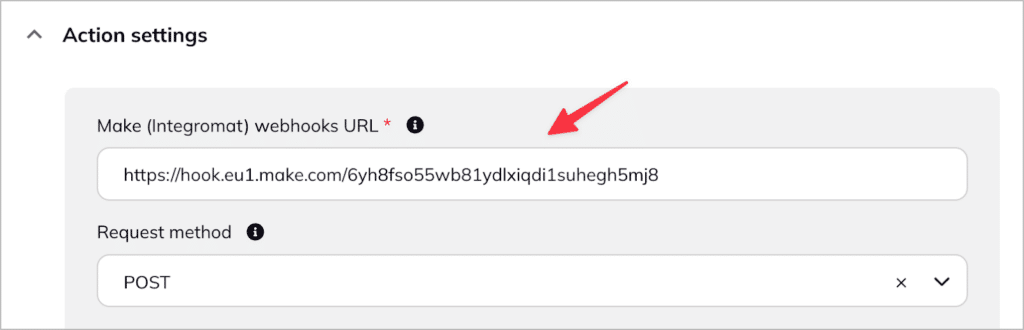
Make will then generate a unique webhook URL which you will need to save. After saving the URL, head over to your WordPress site where WP Webhooks installed and create a new flow.
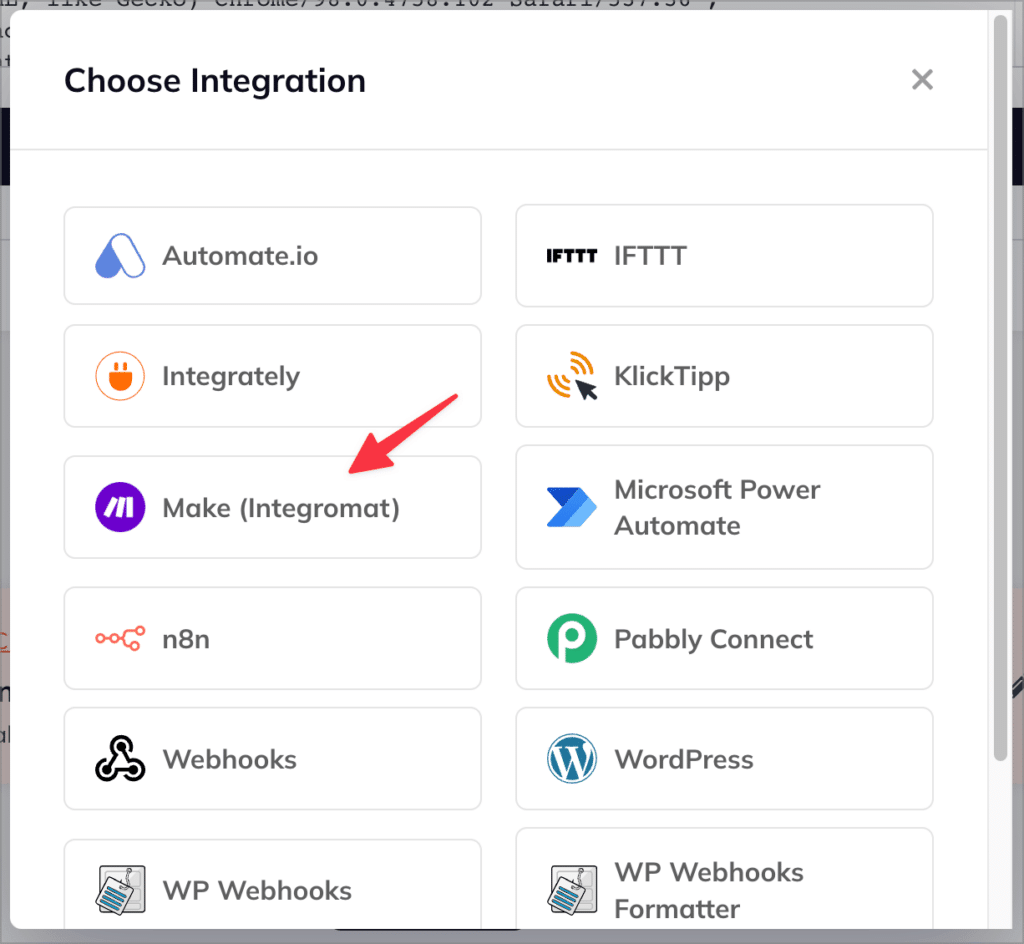
Choose GravityKit as your integration and select a specific trigger. After that, add an action and choose “Make”.
Next, define your action by selecting “Send data to webhook app”.

Now paste the webhook URL from Make that you saved in the previous step.
To cap off the flow, select the data you want to send to Make using Key-Value pairs.
After successfully connecting GravityKit with Make, you need to decide what to do with the data once it’s received. Therefore, the final step is to return to Make to complete your workflow!
You can connect GravityKit to any number of third-party applications, so the possibilities are endless!
5. Connect GravityKit to 5,000+ apps using Zapier
Zapier is a visual automation platform that provides integrations with over 5,000 different web applications! Like Make, Zapier does not have an integration with GravityKit directly, but you can connect to it using an intermediary plugin, like Uncanny Automator.
Example automations
Here are some examples of the many automations you can set up by connecting GravityKit to Zapier:
- When you approve a new entry via GravityView, create a new contact in HubSpot
- When you reject an entry via GravityView, add a new ticket in Zendesk
- When you approve an entry via GravityView, send a prompt to ChatGPT
- When you reject an entry via GravityView, send a message on Microsoft Teams
How to set it up
Start by creating a Zapier account and creating a new “Zap”. Select “Webhooks by Zapier” as the app.

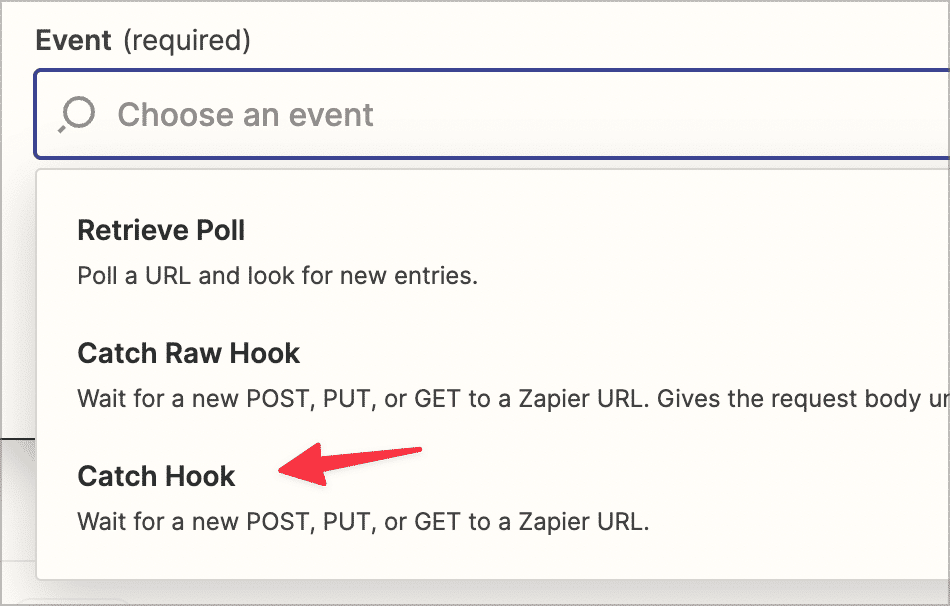
Next, you’ll need to select an event that triggers the workflow. For this, choose “Catch Hook”.
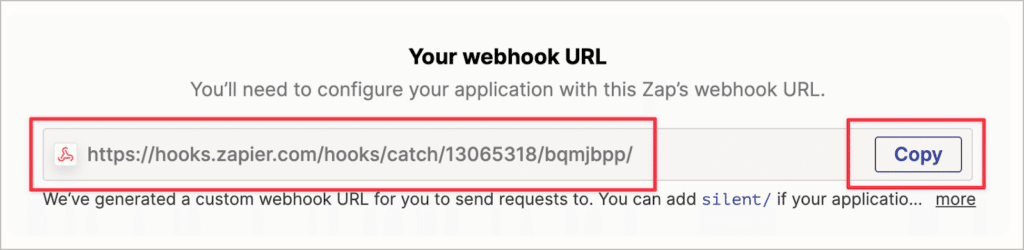
Zapier will then generate a unique webhook URL; make sure you save this.
The next step is to return to your WordPress site and create a new “recipe” in Uncanny Automator to send data to Zapier.
Create the recipe, select the GravityKit integration, and choose a trigger for the workflow. After that, you’ll need to choose an Action. This determines what happens when the trigger is fired.
For the Action, select “Zapier” and enter your webhook URL.
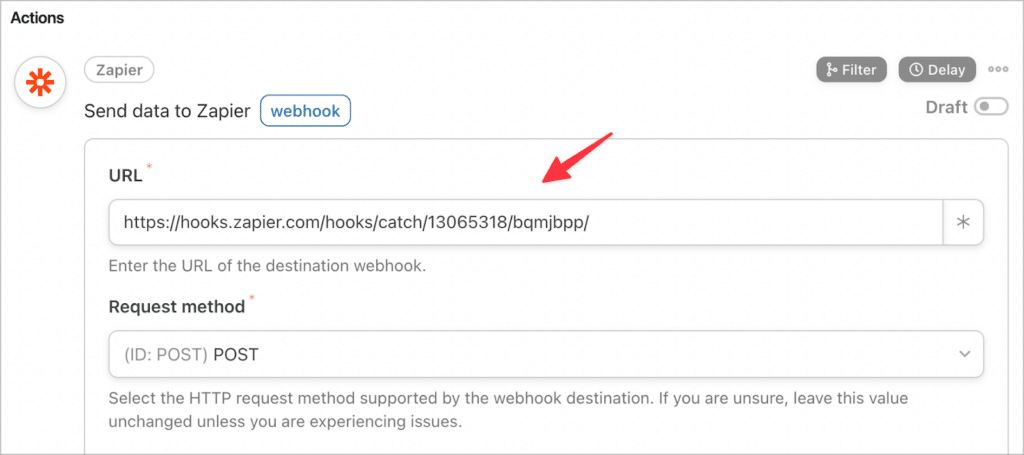
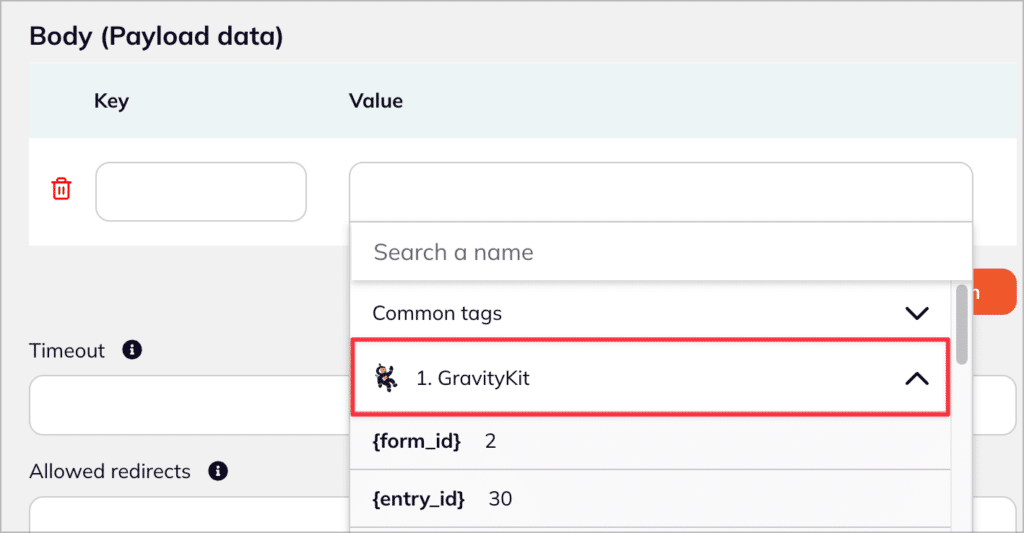
In the “Body” section of your webhook request, you can specify the data you want to send to Zapier by using Key-Value pairs.
After setting up your recipe in Uncanny Automator, return to Zapier to configure the rest of the workflow. To do this, you’ll need to choose an event—this is the activity that will happen once Zapier receives data from GravityKit via the webhook URL.
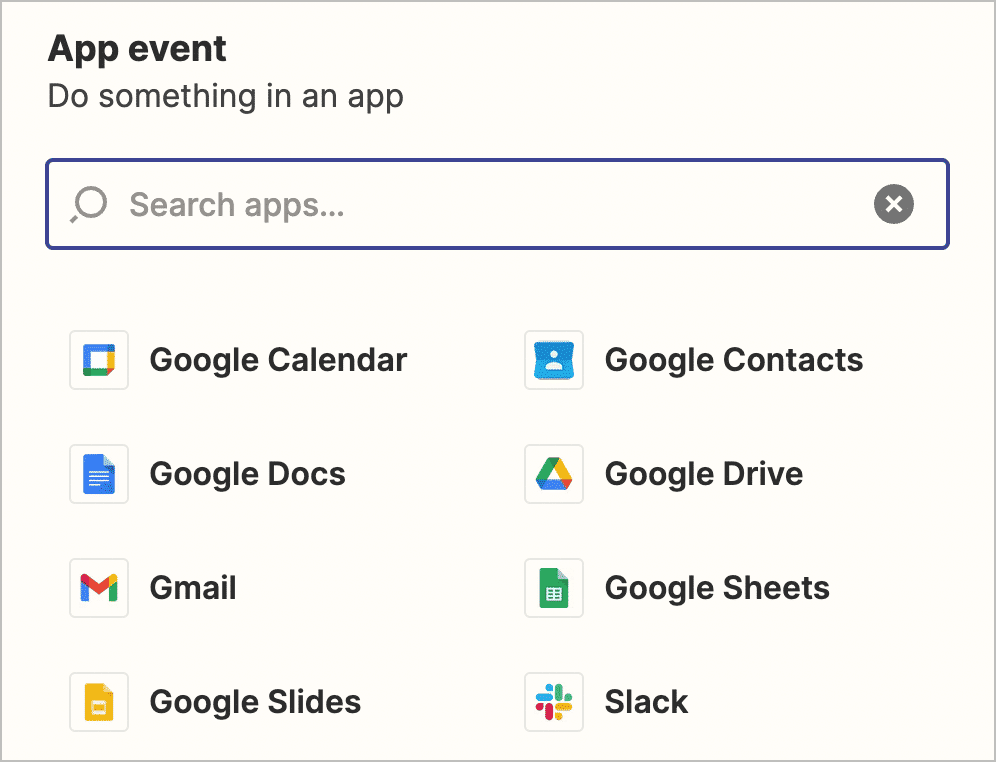
Zapier integrates with over 5,000 different apps, so you have plenty of choices for what should happen once your data has been received!
Create unlimited automations with these powerful tools
In this post, we showed you how to create automated workflows for your GravityKit applications using different tools. Not only does GravityKit integrate with several WordPress automation plugins, it can also be connected to Zapier and Make!
If you found this article helpful, subscribe to our newsletter below for more tips and tricks.

Helpful tips right in your inbox.
Subscribe to get the latest articles, information on releases and helpful Gravity Forms tips!
More articles

Launch Log: GravityView 3.0, plus upgrades to Block MCP and GravityKit MCP
GravityView 3.0 lands with the new Vantage theme, frontend bulk actions, and AI-assisted View creation. This launch log also covers updates to GravityKit MCP, Block MCP, and Dashboard Views.

Announcing GravityView 3.0: a fresh new look, AI View creation, and native page builder support
GravityView 3.0 is here: restyle Views with the new Vantage theme, build them with AI, embed them in any page builder, and run bulk actions on the front end.

Launch Log: GravitySearch arrives, plus AI spam review and GravityView fixes
This week, releases are anchored by a brand-new product! GravitySearch joins the GravityKit suite with cross-form entry search for Gravity Forms. Alongside it, Gravity Forms Zero Spam picks up an AI-powered review step, and GravityView sees fixes for Enhanced Security, Edit Entry, and Entry…