Published
•
Updated
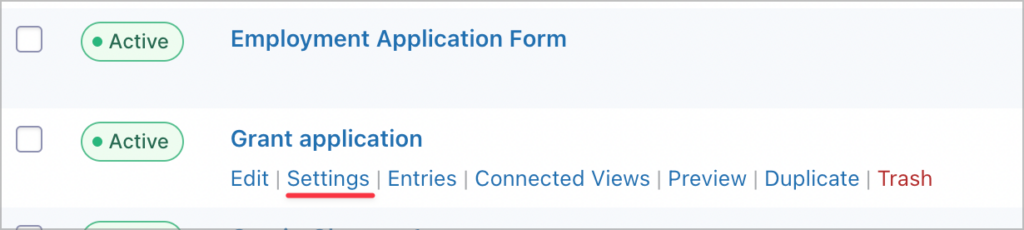
How to save revisions in Gravity Forms and restore prior versions
GravityRevisions adds full version control to Gravity Forms. Track form changes, see who made edits, compare versions, and restore any prior revision with a single click.

Have you ever needed to restore an older version of a Gravity Form? I know I have!
For many people, forms are an integral part of their websites. Not having a way to back up form data can lead to loss of important information.
By default, Gravity Forms does not store revisions for forms or entries. In order to track revisions to your forms or entries, see who made changes, and restore prior versions, you’ll need GravityRevisions. In this post, I’m going show you how it works!
Wanna try it?
Spin up a demo
See GravityRevisions in action on its live demo site.

What is GravityRevisions?

GravityRevisions is an add-on for Gravity Forms that enables you to store form revisions, see who made changes, see what changes were made, and restore prior versions. Essentially, Its a full-scale version control system for Gravity Forms!
What’s more, GravityRevisions enables you to store revisions made to forms and form submissions.
Saving form revisions when you edit a form
After installing GravityRevisions, you can begin to track any changes made to your forms. To enable form revisions, go to your form’s settings page.
Next, scroll down to “Form Options” and toggle the option labeled “Enable form revisions”.
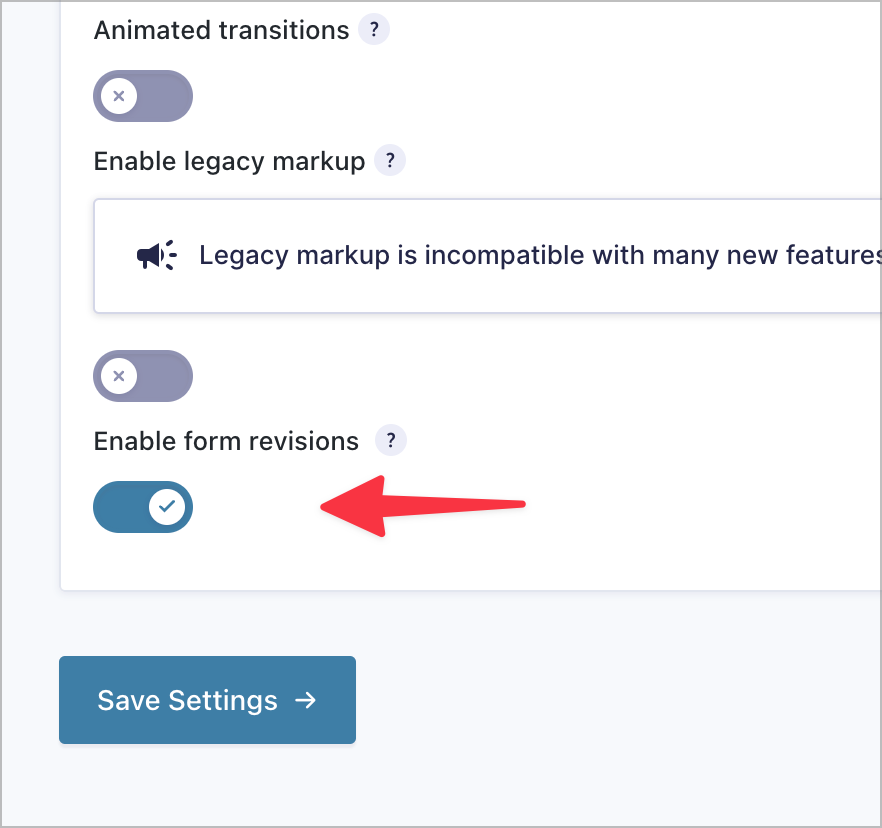
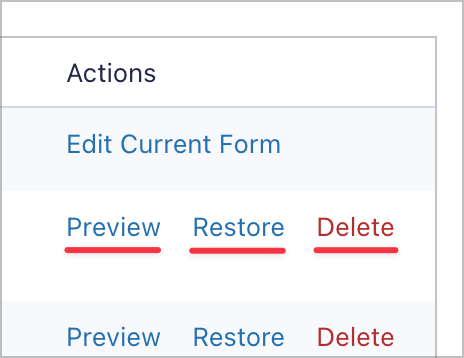
After saving the settings, GravityRevisions will begin to save all revisions made to your form. You can view these revisions by clicking on the “Form Revisions” tab on the left. Here you’ll see a list of form revisions, including the user who made the change, the time the change was made, the number of fields the form had at that time, and links for previewing, restoring, or deleting the revision.
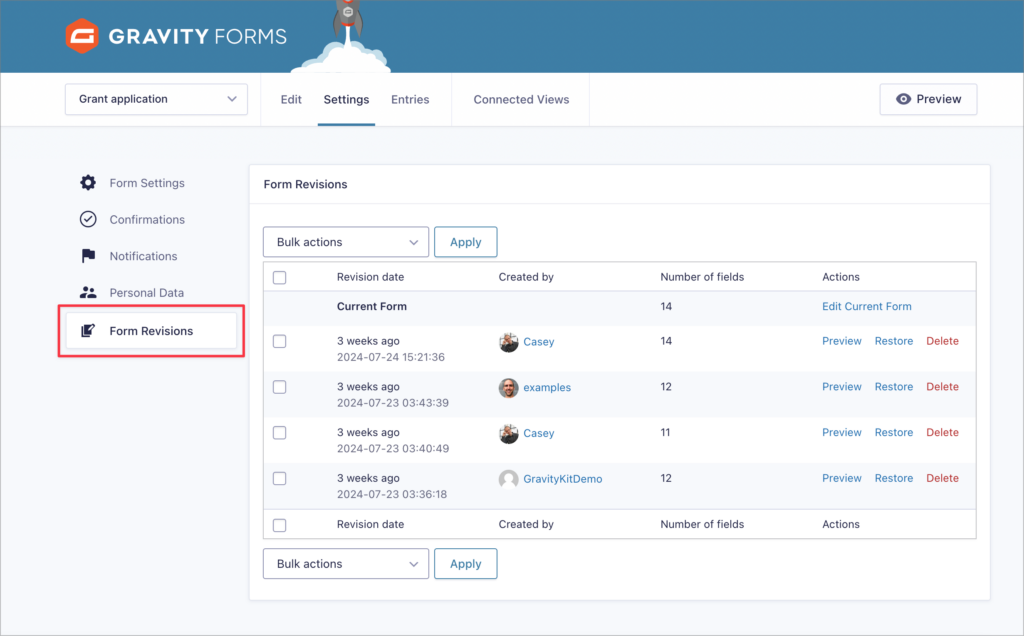
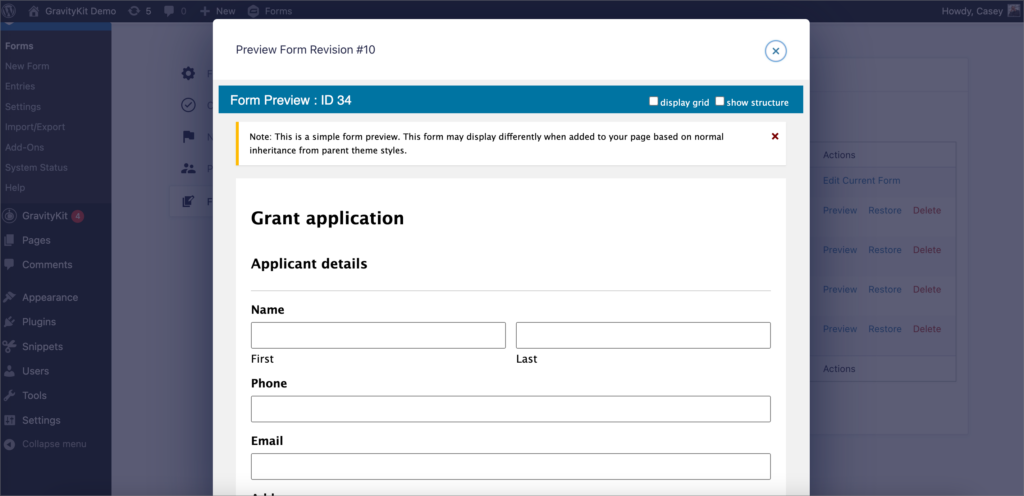
If you want to see what the form looked like at a previous point, simply click “Preview”. If you want to restore a form to a prior version, click “Restore”.
Here’s what the form preview looks like. As you can see, the form opens in a new modal, enabling you to see how it looked at a previous point.
Now let’s see how to save changes made to your form submissions.
Saving changes made to form entries
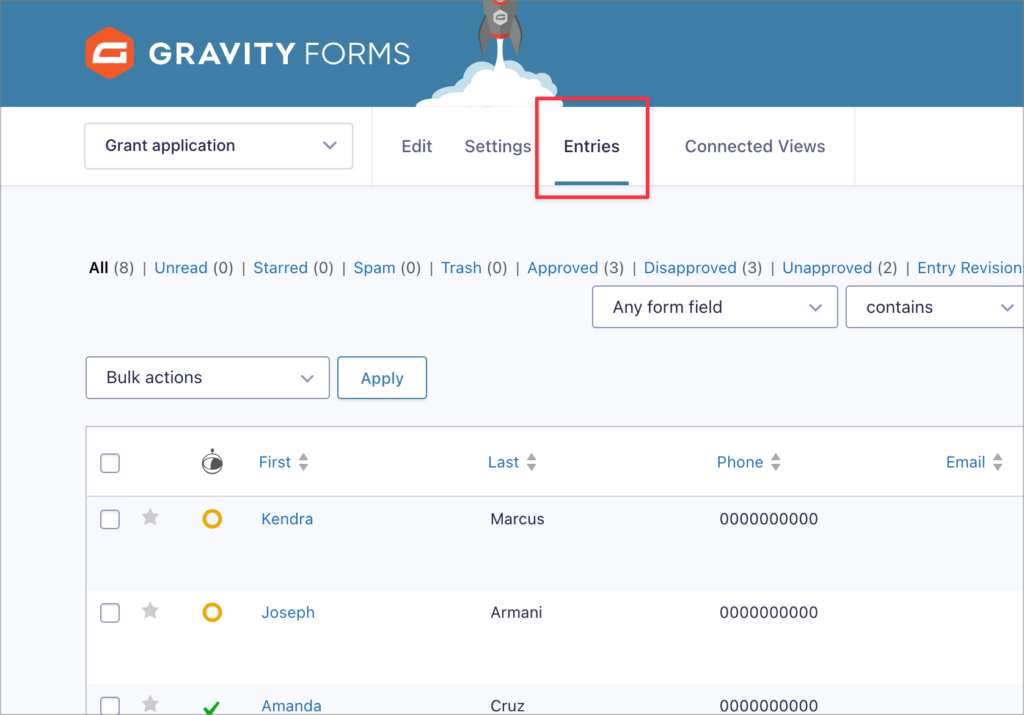
After installing GravityRevisions, it will automatically save revisions made to your form entries. To view these revisions, you’ll need to open the entry in Gravity Forms. To do this, open your form and click on the “Entries” link at the top to see a list of your current form submissions.
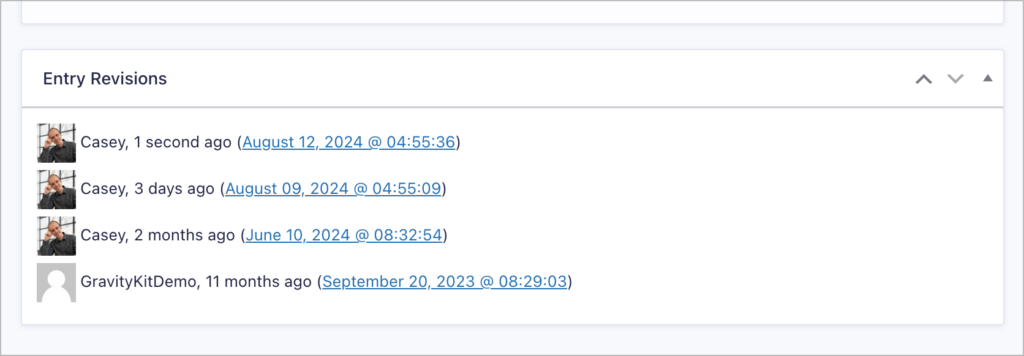
Next, hover over one of the submissions and click “View”. Now scroll down to “Entry Revisions”. Here, you’ll see a list of revisions made to the entry, including the user who made the change and the time it was made!
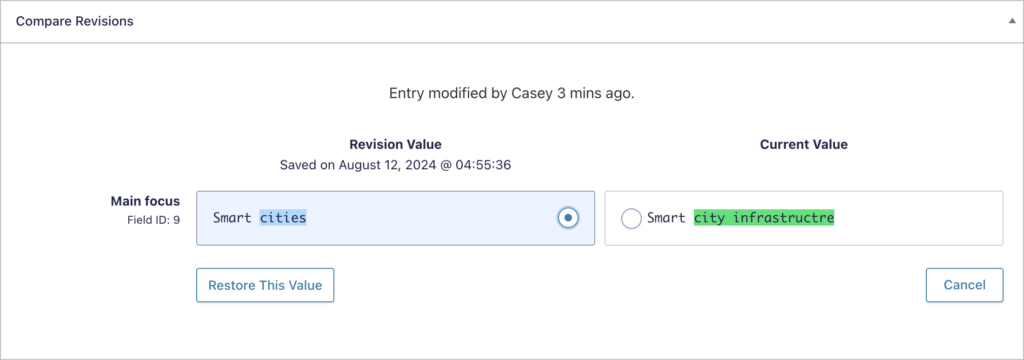
To view the revisions, simply click on the linked timestamp. Here you’ll see a side-by-side comparison of the current entry and the revision, enabling you to see exactly what changed. To restore prior values, simply select them and click the restore button below!
Receive an email when changes are made
If you want to be notified when a form submission has been edited, you can set up a notification email that gets triggered when a new revision is saved.
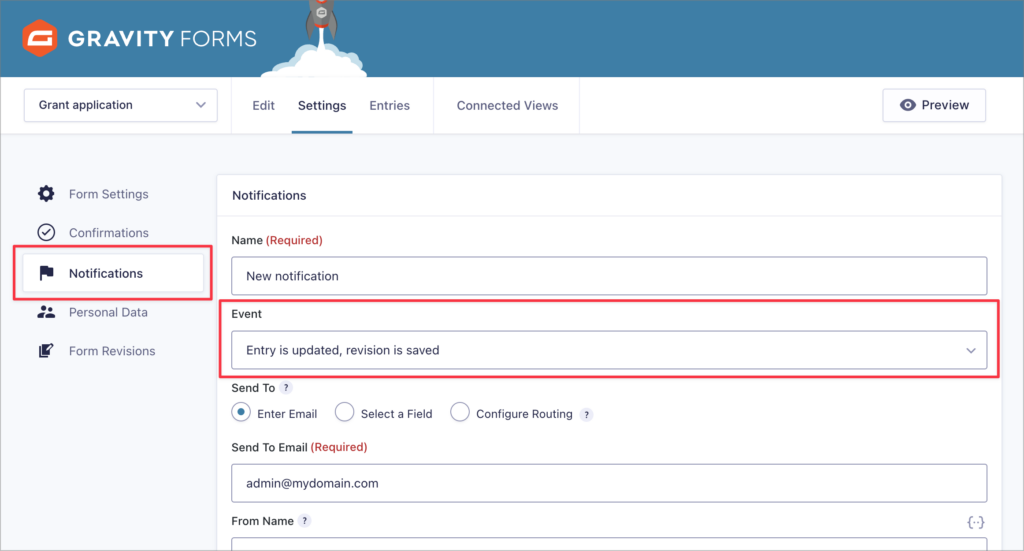
To do this, go to the form settings, cick on “Notifications” and then click “Add New” to create a new email notification. Now click on the drop down field labeled “Event” and select “Entry is updated, revision is saved”. This will ensure that the email only sends once a new entry revision is saved.
Next, scroll down to configure the email itself. Here you can use merge tags (underlined in red) to populate the email with dynamic content.
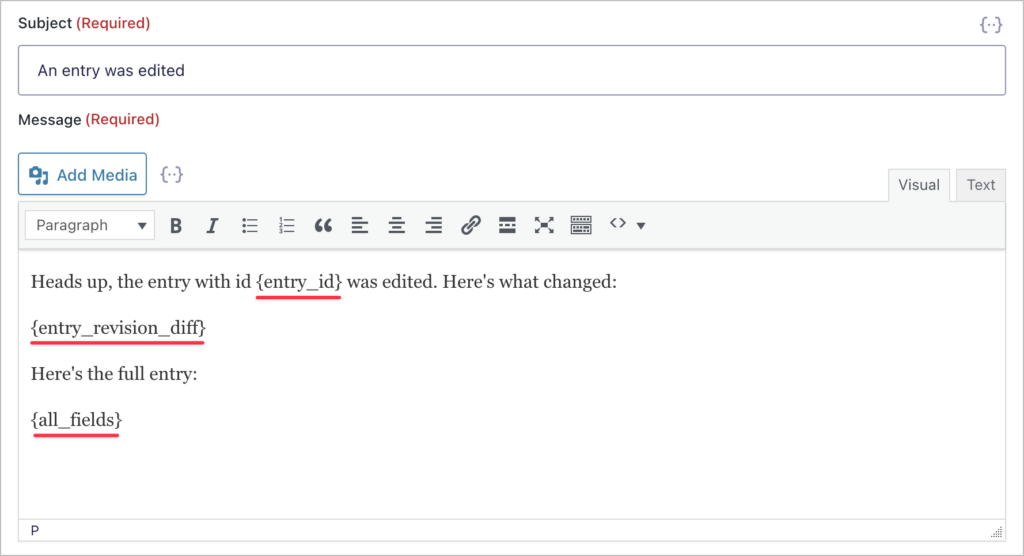
I like to use the {entry_revision_diff} merge tag, which shows exactly what was changed when the entry was updated.
Pro tipRead our ultimate guide to learn more about Gravity Forms merge tags.
What GravityRevisions tracks
GravityRevisions stores a complete snapshot of each form or entry every time a change is made. Here’s what gets recorded:
- Entry revisions: All field values at the time of each edit, including who made the change and when
- Form revisions: The full form configuration (fields, settings, notifications, confirmations) at each save point
- Metadata: The username of the person who made the modification, along with the date and time
Revision data is stored in your WordPress database alongside your existing Gravity Forms tables. No external services or third-party storage is involved — everything stays on your server.
Compatibility
GravityRevisions works alongside other Gravity Forms add-ons without conflict. It also integrates with GravityView to display entry revision history on the front end of your website!
Limitations
- No retroactive tracking: GravityRevisions only tracks changes made after the plugin is installed and activated. It cannot recover edits made before installation. If you need to retrieve older data, your only option is to restore from a database backup.
- No native alternative in Gravity Forms: Gravity Forms does not include built-in revision tracking for entries. You can export forms as JSON files as a manual backup, but this only captures form structure — not entry data or change history.
Developer hooks
GravityRevisions includes hooks and filters for developers who need to customize revision behavior, such as:
- Excluding specific fields from revision diffs
- Controlling whether Gravity Forms hooks fire during a restore
- Suppressing or triggering notifications when revisions are created
- Customizing the revision list output
Start tracking changes to Gravity Forms forms and entries
Unlike WordPress post types, Gravity Forms revisions are not saved by default. This can be frustrating considering how important forms are for most websites. However, it is possible to track changes made to a form using the powerful GravityRevisions add-on.
Using this add-on, you can see when a form (or submission) was last changed, what changed, and who made the change! You can also preview form revisions and restore prior versions.
If you’re in need of version tracking for Gravity Forms, get GravityRevisions today!

Helpful tips right in your inbox.
Subscribe to get the latest articles, information on releases and helpful Gravity Forms tips!
More articles

Launch Log: Row headers for screen readers, smarter conditional logic, and multi-View fixes
GravityView 3.1 adds row headers for screen readers, plus smarter conditional logic in GravityCalendar and fixes for DataTables, Maps, and Dynamic Lookup.

Ecommerce platform market share 2026: WooCommerce leads the web, Shopify leads the top tier
Ecommerce platform market share in 2026, from HTTP Archive data. WooCommerce leads the whole web at 6.64%, but Shopify already leads the top 1M sites.

Launch Log: 3D map enhancements, smarter filtering, and improved performance on large data sets
GravityKit’s July 9 launch log: 3D map starting views and viewport loading, searchable field-to-field filtering, and fixes across DataTables and more.