Are you looking for a way to import form entries from an Excel file to Gravity Forms?
In this step-by-step guide, we’ll show you how easy it is to import entry data from an Excel spreadsheet using the GravityImport plugin.
Export your entries from Excel to CSV
The first thing you need to do is export your entry data to a CSV file. You can do this in Excel with a few simple clicks! Why is this even necessary? Because it’s easier to import data from a CSV file than from an XLSX file.
Here’s how to convert your Excel worksheet to a CSV file:
- Click “File” and then “Save As”.
- In the “Save as type” box, choose “CSV (Comma delimited)”.
- Save the file
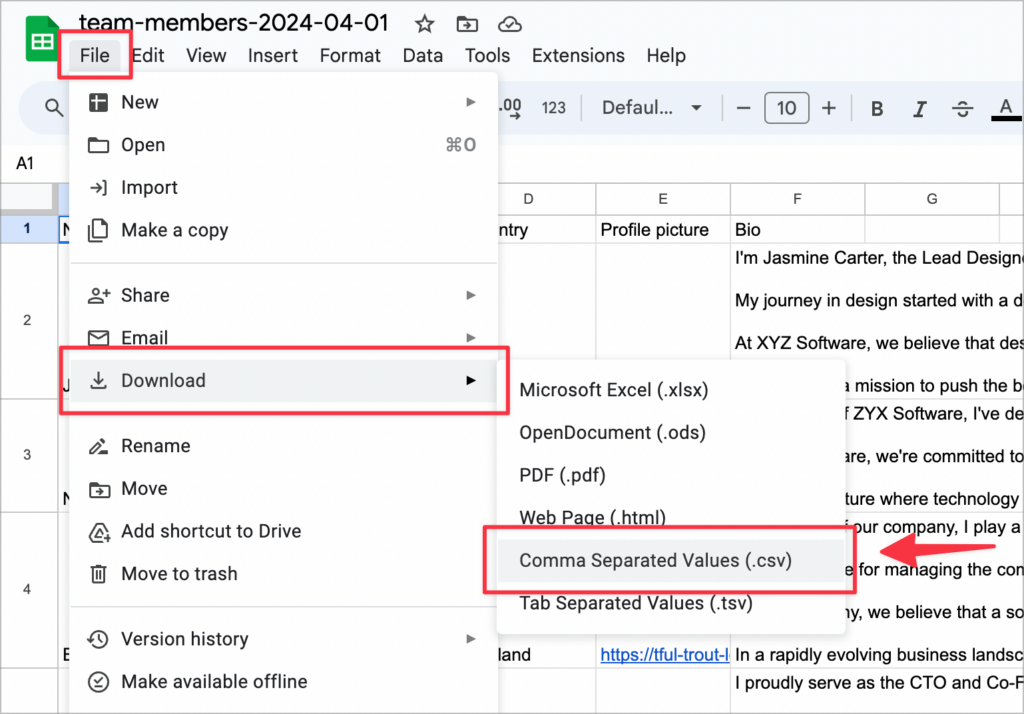
If your data is in a Google Sheet, you can export it to CSV format by clicking “File”, hovering over “Download”, and selecting “Comma Separated Values (.csv)”.
Now that you’ve saved your form entry data to a CSV file, you’ll need a way to import it to Gravity Forms.
Install GravityImport
There is no way to import data into Gravity Forms without using a plugin. That’s why you’ll need to install GravityImport—the only certified import entries plugin for Gravity Forms!

Import your entry data using GravityImport
Now that you have your data ready in CSV format, and GravityImport installed on your site, you can begin the process of importing your entries to Gravity Forms!
1. Select the source of your entry data
Start by hovering over “Forms” and click “Import/Export”. Now, click on the “Import Entries” tab on the left.
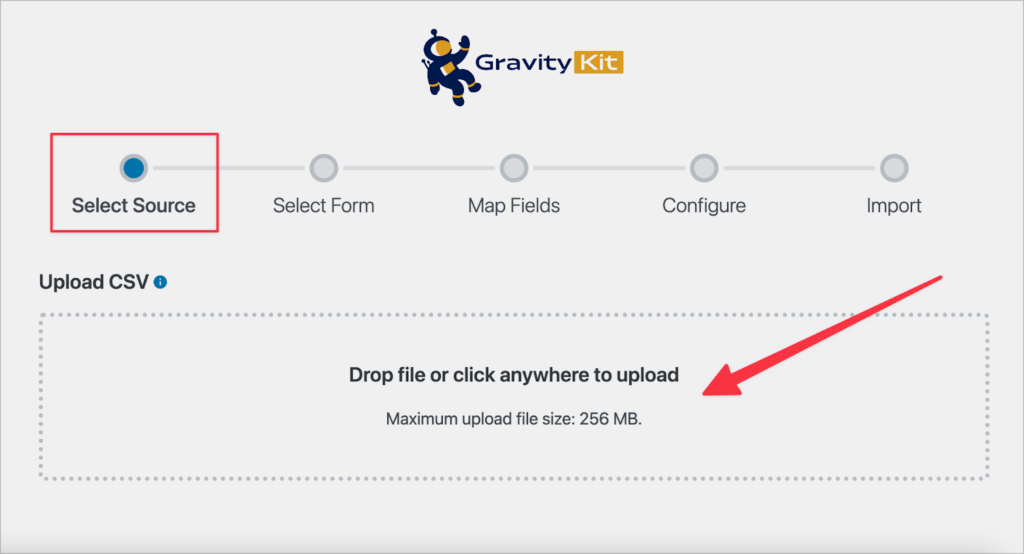
Here, you can upload the CSV file containing your form entry data. To do this, either click inside the box and select the file, or simply drag and drop it into the box. GravityImport will now process your uploaded CSV file.
2. Select a form
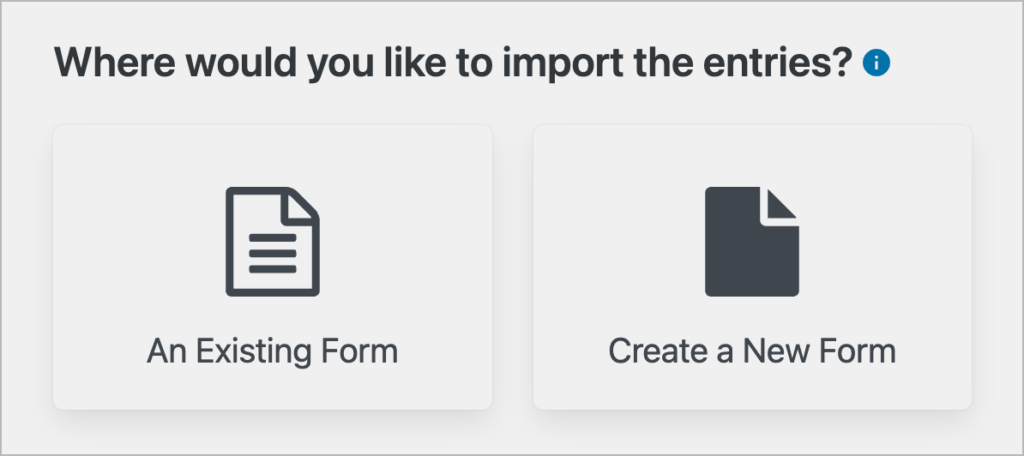
After uploading your CSV file, you will need to choose where to import the entries. You can either select an existing form in Gravity Forms, or you can create a brand new form!
If you choose “Create a New Form”, GravityImport will create a new form for you automatically based on the data in your CSV file—Pretty cool, right?
3. Map your form fields
After choosing where you want to import your data, you’ll need to map the columns in your CSV file to the correct field types in Gravity Forms.
To select a field type, simply click on the “Field Type” dropdown and select the correct type from the list. Do this for each column and ensure they are all correct before moving on to the next step.
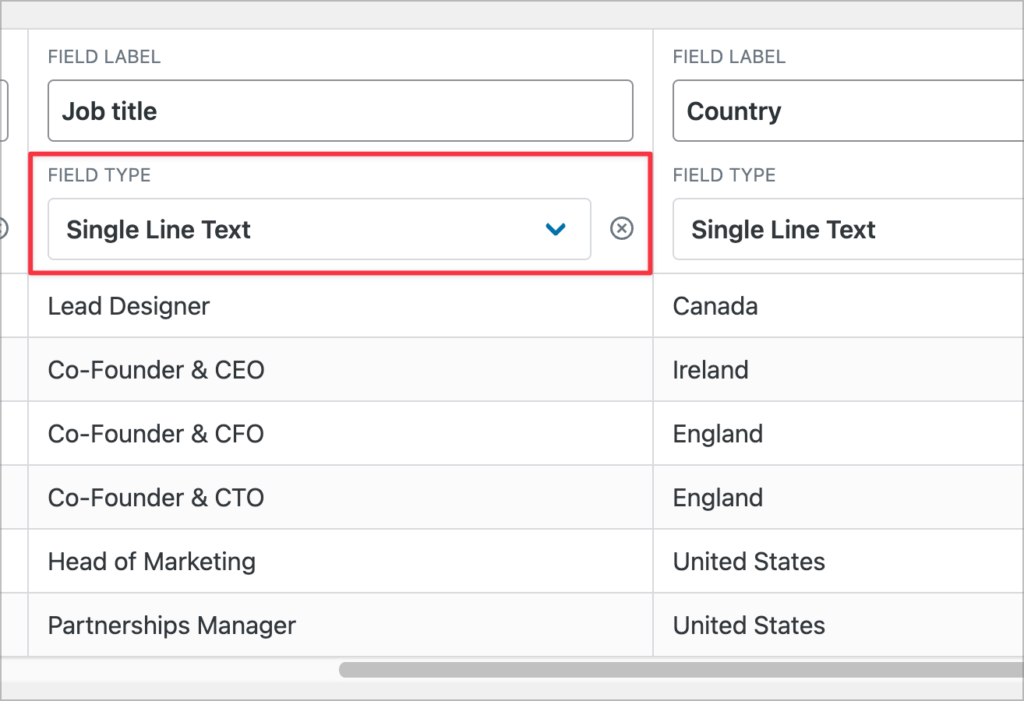
💡 Pro tip: If there’s a column in your CSV file that you don’t want to import at all, you can ignore it by clicking on the ‘x’ icon.
4. More import options
The final step in the import entries process is to configure the remaining import options. For example, you can filter entries using conditional logic, trigger email notifications, skip field validation, and more.
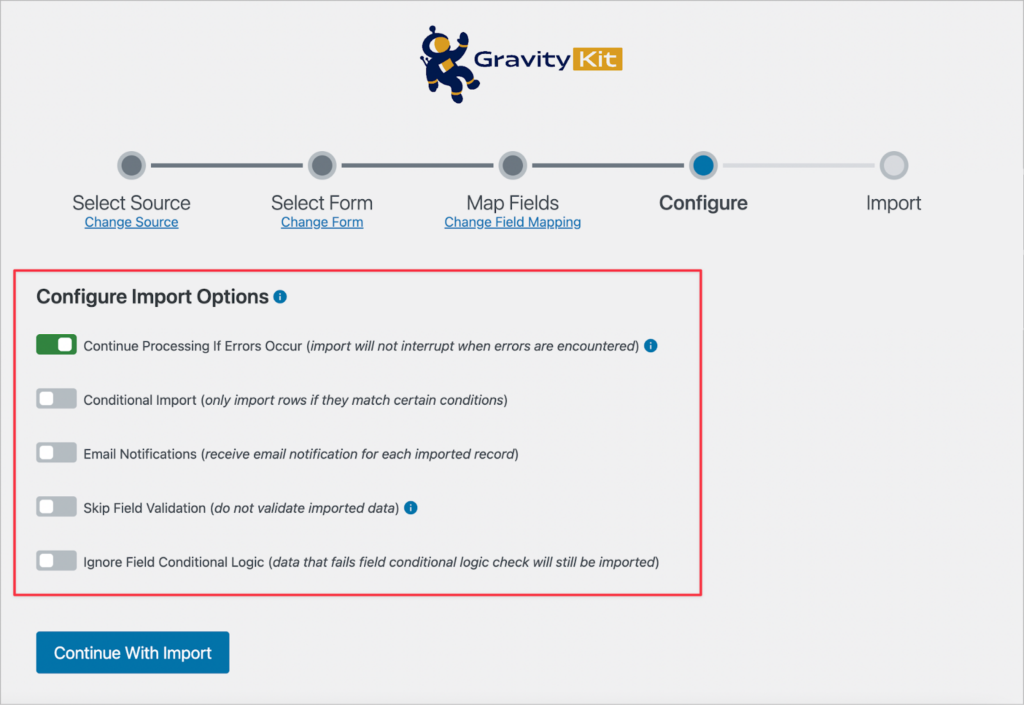
After configuring the various options, click “Continue With Import” to import your entries to Gravity Forms.
5. View the imported data
GravityImport will now import your entries to Gravity Forms. When the importer has finished, click “View Imported Records” to see your new form entries.
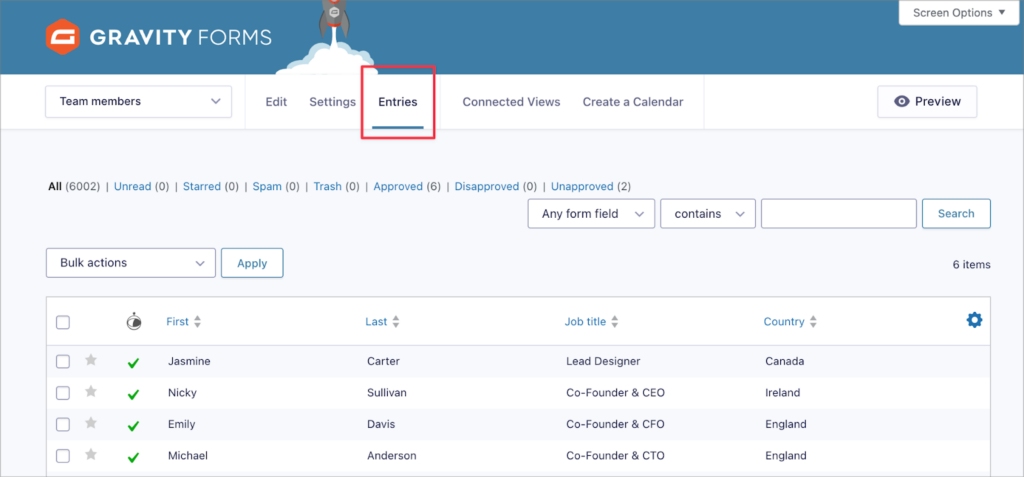
That’s it!
Import your Gravity Forms entries from Excel
In this post, we showed you how to import Gravity Forms entries from an Excel file. It starts with converting your spreadsheet to a CSV file, then you can use the GravityImport add-on to efficiently import your form data to a new or existing form!
If you found this tutorial helpful, subscribe to our newsletter below so we can notify you when we publish new content.

Helpful tips right in your inbox.
Subscribe to our weekly newsletter for tips, special offers, and more!
Helpful tips right in your inbox.
Subscribe to our weekly newsletter for tips, special offers, and more!
