Published
•
Updated
How to automatically attach PDF exports to Gravity Forms email notifications
If you’re using Gravity Forms, exporting submission data in a clean, professional format is often essential. One effective method is converting form entries to PDF and emailing them as attachments. A common use case is invoicing, where you can learn how to build a PDF invoice generator. In this guide, we’ll show you how to:…
If you’re using Gravity Forms, exporting submission data in a clean, professional format is often essential. One effective method is converting form entries to PDF and emailing them as attachments. A common use case is invoicing, where you can learn how to build a PDF invoice generator.
In this guide, we’ll show you how to:
- Export Gravity Forms entries as PDF files
- Automatically include those PDFs in email notifications
- Use two powerful tools: GravityExport and Gravity PDF
Let’s dive in!
Method 1: Emailing PDF reports using GravityExport
GravityExport is an add-on for Gravity Forms that allows you to:
- Export entries to CSV, Excel (XLSX), or PDF
- Send data to SFTP or Dropbox
- Attach exports to email notifications
- Generate secure, shareable links for sharing access to reports
It’s important to know that while GravityExport has a lite version that’s free on WordPress.org, PDF export functionality is only available in the paid version of the plugin.
Pro tipLooking to learn more? You can try GravityExport for free with your own demo site.
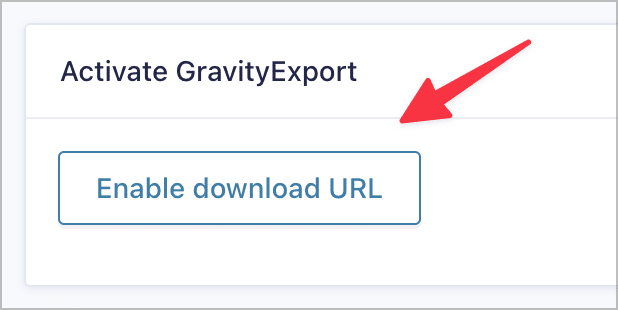
Step 1: Create a GravityExport feed
The first thing you’ll need to do is activate GravityExport by enabling the download URL. To do this, navigate to your form’s settings in WordPress, select “GravityExport” on the left and finally click “Enable download URL”.
This activates a secure URL to your export file that you can share or link to in emails.
Step 2: Configure PDF export settings
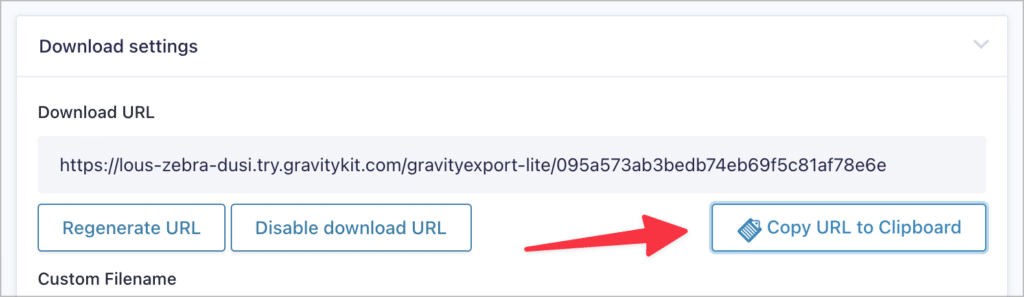
Now you can configure the PDF report. The first thing to do is configure the download settings. You’ll see three important sections here.
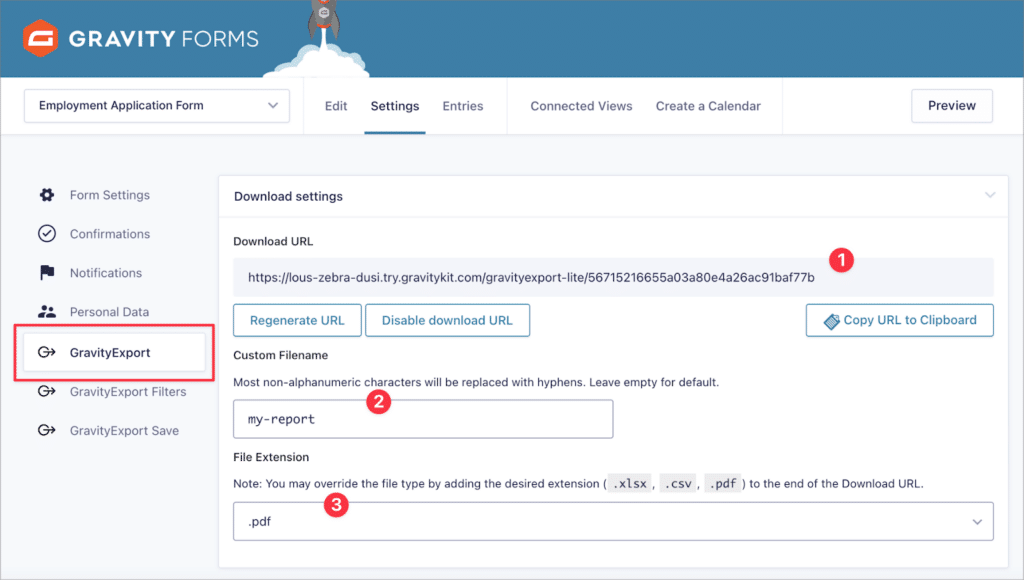
- Download URL: The unique download URL associated with the report. You can send this URL to anyone who needs the data.
- Custom filename: Name your file (e.g.,
report-{date}). Merge tags are supported here. - File extension: Select “PDF”.
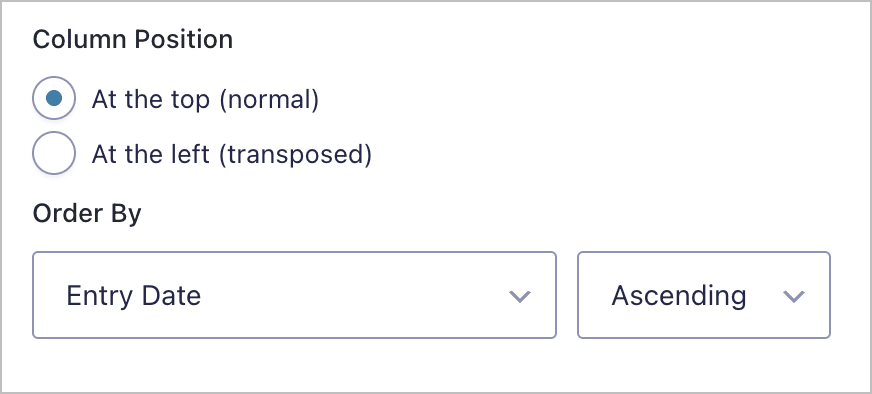
Scroll down to the general settings and select the column position (normal or transposed) and the order of the form fields in the report.
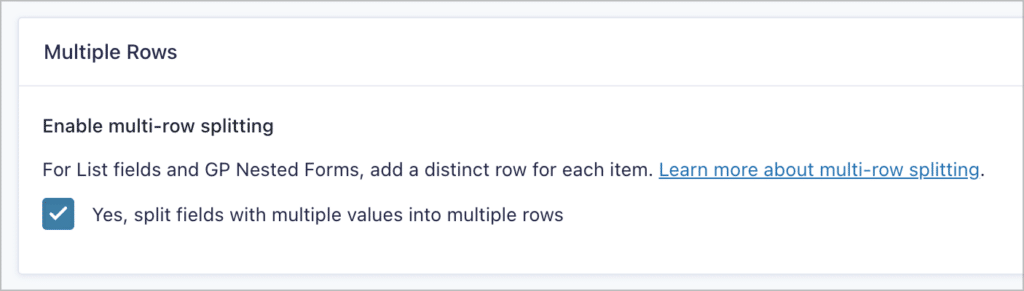
Choose if you want to enable multi-row splitting: this allows you to split fields with multiple values into separate rows.
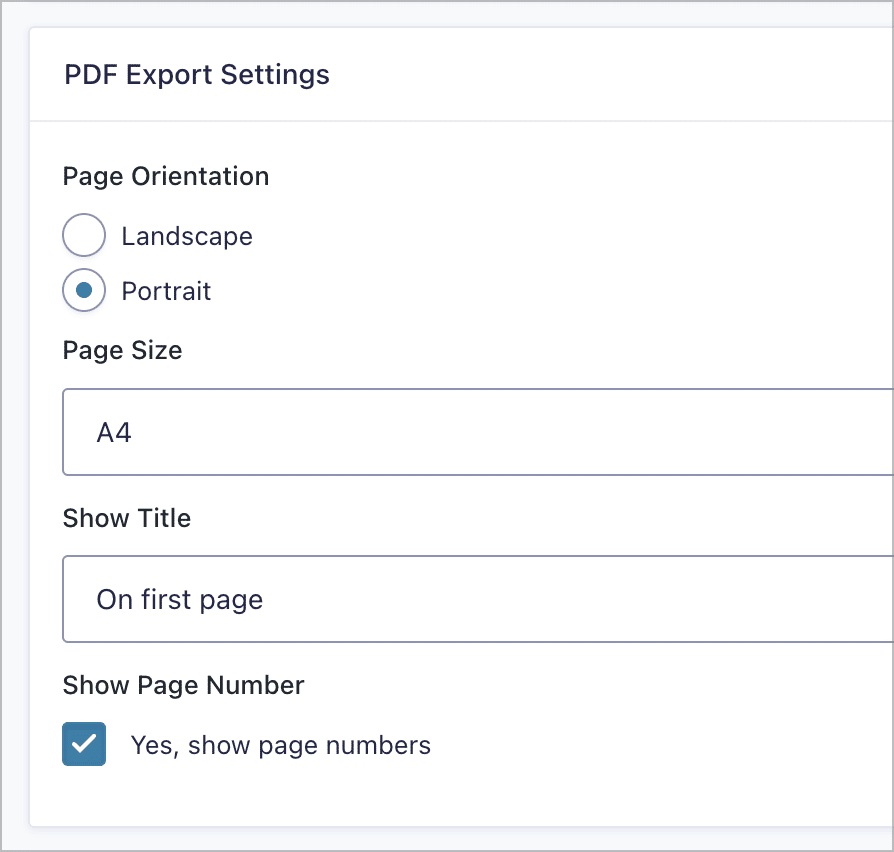
Next, modify the PDF export settings: change the page orientation and size, hide/show the title, configure page numbers, and add your own colors.
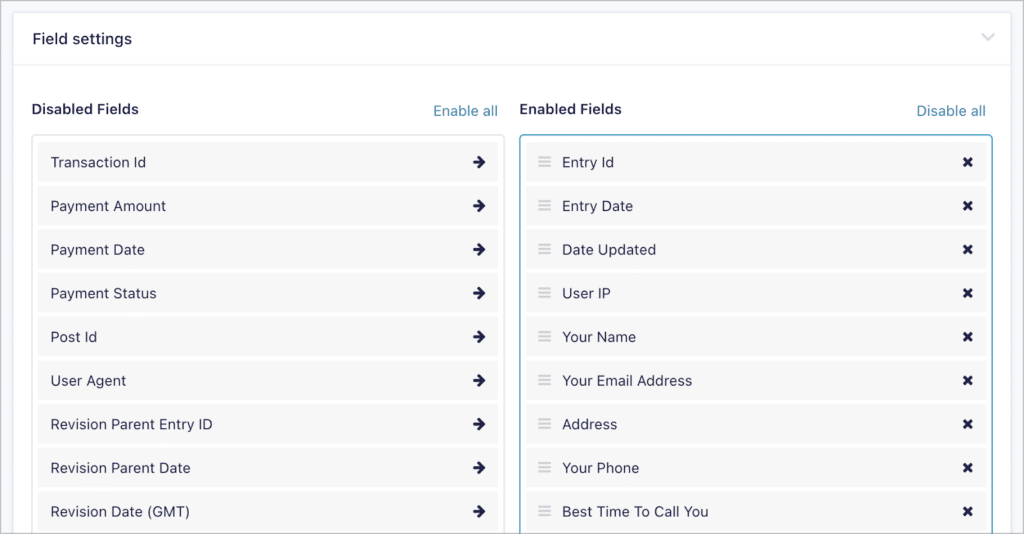
Finally, adjust the field settings: choose which form fields to include in your PDF.
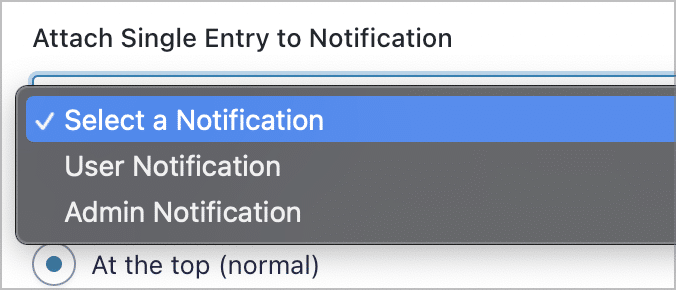
Step 3: Select a notification
Under “Attach Single Entry to Notification”, choose an existing Gravity Forms notification. Whenever a new entry is submitted, that entry’s data will be exported as a PDF and automatically attached to the email.
That’s it! entry PDFs will now automatically be attached to the selected email notification when they are sent.
Optional: Insert a download link instead
You can also add a download link inside the email body that will enable the recipient to download a PDF of the most recent entry.
First, copy the download URL by clicking “Copy URL to Clipboard”.
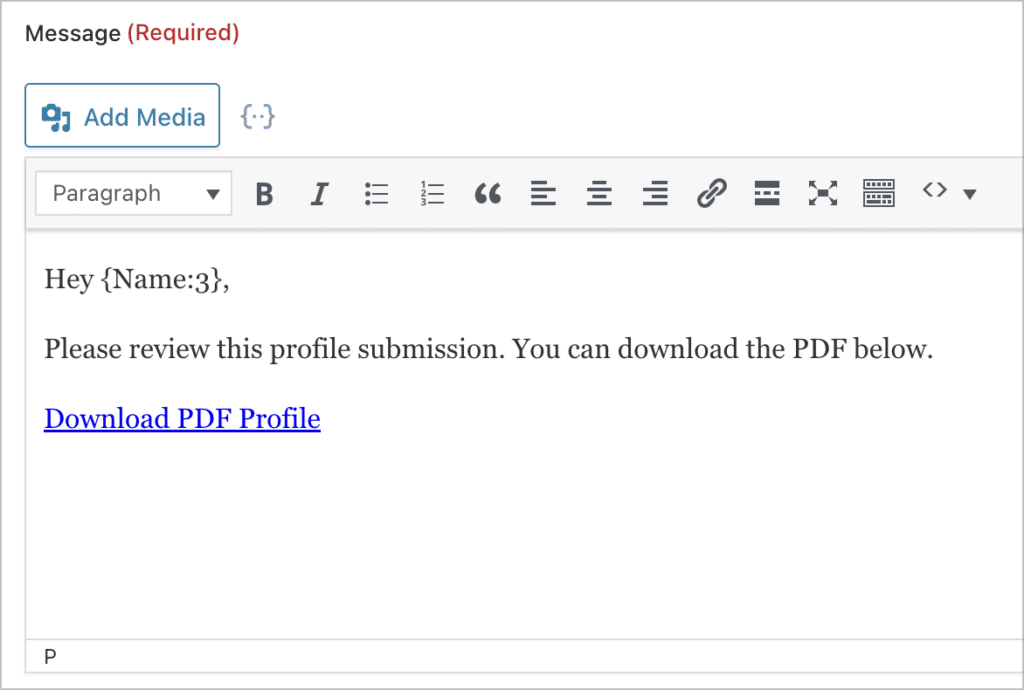
Next, construct a simple hyperlink using the HTML anchor tag, like so:
<a href=“[DOWNLOAD URL]”>Download PDF</a>Next, insert this link into the Gravity Forms notification message body.
Use this if you don’t want large attachments, or if you prefer that users click a link to dowload.
Now, let’s turn our attention to another powerful PDF export solution that’s popular in the Gravity Forms ecosystem—Gravity PDF.
Method 2: Using Gravity PDF
Gravity PDF is a separate plugin not affiliated with GravityKit. It’s available for free on the WordPress plugin repository.
Here’s how to use it:
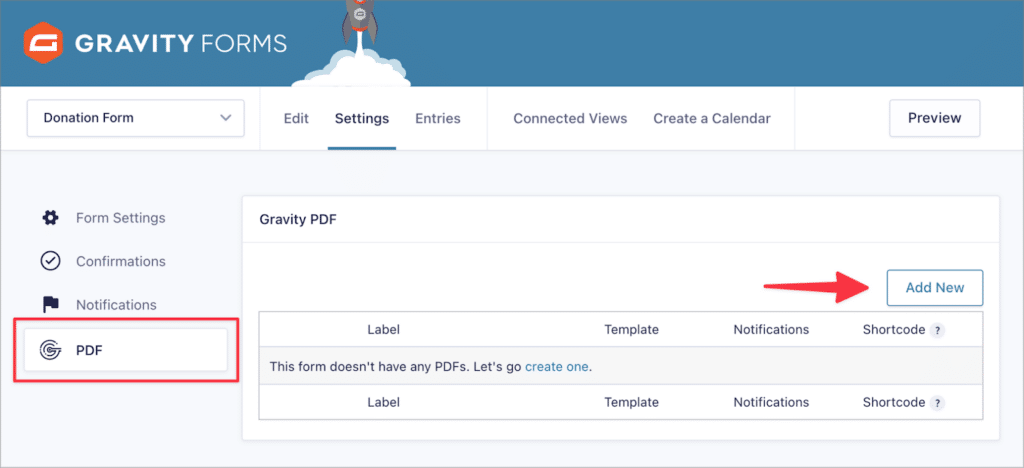
Step 1: Create a Gravity PDF feed
Start by creating a new Gravity PDF feed. You can do this by going to the form settings, clicking on “PDF” and then clicking “Add New”.
Step 2: Configure the PDF feed
Gravity PDF will create a PDF file from the data submitted in the most recent Gravity Forms entry. To configure the feed:
- Give your PDF a name
- Choose a template (this determines the layout and style of your PDF file)
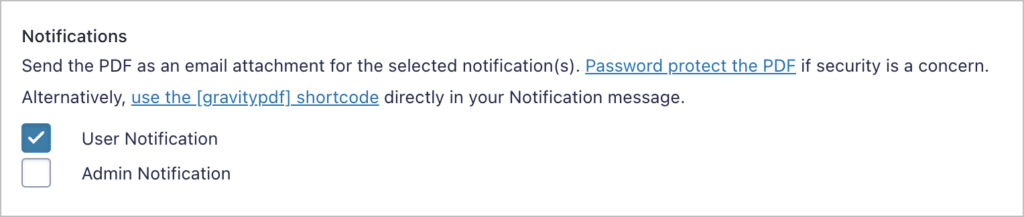
- Select a notification: a PDF of the submitted entry will be attached to that email
Under “Appearance” there are several options for customizing the look and style of the exported PDF document. This includes modifying the paper size, adding headers and footers, choosing the fonts and colors, and more.

After configuring the feed, all you need to do is click “Add PDF”. Gravity PDF will now generate a single PDF document for each form entry that is submitted.
Like GravityExport, Gravity PDF also allows you to insert links to PDF reports inside notification messages.
Optional: Inserting a download link
Use the [gravitypdf] shortcode inside the email message body to display a download link. You don’t need to manually enter the URL.
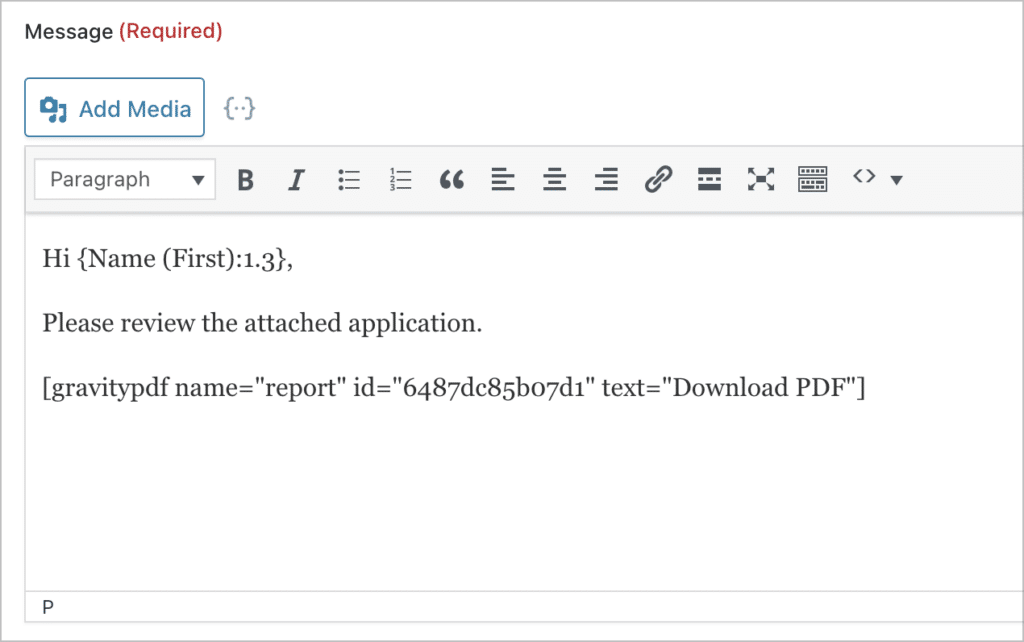
You can learn more about the shortcode from the Gravity PDF docs.
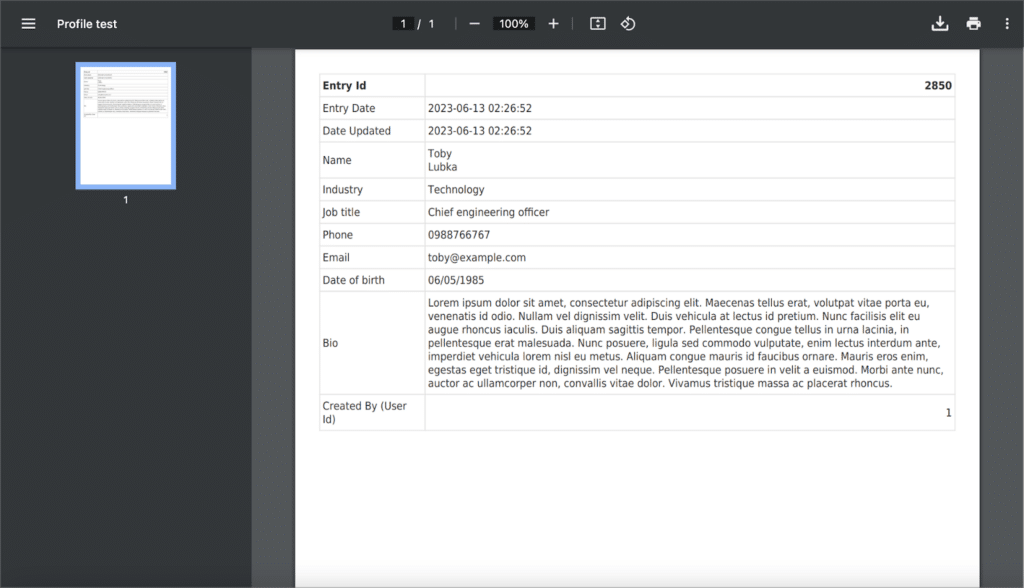
Sample: How the PDFs Look
GravityExport’s PDF is stylized like a spreadsheet: clean rows and columns:
Gravity PDF provides more layout and branding options using preset templates:
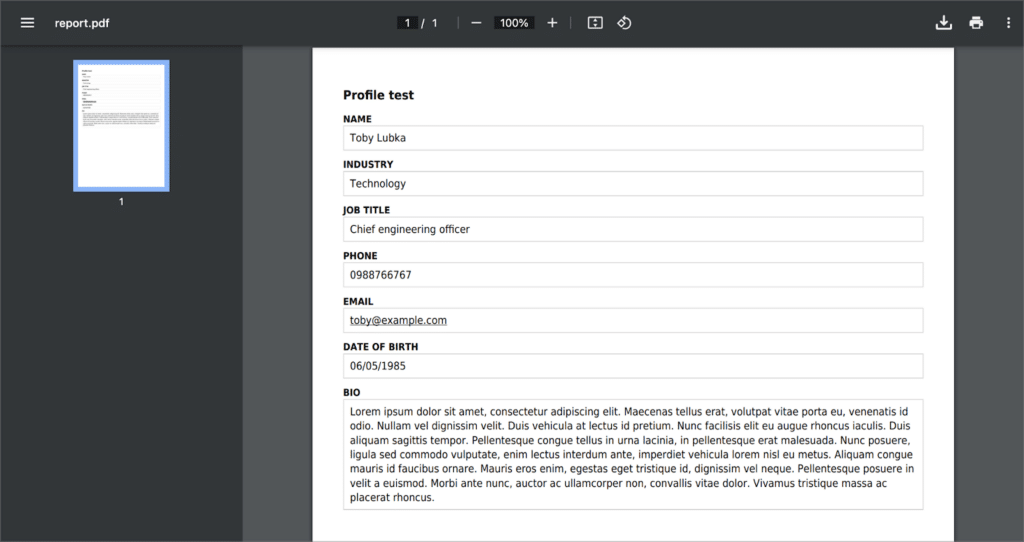
Both are great options depending on your use case.
Create PDF email attachments from your Gravity Forms entries
Whether you’re creating customer receipts, reports, or internal documentation, automating PDF exports and attachments in Gravity Forms can save hours of manual work.
- GravityExport (for spreadsheet-style reports and automation)
- Gravity PDF (for template-based documents)
If you found this post beneficial, read more helpful tutorials on our blog!

Helpful tips right in your inbox.
Subscribe to get the latest articles, information on releases and helpful Gravity Forms tips!
More articles

GravityKit turns 12: a year in review, and 30% off Lifetime All Access
GravityKit turns 12. A look back at a year of GravityView 3.0, GravitySearch, and AI-assisted building, plus a birthday sale on the Lifetime All Access Pass.

Launch Log: Row headers for screen readers, smarter conditional logic, and multi-View fixes
GravityView 3.1 adds row headers for screen readers, plus smarter conditional logic in GravityCalendar and fixes for DataTables, Maps, and Dynamic Lookup.

Ecommerce platform market share 2026: WooCommerce leads the web, Shopify leads the top tier
Ecommerce platform market share in 2026, from HTTP Archive data. WooCommerce leads the whole web at 6.64%, but Shopify already leads the top 1M sites.
