Published
•
Updated
How to build an asset tracker on WordPress without code
Build a fully functional asset tracker on WordPress using Gravity Forms and GravityView. Download the free template, customize it, and track equipment without writing any code.

In this tutorial, I show you how to build an asset tracker on WordPress using Gravity Forms and GravityKit (no code needed).
Whether you’re managing IT equipment, office tools, or other fixed assets, this is your ultimate guide to setting up a fully functional asset tracking system for a small or large business.
Let’s get started.
Download the free asset tracker form template now!
Import the template into Gravity Forms and customize as necessary.
Sneak peek
Here’s a sneak peek at our finished asset tracking system. New assets can be added to the system through a form. All assets are then displayed in a table with various information including category, model and status.
There is also a search bar that enables users to search and filter assets if they’re looking for something specific.
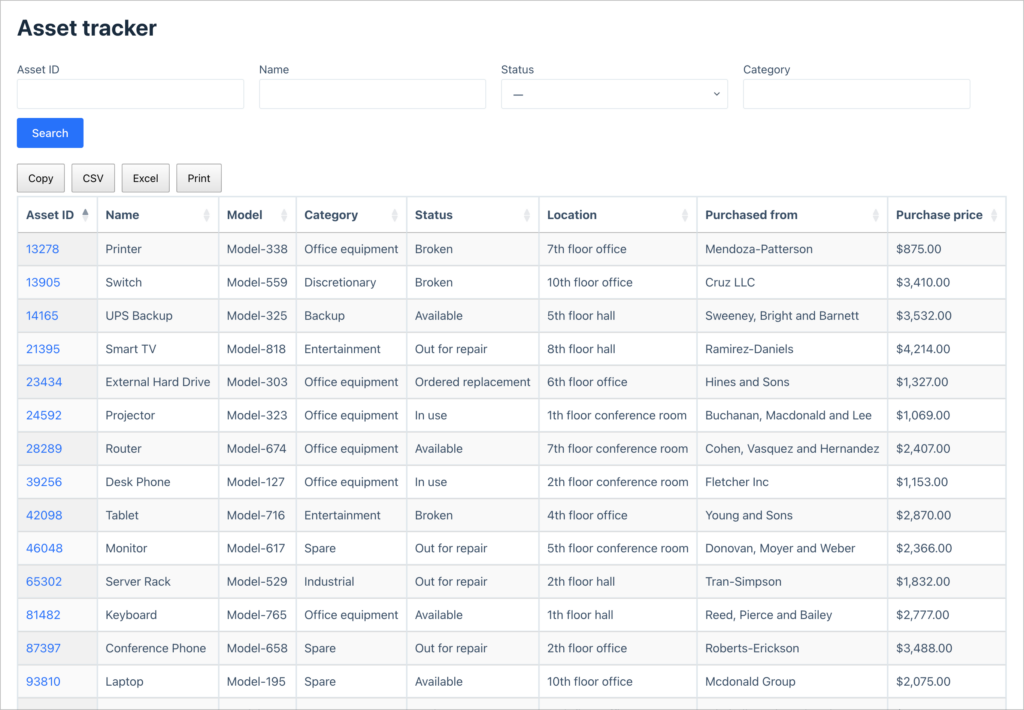
Each asset has a unique ID. When clicked, this opens a lightbox with additional information about the asset (including a picture of it).
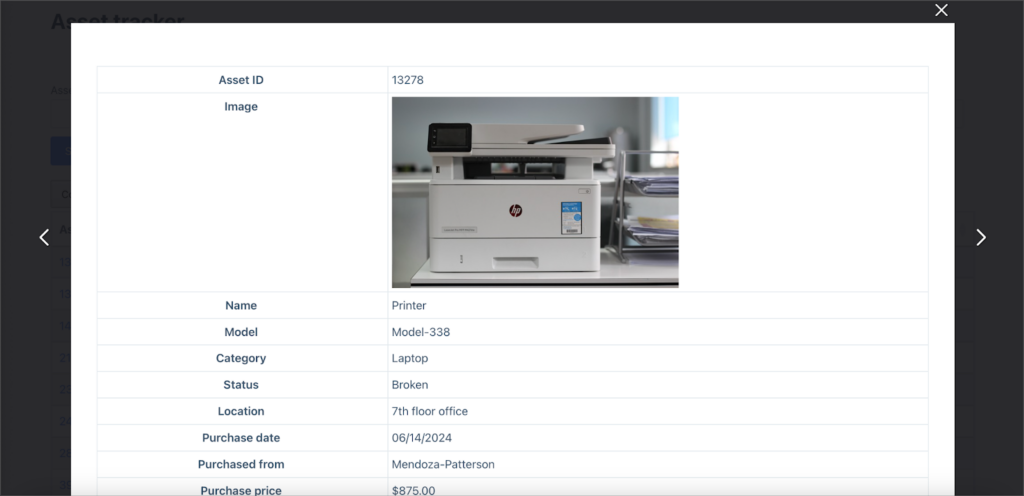
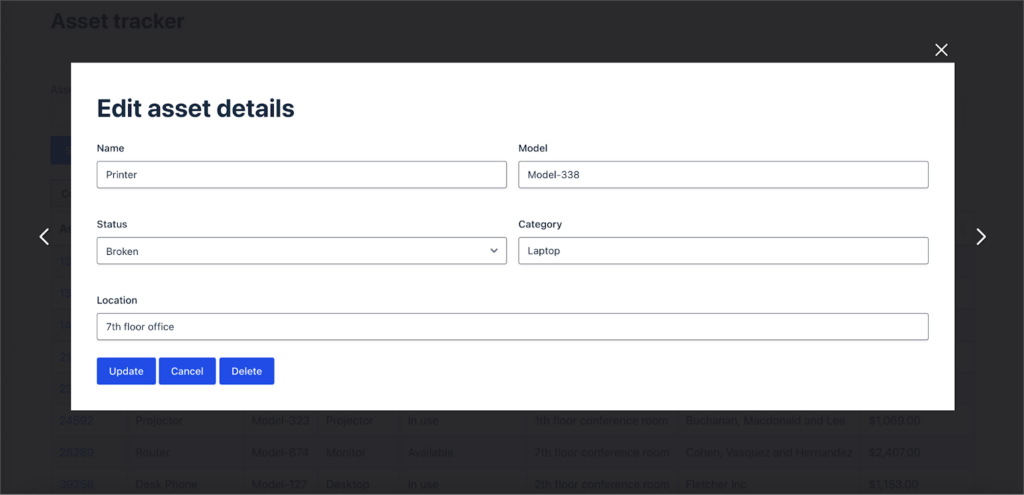
There is also a link to edit the asset details. Authorized users can click this to update important information.
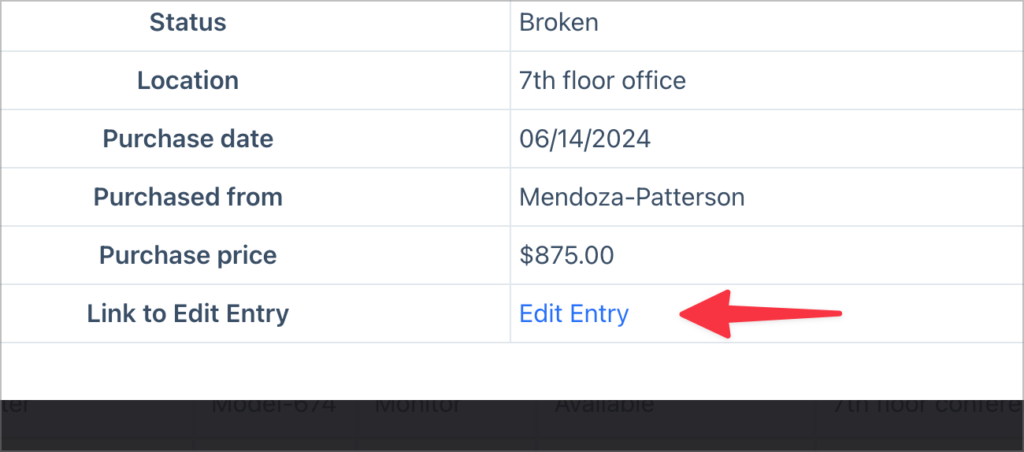
Administrators can easily update asset details from the front end. This is useful for updating the asset’s status (changing it from “Available” to “In use” for example).

The asset tracker in this example is highly customizable! You can use this as a template to create one that meets the needs of your organization.
Wanna try it?
Spin up a demo
See a live no-code asset tracker built with GravityView — explore the demo.

What you’ll need
Here are the plugins you’ll need to create an asset tracker like the one in this example:
What is an asset tracker?
An asset tracker is a system or tool used to monitor and manage a company’s valuable resources, such as equipment, technology, or other fixed assets.
Whether it’s IT hardware, office tools, or inventory, an asset tracker helps businesses keep track of where their assets are located, their current status (in use, available, or under repair), and essential details like purchase date and price.
Having an asset tracker is crucial for businesses to ensure assets are accounted for, maintained properly, and utilized efficiently.
Asset tracking systems can vary in complexity, from simple spreadsheets to more advanced software solutions that provide real-time updates, reporting features, and automated workflows. However, many specialized solutions are costly and therefore not realistic for many smaller organizations.
By implementing an asset tracker, organizations can reduce the risk of misplaced or underutilized assets.
1. Creating the asset tracking form
The first step is to create an asset tracking form. This will enable admins and office managers to add new assets to the database.
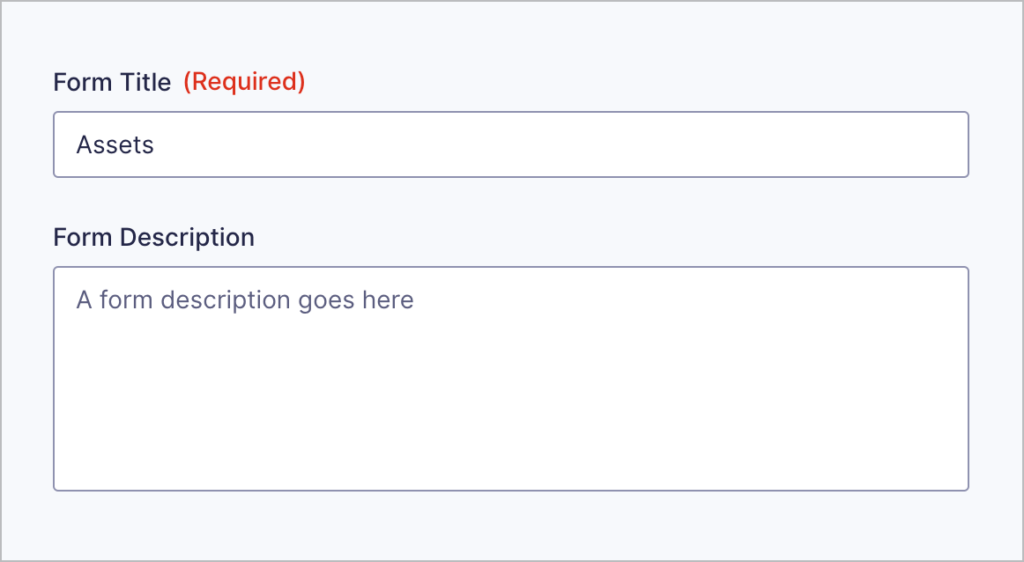
To create a new form, we’ll hover over “Forms” in the WordPress menu and click “New Form”. Next, we’ll select a blank form to start, give it a name, and click “Create Blank form”.
Now we can start creating the form using the Gravity Forms visual interface. To do this, we can simply drag and drop fields from the panel on the left.
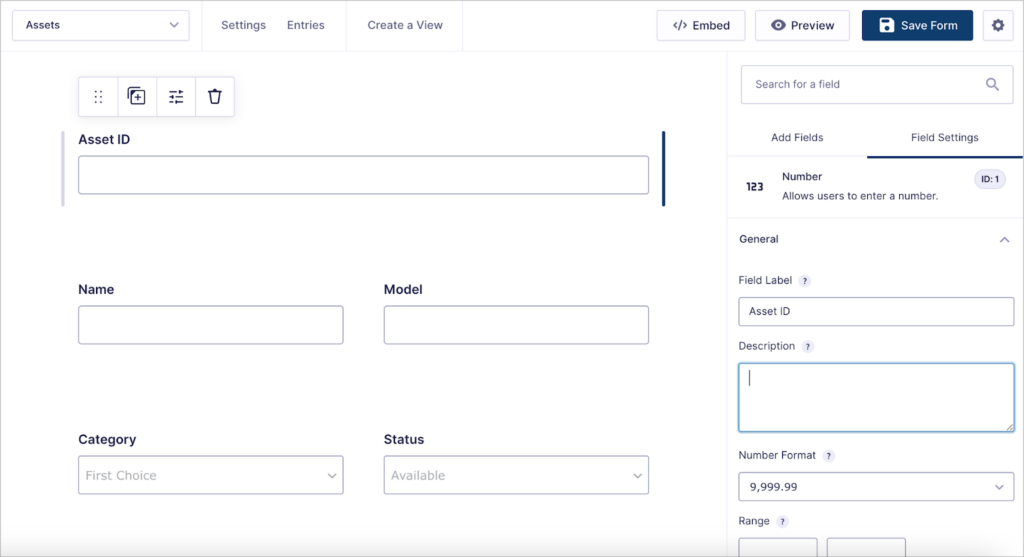
Feel free to add any fields here you feel are necessary! For this example, we’ll keep things simple by adding the following form fields:
- Asset ID (“Number” field)
- Name (“Single Line Text” field)
- Model (“Single Line Text” field)
- Category (“Drop Down” field)
- Status (“Drop Down” field)
- Location (“Single Line Text” field)
- Date purchased (“Date” field)
- Purchased from (“Single Line Text” field)
- Purchase price (“Number” field)
- Image (“File Upload” field)
After creating a form, we’ll embed it on a page or post:
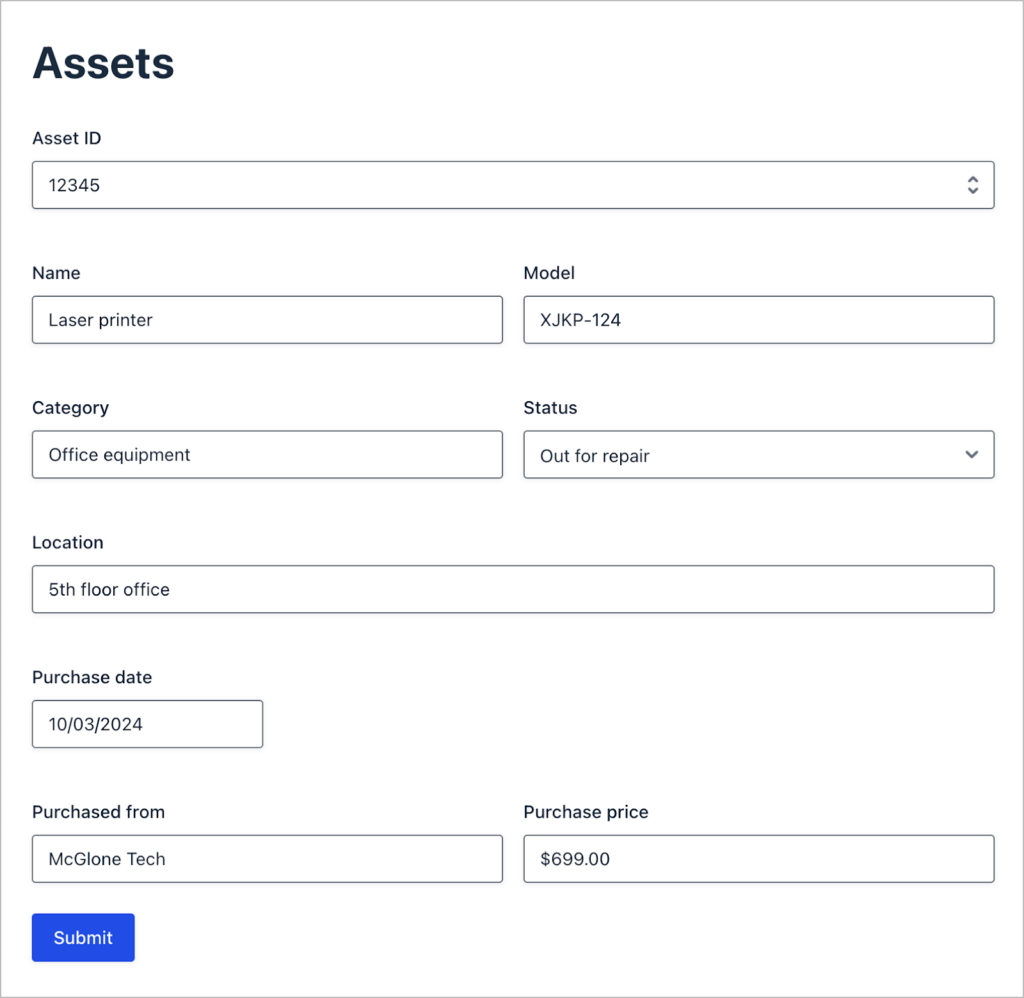
Now let’s turn our attention to building the asset tracker front-end.
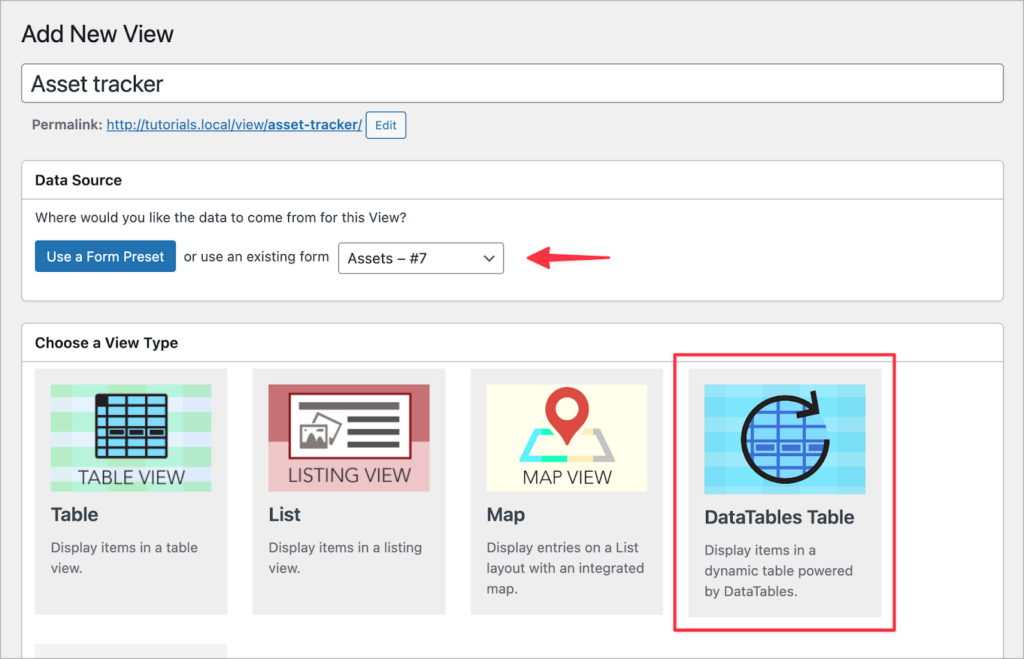
2. Building the asset tracker View
Now that we have a form for tracking assets, we’re going to create a searchable, front-end interface to display details about each asset.
To do this, we’ll hover over “GravityKit” and click “New View”. After giving our View a name, we’ll choose our new “Assets” form as the data source and select “DataTables Table” as our View type.
Now we can start building the asset tracker using GravityView’s intuitive builder! Let’s start by configuring the Multiple Entries layout.

Here we’ll scroll down to the “Entries Fields” section and add the fields we want to display as table columns. Here we’ll add the “Asset ID”, “Name”, “Model”, “Category”, “Status”, “Location”, “Purchased from”, and “Purchase price” fields.
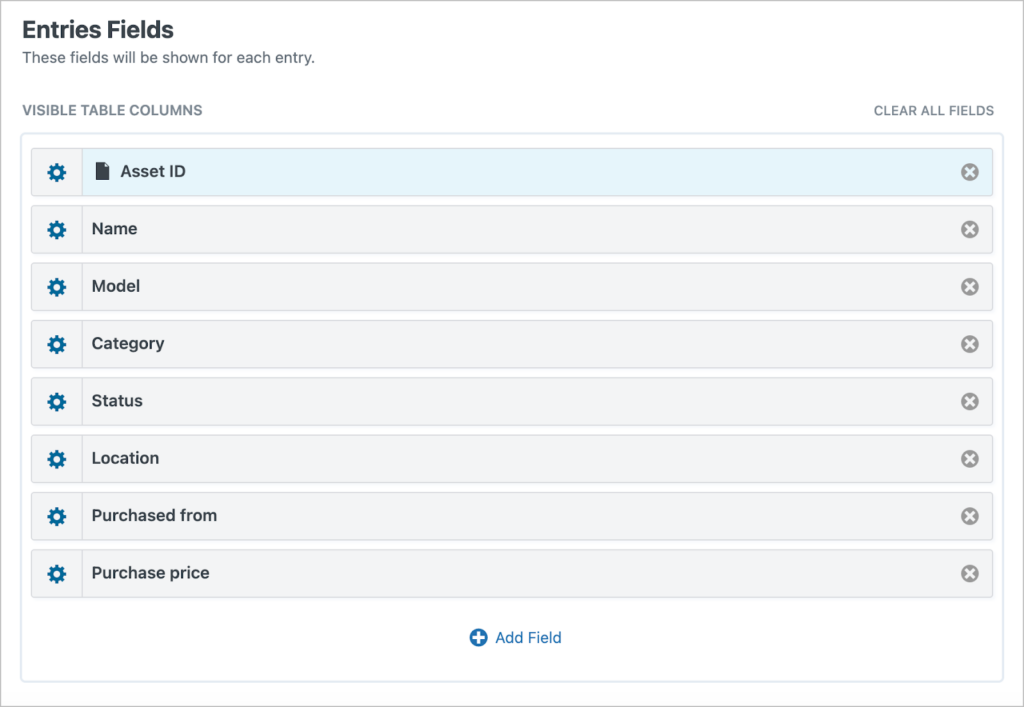
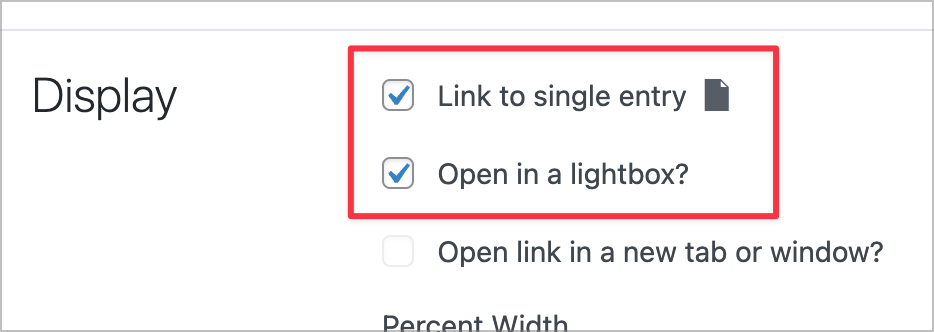
In the “Asset ID” field settings, we’ll check the boxes that say “Link to single entry” and “Open in lightbox?”. This turns the Asset ID field into a link that opens the single entry layout with additional information about the asset (we’ll configure this layout in the next step).
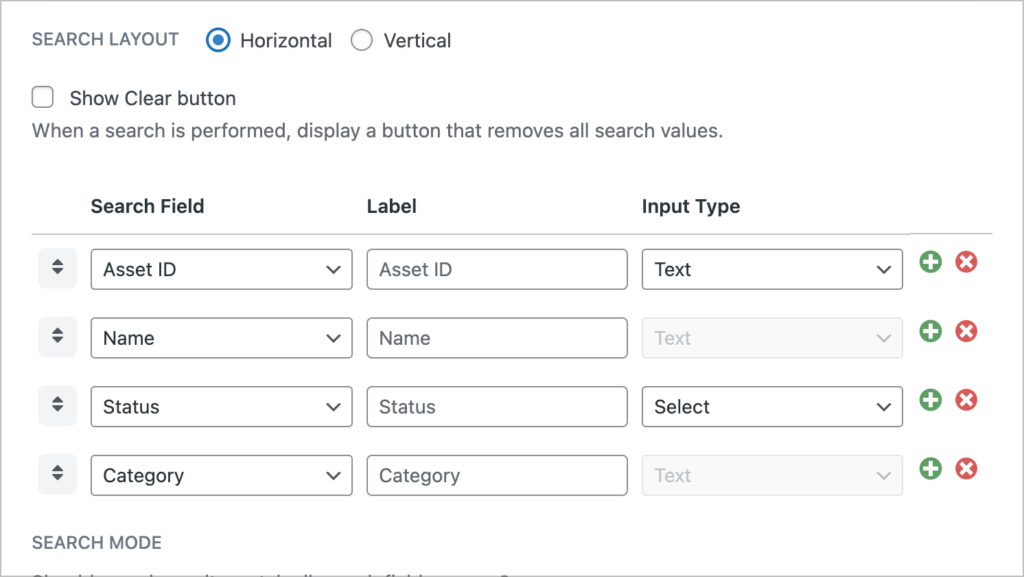
Next, we’ll scroll up and add a search bar widget. This will enable users to search and filter assets directly from the front end.
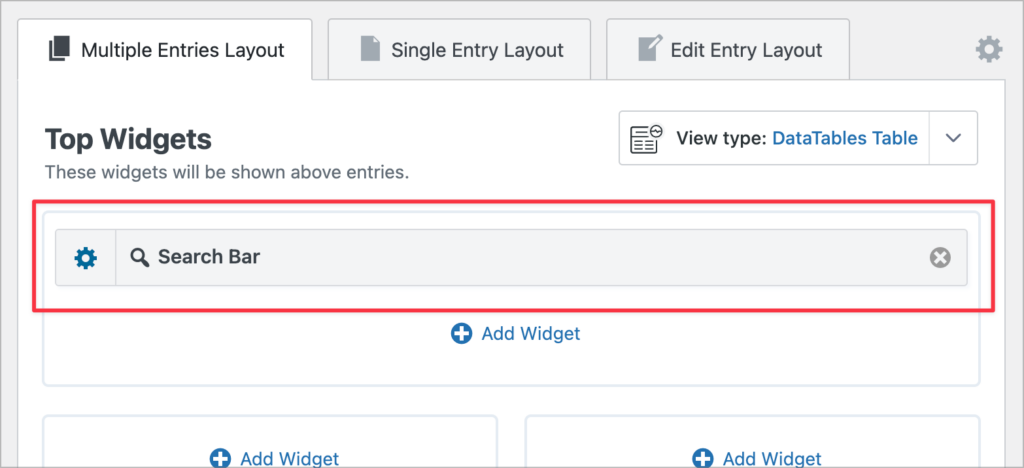
After adding the search bar widget, we can configure the search inputs by opening up the widget settings. Here we can modify the search settings and define searchable fields. Let’s add “Asset ID”, “Name”, “Status” and “Category” as search fields.
Here’s what our View looks like on the front end:
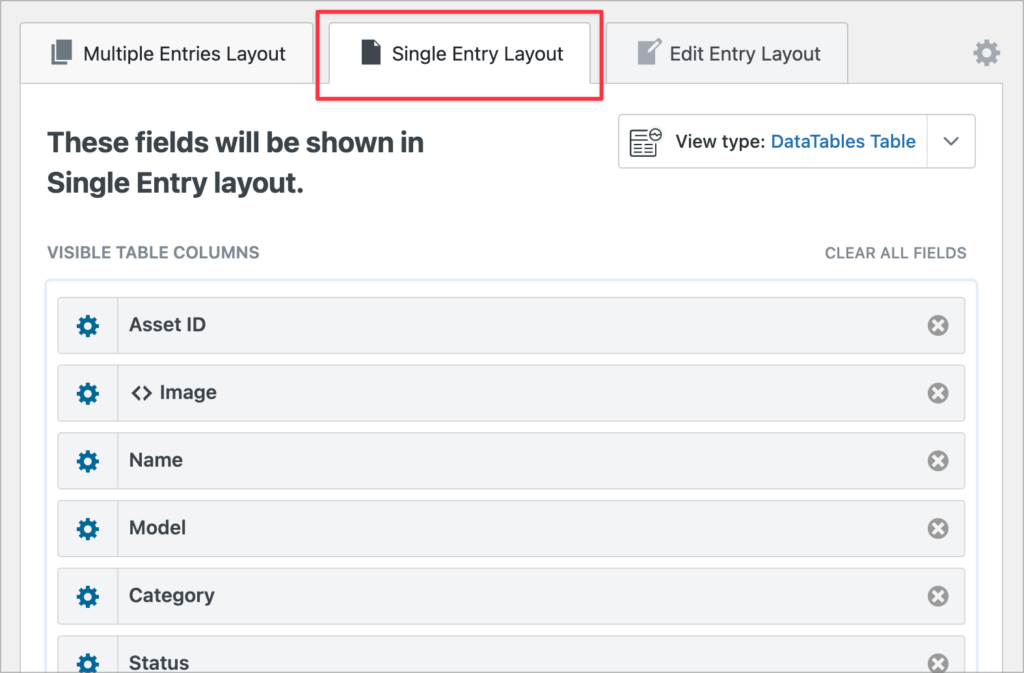
The next step is to configure the Single Entry layout.
Configuring the Single Entry layout
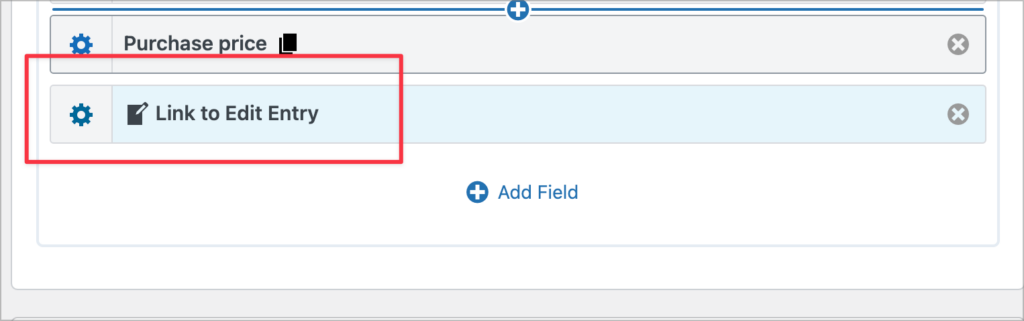
In GravityView, configuring the Single Entry layout allows us to display additional information about a specific entry. Here we’ll add all of our remaining form fields, including the “Image” field.
We’ll also add a “Link to Edit Entry” field. This is a custom field in GravityView that outputs a link to the Edit Entry layout where authorized users can update entry information.
When clicking on the asset ID, the single entry layout opens in a popup window. Here’s what it looks like:

The final step is to make fields editable so that admins and users can update asset information easily.
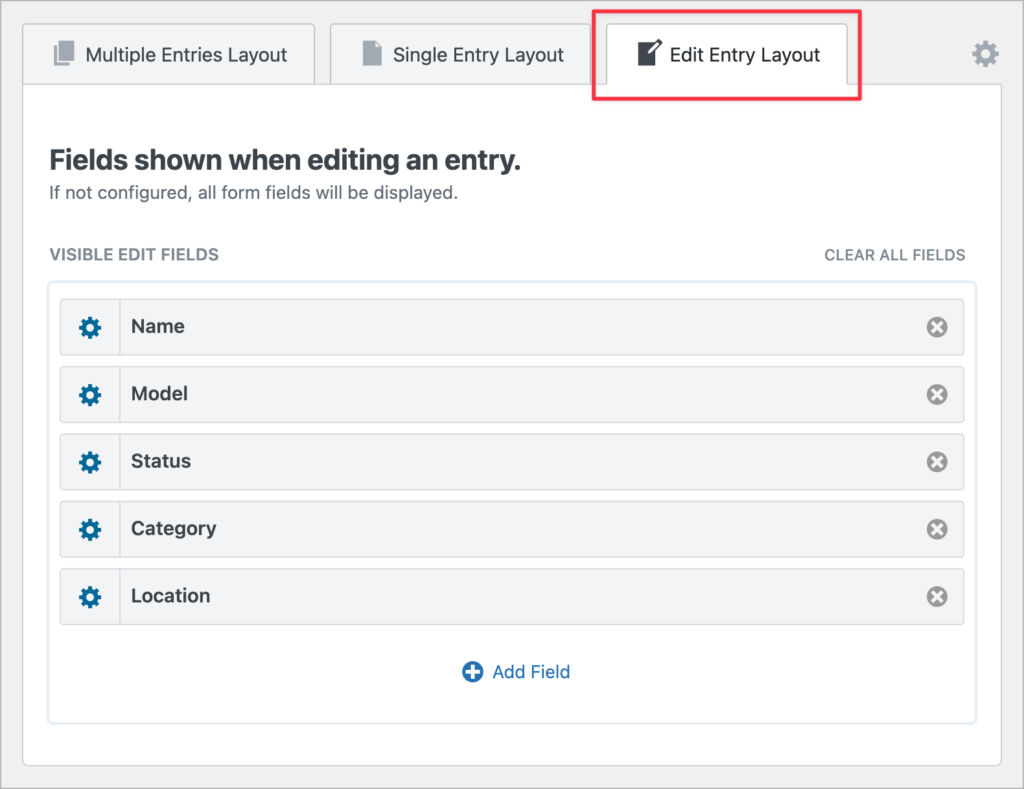
Making fields editable
To make fields editable from the front end, all we need to do is add them to the “Edit Entry” layout. Let’s add the “Name”, “Model”, “Status”, “Category”, and “Location” fields.
Here’s what that looks like on the front-end:
Now all that’s left to do is embed our asset tracker on a page or post.
3. Embedding the asset tracker on a page
After configuring our asset tracker View, we’ll publish it and embed it on a page. We can do this using the “GravityView View” block in the WordPress editor.
That’s it!
Start building your asset tracker now
In this post, I showed you how to build a customizable asset tracking system on WordPress using Gravity Forms and GravityView. Whether you’re managing IT equipment, office tools, or any other assets, this solution provides an efficient, easy-to-use interface for adding, searching, and updating asset details.
Say goodbye to outdated spreadsheets and embrace a scalable system that can grow with your business! Ready to start building? Get GravityView today.

Helpful tips right in your inbox.
Subscribe to get the latest articles, information on releases and helpful Gravity Forms tips!
More articles

WordPress page builder market share 2026: Elementor leads at 32.67%
Elementor reaches 32.7% of WordPress sites. WordPress Block Editor 20.6%, wpBakery 8.5%, Divi 5.7%. Latest HTTP Archive crawl, share-of-WordPress basis throughout.

Launch Log: GravityView 3.0, plus upgrades to Block MCP and GravityKit MCP
GravityView 3.0 lands with the new Vantage theme, frontend bulk actions, and AI-assisted View creation. This launch log also covers updates to GravityKit MCP, Block MCP, and Dashboard Views.

Announcing GravityView 3.0: a fresh new look, AI View creation, and native page builder support
GravityView 3.0 is here: restyle Views with the new Vantage theme, build them with AI, embed them in any page builder, and run bulk actions on the front end.