We are excited to introduce our latest extension for GravityView – Dashboard Views! With this new extension, you can now display your Views directly within the WordPress admin dashboard, offering a new way to manage and interact with your data.
Dashboard Views also provides the option to hide Views from the front end, making them accessible only through the dashboard. These enhancements open up new possibilities for how you organize and utilize your Gravity Forms data, giving you greater control, flexibility, and privacy.
Discover how Dashboard Views can elevate your GravityView experience and bring new functionality to your WordPress admin area!
What you need to know about Dashboard Views
After several requests for the ability to display Views in the WordPress admin area, we decided to develop this functionality into a new extension!
After installing Dashboard Views, you will be able to display any new or existing View inside the WordPress admin interface by simply checking a box in the settings. You can also restrict access by user role, and remove the View from the front-end entirely. This is handy for creating internal displays for your data that are only visible to logged-in users from inside the admin dashboard.
To use Dashboard Views, you will need a GravityView Pro license.
Installing Dashboard Views
If you have a GravityView Pro license, you can install Dashboard Views directly from your WordPress site by hovering over “GravityKit”, clicking “Manage Your Kit” and scrolling down to “Extensions”.
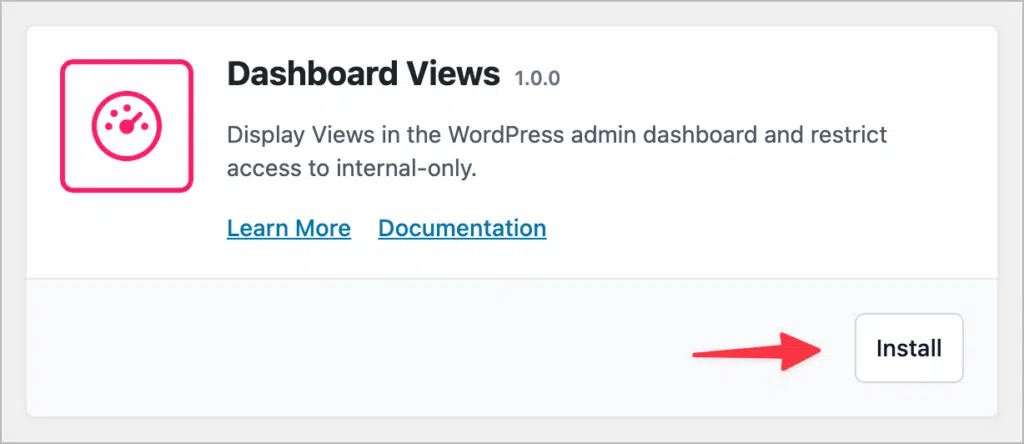
Alternatively, you can download the Dashboard Views plugin file from your GravityKit account and upload it to your site via the WordPress “Plugins” page.
Displaying a View in the admin dashboard
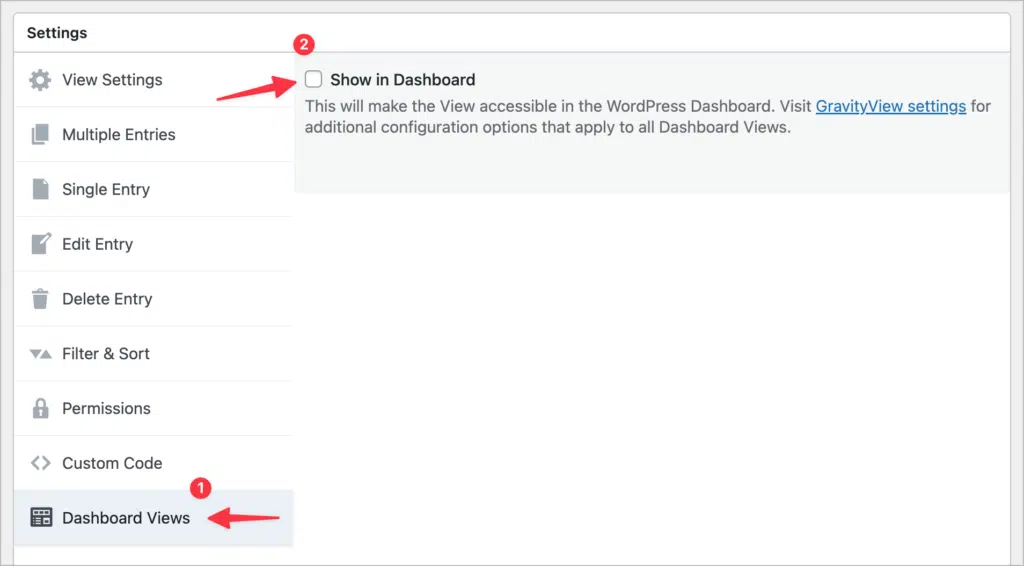
After installing and activating the extension, you’ll see a new tab appear in the View settings. There is a single checkbox here labeled “Show in Dashboard”. If you enable this option, your View will be visible from the admin dashboard.
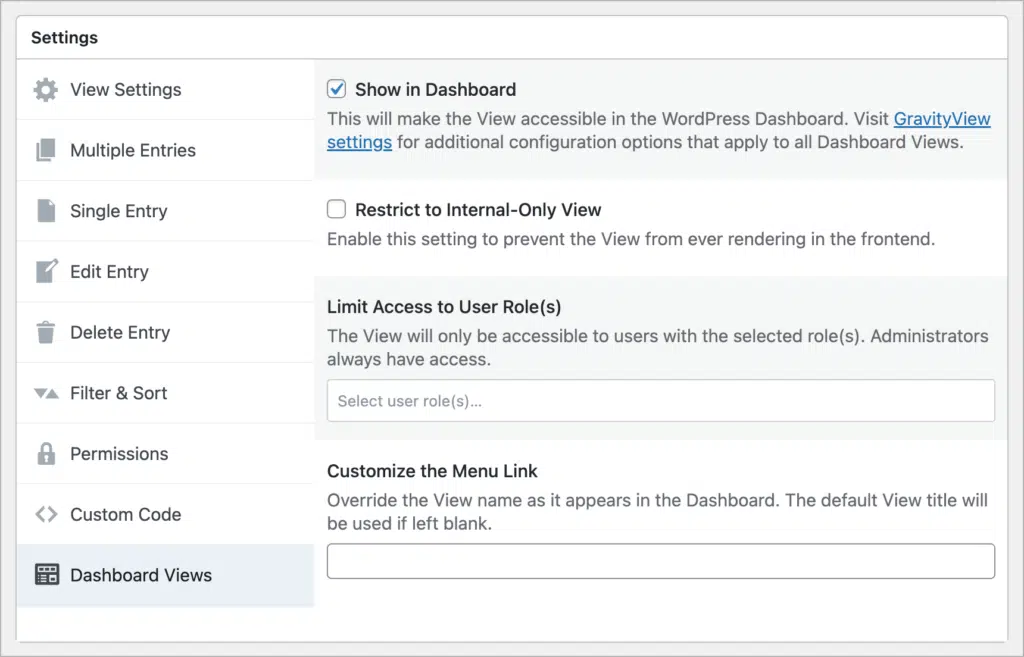
Enabling this option will reveal several other settings. For example, you can restrict a View to “Internal-Only”, ensuring it never renders on the front end of your site or appears in any of your sitemaps. You can also limit View access by user role, and change the menu link text.
There are some additional global settings to configure, but we’ll dive into those later.
When you’re finished configuring the settings, save your View and refresh the page. A new menu item will appear under “Dashboard” labeled “Dashboard Views”. All Views with the “Show in Dashboard” option enabled will appear here!
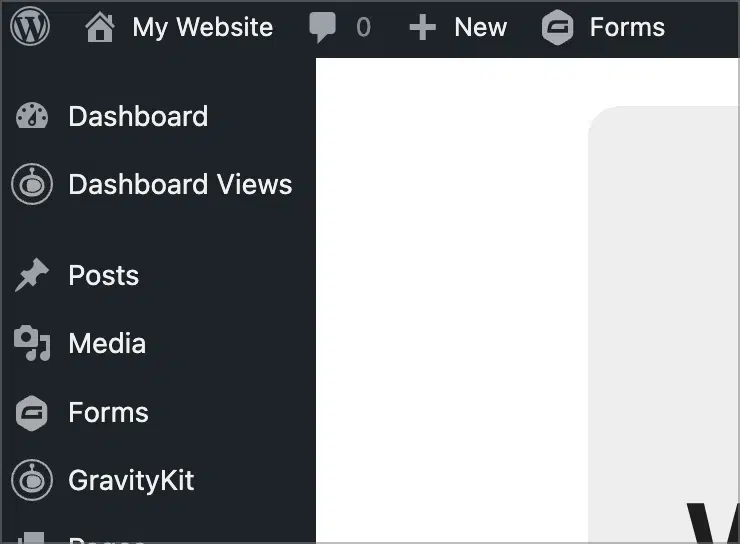
When opening a View in the backend, it will render as normal. All functionality works as expected, including searching, sorting, filtering, editing, and deleting entries!

You can show a View in the dashboard and on the front-end if you want to, unless you enable the “Internal-Only” option; in this case, the View will only render in the dashboard.
Global settings and styles
On the GravityKit settings page, you’ll find several global options for Dashboard Views. Here you can modify the menu label, change its position, and select a default stylesheet for all Views displayed in the dashboard.
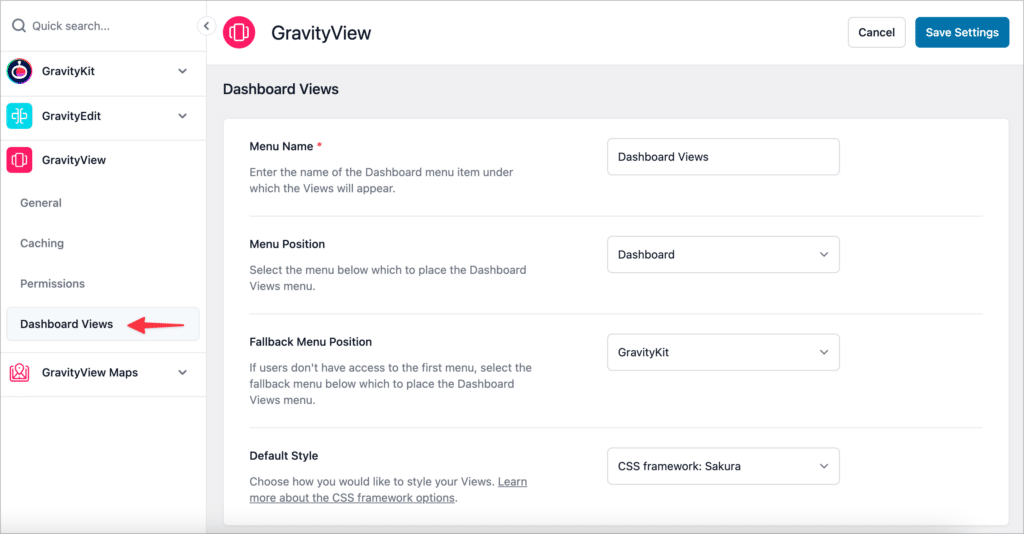
We’ve included several preset stylesheets here, enabling you to change the look and feel of your dashboard Views! Look out for this option coming to front-end Views soon.

To learn more about the different style options, check out this helpful guide.
Get started with Dashboard Views today!
We’re thrilled to bring you Dashboard Views, a powerful new extension that lets you display and manage your GravityView Views directly within the WordPress admin dashboard.
Ready to elevate your GravityView experience? If you’re a GravityView Pro customer, you can install Dashboard Views from the “Manage Your Kit” page in WordPress. Don’t miss out on this exciting new extension—get started with Dashboard Views today.

Helpful tips right in your inbox.
Subscribe to our weekly newsletter for tips, special offers, and more!
Helpful tips right in your inbox.
Subscribe to our weekly newsletter for tips, special offers, and more!
