
Are you looking for a way to build an online journal? Whether you’re a wellness coach wanting to offer helpful tools to your clients, or an entrepreneur seeking to launch a new business idea, we’ve got you covered!
Journaling is a known habit of many successful people. Taking your thoughts out of your head and writing them down can help you to improve your focus, gain clarity on important issues, and make progress towards your goals.
In this post, we’re going to show you how to build your own WordPress journal application using Gravity Forms and GravityView. Let’s get started.
Sneak peek
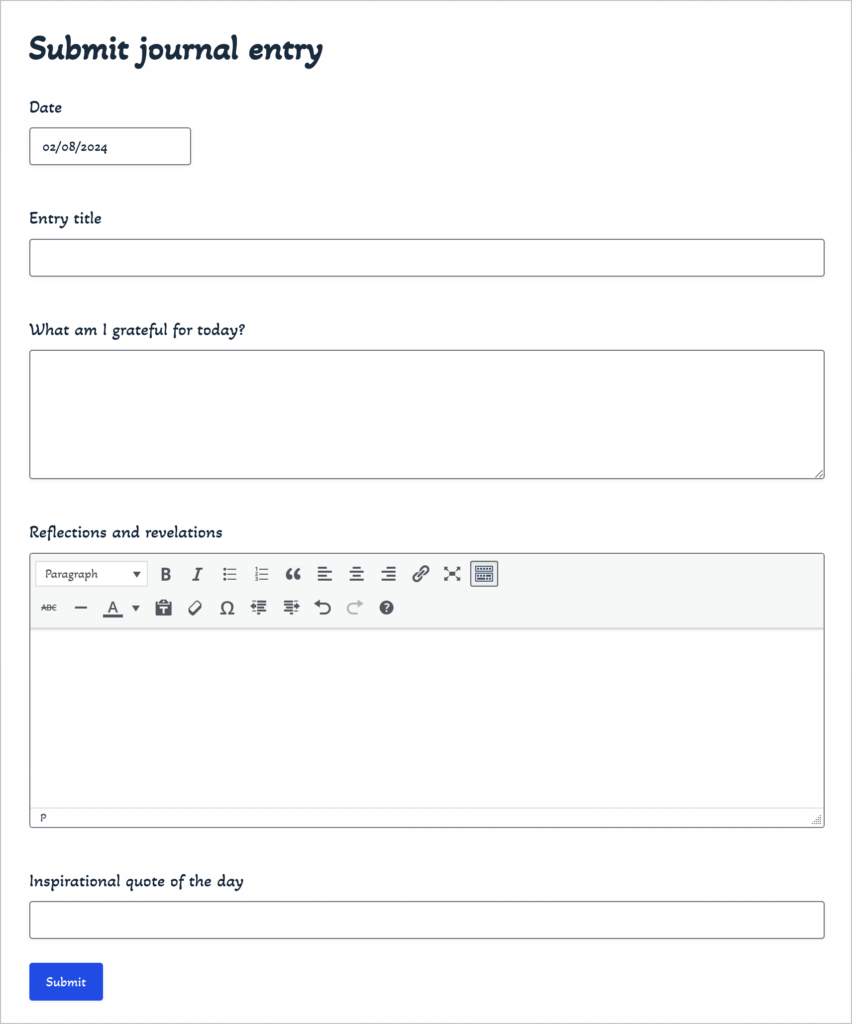
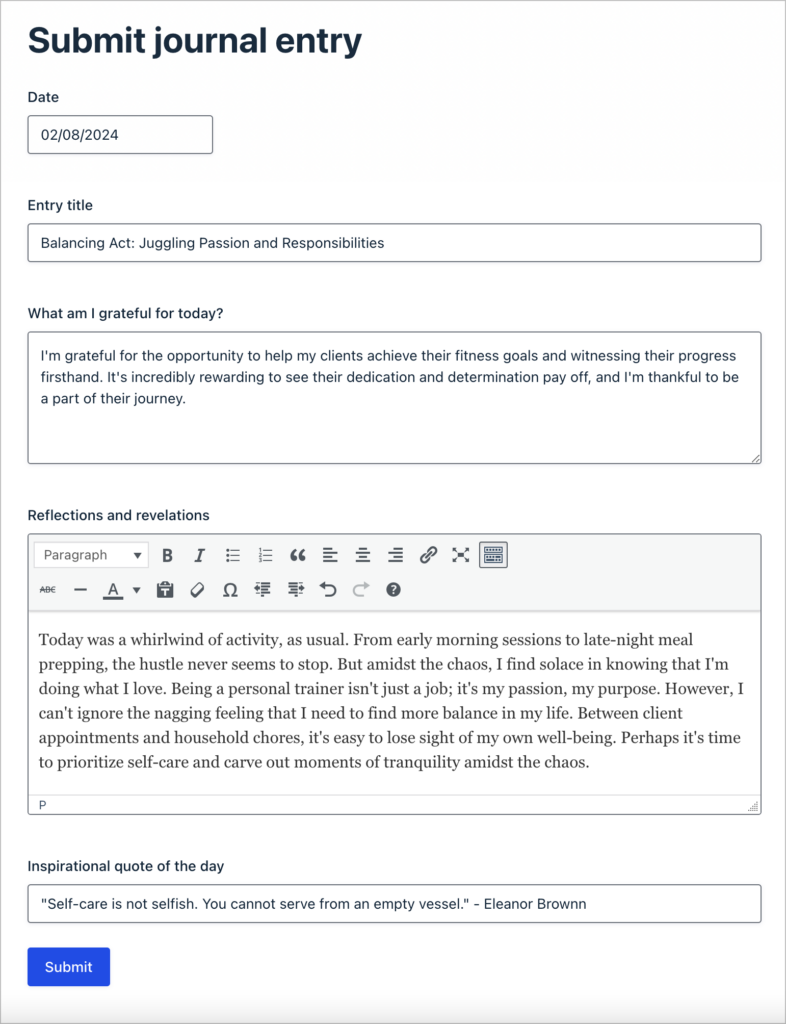
Let’s take a look at the journal app we’re going to build in this tutorial. Here’s the form where users can write and submit new journal entries:
A preview of each journal entry is displayed below, in order of date published:
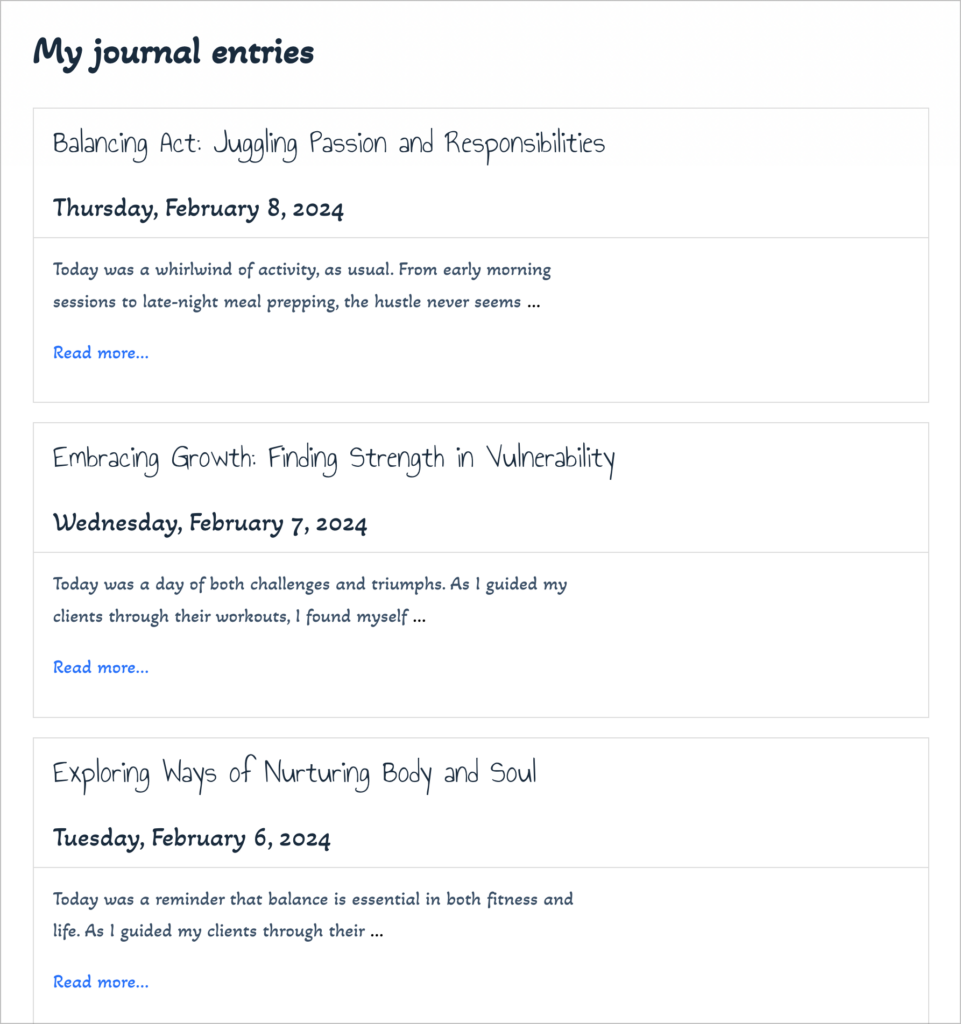
Users can then click “Read more…” to view the full entry:
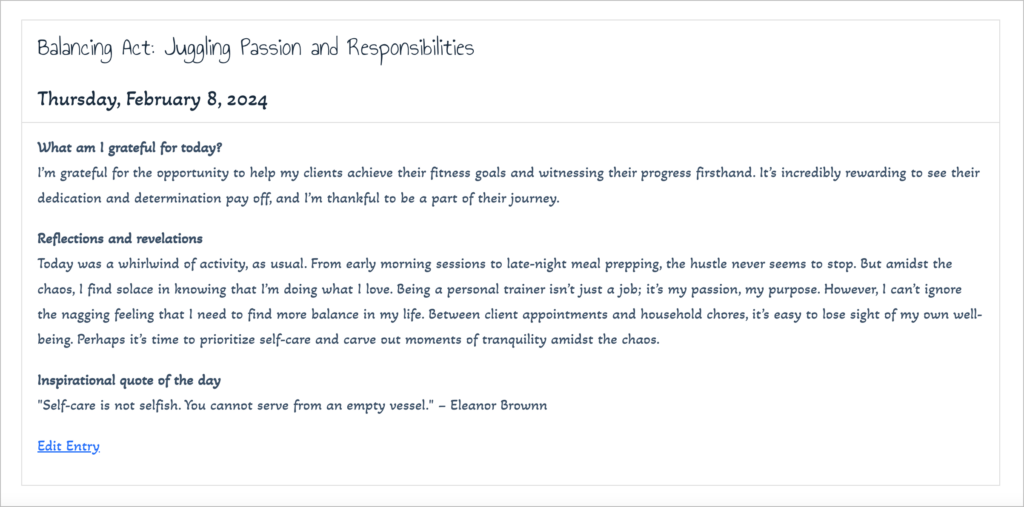
If they made a mistake and want to go back and edit the entry, they can simply click “Edit entry”. This will allow them to update their journal submission directly from the front end, without needing access to the Admin dashboard!
What you’ll need
Here are the plugins you’ll need if you’re following along with this tutorial:
Ideas for different types of WordPress journal applications
WordPress is a flexible platform that allows you to build different kinds of applications. The type of journaling app you build will depend on what you want to achieve. Are you trying to start a business? Do you want to form a community? Here are some examples of journaling apps you could build:
- Private journal for personal use: Write down your thoughts every day, keep track of your goals and catalog your idea.
- Private journal for members: Members would be able to log in, see their ‘posts’ on their dashboard, then create, edit, and delete entries.
- Online journaling community: Form a community of users who are interested in journaling, making connections and helping each other achieve their goals.
Now let’s look at some of the benefits of keeping a private journal.
How to build your own private WordPress journal platform
There are two main components to a WordPress online journal: 1) there needs to be an easy way to write down your thoughts and make edits/updates; 2) there must be a way to catalog each journal entry by date so that they’re easily viewable in the future.
For our journal application, we’re going to use Gravity Forms for writing journal entries and GravityView to display those entries chronologically on the front end. In this way, GravityView becomes a powerful WordPress journal plugin!
This is something you can use only for yourself, or you could turn it into an online community. You could even create a business around it!
Creating the journal entry form
The first step is to create a form in Gravity Forms that allows users to write and publish new journal entries.
To create a new form, we’ll hover over “Forms” and click “New Form”. Now we can start adding fields to our form using the Gravity Forms visual builder.
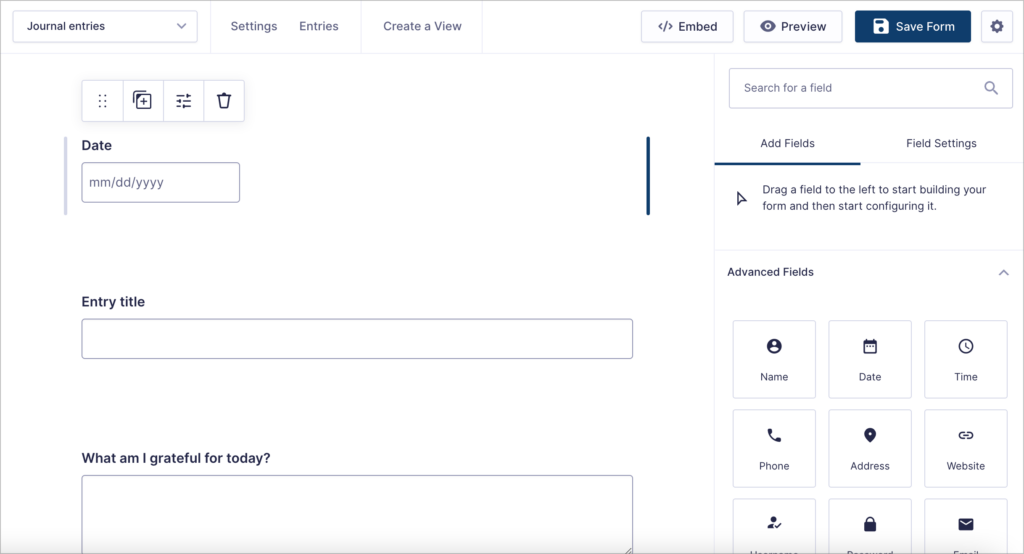
To keep things simple, we’ll add the following fields to our form:
- Date (“Date” field)
- Entry title (“Single Line Text” field)
- What am I grateful for today (“Paragraph Text” field)
- Reflections and revelations (“Paragraph Text” field)
- Inspirational quote of the day (“Single Line Text” field)
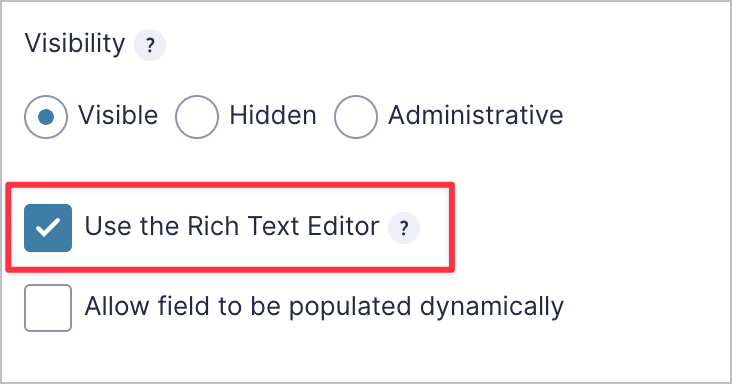
After adding the “Reflections and revelations” field to our form, we’ll enable the rich text editor as this will allow users to use bold, italics, lists, headings and other rich text elements in their journal entries.
To do this, we’ll open the field settings, scroll down to “Advanced” and check the box that says “Use the Rich Text Editor”.
Here’s what our journal entry form looks like on the front end:
Okay, now that we’ve created your journal entry form, it’s time to build a View to display journal entries on the front end.
Create a View to display journal entries
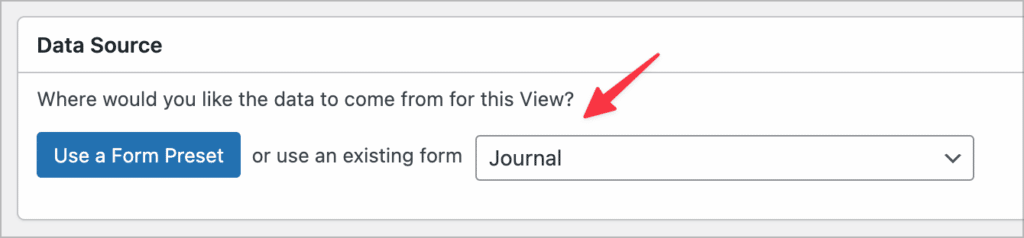
To create a new View, we’ll hover over “GravityKit” in the WordPress menu and click “New View”. After giving our View a name, we’ll select our journal entry form as the data source.
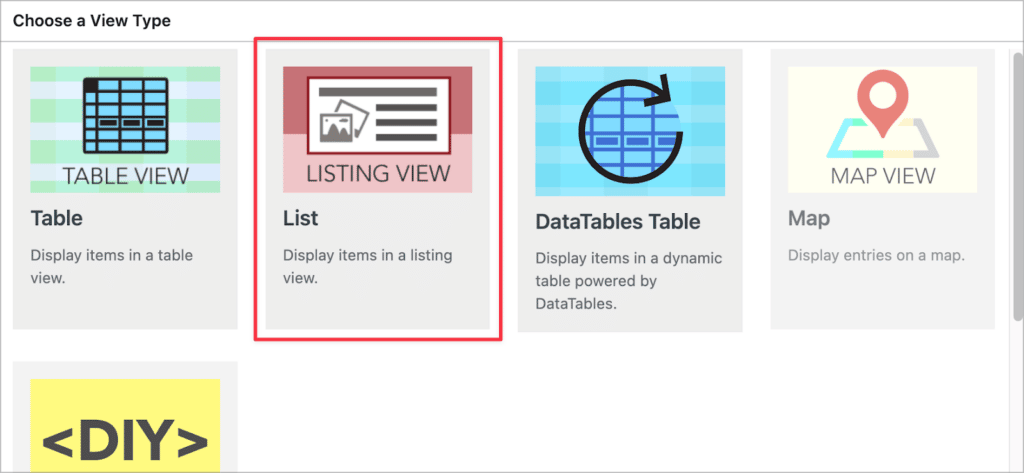
Next, we need to choose a View Type. The View Type we choose will depend on the kind of layout we want for our journal. For a WordPress journal application, we suggest selecting the “List” layout.
Okay, now we can begin constructing our journal View using the GravityView visual builder.
Configuring the Multiple Entries Layout
Let’s start by configuring the Multiple Entries Layout—this is the main journal where each entry will appear, one after the other.

We’ll scroll down to the “Entries Fields” section of the editor and add the “Entry title” field to the “Listing Title” section. Next, we’ll add the “Date” field to the “Subheading” section.
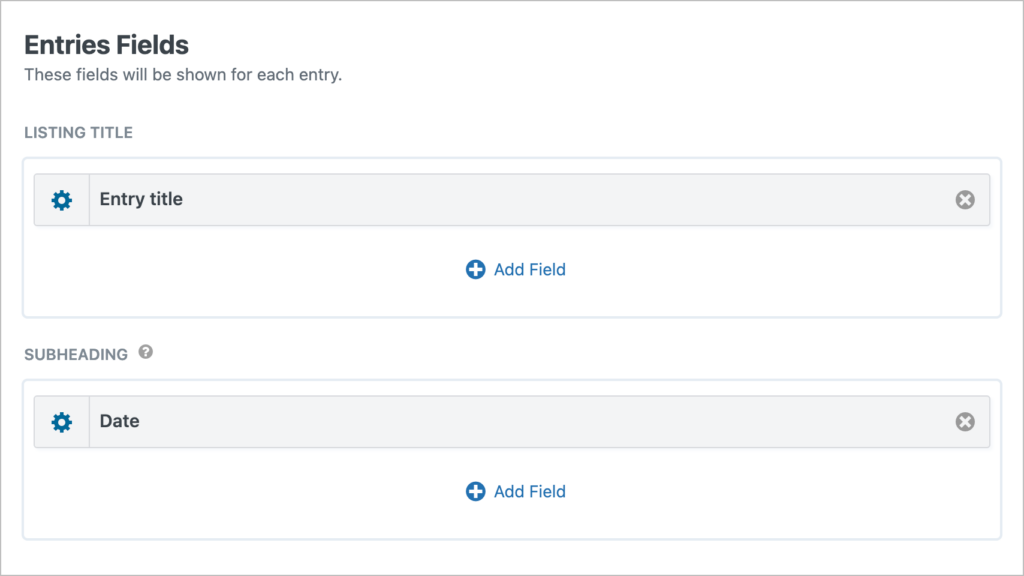
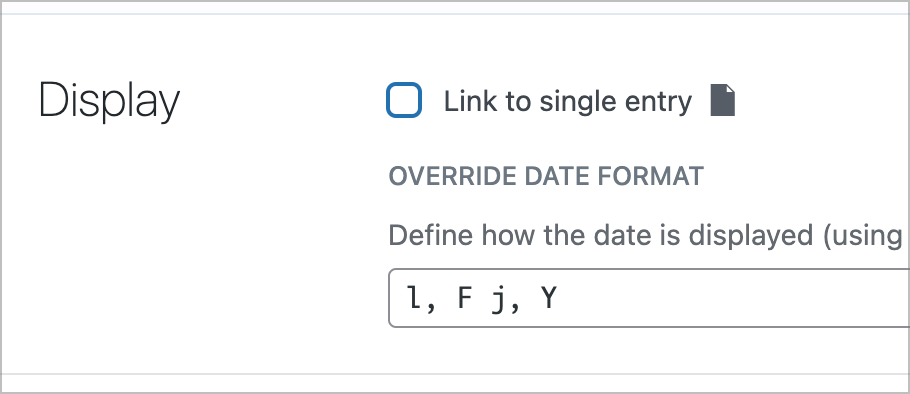
Clicking on the gear icon to open the field settings allows us to change the date format using PHP date formatting.
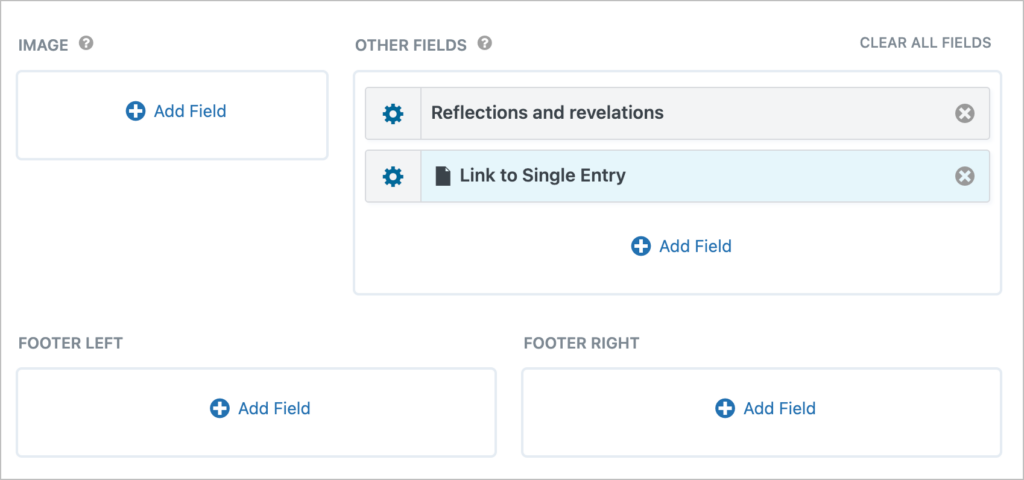
Finally, we’ll add the “Reflections and revelations” field and the “Link to Single Entry” field to the “Other Fields” section. We’ll leave both the image and footer sections blank.
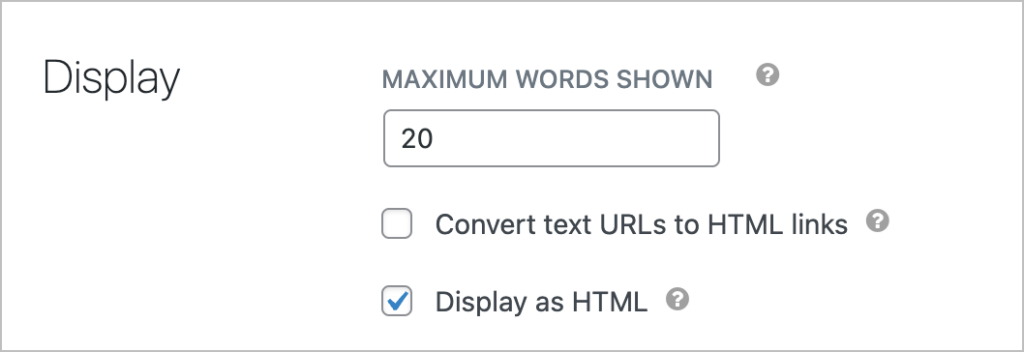
After adding the “Reflections and revelations” field, we’ll click on the gear icon to open the field settings. Here, we’re going to limit the number of words shown to 20.
That’s it for the Multiple Entries Layout. Let’s turn our attention to the Single Entry Layout where we’re going to display each journal entry in full!
Configuring the Single Entry Layout
The Single Entry Layout allows us to display more information about a single journal entry. Here, we’re going to add every form field, including the “What am I grateful for today” and “Inspirational quote of the day” fields.
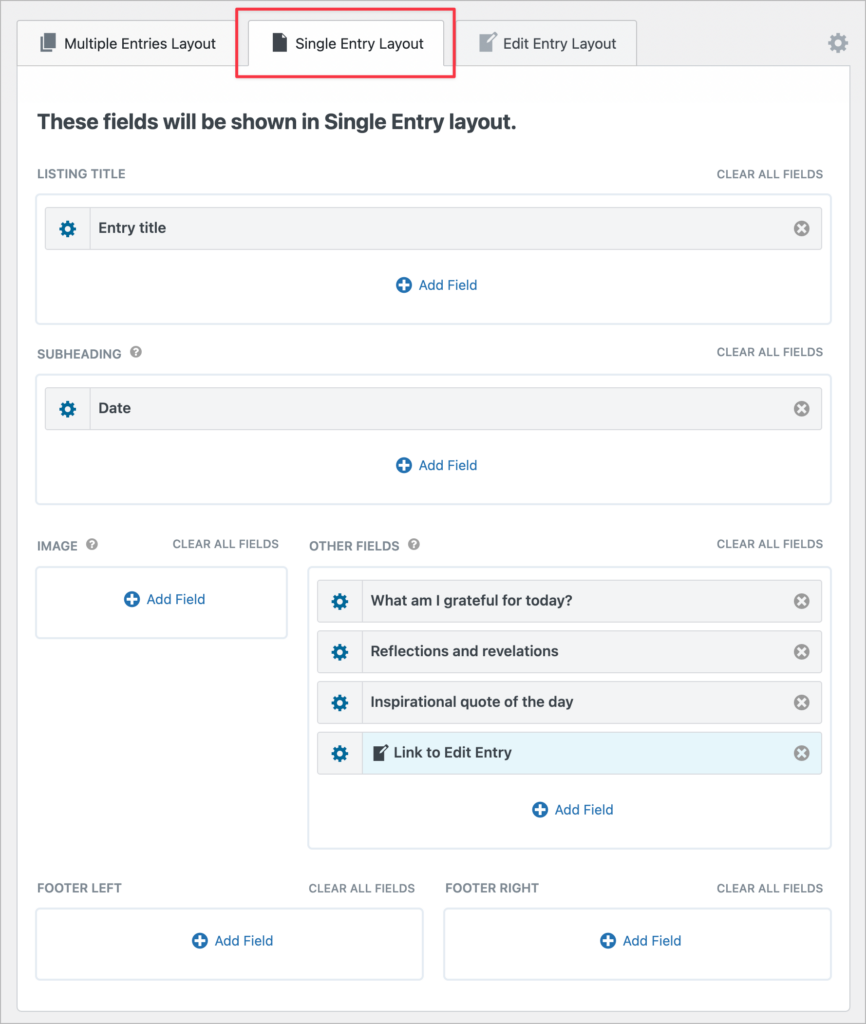
Finally, we’re going to add a “Link to Edit Entry” field at the bottom. This will allow users to update journal entries directly from the front end!
💡 Pro tip: If you want to approve journal submissions before they are published, use GravityView’s powerful entry approval system.
To limit which fields are editable, you can simply click on the “Edit Entry Layout” tab and add those specific fields to the View editor. If you leave the layout blank, all fields will be editable.
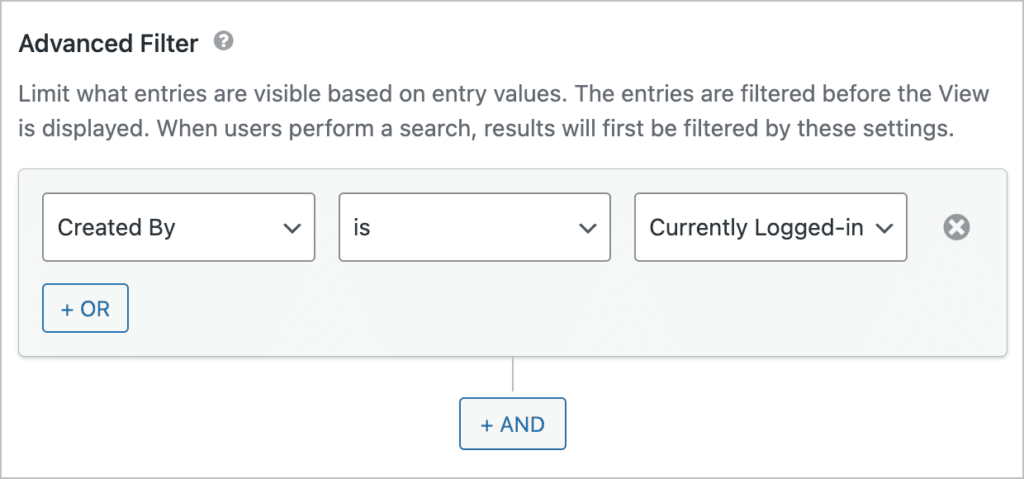
Ensuring each journal is private
To ensure each user has the utmost privacy, we’re going to add a filtering condition to our View that limits entries to those created by the logged-in user.
To do this, we’ll scroll down to the View Settings, click on the “Filter & Sort” tab and add a new advanced filtering condition. Here’s the condition we need to add: “Created By”, “is”, “Currently Logged-in user”.
That’s it! Here’s what our WordPress journal application looks like on the front end:
If you want the journal form and View to be on the same page, simply embed both on a new page on your site!
Create a WordPress journal app today
Journaling is a useful habit that helps you to clear your mind, improve your problem-solving abilities, and achieve your goals. WordPress is perfect for building a journaling application because it’s free, easy to use, and it’s built for creators.
In this post, we showed you how to build a WordPress journal application using Gravity Forms and GravityView. If you found this tutorial helpful, subscribe to our newsletter below so we can notify you when we publish new content!
Helpful tips right in your inbox.
Subscribe to our biweekly newsletter for tips, special offers, and more!
Helpful tips right in your inbox.
Subscribe to our biweekly newsletter for tips, special offers, and more!