---
title: "Adding custom CSS classes and HTML IDs to Layout Builder rows"
date: 2026-04-23
author: "GravityKit"
link: "https://www.gravitykit.com/docs/gravityview/advanced/adding-custom-css-classes-and-html-ids-to-layout-builder-rows/"
---
GravityView allows you to add custom CSS classes and HTML IDs to row wrapper elements directly in the Layout Builder. This gives you more control over the styling and behavior of individual rows in your View without needing to modify template files.
This article covers how to access row settings, configure custom CSS classes and HTML IDs, and use the `{row_index}` merge tag for dynamic values.
## Opening row settings
Each row in the Layout Builder has a settings panel for configuring custom CSS classes and HTML IDs.
To open the settings panel:
- Open your View for editing in the WordPress admin.
- In the **View editor**, hover over the top-left corner of the row you want to configure. Three icons will appear: a drag handle, a gear icon, and a trash icon.
- Click the **gear icon**.
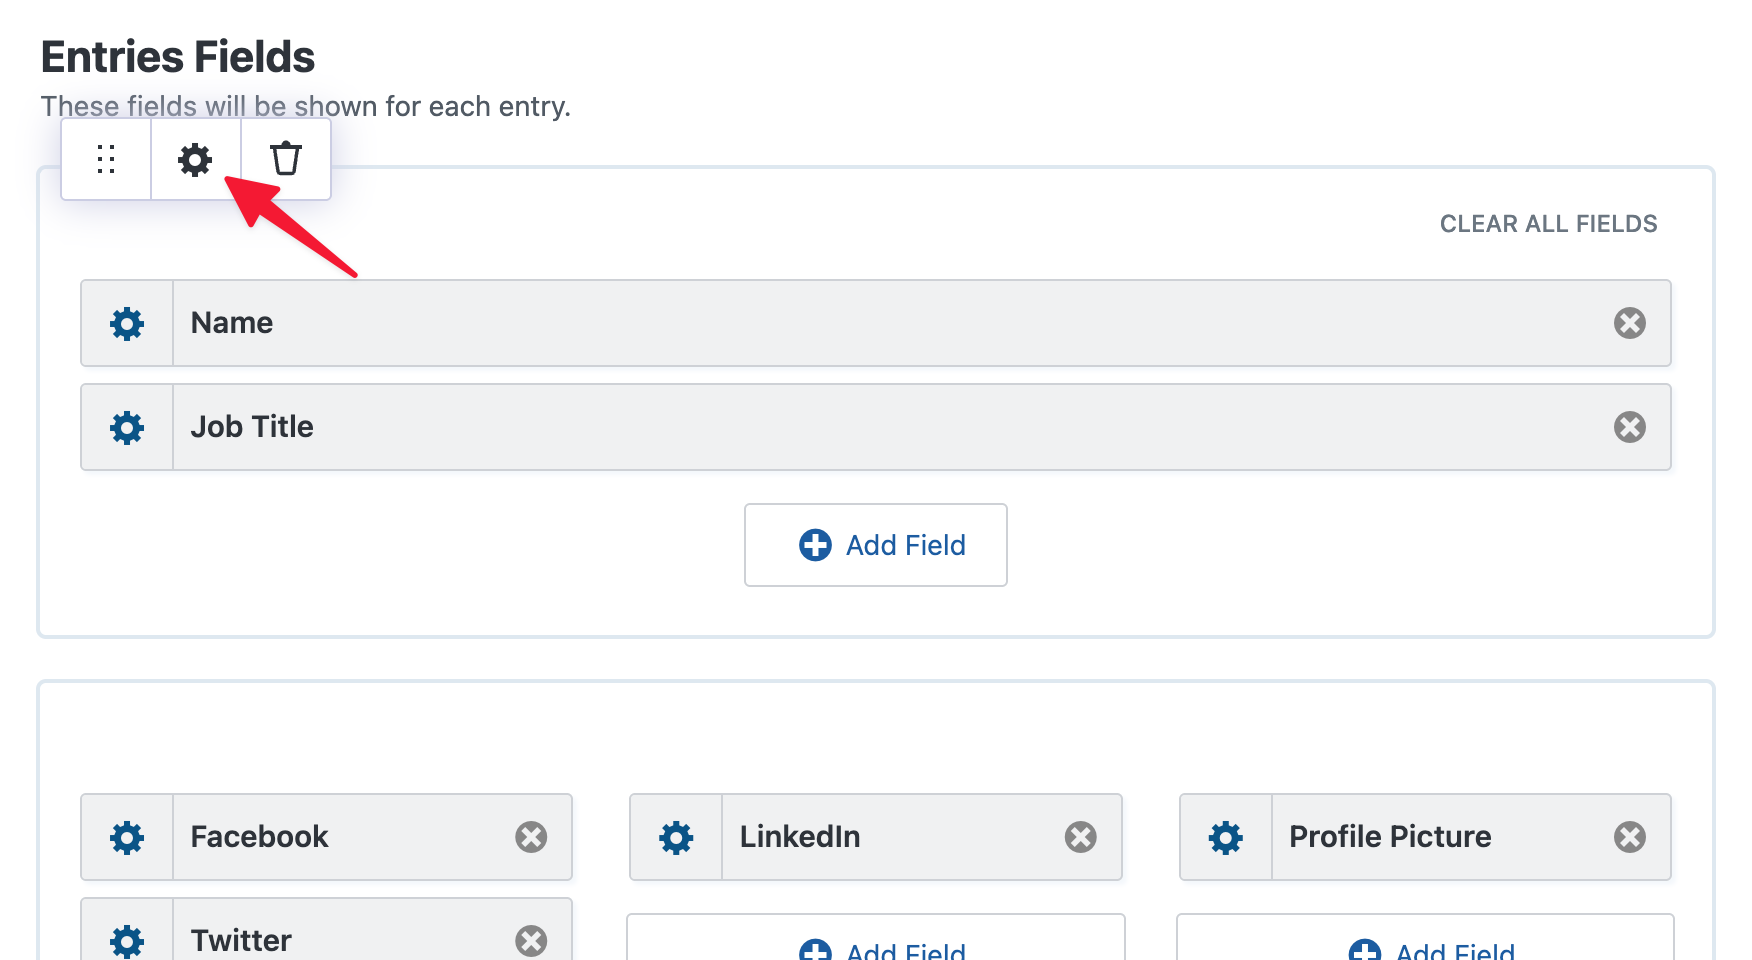
The **Row Settings** panel will open with two fields: **Custom CSS Class** and **Custom HTML ID**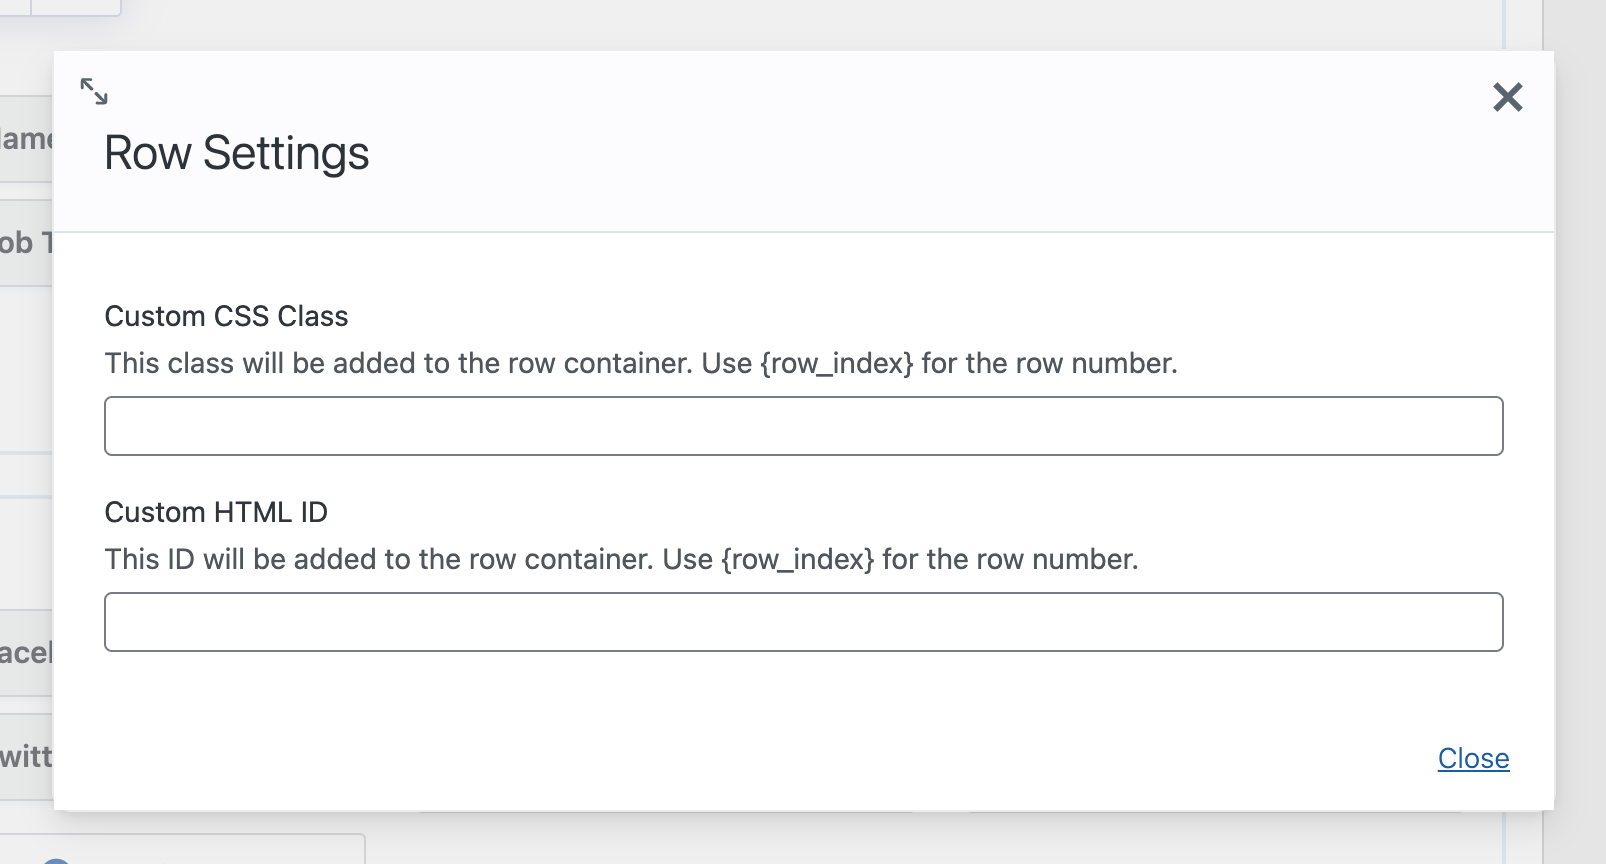
## Adding a custom CSS class
The **Custom CSS Class** field adds one or more CSS classes to the row's wrapper element. Use this to target rows with custom CSS styles.
- Click the **gear icon** on the row to open **Row Settings**.
- Enter a class name in the **Custom CSS Class** field (e.g., `highlight-row` ).
- Click **Close**.
To add multiple classes, separate them with a space (e.g., `highlight-row featured` ).
### The `{row_index}` merge tag
The **Custom CSS Class** field supports the `{row_index}` merge tag, which is replaced with the row's position number on the front end. This is useful for assigning unique class names to each row automatically.
For example, entering `row-{row_index}` will output:
- `row-1` for the first row
- `row-2` for the second row
- `row-3` for the third row
> **Note:** The `{row_index}` value is based on the row's position in the Layout Builder, starting at 1.
## Adding a custom HTML ID
The **Custom HTML ID** field assigns an `id` attribute to the row wrapper element.
- Click the **gear icon** on the row to open **Row Settings**.
- Enter an ID in the **Custom HTML ID** field (e.g., `contact-info` ).
- Click **Close**.
The `{row_index}` merge tag is also supported here (e.g., `section-{row_index}` ).
### When to use an ID vs. a class
| | **CSS class** | **HTML ID** |
|---|---|---|
| **Uniqueness** | Can be reused across multiple rows | Should be unique on the page |
| **CSS specificity** | Lower specificity | Higher specificity (overrides class-based styles) |
| **Best for** | Applying the same styles to multiple rows | Targeting a single specific row |
Use **classes** for general styling. Use **IDs** when you need to target a single row—for example, as an anchor link destination or a JavaScript hook.
## Example: Styling a specific row
This example adds a custom background color to the first row in a View.
**1. Add a CSS class to the row**
- Open **Row Settings** for the first row by clicking the **gear icon**.
- In the **Custom CSS Class** field, enter `featured-row` .
- Click **Close**.
**2. Add CSS to your site**
Add the following CSS using **View settings** > **Custom Code** > **Custom** **CSS**, or through a custom CSS plugin:
```
```
```
```
To style rows dynamically based on position, use the `{row_index}` merge tag. Enter `row-{row_index}` as the class name, then target individual rows in CSS:
```
```